
aiavatarkit
🥰 Building AI-based conversational avatars lightning fast ⚡️💬
Stars: 413
AIAvatarKit is a tool for building AI-based conversational avatars quickly. It supports various platforms like VRChat and cluster, along with real-world devices. The tool is extensible, allowing unlimited capabilities based on user needs. It requires VOICEVOX API, Google or Azure Speech Services API keys, and Python 3.10. Users can start conversations out of the box and enjoy seamless interactions with the avatars.
README:
🥰 Building AI-based conversational avatars lightning fast ⚡️💬
-
🌏 Live anywhere: AIAvatarKit is a general-purpose Speech-to-Speech framework with multimodal input/output support. It can serve as the backend for a wide range of conversational AI systems.
- Metaverse Platforms: Compatible with VRChat, cluster, Vket Cloud, and other platforms
- Standalone Apps: Enables ultra-low latency real-time interaction via WebSocket or HTTP (SSE), with a unified interface that abstracts differences between LLMs
- Channels and Devices: Supports edge devices like Raspberry Pi and telephony services like Twilio
-
🧩 Modular architecture: Components such as VAD, STT, LLM, and TTS are modular and easy to integrate via lightweight interfaces. Supported modules include:
- VAD: Built-in standard VAD (silence-based end-of-turn detection), SileroVAD
- STT: Google, Azure, OpenAI, AmiVoice
- LLM: ChatGPT, Gemini, Claude, and any model supported by LiteLLM or Dify
- TTS: VOICEVOX / AivisSpeech, OpenAI, SpeechGateway (including Style-Bert-VITS2 and NijiVoice)
- ⚡️ AI Agent native: Designed to support agentic systems. In addition to standard tool calls, it offers Dynamic Tool Calls for extensibility and supports progress feedback for high-latency operations.
- VOICEVOX API in your computer or network reachable machine (Text-to-Speech)
- API key for OpenAI API (ChatGPT and Speech-to-Text)
- Python 3.10 (Runtime)
Install AIAvatarKit.
pip install aiavatarNOTE: If the steps in technical blogs don’t work as expected, the blog may be based on a version prior to v0.6. Some features may be limited, but you can try downgrading with pip install aiavatar==0.5.8 to match the environment described in the blog.
Make the script as run.py.
import asyncio
from aiavatar import AIAvatar

aiavatar_app = AIAvatar(
    openai_api_key=OPENAI_API_KEY,
    debug=True
)
asyncio.run(aiavatar_app.start_listening())
Start AIAvatar. Also, don't forget to launch VOICEVOX beforehand.
$ python run.pyConversation will start when you say the wake word "こんにちは" (or "Hello" when language is not ja-JP).
Feel free to enjoy the conversation afterwards!
In version v0.7.0, the internal Speech-to-Speech pipeline previously provided by the external LiteSTS library has been fully integrated into AIAvatarKit.
- The functionality remains the same — no API behavior changes.
- However, import paths have been updated.
All imports from litests should now be updated to aiavatar.sts.
For example:
# Before
from litests import STSRequest, STSResponse
from litests.llm.chatgpt import ChatGPTService

# After
from aiavatar.sts import STSRequest, STSResponse
from aiavatar.sts.llm.chatgpt import ChatGPTService
This change ensures compatibility with the new internal structure and removes the need for LiteSTS as a separate dependency.
You can set model and system prompt when instantiate AIAvatar.
aiavatar_app = AIAvatar(
    openai_api_key="YOUR_OPENAI_API_KEY",
    openai_model="gpt-4o",
    system_prompt="You are my cat."
)If you want to configure in detail, create instance of ChatGPTService with custom parameters and set it to AIAvatar.
# Create ChatGPTService
from aiavatar.sts.llm.chatgpt import ChatGPTService
llm = ChatGPTService(
    openai_api_key=OPENAI_API_KEY,
    model="gpt-4o",
    temperature=0.0,
    system_prompt="You are my cat."
)

# Create AIAvatar with ChatGPTService
aiavatar_app = AIAvatar(
    llm=llm,
    openai_api_key=OPENAI_API_KEY   # API Key for STT
)Create instance of ClaudeService with custom parameters and set it to AIAvatar. The default model is claude-3-5-sonnet-latest.
# Create ClaudeService
from aiavatar.sts.llm.claude import ClaudeService
llm = ClaudeService(
    anthropic_api_key=ANTHROPIC_API_KEY,
    model="claude-3-7-sonnet-20250219",
    temperature=0.0,
    system_prompt="You are my cat."
)

# Create AIAvatar with ClaudeService
aiavatar_app = AIAvatar(
    llm=llm,
    openai_api_key=OPENAI_API_KEY   # API Key for STT
)
NOTE: We support Claude on Anthropic API, not Amazon Bedrock for now. Use LiteLLM or other API Proxies.
Create instance of GeminiService with custom parameters and set it to AIAvatar. The default model is gemini-2.0-flash-exp.
# Create GeminiService
# pip install google-genai
from aiavatar.sts.llm.gemini import GeminiService
llm = GeminiService(
    gemini_api_key=GEMINI_API_KEY,
    model="gemini-2.0-pro-latest",
    temperature=0.0,
    system_prompt="You are my cat."
)

# Create AIAvatar with GeminiService
aiavatar_app = AIAvatar(
    llm=llm,
    openai_api_key=OPENAI_API_KEY   # API Key for STT
)
NOTE: We support Gemini on Google AI Studio, not Vertex AI for now. Use LiteLLM or other API Proxies.
You can use the Dify API instead of a specific LLM's API. This eliminates the need to manage code for tools or RAG locally.
# Create DifyService
from aiavatar.sts.llm.dify import DifyService
llm = DifyService(
    api_key=DIFY_API_KEY,
    base_url=DIFY_URL,
    user="aiavatarkit_user",
    is_agent_mode=True
)

# Create AIAvatar with DifyService
aiavatar_app = AIAvatar(
    llm=llm,
    openai_api_key=OPENAI_API_KEY   # API Key for STT
)You can use other LLMs by using LiteLLMService or implementing LLMService interface.
See the details of LiteLLM here: https://github.com/BerriAI/litellm
You can set speaker id and the base url for VOICEVOX server when instantiate AIAvatar.
aiavatar_app = AIAvatar(
    openai_api_key="YOUR_OPENAI_API_KEY",
    # 46 is Sayo. See http://127.0.0.1:50021/speakers to get all ids for characters
    voicevox_speaker=46
)
If you want to configure in detail, create instance of VoicevoxSpeechSynthesizer with custom parameters and set it to AIAvatar.
Here is the example for AivisSpeech.
# Create VoicevoxSpeechSynthesizer with AivisSpeech configurations
from aiavatar.sts.tts.voicevox import VoicevoxSpeechSynthesizer
tts = VoicevoxSpeechSynthesizer(
    base_url="http://127.0.0.1:10101",  # Your AivisSpeech API server
    speaker="888753761"   # Anneli
)

# Create AIAvatar with VoicevoxSpeechSynthesizer
aiavatar_app = AIAvatar(
    tts=tts,
    openai_api_key=OPENAI_API_KEY   # API Key for LLM and STT
)
You can also set speech controller that uses alternative Text-to-Speech services. We support Azure, Google, OpenAI and any other TTS services supported by SpeechGateway such as Style-Bert-VITS2 and NijiVoice.
from aiavatar.sts.tts.azure import AzureSpeechSynthesizer
from aiavatar.sts.tts.google import GoogleSpeechSynthesizer
from aiavatar.sts.tts.openai import OpenAISpeechSynthesizer
from aiavatar.sts.tts.speech_gateway import SpeechGatewaySpeechSynthesizerFor quick setup of custom TTS services with HTTP API endpoints, use create_instant_synthesizer. This allows you to create a TTS synthesizer with just HTTP request parameters.
from aiavatar.sts.tts.base import create_instant_synthesizer

# Example: Style-Bert-VITS2 API
sbv2_tts = create_instant_synthesizer(
    method="POST",
    url="http://127.0.0.1:5000/voice",
    json={
        "model_id": "0",
        "speaker_id": "0",
        "text": "{text}"  # Placeholder for processed text
    }
)
The {text} and {language} placeholders in params, headers, and json will be automatically replaced with the processed text and language values during synthesis.
You can also make custom tts components by impelemting SpeechSynthesizer interface.
AIAvatarKit provides text preprocessing functionality that transforms text before Text-to-Speech processing. This enables improved speech quality and conversion of specific text patterns.
Here's an example of a preprocessor that converts alphabet text to katakana:
from aiavatar.sts.tts.preprocessor.alphabet2kana import AlphabetToKanaPreprocessor

# Create preprocessor
alphabet2kana_preproc = AlphabetToKanaPreprocessor(
    openai_api_key=OPENAI_API_KEY,
    model="gpt-4o-mini",                      # Model to use (default: gpt-4.1-mini)
    alphabet_length=3,                        # Minimum alphabet length to convert (default: 3)
    system_prompt="Convert foreign languages..." # Custom prompt (optional)
)

# Add to TTS
tts.preprocessors.append(alphabet2kana_preproc)You can also use regular expressions and string patterns for conversion:
from aiavatar.sts.tts.preprocessor.patternmatch import PatternMatchPreprocessor

# Create pattern match preprocessor
pattern_preproc = PatternMatchPreprocessor(patterns=[
    ("API", "エーピーアイ"),               # Fixed string replacement
    ("URL", "ユーアールエル"),
    (r"\d+", lambda m: "number"),          # Regex replacement with function
])

# Add common patterns
pattern_preproc.add_number_dash_pattern()  # Number-dash patterns (e.g., 12-34 → イチニの サンヨン)
pattern_preproc.add_phonenumber_pattern()  # Phone number patterns

# Add to TTS
tts.preprocessors.append(pattern_preproc)You can create your own preprocessors by implementing the TTSPreprocessor interface:
from aiavatar.sts.tts.preprocessor import TTSPreprocessor

class CustomPreprocessor(TTSPreprocessor):
    def __init__(self, custom_dict: dict = None):
        self.custom_dict = custom_dict or {}

    async def process(self, text: str, style_info: dict = None, language: str = None) -> str:
        # Custom conversion logic
        processed_text = text

        # Dictionary-based replacement
        for original, replacement in self.custom_dict.items():
            processed_text = processed_text.replace(original, replacement)

        # Language-specific conversions
        if language == "ja-JP":
            processed_text = processed_text.replace("OK", "オーケー")

        return processed_text

# Use custom preprocessor
custom_preproc = CustomPreprocessor(custom_dict={
    "GitHub": "ギットハブ",
    "Python": "パイソン",
    "Docker": "ドッカー"
})

tts.preprocessors.append(custom_preproc)Multiple preprocessors can be used together. They are executed in the order they were registered:
# Combine multiple preprocessors
tts.preprocessors.extend([
    pattern_preproc,        # 1. Pattern match conversion
    alphabet2kana_preproc,  # 2. Alphabet to katakana conversion
    custom_preproc          # 3. Custom conversion
])If you want to configure in detail, create instance of SpeechRecognizer with custom parameters and set it to AIAvatar. We support Azure, Google and OpenAI Speech-to-Text services.
NOTE: AzureSpeechRecognizer is much faster than Google and OpenAI(default).
# Create AzureSpeechRecognizer
from aiavatar.sts.stt.azure import AzureSpeechRecognizer
stt = AzureSpeechRecognizer(
    azure_api_key=AZURE_API_KEY,
    azure_region=AZURE_REGION
)

# Create AIAvatar with AzureSpeechRecognizer
aiavatar_app = AIAvatar(
    stt=stt,
    openai_api_key=OPENAI_API_KEY   # API Key for LLM
)
You can also make custom STT components by implementing SpeechRecognizer interface.
You can add custom preprocessing and postprocessing to any SpeechRecognizer implementation. This is useful for tasks like speaker verification, audio filtering, or text normalization.
from aiavatar.sts.stt.openai import OpenAISpeechRecognizer

# Create recognizer
recognizer = OpenAISpeechRecognizer(openai_api_key="your-api-key")

# Add preprocessing - e.g., speaker verification
@recognizer.preprocess
async def verify_speaker(session_id: str, audio_data: bytes):
    # Perform speaker verification
    is_valid_speaker = await check_speaker_identity(audio_data)

    if not is_valid_speaker:
        # Return empty bytes to skip transcription
        return b"", {"rejected": True, "reason": "speaker_mismatch"}

    # Return processed audio and metadata
    filtered_audio = apply_noise_filter(audio_data)
    return filtered_audio, {"speaker_verified": True, "session_id": session_id}

# Add postprocessing - e.g., text formatting
@recognizer.postprocess
async def format_text(session_id: str, text: str, audio_data: bytes, preprocess_metadata: dict):
    # Format transcribed text
    formatted_text = text.strip().capitalize()

    # Add punctuation if missing
    if formatted_text and formatted_text[-1] not in '.!?':
        formatted_text += '.'

    # Return formatted text and metadata
    return formatted_text, {
        "original_text": text,
        "formatting_applied": True,
        "preprocess_info": preprocess_metadata
    }

# Use the recognizer with preprocessing and postprocessing
result = await recognizer.recognize(
    session_id="user-123",
    data=audio_bytes
)

print(f"Text: {result.text}")
print(f"Preprocess metadata: {result.preprocess_metadata}")
print(f"Postprocess metadata: {result.postprocess_metadata}")
The preprocessing and postprocessing functions can return either:
- Just the processed data (bytes for preprocess, string for postprocess)
- A tuple of (processed_data, metadata_dict) for additional information
If preprocessing returns empty bytes, the transcription is skipped and the result will have text=None.
AIAvatarKit provides speaker diarization functionality to suppress responses to voices other than the main speaker. This prevents interruptions from surrounding conversations or venue announcements at events.
The MainSpeakerGate provides the following features:
- Calculates voice embeddings from request audio
- Registers a voice as the main speaker when similarity exceeds threshold for 2 consecutive requests (per session)
- Returns
accepted=Truewhen request audio similarity exceeds threshold after main speaker registration - Returns
accepted=Truewhen no main speaker is registered yet
NOTE: While mechanically ignoring non-main speaker voices (Example 1) is simplest, it risks stopping conversation due to misidentification and cannot handle speaker changes. Consider context-aware handling (Example 2) as well.
from aiavatar.sts.stt.speaker_gate import MainSpeakerGate
speaker_gate = MainSpeakerGate()

# Example 1: Drop request when the voice is not from main speaker
@aiavatar_app.sts.stt.preprocess
async def stt_preprocess(session_id: str, audio_bytes: bytes):
    # Compare with main speaker's voice embedding
    gate_response = await speaker_gate.evaluate(session_id, audio_bytes, aiavatar_app.sts.vad.sample_rate)
    # Branch processing based on similarity with main speaker's voice
    if not gate_response.accepted:
        logger.info(f"Ignore other speaker's voice: confidence={gate_response.confidence}")
        return None, gate_response.to_dict()
    else:
        return audio_bytes, gate_response.to_dict()

# Example 2: Add annotation for LLM that the voice is not from main speaker
@aiavatar_app.sts.stt.postprocess
async def stt_postprocess(session_id: str, text: str, audio_bytes: bytes, preprocess_metadata: dict):
    # Compare with main speaker's voice embedding
    gate_response = await speaker_gate.evaluate(session_id, audio_bytes, aiavatar_app.sts.vad.sample_rate)
    # Branch processing based on similarity with main speaker's voice
    if not gate_response.accepted:
        logger.info(f"Adding note that this may be from a different speaker: confidence={gate_response.confidence}")
        return f"$The following request may not be from the main speaker (similarity: {gate_response.confidence}). Determine from the content whether to respond. If you should not respond, output just[wait:user] as the answer:\n\n{text}", gate_response.to_dict()
    else:
return text, gate_response.to_dict()AIAvatarKit includes Voice Activity Detection (VAD) components to automatically detect when speech starts and ends in audio streams. This enables seamless conversation flow without manual input controls.
The default StandardSpeechDetector uses volume-based detection with configurable thresholds:
from aiavatar.sts.vad.standard import StandardSpeechDetector

# Create StandardSpeechDetector with custom parameters
vad = StandardSpeechDetector(
    volume_db_threshold=-30.0,           # Voice detection threshold in dB
    silence_duration_threshold=0.5,      # Seconds of silence to end recording
    max_duration=10.0,                   # Maximum recording duration
    min_duration=0.2,                    # Minimum recording duration
    sample_rate=16000,                   # Audio sample rate
    channels=1,                          # Audio channels
    preroll_buffer_count=5,              # Pre-recording buffer size
    debug=True
)

# Create AIAvatar with custom VAD
aiavatar_app = AIAvatar(
    vad=vad,
    openai_api_key=OPENAI_API_KEY
)For more accurate speech detection, use SileroSpeechDetector which employs AI-based voice activity detection:
pip install silero-vadfrom aiavatar.sts.vad.silero import SileroSpeechDetector
# Create SileroSpeechDetector with custom parameters
vad = SileroSpeechDetector(
speech_probability_threshold=0.5, # AI model confidence threshold (0.0-1.0)
silence_duration_threshold=0.5, # Seconds of silence to end recording
volume_db_threshold=-30.0, # Voice detection threshold in dB (Default is None: set value only when you want to filter out non-speaker voices)
max_duration=10.0, # Maximum recording duration
min_duration=0.2, # Minimum recording duration
sample_rate=16000, # Audio sample rate
channels=1, # Audio channels
chunk_size=512, # Audio processing chunk size
model_pool_size=1, # Number of parallel AI models
debug=True
)
# Create AIAvatar with Silero VAD
aiavatar_app = AIAvatar(
vad=vad,
openai_api_key=OPENAI_API_KEY
)For applications with many concurrent users:
# High-performance configuration for 100+ concurrent sessions
vad = SileroSpeechDetector(
    speech_probability_threshold=0.6,    # Stricter threshold for noisy environments
    model_pool_size=4,                   # 4 parallel AI models for load balancing
    chunk_size=512,                      # Optimized chunk size
    debug=False                          # Disable debug for production
)
You can also make custom VAD components by implementing SpeechDetector interface.
SpeechDetectors supports an on_recording_started callback that gets triggered when speech recording starts and meets the minimum duration threshold. The callback will be executed asynchronously as a background task.
from aiavatar.sts.vad.standard import StandardSpeechDetector

async def my_recording_started_handler(session_id: str):
    print(f"Recording started for session: {session_id}")
    # Add your custom logic here

detector = StandardSpeechDetector(
    on_recording_started=my_recording_started_handler,
    volume_db_threshold=-30.0,
    silence_duration_threshold=0.5,
    # other parameters...
)To control facial expressions within conversations, set the facial expression names and values in FaceController.faces as shown below, and then include these expression keys in the response message by adding instructions to the prompt.
aiavatar_app.face_controller.faces = {
    "neutral": "🙂",
    "joy": "😀",
    "angry": "😠",
    "sorrow": "😞",
    "fun": "🥳"
}

aiavatar_app.sts.llm.system_prompt = """# Face Expression

* You have the following expressions:

- joy
- angry
- sorrow
- fun

* If you want to express a particular emotion, please insert it at the beginning of the sentence like [face:joy].

Example
[face:joy]Hey, you can see the ocean! [face:fun]Let's go swimming.
"""
This allows emojis like 🥳 to be autonomously displayed in the terminal during conversations. To actually control the avatar's facial expressions in a metaverse platform, instead of displaying emojis like 🥳, you will need to use custom implementations tailored to the integration mechanisms of each platform. Please refer to our VRChatFaceController as an example.
Now writing... ✍️
You can host AIAvatarKit on a server to enable multiple clients to have independent context-aware conversations via RESTful API with streaming responses (Server-Sent Events) and WebSocket.
Below is the simplest example of a server program:
from fastapi import FastAPI
from aiavatar.adapter.http.server import AIAvatarHttpServer

# AIAvatar
aiavatar_app = AIAvatarHttpServer(
    openai_api_key=OPENAI_API_KEY,
    debug=True
)

# Setup FastAPI app with AIAvatar components
app = FastAPI()
router = aiavatar_app.get_api_router()
app.include_router(router)
Save the above code as server.py and run it using:
uvicorn server:appNext is the simplest example of a client program:
import asyncio
from aiavatar.adapter.http.client import AIAvatarHttpClient

aiavatar_app = AIAvatarHttpClient(
    debug=True
)
asyncio.run(aiavatar_app.start_listening(session_id="http_session", user_id="http_user"))
Save the above code as client.py and run it using:
python client.pyYou can now perform voice interactions just like when running locally.
When using the streaming API via HTTP, clients communicate with the server using JSON-formatted requests.
Below is the format for initiating a session:
{
    "type": "start",          // Always `start`
    "session_id": "6d8ba9ac-a515-49be-8bf4-cdef021a169d",
    "user_id": "user_id",
    "context_id": "c37ac363-5c65-4832-aa25-fd3bbbc1b1e7",   // Set null or provided id in `start` response
    "text": "こんにちは",       // If set, audio_data will be ignored
    "audio_data": "XXXX",     // Base64 encoded audio data
    "files": [
        {
            "type": "image",        // Only `image` is supported for now
            "url": "https://xxx",
        }
    ],
    "metadata": {}
}
The server returns responses as a stream of JSON objects in the following structure.
The communication flow typically consists of:
{
    "type": "chunk",    // start -> chunk -> final
    "session_id": "6d8ba9ac-a515-49be-8bf4-cdef021a169d",
    "user_id": "user01",
    "context_id": "c37ac363-5c65-4832-aa25-fd3bbbc1b1e7",
    "text": "[face:joy]こんにちは!",   // Response text with info
    "voice_text": "こんにちは!",       // Response text for voice synthesis
    "avatar_control_request": {
        "animation_name": null,       // Parsed animation name
        "animation_duration": null,   // Parsed duration for animation
        "face_name": "joy",           // Parsed facial expression name
        "face_duration": 4.0          // Parsed duration for the facial expression
    },
    "audio_data": "XXXX",   // Base64 encoded. Playback this as the character's voice.
    "metadata": {
        "is_first_chunk": true
    }
}
You can test the streaming API using a simple curl command:
curl -N -X POST http://127.0.0.1:8000/chat \
    -H "Content-Type: application/json" \
    -d '{
        "type": "start",
        "session_id": "6d8ba9ac-a515-49be-8bf4-cdef021a169d",
        "user_id": "user01",
        "text": "こんにちは"
    }'
Sample response (streamed from the server):
data: {"type": "start", "session_id": "6d8ba9ac-a515-49be-8bf4-cdef021a169d", "user_id": "user01", "context_id": "c37ac363-5c65-4832-aa25-fd3bbbc1b1e7", "text": null, "voice_text": null, "avatar_control_request": null, "audio_data": "XXXX", "metadata": {"request_text": "こんにちは"}}

data: {"type": "chunk", "session_id": "6d8ba9ac-a515-49be-8bf4-cdef021a169d", "user_id": "user01", "context_id": "c37ac363-5c65-4832-aa25-fd3bbbc1b1e7", "text": "[face:joy]こんにちは!", "voice_text": "こんにちは!", "avatar_control_request": {"animation_name": null, "animation_duration": null, "face_name": "joy", "face_duration": 4.0}, "audio_data": "XXXX", "metadata": {"is_first_chunk": true}}

data: {"type": "chunk", "session_id": "6d8ba9ac-a515-49be-8bf4-cdef021a169d", "user_id": "user01", "context_id": "c37ac363-5c65-4832-aa25-fd3bbbc1b1e7", "text": "今日はどんなことをお手伝いしましょうか?", "voice_text": "今日はどんなことをお手伝いしましょうか?", "avatar_control_request": {"animation_name": null, "animation_duration": null, "face_name": null, "face_duration": null}, "audio_data": "XXXX", "metadata": {"is_first_chunk": false}}

data: {"type": "final", "session_id": "6d8ba9ac-a515-49be-8bf4-cdef021a169d", "user_id": "user01", "context_id": "c37ac363-5c65-4832-aa25-fd3bbbc1b1e7", "text": "[face:joy]こんにちは!今日はどんなことをお手伝いしましょうか?", "voice_text": "こんにちは!今日はどんなことをお手伝いしましょうか?", "avatar_control_request": null, "audio_data": "XXXX", "metadata": {}}
To continue the conversation, include the context_id provided in the start response in your next request.
NOTE: When using the RESTful API, voice activity detection (VAD) must be performed client-side.
NOTE: To protect API with API Key, set api_key=API_KEY_YOU_MAKE to AIAvatarHttpServer and send Authorization: Bearer {API_KEY_YOU_MAKE} as HTTP header from client.
Below is the simplest example of a server program:
from fastapi import FastAPI
from aiavatar.adapter.websocket.server import AIAvatarWebSocketServer

# Create AIAvatar
aiavatar_app = AIAvatarWebSocketServer(
    openai_api_key=OPENAI_API_KEY,
    volume_db_threshold=-30,  # <- Adjust for your audio env
    debug=True
)

# Set router to FastAPI app
app = FastAPI()
router = aiavatar_app.get_websocket_router()
app.include_router(router)
Save the above code as server.py and run it using:
uvicorn server:appNOTE: When you specify response_audio_chunk_size in the AIAvatarWebSocketServer instance, the audio response will be streamed as PCM data chunks of the specified byte size. In this case, no WAVE header will be included in the response - you'll receive raw PCM audio data only.
Next is the simplest example of a client program:
import asyncio
from aiavatar.adapter.websocket.client import AIAvatarWebSocketClient

client = AIAvatarWebSocketClient()
asyncio.run(client.start_listening(session_id="ws_session", user_id="ws_user"))
Save the above code as client.py and run it using:
python client.pyYou can now perform voice interactions just like when running locally.
NOTE: When using the WebSocket API, voice activity detection (VAD) is performed on the server side, so clients can simply stream microphone input directly to the server.
You can register callbacks to handle WebSocket connection and disconnection events. This is useful for logging, session management, or custom initialization/cleanup logic.
@aiavatar_app.on_connect
async def on_connect(request, session_data):
    print(f"Client connected: {session_data.id}")
    print(f"User ID: {session_data.user_id}")
    print(f"Session ID: {session_data.session_id}")

    # Custom initialization logic
    # e.g., load user preferences, initialize resources, etc.

@aiavatar_app.on_disconnect
async def on_disconnect(session_data):
    print(f"Client disconnected: {session_data.id}")

    # Custom cleanup logic
    # e.g., save session data, release resources, etc.
The session_data object contains information about the WebSocket session:
-
id: Unique session identifier -
user_id: User identifier from the connection request -
session_id: Session identifier from the connection request - Additional metadata passed during connection
AIAvatarHttpServer provides REST API endpoints for Speech-to-Text (STT) and Text-to-Speech (TTS) functionality:
POST /stt - Converts audio to text.
import requests

# Read audio file
with open("audio.wav", "rb") as f:
    audio_data = f.read()

# Send to STT endpoint
response = requests.post(
    "http://localhost:8000/stt",
    data=audio_data,
    headers={"Content-Type": "audio/wav"}
)

print(response.json()) # {"text": "recognized speech"}POST /tts - Converts text to speech.
import requests

# Send text to TTS endpoint
response = requests.post(
    "http://localhost:8000/tts",
    json={"text": "Hello, this is AI Avatar speaking"}
)

# Save audio response
with open("output.wav", "wb") as f:
f.write(response.content)AIAvatarKit is capable of operating on any platform that allows applications to hook into audio input and output. The platforms that have been tested include:
- VRChat
- cluster
- Vket Cloud
In addition to running on PCs to operate AI avatars on these platforms, you can also create a communication robot by connecting speakers, a microphone, and, if possible, a display to a Raspberry Pi.
- 2 Virtual audio devices (e.g. VB-CABLE) are required.
- Multiple VRChat accounts are required to chat with your AIAvatar.
First, run the commands below in python interpreter to check the audio devices.
$ python

>>> from aiavatar import AudioDevice
>>> AudioDevice().list_audio_devices()
0: Headset Microphone (Oculus Virt
    :
6: CABLE-B Output (VB-Audio Cable
7: Microsoft サウンド マッパー - Output
8: SONY TV (NVIDIA High Definition
    :
13: CABLE-A Input (VB-Audio Cable A
    :
In this example,
- To use
VB-Cable-Afor microphone for VRChat, index foroutput_deviceis13(CABLE-A Input). - To use
VB-Cable-Bfor speaker for VRChat, index forinput_deviceis6(CABLE-B Output). Don't forget to setVB-Cable-B Inputas the default output device of Windows OS.
Then edit run.py like below.
# Create AIAvatar
aiavatar_app = AIAvatar(
    openai_api_key=OPENAI_API_KEY,
    input_device=6,     # Listen sound from VRChat
    output_device=13,   # Speak to VRChat microphone
)
Run it.
$ run.pyLaunch VRChat as desktop mode on the machine that runs run.py and log in with the account for AIAvatar. Then set VB-Cable-A to microphone in VRChat setting window.
That's all! Let's chat with the AIAvatar. Log in to VRChat on another machine (or Quest) and go to the world the AIAvatar is in.
AIAvatarKit controls the face expression by Avatar OSC.
LLM(ChatGPT/Claude/Gemini)
↓ response with face tag [face:joy]Hello!
AIAvatarKit(VRCFaceExpressionController)
↓ osc FaceOSC=1
VRChat(FX AnimatorController)
↓
😆
So at first, setup your avatar the following steps:
- Add avatar parameter
FaceOSC(type: int, default value: 0, saved: false, synced: true). - Add
FaceOSCparameter to the FX animator controller. - Add layer and put states and transitions for face expression to the FX animator controller.
- (option) If you use the avatar that is already used in VRChat, add input parameter configuration to avatar json.
Next, use VRChatFaceController.
from aiavatar.face.vrchat import VRChatFaceController

# Setup VRChatFaceContorller
vrc_face_controller = VRChatFaceController(
    faces={
        "neutral": 0,   # always set `neutral: 0`

        # key = the name that LLM can understand the expression
        # value = FaceOSC value that is set to the transition on the FX animator controller
        "joy": 1,
        "angry": 2,
        "sorrow": 3,
        "fun": 4
    }
)
Lastly, add face expression section to the system prompt.
# Make system prompt
system_prompt = """
# Face Expression

* You have following expressions:

- joy
- angry
- sorrow
- fun

* If you want to express a particular emotion, please insert it at the beginning of the sentence like [face:joy].

Example
[face:joy]Hey, you can see the ocean! [face:fun]Let's go swimming.
"""

# Set them to AIAvatar
aiavatar_app = AIAvatar(
    openai_api_key=OPENAI_API_KEY,
    face_controller=vrc_face_controller,
    system_prompt=system_prompt
)
You can test it not only through the voice conversation but also via the REST API.
Now writing... ✍️
AIAvatarKit provides comprehensive administration APIs for monitoring and controlling running instances. These APIs enable dynamic configuration updates, runtime control, and system monitoring for production deployments.
The Configuration API allows real-time management of AIAvatar components and their settings. You can dynamically switch between different LLM providers, adjust TTS settings, modify STT parameters, and monitor system logs.
from fastapi import FastAPI
from aiavatar.adapter.http.server import AIAvatarHttpServer
from aiavatar.admin.config import ConfigAPI

# Create AIAvatar server
aiavatar_app = AIAvatarHttpServer(
    openai_api_key=OPENAI_API_KEY,
    debug=True
)

# Create multiple LLM services for switching
from aiavatar.sts.llm.chatgpt import ChatGPTService
from aiavatar.sts.llm.claude import ClaudeService

chatgpt_service = ChatGPTService(openai_api_key=OPENAI_API_KEY, model="gpt-4o")
claude_service = ClaudeService(anthropic_api_key=ANTHROPIC_API_KEY, model="claude-3-5-sonnet-latest")

# Setup Configuration API
config_api = ConfigAPI(
    sts=aiavatar_app.sts,
    llms={
        "chatgpt": chatgpt_service,
        "claude": claude_service
    },
    logfile_path="/var/log/aiavatar.log"
)

# Setup FastAPI app
app = FastAPI()
app.include_router(aiavatar_app.get_api_router())
app.include_router(config_api.get_router(), prefix="/admin")Component Management
- Switch between different STT, LLM, and TTS providers at runtime
- Query available components and their current configurations
- Hot-swap components without restarting the application
Dynamic Configuration Updates
- Update LLM parameters (temperature, model, system prompt)
- Modify TTS settings (voice, speaker, style mappings)
- Adjust STT configurations (language, timeout, debug mode)
System Monitoring
- Retrieve recent system logs
- Monitor component health and status
- Track configuration changes
# Get current LLM configuration
curl -X GET "http://localhost:8000/admin/llm/config"

# Switch to Claude
curl -X POST "http://localhost:8000/admin/sts/component" \
    -H "Content-Type: application/json" \
    -d '{"llm": "claude"}'

# Update system prompt
curl -X POST "http://localhost:8000/admin/llm/config" \
    -H "Content-Type: application/json" \
    -d '{
        "config": {
            "system_prompt": "You are a helpful virtual assistant.",
            "temperature": 0.7
        }
    }'

# Get system logs
curl -X GET "http://localhost:8000/admin/system/log?count=50"The Control API provides runtime control over AIAvatar behavior, allowing you to manage listening sessions, control avatar expressions and animations, and handle conversations programmatically.
from fastapi import FastAPI
from aiavatar import AIAvatar
from aiavatar.admin.control import ControlAPI

# Create AIAvatar
aiavatar_app = AIAvatar(
    openai_api_key=OPENAI_API_KEY,
    debug=True
)

# Setup Control API
control_api = ControlAPI(aiavatar_app)

# Setup FastAPI app
app = FastAPI()
app.include_router(control_api.get_router(), prefix="/control")Listener Management
- Start and stop voice listening sessions
- Monitor listening status
- Handle multiple concurrent sessions
Avatar Control
- Set facial expressions with duration control
- Trigger animations programmatically
- Perform synchronized speech with avatar controls
- Monitor current avatar state
Conversation Management
- Send text messages directly to the conversation pipeline
- Retrieve conversation history
- Monitor conversation flow
# Start listening for session
curl -X POST "http://localhost:8000/control/listener/start" \
    -H "Content-Type: application/json" \
    -d '{"session_id": "demo_session"}'

# Check listener status
curl -X GET "http://localhost:8000/control/listener/status"

# Set facial expression
curl -X POST "http://localhost:8000/control/avatar/face" \
    -H "Content-Type: application/json" \
    -d '{
        "name": "joy",
        "duration": 3.0
    }'

# Trigger animation
curl -X POST "http://localhost:8000/control/avatar/animation" \
    -H "Content-Type: application/json" \
    -d '{
        "name": "wave_hands",
        "duration": 2.5
    }'

# Perform speech with control tags
curl -X POST "http://localhost:8000/control/avatar/perform" \
    -H "Content-Type: application/json" \
    -d '{
        "text": "[face:joy]Hello there! [animation:wave_hands]Nice to meet you!"
    }'

# Send conversation message
curl -X POST "http://localhost:8000/control/conversation" \
    -H "Content-Type: application/json" \
    -d '{
        "text": "What's the weather like today?"
    }'

# Get conversation history
curl -X GET "http://localhost:8000/control/conversation/histories"The administration APIs support secure authentication using Bearer tokens to protect sensitive management operations in production environments.
AIAvatarKit provides a built-in authentication system through the aiavatar.auth module:
from fastapi import FastAPI, Depends
from aiavatar.auth import BearerAuth
from aiavatar.adapter.http.server import AIAvatarHttpServer
from aiavatar.admin.config import ConfigAPI
from aiavatar.admin.control import ControlAPI

# Create AIAvatar server
aiavatar_app = AIAvatarHttpServer(
    openai_api_key=OPENAI_API_KEY,
    debug=True
)

# Setup authentication
auth = BearerAuth(api_key="your-secure-admin-token-here")

# Setup administration APIs
config_api = ConfigAPI(sts=aiavatar_app.sts, logfile_path="/var/log/aiavatar.log")
control_api = ControlAPI(aiavatar_app)

# Setup FastAPI app with authentication
app = FastAPI(
    title="AIAvatar Administration",
    description="Administration APIs for AIAvatar management",
    version="1.0.0"
)

# Include routers with authentication
app.include_router(aiavatar_app.get_api_router())
app.include_router(
    config_api.get_router(),
    prefix="/admin",
    dependencies=[Depends(auth)]
)
app.include_router(
    control_api.get_router(),
    prefix="/control",
    dependencies=[Depends(auth)]
)Once authentication is configured, all administration API calls must include the Authorization header:
# Set your admin token
export ADMIN_TOKEN="your-secure-admin-token-here"

# Get LLM configuration with authentication
curl -X GET "http://localhost:8000/admin/llm/config" \
    -H "Authorization: Bearer $ADMIN_TOKEN"

# Start listener with authentication
curl -X POST "http://localhost:8000/control/listener/start" \
    -H "Authorization: Bearer $ADMIN_TOKEN" \
    -H "Content-Type: application/json" \
    -d '{"session_id": "secure_session"}'

# Update system prompt with authentication
curl -X POST "http://localhost:8000/admin/llm/config" \
    -H "Authorization: Bearer $ADMIN_TOKEN" \
    -H "Content-Type: application/json" \
    -d '{
        "config": {
            "system_prompt": "You are a secure virtual assistant.",
            "temperature": 0.7
        }
}'AIAvatarKit is not just a framework for creating chatty AI characters — it is designed to support agentic characters that can interact with APIs and external data sources (RAG).
Register tool with spec by @aiavatar_app.sts.llm.tool. The spec should be in the format for each LLM.
# Spec (for ChatGPT)
weather_tool_spec = {
    "type": "function",
    "function": {
        "name": "get_weather",
        "parameters": {
            "type": "object",
            "properties": {
                "location": {"type": "string"}
            },
        },
    }
}

# Implement tool and register it with spec
@aiavatar_app.sts.llm.tool(weather_tool_spec)
async def get_weather(location: str = None):
    weather = await weather_api(location=location)  # Call weather API
    return weather  # {"weather": "clear", "temperature": 23.4}
Alternatively, register the same tool programmatically:
aiavatar_app.sts.llm.add_tool(
    Tool("get_weather", weather_tool_spec, get_weather)
)Note: When you register a tool with add_tool, the spec is automatically converted to the correct format for GPT, Gemini, or Claude, so you can define it once and use it everywhere.
Before creating your own tools, start with the example tools:
# Google Search
from examples.tools.gemini_websearch import GeminiWebSearchTool
aiavatar_app.sts.llm.add_tool(GeminiWebSearchTool(gemini_api_key=GEMINI_API_KEY))

# Web Scraper
from examples.tools.webscraper import WebScraperTool
aiavatar_app.sts.llm.add_tool(WebScraperTool())Sometimes you may want to provide feedback to the user when a tool takes time to execute. AIAvatarKit supports tools that return stream responses (via AsyncGenerator), which allows you to integrate advanced and costly operations — such as interactions with AI Agent frameworks — into real-time voice conversations without compromising the user experience.
Here’s an example implementation. Intermediate progress is yielded with the second return value set to False, and the final result is yielded with True.
@service.tool(weather_tool_spec)
async def get_weather_stream(location: str):
    # Progress: Geocoding
    yield {"message": "Resolving location"}, False
    geocode = await geocode_api(location=location)

    # Progress: Weather
    yield {"message": "Calling weather api"}, False
    weather = await weather_api(geocode=geocode)  # Call weather API

    # Final result (yield with `True`)
    yield {"weather": "clear", "temperature": 23.4}, True
On the user side, the first value in each yield will be streamed as a progress response under the ToolCall response type.
Additionally, you can yield string values directly to provide immediate voice feedback to the user during processing:
@service.tool(weather_tool_spec)
async def get_weather_stream(location: str):
    # Provide voice feedback during processing
    yield "Converting locaton to geo code. Please wait a moment."
    geocode = await geocode_api(location=location)

    yield "Getting weather information."
    weather = await weather_api(geocode=geocode)

    # Final result
    yield {"weather": "clear", "temperature": 23.4}, True
When you yield a string (str) value, the AI avatar will speak that text while continuing to process the request.
AIAvatarKit supports dynamic Tool Calls. When many tools are loaded up-front, it becomes harder to make the model behave as intended and your system instructions explode in size. With AIAvatarKit’s Dynamic Tool Call mechanism you load only the tools that are actually needed at the moment, eliminating that complexity.
The overall flow is illustrated below.
(exactly the same as with ordinary tools)
# Weather
get_weather_spec = {
    "type": "function",
    "function": {
        "name": "get_weather",
        "description": "Get weather info at the specified location",
        "parameters": {
            "type": "object",
            "properties": {
                "location": {"type": "string"}
            }
        },
    }
}

async def get_weather(location: str):
    resp = await weather_api(location)
    return resp.json() # e.g. {"weather": "clear", "temperature": 23.4}

# Web Search
search_web_spec = {
    "type": "function",
    "function": {
        "name": "search_web",
        "description": "Search info from the internet websites",
        "parameters": {
            "type": "object",
            "properties": {
                "query": {"type": "string"}
            }
        },
    }
}
async def search_web(query: str) -> str:
    resp = await web_search_api(query)
return resp.json() # e.g. {"results": [{...}]}Setting is_dynamic=True tells the framework not to expose the tool by default;
AIAvatarKit will inject it only when the Trigger Detection Tool decides the tool is relevant.
You can also supply an instruction string that will be spliced into the system prompt on-the-fly.
from aiavatar.sts.llm import Tool

llm = aiavatar_app.sts.llm

# Turn on Dynamic Tool Mode
llm.use_dynamic_tools = True

# Register as Dynamic Tools
llm.tools["get_weather"] = Tool(
    "get_weather",
    get_weather_spec,
    get_weather,
    instruction=(
        "## Use of `get_weather`\n\n"
        "Call this tool to obtain current weather or a forecast. "
        "Argument:\n"
        "- `location`: city name or geo-hash."
    ),
    is_dynamic=True,
)

llm.tools["search_web"] = Tool(
    "search_web",
    search_web_spec,
    search_web,
    instruction=(
        "## Use of `search_web`\n\n"
        "Call this tool to look up information on the public internet. "
        "Argument:\n"
        "- `query`: keywords describing what you want to find."
    ),
    is_dynamic=True,
)
Or, register via add_tool.
# Difine tool without `is_dynamic` for other use cases
weather_tool = Tool("get_weather", get_weather_spec, get_weather, instruction="...")

# Register tool via `add_tool` with `is_dynamic`
llm.add_tool(weather_tool, is_dynamic=True)Append a concise “How to use external tools” section (example below). Replace the example tools with those your application actually relies on for smoother behaviour.
## Use of External Tools

When external tools, knowledge, or data are required to process a user's request, use the appropriate tools.
The following rules **must be strictly followed** when using tools.

### Arguments

- Use only arguments that are **explicitly specified by the user** or that can be **reliably inferred from the conversation history**.
- **If information is missing**, ask the user for clarification or use other tools to retrieve the necessary data.
- **It is strictly forbidden** to use values as arguments that are not based on the conversation.

### Tool Selection

When a specialized tool is available for a specific purpose, use that tool.
If you can use only `execute_external_tool`, use it.

Examples where external tools are needed:

- Retrieving weather information
- Retrieving memory from past conversations
- Searching for, playing, or otherwise controlling music
- Performing web searches
- Accessing real-world systems or data to provide better solutions
With these three steps, your AI agent stays lean—loading only what it needs—while still having immediate access to a rich arsenal of capabilities whenever they’re truly required.
By default AIAvatarKit simply hands the entire list of dynamic tools to the LLM and lets the model decide which ones match the current context. This approach works for a moderate number of tools, but the size of the prompt places a hard limit on how many candidates you can include.
For larger-scale systems, pair AIAvatarKit with a retrieval layer (e.g., a vector-search index) so that, out of thousands of available tools, only the handful that are truly relevant are executed.
AIAvatarKit supports this pattern through the get_dynamic_tools hook.
Register an async function decorated with @llm.get_dynamic_tools; it should return a list of tool specification objects for the current turn.
@llm.get_dynamic_tools
async def my_get_dynamic_tools(messages: list, metadata: dict) -> list:
    # Retrieve candidate tools from your vector database (or any other store)
    tools = await search_tools_from_vector_db(messages, metadata)
    # Extract and return the spec objects (not the implementations)
return [t.spec for t in tools]AIAvatarKit includes a comprehensive evaluation framework for testing and assessing AI avatar conversations. The DialogEvaluator enables scenario-based conversation execution with automatic evaluation capabilities.
- Scenario Execution: Run predefined dialog scenarios against your AI system
- Turn-by-Turn Evaluation: Evaluate each conversation turn against specific criteria
- Goal Assessment: Evaluate overall scenario objective achievement
- Result Management: Save, load, and display evaluation results
import asyncio
from aiavatar.eval.dialog import DialogEvaluator, Scenario, Turn
from aiavatar.sts.llm.chatgpt import ChatGPTService

async def main():
    # Initialize LLM services
    llm = ChatGPTService(api_key="your_api_key")
    evaluation_llm = ChatGPTService(api_key="your_api_key")

    # Create evaluator
    evaluator = DialogEvaluator(
        llm=llm,                    # LLM for conversation
        evaluation_llm=evaluation_llm  # LLM for evaluation
    )

    # Define scenario
    scenario = Scenario(
        goal="Provide helpful customer support",
        turns=[
            Turn(
                input_text="Hello, I need help with my order",
                evaluation_criteria="Responds politely and shows willingness to help"
            ),
            Turn(
                input_text="My order number is 12345",
                evaluation_criteria="Acknowledges the order number and proceeds appropriately"
            )
        ]
    )

    # Run evaluation
    results = await evaluator.run(
        dataset=[scenario],
        detailed=True,                # Enable turn-by-turn evaluation
        overwrite_execution=False,    # Skip if already executed
        overwrite_evaluation=False    # Skip if already evaluated
    )

    # Display results
    evaluator.print_results(results)

    # Save results
    evaluator.save_results(results, "evaluation_results.json")

if __name__ == "__main__":
    asyncio.run(main())
Example Output:
=== Scenario 1 ===
Goal: Provide helpful customer support

Turn 1:
  Input: Hello, I need help with my order
  Actual Output: Hello! I'd be happy to help you with your order. Could you please provide your order number?
  Result: ✓ PASS
  Reason: The response is polite, helpful, and appropriately asks for the order number.

Turn 2:
  Input: My order number is 12345
  Actual Output: Thank you for providing order number 12345. Let me look that up for you.
  Result: ✓ PASS
  Reason: Acknowledges the order number and shows willingness to help.

Summary: 2/2 turns passed (100.0%)

=== Overall Scenario Evaluation ===
Goal Achievement: ✓ SUCCESS
Reason: The AI successfully provided helpful customer support by responding politely and efficiently handling the order inquiry.
Load scenarios from JSON files:
{
  "scenarios": [
    {
      "goal": "Basic greeting and assistance",
      "turns": [
        {
          "input_text": "Hello",
          "expected_output": "Friendly greeting",
          "evaluation_criteria": "Responds warmly and appropriately"
        }
      ]
    }
  ]
}
# Load and evaluate from file
results = await evaluator.run(dataset="test_scenarios.json")
# Save results back to file
evaluator.save_results(results, "results.json")# Execution modes
results = await evaluator.run(
dataset=scenarios,
detailed=True, # Turn-by-turn evaluation
overwrite_execution=True, # Re-run conversations
overwrite_evaluation=True # Re-evaluate results
)
# Simple mode (scenario-level evaluation only)
results = await evaluator.run(
dataset=scenarios,
detailed=False
)You can evaluate scenario on the fly via Config API:
# Make evaluator
from aiavatar.eval.dialog import DialogEvaluator
eval_llm = ChatGPTService(openai_api_key=OPENAI_API_KEY)
evaluator = DialogEvaluator(llm=aiavatar_app.sts.llm, evaluation_llm=eval_llm)

# Activate Config API
from aiavatar.admin.config import ConfigAPI
config_router = ConfigAPI(aiavatar_app.sts, evaluator=evaluator).get_router()   # Set evaluator here
app.include_router(config_router)In addition to LLM-based evaluation using evaluation_criteria, you can evaluate more explicitly using custom logic functions.
# Make evaluation function(s)
def evaluate_weather_tool_call(output_text, tool_call, evaluation_criteria, result, eval_result_text):
    if tool_call is not None and tool_call.name != "get_weather":
        # Overwrite result and reason
        return False, f"Incorrect tool call: {tool_call.name}"
    else:
        # Pass through
        return result, eval_result_text

# Register evaluation function(s)
evaluator = DialogEvaluator(
    llm=aiavatar_app.sts.llm,
    evaluation_llm=eval_llm,
    evaluation_functions={"evaluate_weather_tool_call_func": evaluate_weather_tool_call}
)

# Use evaluation function in scenario
scenario = Scenario(
    turns=[
        Turn(input_text="Hello", expected_output_text="Hi", evaluation_criteria="Greeting"),
        Turn(input_text="What is the weather in Tokyo?", expected_output_text="It's sunny.", evaluation_criteria="Answer the weather based on the result of calling get_weather tool.", evaluation_function_name="evaluate_weather_tool_call_func"),
    ],
    goal="Answer the weather in Tokyo based on the result of get_weather."
)Advanced usases.
AIAvatarKit captures and sends image to AI dynamically when the AI determine that vision is required to process the request. This gives "eyes" to your AIAvatar in metaverse platforms like VRChat.
# Instruct vision tag in the system message
SYSTEM_PROMPR = """
## Using Vision

If you need an image to process a user's request, you can obtain it using the following methods:

- screenshot
- camera

If an image is needed to process the request, add an instruction like [vision:screenshot] to your response to request an image from the user.

By adding this instruction, the user will provide an image in their next utterance. No comments about the image itself are necessary.

Example:

user: Look! This is the sushi I had today.
assistant: [vision:screenshot] Let me take a look.
"""

# Create AIAvatar with the system prompt
aiavatar_app = AIAvatar(
    system_prompt=SYSTEM_PROMPT,
    openai_api_key=OPENAI_API_KEY
)

# Implement get_image_url
import base64
import io
import pyautogui    # pip install pyautogui
from aiavatar.device.video import VideoDevice   # pip install opencv-python
default_camera = VideoDevice(device_index=0, width=960, height=540)

@aiavatar_app.get_image_url
async def get_image_url(source: str) -> str:
    image_bytes = None

    if source == "camera":
        # Capture photo by camera
        image_bytes = await default_camera.capture_image("camera.jpg")
    elif source == "screenshot":
        # Capture screenshot
        buffered = io.BytesIO()
        image = pyautogui.screenshot(region=(0, 0, 1280, 720))
        image.save(buffered, format="PNG")
        image_bytes = buffered.getvalue()

    if image_bytes:
        # Upload and get url, or, make base64 encoded url
        b64_encoded = base64.b64encode(image_bytes).decode('utf-8')
        b64_url = f"data:image/jpeg;base64,{b64_encoded}"
return b64_urlTo recall information from past conversations across different contexts, a long-term memory service is used.
To store conversation history, define a function decorated with @aiavatar_app.sts.on_finish. To retrieve memories from the conversation history, call the search function of the long-term memory service as a tool.
Below is an example using ChatMemory.
# Create client for ChatMemory
from examples.misc.chatmemory import ChatMemoryClient
chat_memory_client = ChatMemoryClient(
    base_url="http://your_chatmemory_host",
    debug=True
)

# Add messages to ChatMemory service
@aiavatar_app.sts.on_finish
async def on_finish(request, response):
    try:
        await chat_memory_client.enqueue_messages(request, response)
    except Exception as ex:
        print(ex)

# Retrieve memory by calling tool
search_memory_tool_spec = {
    "type": "function",
    "function": {
        "name": "search_memory",
        "parameters": {
            "type": "object",
            "properties": {
                "query": {"type": "string"}
            },
        },
    }
}
@aiavatar_app.sts.llm.tool(search_memory_tool_spec)
async def search_memory(query: str, metadata: dict = None):
    """Search long-term memory

    Args:
        query: Query to search memory.
    """
    result = await chat_memory_client.search(metadata["user_id"], query)
return result.__dict__Set wakewords when instantiating AIAvatar. Conversation will start when the AIAvatar recognizes one of the words in this list. You can also set wakeword_timeout, after which the AIAvatar will return to listening for the wakeword again.
aiavatar_app = AIAvatar(
    openai_api_key=OPENAI_API_KEY,
    wakewords=["Hello", "こんにちは"],
    wakeword_timeout=60,
)You can embed parameters into your system prompt dynamically.
First, define your AIAvatar instance with a system prompt containing placeholders:
aiavatar_app = AIAvatar(
    openai_api_key="YOUR_OPENAI_API_KEY",
    model="gpt-4o",
    system_prompt="User's name is {name}."
)
When invoking, pass the parameters as a dictionary using system_prompt_params:
aiavatar_app.sts.invoke(STSRequest(
    # (other fields omitted)
    system_prompt_params={"name": "Nekochan"}
))
Placeholders in the system prompt, such as {name}, will be replaced with the corresponding values at runtime.
Request merging helps prevent conversation breakdown when speech recognition produces fragmented results. When enabled, consecutive requests within a specified time window are automatically merged into a single request, improving conversation continuity and user experience.
Example without request merging:
User: I'm feeling hungry...
AI: Would you... (interrupted mid-sentence while saying "Would you like me to book a restaurant? The place from last time has availability")
User: Uh-huh (misrecognized from "Um..." - a hesitant sound)
AI: Booking completed. (responded to "Uh-huh" and executed restaurant booking)
User: What are you talking about??
Example with request merging:
User: I'm feeling hungry...
AI: Would you... (interrupted mid-sentence while saying "Would you like me to book a restaurant? The place from last time has availability")
User: Uh-huh (misrecognized from "Um..." - a hesitant sound)
AI: Would you like me to book a restaurant? The place from last time has availability (responding to merged request "I'm feeling hungry... Uh-huh...")
User: Yes, please!
To enable this feature, set merge_request_threshold > 0.
aiavatar_app.sts.merge_request_threshold = 2.0 # Merge requests within 2 secondsYou can also customize the merge prefix message. Here's an example of setting the prefix in Japanese:
aiavatar_app.sts.merge_request_prefix = "$直前のユーザーの要求とあなたの応答はキャンセルされました。以下の要求に対して、あらためて応答しなおしてください:\n\n"NOTE: Files from the previous request are preserved in the merged request
You can specify the audio devices to be used in components by device index.
First, check the device indexes you want to use.
$ python

>>> from aiavatar import AudioDevice
>>> AudioDevice().list_audio_devices()
{'index': 0, 'name': '外部マイク', 'max_input_channels': 1, 'max_output_channels': 0, 'default_sample_rate': 44100.0}
{'index': 1, 'name': '外部ヘッドフォン', 'max_input_channels': 0, 'max_output_channels': 2, 'default_sample_rate': 44100.0}
{'index': 2, 'name': 'MacBook Airのマイク', 'max_input_channels': 3, 'max_output_channels': 0, 'default_sample_rate': 44100.0}
{'index': 3, 'name': 'MacBook Airのスピーカー', 'max_input_channels': 0, 'max_output_channels': 2, 'default_sample_rate': 44100.0}
Set indexes to AIAvatar.
aiavatar_app = AIAvatar(
    input_device=2,     # MacBook Airのマイク
    output_device=3,    # MacBook Airのスピーカー
    openai_api_key=OPENAI_API_KEY
)You can invoke custom implementations on_response(response_type). In the following example, show "thinking" face expression while processing request to enhance the interaction experience with the AI avatar.
# Set face when the character is thinking the answer
@aiavatar_app.on_response("start")
async def on_start_response(response):
    await aiavatar_app.face_controller.set_face("thinking", 3.0)

# Reset face before answering
@aiavatar_app.on_response("chunk")
async def on_chunk_response(response):
    if response.metadata.get("is_first_chunk"):
aiavatar_app.face_controller.reset()AIAvatarKit automatically adjusts the noise filter for listeners when you instantiate an AIAvatar object. To manually set the noise filter level for voice detection, set auto_noise_filter_threshold to False and specify the volume_threshold_db in decibels (dB).
aiavatar_app = AIAvatar(
    openai_api_key=OPENAI_API_KEY,
    auto_noise_filter_threshold=False,
    volume_threshold_db=-40   # Set the voice detection threshold to -40 dB
)
For Tasks:
Click tags to check more tools for each tasksFor Jobs:
Alternative AI tools for aiavatarkit
Similar Open Source Tools
aiavatarkit
AIAvatarKit is a tool for building AI-based conversational avatars quickly. It supports various platforms like VRChat and cluster, along with real-world devices. The tool is extensible, allowing unlimited capabilities based on user needs. It requires VOICEVOX API, Google or Azure Speech Services API keys, and Python 3.10. Users can start conversations out of the box and enjoy seamless interactions with the avatars.
promptic
Promptic is a tool designed for LLM app development, providing a productive and pythonic way to build LLM applications. It leverages LiteLLM, allowing flexibility to switch LLM providers easily. Promptic focuses on building features by providing type-safe structured outputs, easy-to-build agents, streaming support, automatic prompt caching, and built-in conversation memory.
deep-searcher
DeepSearcher is a tool that combines reasoning LLMs and Vector Databases to perform search, evaluation, and reasoning based on private data. It is suitable for enterprise knowledge management, intelligent Q&A systems, and information retrieval scenarios. The tool maximizes the utilization of enterprise internal data while ensuring data security, supports multiple embedding models, and provides support for multiple LLMs for intelligent Q&A and content generation. It also includes features like private data search, vector database management, and document loading with web crawling capabilities under development.
langchainrb
Langchain.rb is a Ruby library that makes it easy to build LLM-powered applications. It provides a unified interface to a variety of LLMs, vector search databases, and other tools, making it easy to build and deploy RAG (Retrieval Augmented Generation) systems and assistants. Langchain.rb is open source and available under the MIT License.
ruby-openai
Use the OpenAI API with Ruby! 🤖🩵 Stream text with GPT-4, transcribe and translate audio with Whisper, or create images with DALL·E... Hire me | 🎮 Ruby AI Builders Discord | 🐦 Twitter | 🧠 Anthropic Gem | 🚂 Midjourney Gem ## Table of Contents * Ruby OpenAI * Table of Contents * Installation * Bundler * Gem install * Usage * Quickstart * With Config * Custom timeout or base URI * Extra Headers per Client * Logging * Errors * Faraday middleware * Azure * Ollama * Counting Tokens * Models * Examples * Chat * Streaming Chat * Vision * JSON Mode * Functions * Edits * Embeddings * Batches * Files * Finetunes * Assistants * Threads and Messages * Runs * Runs involving function tools * Image Generation * DALL·E 2 * DALL·E 3 * Image Edit * Image Variations * Moderations * Whisper * Translate * Transcribe * Speech * Errors * Development * Release * Contributing * License * Code of Conduct
clarifai-python
The Clarifai Python SDK offers a comprehensive set of tools to integrate Clarifai's AI platform to leverage computer vision capabilities like classification , detection ,segementation and natural language capabilities like classification , summarisation , generation , Q&A ,etc into your applications. With just a few lines of code, you can leverage cutting-edge artificial intelligence to unlock valuable insights from visual and textual content.
mcp
Semgrep MCP Server is a beta server under active development for using Semgrep to scan code for security vulnerabilities. It provides a Model Context Protocol (MCP) for various coding tools to get specialized help in tasks. Users can connect to Semgrep AppSec Platform, scan code for vulnerabilities, customize Semgrep rules, analyze and filter scan results, and compare results. The tool is published on PyPI as semgrep-mcp and can be installed using pip, pipx, uv, poetry, or other methods. It supports CLI and Docker environments for running the server. Integration with VS Code is also available for quick installation. The project welcomes contributions and is inspired by core technologies like Semgrep and MCP, as well as related community projects and tools.
shell-ai
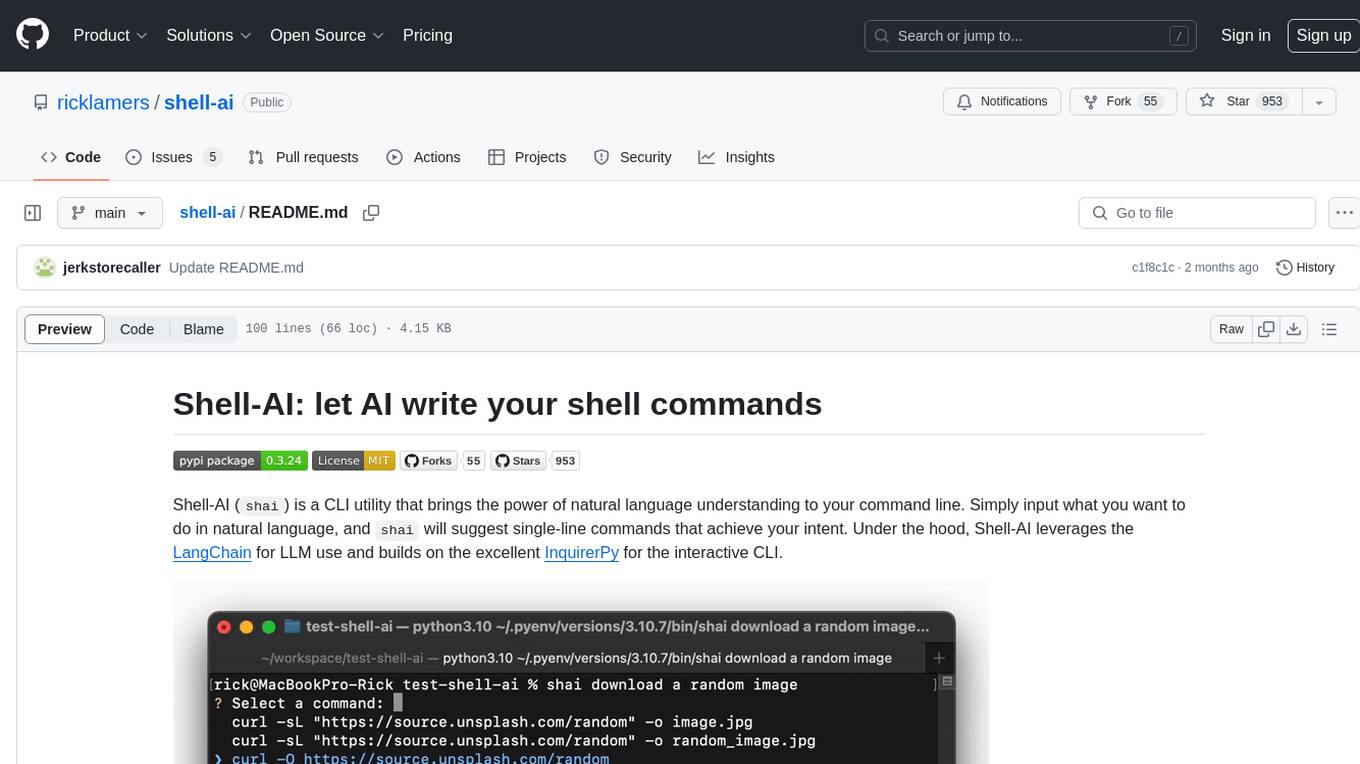
Shell-AI (`shai`) is a CLI utility that enables users to input commands in natural language and receive single-line command suggestions. It leverages natural language understanding and interactive CLI tools to enhance command line interactions. Users can describe tasks in plain English and receive corresponding command suggestions, making it easier to execute commands efficiently. Shell-AI supports cross-platform usage and is compatible with Azure OpenAI deployments, offering a user-friendly and efficient way to interact with the command line.
instructor
Instructor is a Python library that makes it a breeze to work with structured outputs from large language models (LLMs). Built on top of Pydantic, it provides a simple, transparent, and user-friendly API to manage validation, retries, and streaming responses. Get ready to supercharge your LLM workflows!
instructor
Instructor is a popular Python library for managing structured outputs from large language models (LLMs). It offers a user-friendly API for validation, retries, and streaming responses. With support for various LLM providers and multiple languages, Instructor simplifies working with LLM outputs. The library includes features like response models, retry management, validation, streaming support, and flexible backends. It also provides hooks for logging and monitoring LLM interactions, and supports integration with Anthropic, Cohere, Gemini, Litellm, and Google AI models. Instructor facilitates tasks such as extracting user data from natural language, creating fine-tuned models, managing uploaded files, and monitoring usage of OpenAI models.
json-repair
JSON Repair is a toolkit designed to address JSON anomalies that can arise from Large Language Models (LLMs). It offers a comprehensive solution for repairing JSON strings, ensuring accuracy and reliability in your data processing. With its user-friendly interface and extensive capabilities, JSON Repair empowers developers to seamlessly integrate JSON repair into their workflows.
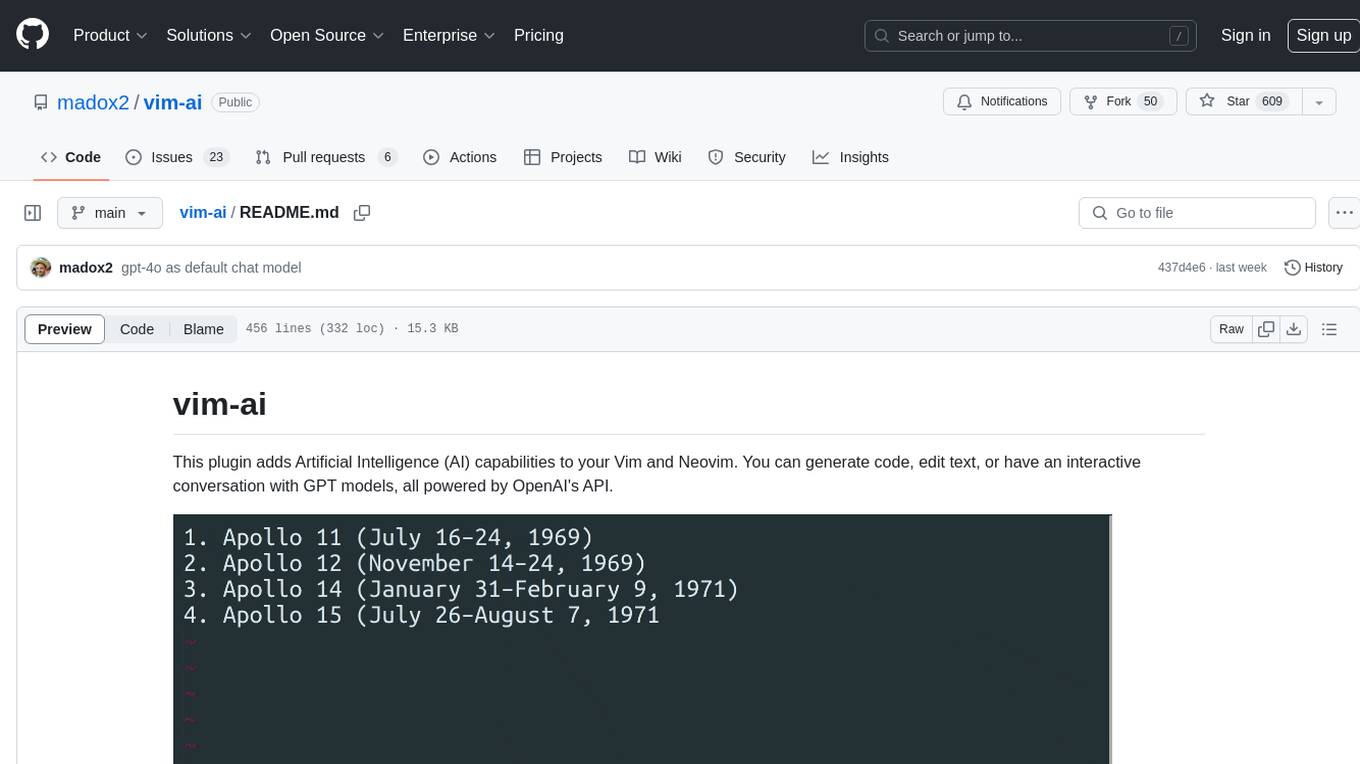
vim-ai
vim-ai is a plugin that adds Artificial Intelligence (AI) capabilities to Vim and Neovim. It allows users to generate code, edit text, and have interactive conversations with GPT models powered by OpenAI's API. The plugin uses OpenAI's API to generate responses, requiring users to set up an account and obtain an API key. It supports various commands for text generation, editing, and chat interactions, providing a seamless integration of AI features into the Vim text editor environment.

Gmail-MCP-Server
Gmail AutoAuth MCP Server is a Model Context Protocol (MCP) server designed for Gmail integration in Claude Desktop. It supports auto authentication and enables AI assistants to manage Gmail through natural language interactions. The server provides comprehensive features for sending emails, reading messages, managing labels, searching emails, and batch operations. It offers full support for international characters, email attachments, and Gmail API integration. Users can install and authenticate the server via Smithery or manually with Google Cloud Project credentials. The server supports both Desktop and Web application credentials, with global credential storage for convenience. It also includes Docker support and instructions for cloud server authentication.
swarmzero
SwarmZero SDK is a library that simplifies the creation and execution of AI Agents and Swarms of Agents. It supports various LLM Providers such as OpenAI, Azure OpenAI, Anthropic, MistralAI, Gemini, Nebius, and Ollama. Users can easily install the library using pip or poetry, set up the environment and configuration, create and run Agents, collaborate with Swarms, add tools for complex tasks, and utilize retriever tools for semantic information retrieval. Sample prompts are provided to help users explore the capabilities of the agents and swarms. The SDK also includes detailed examples and documentation for reference.
llm-sandbox
LLM Sandbox is a lightweight and portable sandbox environment designed to securely execute large language model (LLM) generated code in a safe and isolated manner using Docker containers. It provides an easy-to-use interface for setting up, managing, and executing code in a controlled Docker environment, simplifying the process of running code generated by LLMs. The tool supports multiple programming languages, offers flexibility with predefined Docker images or custom Dockerfiles, and allows scalability with support for Kubernetes and remote Docker hosts.
open-edison
OpenEdison is a secure MCP control panel that connects AI to data/software with additional security controls to reduce data exfiltration risks. It helps address the lethal trifecta problem by providing visibility, monitoring potential threats, and alerting on data interactions. The tool offers features like data leak monitoring, controlled execution, easy configuration, visibility into agent interactions, a simple API, and Docker support. It integrates with LangGraph, LangChain, and plain Python agents for observability and policy enforcement. OpenEdison helps gain observability, control, and policy enforcement for AI interactions with systems of records, existing company software, and data to reduce risks of AI-caused data leakage.
For similar tasks
aiavatarkit
AIAvatarKit is a tool for building AI-based conversational avatars quickly. It supports various platforms like VRChat and cluster, along with real-world devices. The tool is extensible, allowing unlimited capabilities based on user needs. It requires VOICEVOX API, Google or Azure Speech Services API keys, and Python 3.10. Users can start conversations out of the box and enjoy seamless interactions with the avatars.
discollama
Discollama is a Discord bot powered by a local large language model backed by Ollama. It allows users to interact with the bot in Discord by mentioning it in a message to start a new conversation or in a reply to a previous response to continue an ongoing conversation. The bot requires Docker and Docker Compose to run, and users need to set up a Discord Bot and environment variable DISCORD_TOKEN before using discollama.py. Additionally, an Ollama server is needed, and users can customize the bot's personality by creating a custom model using Modelfile and running 'ollama create'.
Muice-Chatbot
Muice-Chatbot is an AI chatbot designed to proactively engage in conversations with users. It is based on the ChatGLM2-6B and Qwen-7B models, with a training dataset of 1.8K+ dialogues. The chatbot has a speaking style similar to a 2D girl, being somewhat tsundere but willing to share daily life details and greet users differently every day. It provides various functionalities, including initiating chats and offering 5 available commands. The project supports model loading through different methods and provides onebot service support for QQ users. Users can interact with the chatbot by running the main.py file in the project directory.
TerminalGPT
TerminalGPT is a terminal-based ChatGPT personal assistant app that allows users to interact with OpenAI GPT-3.5 and GPT-4 language models. It offers advantages over browser-based apps, such as continuous availability, faster replies, and tailored answers. Users can use TerminalGPT in their IDE terminal, ensuring seamless integration with their workflow. The tool prioritizes user privacy by not using conversation data for model training and storing conversations locally on the user's machine.
ESP32_AI_LLM
ESP32_AI_LLM is a project that uses ESP32 to connect to Xunfei Xinghuo, Dou Bao, and Tongyi Qianwen large models to achieve voice chat functions, supporting online voice wake-up, continuous conversation, music playback, and real-time display of conversation content on an external screen. The project requires specific hardware components and provides functionalities such as voice wake-up, voice conversation, convenient network configuration, music playback, volume adjustment, LED control, model switching, and screen display. Users can deploy the project by setting up Xunfei services, cloning the repository, configuring necessary parameters, installing drivers, compiling, and burning the code.
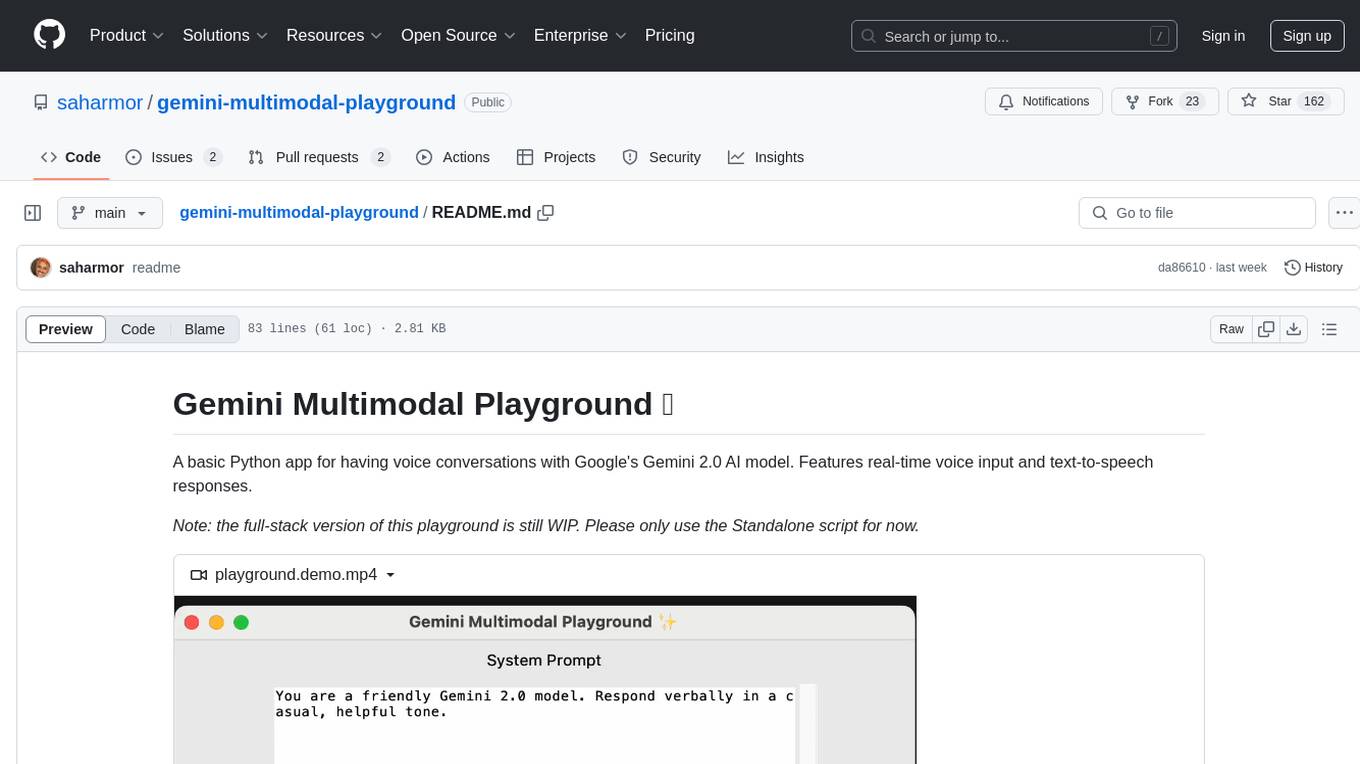
gemini-multimodal-playground
Gemini Multimodal Playground is a basic Python app for voice conversations with Google's Gemini 2.0 AI model. It features real-time voice input and text-to-speech responses. Users can configure settings through the GUI and interact with Gemini by speaking into the microphone. The application provides options for voice selection, system prompt customization, and enabling Google search. Troubleshooting tips are available for handling audio feedback loop issues that may occur during interactions.
alexa-skill-llm-intent
An Alexa Skill template that provides a ready-to-use skill for starting a conversation with an AI. Users can ask questions and receive answers in Alexa's voice, powered by ChatGPT or other llm. The template includes setup instructions for configuring the AI provider API and model, as well as usage commands for interacting with the skill. It serves as a starting point for creating custom Alexa Skills and should be used at the user's own risk.
chatless
Chatless is a modern AI chat desktop application built on Tauri and Next.js. It supports multiple AI providers, can connect to local Ollama models, supports document parsing and knowledge base functions. All data is stored locally to protect user privacy. The application is lightweight, simple, starts quickly, and consumes minimal resources.
For similar jobs
promptflow
**Prompt flow** is a suite of development tools designed to streamline the end-to-end development cycle of LLM-based AI applications, from ideation, prototyping, testing, evaluation to production deployment and monitoring. It makes prompt engineering much easier and enables you to build LLM apps with production quality.
deepeval
DeepEval is a simple-to-use, open-source LLM evaluation framework specialized for unit testing LLM outputs. It incorporates various metrics such as G-Eval, hallucination, answer relevancy, RAGAS, etc., and runs locally on your machine for evaluation. It provides a wide range of ready-to-use evaluation metrics, allows for creating custom metrics, integrates with any CI/CD environment, and enables benchmarking LLMs on popular benchmarks. DeepEval is designed for evaluating RAG and fine-tuning applications, helping users optimize hyperparameters, prevent prompt drifting, and transition from OpenAI to hosting their own Llama2 with confidence.
MegaDetector
MegaDetector is an AI model that identifies animals, people, and vehicles in camera trap images (which also makes it useful for eliminating blank images). This model is trained on several million images from a variety of ecosystems. MegaDetector is just one of many tools that aims to make conservation biologists more efficient with AI. If you want to learn about other ways to use AI to accelerate camera trap workflows, check out our of the field, affectionately titled "Everything I know about machine learning and camera traps".
leapfrogai
LeapfrogAI is a self-hosted AI platform designed to be deployed in air-gapped resource-constrained environments. It brings sophisticated AI solutions to these environments by hosting all the necessary components of an AI stack, including vector databases, model backends, API, and UI. LeapfrogAI's API closely matches that of OpenAI, allowing tools built for OpenAI/ChatGPT to function seamlessly with a LeapfrogAI backend. It provides several backends for various use cases, including llama-cpp-python, whisper, text-embeddings, and vllm. LeapfrogAI leverages Chainguard's apko to harden base python images, ensuring the latest supported Python versions are used by the other components of the stack. The LeapfrogAI SDK provides a standard set of protobuffs and python utilities for implementing backends and gRPC. LeapfrogAI offers UI options for common use-cases like chat, summarization, and transcription. It can be deployed and run locally via UDS and Kubernetes, built out using Zarf packages. LeapfrogAI is supported by a community of users and contributors, including Defense Unicorns, Beast Code, Chainguard, Exovera, Hypergiant, Pulze, SOSi, United States Navy, United States Air Force, and United States Space Force.
llava-docker
This Docker image for LLaVA (Large Language and Vision Assistant) provides a convenient way to run LLaVA locally or on RunPod. LLaVA is a powerful AI tool that combines natural language processing and computer vision capabilities. With this Docker image, you can easily access LLaVA's functionalities for various tasks, including image captioning, visual question answering, text summarization, and more. The image comes pre-installed with LLaVA v1.2.0, Torch 2.1.2, xformers 0.0.23.post1, and other necessary dependencies. You can customize the model used by setting the MODEL environment variable. The image also includes a Jupyter Lab environment for interactive development and exploration. Overall, this Docker image offers a comprehensive and user-friendly platform for leveraging LLaVA's capabilities.

carrot
The 'carrot' repository on GitHub provides a list of free and user-friendly ChatGPT mirror sites for easy access. The repository includes sponsored sites offering various GPT models and services. Users can find and share sites, report errors, and access stable and recommended sites for ChatGPT usage. The repository also includes a detailed list of ChatGPT sites, their features, and accessibility options, making it a valuable resource for ChatGPT users seeking free and unlimited GPT services.
TrustLLM
TrustLLM is a comprehensive study of trustworthiness in LLMs, including principles for different dimensions of trustworthiness, established benchmark, evaluation, and analysis of trustworthiness for mainstream LLMs, and discussion of open challenges and future directions. Specifically, we first propose a set of principles for trustworthy LLMs that span eight different dimensions. Based on these principles, we further establish a benchmark across six dimensions including truthfulness, safety, fairness, robustness, privacy, and machine ethics. We then present a study evaluating 16 mainstream LLMs in TrustLLM, consisting of over 30 datasets. The document explains how to use the trustllm python package to help you assess the performance of your LLM in trustworthiness more quickly. For more details about TrustLLM, please refer to project website.
AI-YinMei
AI-YinMei is an AI virtual anchor Vtuber development tool (N card version). It supports fastgpt knowledge base chat dialogue, a complete set of solutions for LLM large language models: [fastgpt] + [one-api] + [Xinference], supports docking bilibili live broadcast barrage reply and entering live broadcast welcome speech, supports Microsoft edge-tts speech synthesis, supports Bert-VITS2 speech synthesis, supports GPT-SoVITS speech synthesis, supports expression control Vtuber Studio, supports painting stable-diffusion-webui output OBS live broadcast room, supports painting picture pornography public-NSFW-y-distinguish, supports search and image search service duckduckgo (requires magic Internet access), supports image search service Baidu image search (no magic Internet access), supports AI reply chat box [html plug-in], supports AI singing Auto-Convert-Music, supports playlist [html plug-in], supports dancing function, supports expression video playback, supports head touching action, supports gift smashing action, supports singing automatic start dancing function, chat and singing automatic cycle swing action, supports multi scene switching, background music switching, day and night automatic switching scene, supports open singing and painting, let AI automatically judge the content.
