
ruby-openai
OpenAI API + Ruby! 🤖❤️ Now with Responses API + DeepSeek!
Stars: 3007
Use the OpenAI API with Ruby! 🤖🩵 Stream text with GPT-4, transcribe and translate audio with Whisper, or create images with DALL·E... Hire me | 🎮 Ruby AI Builders Discord | 🐦 Twitter | 🧠 Anthropic Gem | 🚂 Midjourney Gem ## Table of Contents * Ruby OpenAI * Table of Contents * Installation * Bundler * Gem install * Usage * Quickstart * With Config * Custom timeout or base URI * Extra Headers per Client * Logging * Errors * Faraday middleware * Azure * Ollama * Counting Tokens * Models * Examples * Chat * Streaming Chat * Vision * JSON Mode * Functions * Edits * Embeddings * Batches * Files * Finetunes * Assistants * Threads and Messages * Runs * Runs involving function tools * Image Generation * DALL·E 2 * DALL·E 3 * Image Edit * Image Variations * Moderations * Whisper * Translate * Transcribe * Speech * Errors * Development * Release * Contributing * License * Code of Conduct
README:
Use the OpenAI API with Ruby! 🤖❤️
Stream chats with the Responses API, transcribe and translate audio with Whisper, create images with DALL·E, and much more...
💥 Click subscribe now to hear first about new releases in the Rails AI newsletter!
🎮 Ruby AI Builders Discord | 🐦 X | 🧠 Anthropic Gem | 🚂 Midjourney Gem
-
Ruby OpenAI
- Contents
- Installation
- How to use
- Development
- Release
- Contributing
- License
- Code of Conduct
Add this line to your application's Gemfile:
gem "ruby-openai"And then execute:
bundle installOr install with:
gem install ruby-openaiand require with:
require "openai"- Get your API key from https://platform.openai.com/account/api-keys
- If you belong to multiple organizations, you can get your Organization ID from https://platform.openai.com/account/org-settings
For a quick test you can pass your token directly to a new client:
client = OpenAI::Client.new(
  access_token: "access_token_goes_here",
  log_errors: true # Highly recommended in development, so you can see what errors OpenAI is returning. Not recommended in production because it could leak private data to your logs.
)For a more robust setup, you can configure the gem with your API keys, for example in an openai.rb initializer file. Never hardcode secrets into your codebase - instead use something like dotenv to pass the keys safely into your environments.
OpenAI.configure do |config|
  config.access_token = ENV.fetch("OPENAI_ACCESS_TOKEN")
  config.admin_token = ENV.fetch("OPENAI_ADMIN_TOKEN") # Optional, used for admin endpoints, created here: https://platform.openai.com/settings/organization/admin-keys
  config.organization_id = ENV.fetch("OPENAI_ORGANIZATION_ID") # Optional
  config.log_errors = true # Highly recommended in development, so you can see what errors OpenAI is returning. Not recommended in production because it could leak private data to your logs.
end
Then you can create a client like this:
client = OpenAI::Client.newYou can still override the config defaults when making new clients; any options not included will fall back to any global config set with OpenAI.configure. e.g. in this example the organization_id, request_timeout, etc. will fallback to any set globally using OpenAI.configure, with only the access_token and admin_token overridden:
client = OpenAI::Client.new(access_token: "access_token_goes_here", admin_token: "admin_token_goes_here")- The default timeout for any request using this library is 120 seconds. You can change that by passing a number of seconds to the
request_timeoutwhen initializing the client. - You can also change the base URI used for all requests, eg. to use observability tools like Helicone or Velvet
- You can also add arbitrary other headers e.g. for openai-caching-proxy-worker, eg.:
client = OpenAI::Client.new(
  access_token: "access_token_goes_here",
  uri_base: "https://oai.hconeai.com/",
  request_timeout: 240,
  extra_headers: {
    "X-Proxy-TTL" => "43200", # For https://github.com/6/openai-caching-proxy-worker#specifying-a-cache-ttl
    "X-Proxy-Refresh": "true", # For https://github.com/6/openai-caching-proxy-worker#refreshing-the-cache
    "Helicone-Auth": "Bearer HELICONE_API_KEY", # For https://docs.helicone.ai/getting-started/integration-method/openai-proxy
    "helicone-stream-force-format" => "true", # Use this with Helicone otherwise streaming drops chunks # https://github.com/alexrudall/ruby-openai/issues/251
  }
)
or when configuring the gem:
OpenAI.configure do |config|
  config.access_token = ENV.fetch("OPENAI_ACCESS_TOKEN")
  config.admin_token = ENV.fetch("OPENAI_ADMIN_TOKEN") # Optional, used for admin endpoints, created here: https://platform.openai.com/settings/organization/admin-keys
  config.organization_id = ENV.fetch("OPENAI_ORGANIZATION_ID") # Optional
  config.log_errors = true # Optional
  config.uri_base = "https://oai.hconeai.com/" # Optional
  config.request_timeout = 240 # Optional
  config.extra_headers = {
    "X-Proxy-TTL" => "43200", # For https://github.com/6/openai-caching-proxy-worker#specifying-a-cache-ttl
    "X-Proxy-Refresh": "true", # For https://github.com/6/openai-caching-proxy-worker#refreshing-the-cache
    "Helicone-Auth": "Bearer HELICONE_API_KEY" # For https://docs.helicone.ai/getting-started/integration-method/openai-proxy
  } # Optional
endYou can dynamically pass headers per client object, which will be merged with any headers set globally with OpenAI.configure:
client = OpenAI::Client.new(access_token: "access_token_goes_here")
client.add_headers("X-Proxy-TTL" => "43200")By default, ruby-openai does not log any Faraday::Errors encountered while executing a network request to avoid leaking data (e.g. 400s, 500s, SSL errors and more - see here for a complete list of subclasses of Faraday::Error and what can cause them).
If you would like to enable this functionality, you can set log_errors to true when configuring the client:
client = OpenAI::Client.new(log_errors: true)You can pass Faraday middleware to the client in a block, eg. to enable verbose logging with Ruby's Logger:
client = OpenAI::Client.new do |f|
  f.response :logger, Logger.new($stdout), bodies: true
endTo use the Azure OpenAI Service API, you can configure the gem like this:
OpenAI.configure do |config|
  config.access_token = ENV.fetch("AZURE_OPENAI_API_KEY")
  config.uri_base = ENV.fetch("AZURE_OPENAI_URI")
  config.api_type = :azure
  config.api_version = "2023-03-15-preview"
end
where AZURE_OPENAI_URI is e.g. https://custom-domain.openai.azure.com/openai/deployments/gpt-35-turbo
Deepseek is compatible with the OpenAI chat API. Get an access token from here, then:
client = OpenAI::Client.new(
  access_token: "deepseek_access_token_goes_here",
  uri_base: "https://api.deepseek.com/"
)

client.chat(
  parameters: {
    model: "deepseek-chat", # Required.
    messages: [{ role: "user", content: "Hello!"}], # Required.
    temperature: 0.7,
    stream: proc do |chunk, _bytesize|
     print chunk.dig("choices", 0, "delta", "content")
    end
  }
)
Ollama allows you to run open-source LLMs, such as Llama 3, locally. It offers chat compatibility with the OpenAI API.
You can download Ollama here. On macOS you can install and run Ollama like this:
brew install ollama
ollama serve
ollama pull llama3:latest # In new terminal tab.
Create a client using your Ollama server and the pulled model, and stream a conversation for free:
client = OpenAI::Client.new(
  uri_base: "http://localhost:11434"
)

client.chat(
  parameters: {
    model: "llama3", # Required.
    messages: [{ role: "user", content: "Hello!"}], # Required.
    temperature: 0.7,
    stream: proc do |chunk, _bytesize|
      print chunk.dig("choices", 0, "delta", "content")
    end
  }
)

# => Hi! It's nice to meet you. Is there something I can help you with, or would you like to chat?
Groq API Chat is broadly compatible with the OpenAI API, with a few minor differences. Get an access token from here, then:
client = OpenAI::Client.new(
  access_token: "groq_access_token_goes_here",
  uri_base: "https://api.groq.com/openai"
)

client.chat(
  parameters: {
    model: "llama3-8b-8192", # Required.
    messages: [{ role: "user", content: "Hello!"}], # Required.
    temperature: 0.7,
    stream: proc do |chunk, _bytesize|
     print chunk.dig("choices", 0, "delta", "content")
    end
  }
)OpenAI parses prompt text into tokens, which are words or portions of words. (These tokens are unrelated to your API access_token.) Counting tokens can help you estimate your costs. It can also help you ensure your prompt text size is within the max-token limits of your model's context window, and choose an appropriate max_tokens completion parameter so your response will fit as well.
To estimate the token-count of your text:
OpenAI.rough_token_count("Your text")If you need a more accurate count, try tiktoken_ruby.
There are different models that can be used to generate text. For a full list and to retrieve information about a single model:
client.models.list
client.models.retrieve(id: "gpt-4o")
You can also delete any finetuned model you generated, if you're an account Owner on your OpenAI organization:
client.models.delete(id: "ft:gpt-4o-mini:acemeco:suffix:abc123")GPT is a model that can be used to generate text in a conversational style. You can use it to generate a response to a sequence of messages:
response = client.chat(
  parameters: {
    model: "gpt-4o", # Required.
    messages: [{ role: "user", content: "Hello!"}], # Required.
    temperature: 0.7,
  }
)
puts response.dig("choices", 0, "message", "content")
# => "Hello! How may I assist you today?"Quick guide to streaming Chat with Rails 7 and Hotwire
You can stream from the API in realtime, which can be much faster and used to create a more engaging user experience. Pass a Proc (or any object with a #call method) to the stream parameter to receive the stream of completion chunks as they are generated. Each time one or more chunks is received, the proc will be called once with each chunk, parsed as a Hash. If OpenAI returns an error, ruby-openai will raise a Faraday error.
client.chat(
  parameters: {
    model: "gpt-4o", # Required.
    messages: [{ role: "user", content: "Describe a character called Anna!"}], # Required.
    temperature: 0.7,
    stream: proc do |chunk, _bytesize|
      print chunk.dig("choices", 0, "delta", "content")
    end
  }
)
# => "Anna is a young woman in her mid-twenties, with wavy chestnut hair that falls to her shoulders..."
Note: In order to get usage information, you can provide the stream_options parameter and OpenAI will provide a final chunk with the usage. Here is an example:
stream_proc = proc { |chunk, _bytesize| puts "--------------"; puts chunk.inspect; }
client.chat(
  parameters: {
    model: "gpt-4o",
    stream: stream_proc,
    stream_options: { include_usage: true },
    messages: [{ role: "user", content: "Hello!"}],
  }
)
# => --------------
# => {"id"=>"chatcmpl-7bbq05PiZqlHxjV1j7OHnKKDURKaf", "object"=>"chat.completion.chunk", "created"=>1718750612, "model"=>"gpt-4o-2024-05-13", "system_fingerprint"=>"fp_9cb5d38cf7", "choices"=>[{"index"=>0, "delta"=>{"role"=>"assistant", "content"=>""}, "logprobs"=>nil, "finish_reason"=>nil}], "usage"=>nil}
# => --------------
# => {"id"=>"chatcmpl-7bbq05PiZqlHxjV1j7OHnKKDURKaf", "object"=>"chat.completion.chunk", "created"=>1718750612, "model"=>"gpt-4o-2024-05-13", "system_fingerprint"=>"fp_9cb5d38cf7", "choices"=>[{"index"=>0, "delta"=>{"content"=>"Hello"}, "logprobs"=>nil, "finish_reason"=>nil}], "usage"=>nil}
# => --------------
# => ... more content chunks
# => --------------
# => {"id"=>"chatcmpl-7bbq05PiZqlHxjV1j7OHnKKDURKaf", "object"=>"chat.completion.chunk", "created"=>1718750612, "model"=>"gpt-4o-2024-05-13", "system_fingerprint"=>"fp_9cb5d38cf7", "choices"=>[{"index"=>0, "delta"=>{}, "logprobs"=>nil, "finish_reason"=>"stop"}], "usage"=>nil}
# => --------------
# => {"id"=>"chatcmpl-7bbq05PiZqlHxjV1j7OHnKKDURKaf", "object"=>"chat.completion.chunk", "created"=>1718750612, "model"=>"gpt-4o-2024-05-13", "system_fingerprint"=>"fp_9cb5d38cf7", "choices"=>[], "usage"=>{"prompt_tokens"=>9, "completion_tokens"=>9, "total_tokens"=>18}}You can use the GPT-4 Vision model to generate a description of an image:
messages = [
  { "type": "text", "text": "What’s in this image?"},
  { "type": "image_url",
    "image_url": {
      "url": "https://upload.wikimedia.org/wikipedia/commons/thumb/d/dd/Gfp-wisconsin-madison-the-nature-boardwalk.jpg/2560px-Gfp-wisconsin-madison-the-nature-boardwalk.jpg",
    },
  }
]
response = client.chat(
  parameters: {
    model: "gpt-4-vision-preview", # Required.
    messages: [{ role: "user", content: messages}], # Required.
  }
)
puts response.dig("choices", 0, "message", "content")
# => "The image depicts a serene natural landscape featuring a long wooden boardwalk extending straight ahead"You can set the response_format to ask for responses in JSON:
response = client.chat(
  parameters: {
    model: "gpt-4o",
    response_format: { type: "json_object" },
    messages: [{ role: "user", content: "Hello! Give me some JSON please."}],
    temperature: 0.7,
  })
  puts response.dig("choices", 0, "message", "content")
  # =>
  # {
  #   "name": "John",
  #   "age": 30,
  #   "city": "New York",
  #   "hobbies": ["reading", "traveling", "hiking"],
  #   "isStudent": false
  # }
You can stream it as well!
  response = client.chat(
    parameters: {
      model: "gpt-4o",
      messages: [{ role: "user", content: "Can I have some JSON please?"}],
      response_format: { type: "json_object" },
      stream: proc do |chunk, _bytesize|
        print chunk.dig("choices", 0, "delta", "content")
      end
    }
  )
  # =>
  # {
  #   "message": "Sure, please let me know what specific JSON data you are looking for.",
  #   "JSON_data": {
  #     "example_1": {
  #       "key_1": "value_1",
  #       "key_2": "value_2",
  #       "key_3": "value_3"
  #     },
  #     "example_2": {
  #       "key_4": "value_4",
  #       "key_5": "value_5",
  #       "key_6": "value_6"
  #     }
  #   }
# }OpenAI's most advanced interface for generating model responses. Supports text and image inputs, and text outputs. Create stateful interactions with the model, using the output of previous responses as input. Extend the model's capabilities with built-in tools for file search, web search, computer use, and more. Allow the model access to external systems and data using function calling.
response = client.responses.create(parameters: {
  model: "gpt-4o",
  input: "Hello! I'm Szymon!"
})
puts response.dig("output", 0, "content", 0, "text")
# => Hello Szymon! How can I assist you today?followup = client.responses.create(parameters: {
model: "gpt-4o",
input: "Remind me, what is my name?",
previous_response_id: response["id"]
})
puts followup.dig("output", 0, "content", 0, "text")
# => Your name is Szymon! How can I help you today?response = client.responses.create(parameters: {
model: "gpt-4o",
input: "What's the weather in Paris?",
tools: [
{
"type" => "function",
"name" => "get_current_weather",
"description" => "Get the current weather in a given location",
"parameters" => {
"type" => "object",
"properties" => {
"location" => {
"type" => "string",
"description" => "The geographic location to get the weather for"
}
},
"required" => ["location"]
}
}
]
})
puts response.dig("output", 0, "name")
# => "get_current_weather"client.responses.create(
parameters: {
model: "gpt-4o", # Required.
input: "Hello!", # Required.
stream: proc do |chunk, _bytesize|
if chunk["type"] == "response.output_text.delta"
print chunk["delta"]
$stdout.flush # Ensure output is displayed immediately
end
end
}
)
# => "Hi there! How can I assist you today?..."retrieved_response = client.responses.retrieve(response_id: response["id"])
puts retrieved_response["object"]
# => "response"deletion = client.responses.delete(response_id: response["id"])
puts deletion["deleted"]
# => trueinput_items = client.responses.input_items(response_id: response["id"])
puts input_items["object"] # => "list"You can describe and pass in functions and the model will intelligently choose to output a JSON object containing arguments to call them - eg., to use your method get_current_weather to get the weather in a given location. Note that tool_choice is optional, but if you exclude it, the model will choose whether to use the function or not (see here).
def get_current_weather(location:, unit: "fahrenheit")
  # Here you could use a weather api to fetch the weather.
  "The weather in #{location} is nice 🌞 #{unit}"
end

messages = [
  {
    "role": "user",
    "content": "What is the weather like in San Francisco?",
  },
]

response =
  client.chat(
    parameters: {
      model: "gpt-4o",
      messages: messages,  # Defined above because we'll use it again
      tools: [
        {
          type: "function",
          function: {
            name: "get_current_weather",
            description: "Get the current weather in a given location",
            parameters: {  # Format: https://json-schema.org/understanding-json-schema
              type: :object,
              properties: {
                location: {
                  type: :string,
                  description: "The city and state, e.g. San Francisco, CA",
                },
                unit: {
                  type: "string",
                  enum: %w[celsius fahrenheit],
                },
              },
              required: ["location"],
            },
          },
        }
      ],
      # Optional, defaults to "auto"
      # Can also put "none" or specific functions, see docs
      tool_choice: "required"
    },
  )

message = response.dig("choices", 0, "message")

if message["role"] == "assistant" && message["tool_calls"]
  message["tool_calls"].each do |tool_call|
    tool_call_id = tool_call.dig("id")
    function_name = tool_call.dig("function", "name")
    function_args = JSON.parse(
      tool_call.dig("function", "arguments"),
      { symbolize_names: true },
    )
    function_response =
      case function_name
      when "get_current_weather"
        get_current_weather(**function_args)  # => "The weather is nice 🌞"
      else
        # decide how to handle
      end

    # For a subsequent message with the role "tool", OpenAI requires the preceding message to have a tool_calls argument.
    messages << message

    messages << {
      tool_call_id: tool_call_id,
      role: "tool",
      name: function_name,
      content: function_response
    }  # Extend the conversation with the results of the functions
  end

  second_response = client.chat(
    parameters: {
      model: "gpt-4o",
      messages: messages
    }
  )

  puts second_response.dig("choices", 0, "message", "content")

  # At this point, the model has decided to call functions, you've called the functions
  # and provided the response back, and the model has considered this and responded.
end
# => "It looks like the weather is nice and sunny in San Francisco! If you're planning to go out, it should be a pleasant day."Hit the OpenAI API for a completion using other GPT-3 models:
response = client.completions(
  parameters: {
    model: "gpt-4o",
    prompt: "Once upon a time",
    max_tokens: 5
  }
)
puts response["choices"].map { |c| c["text"] }
# => [", there lived a great"]You can use the embeddings endpoint to get a vector of numbers representing an input. You can then compare these vectors for different inputs to efficiently check how similar the inputs are.
response = client.embeddings(
  parameters: {
    model: "text-embedding-ada-002",
    input: "The food was delicious and the waiter..."
  }
)

puts response.dig("data", 0, "embedding")
# => Vector representation of your embeddingThe Batches endpoint allows you to create and manage large batches of API requests to run asynchronously. Currently, the supported endpoints for batches are /v1/chat/completions (Chat Completions API) and /v1/embeddings (Embeddings API).
To use the Batches endpoint, you need to first upload a JSONL file containing the batch requests using the Files endpoint. The file must be uploaded with the purpose set to batch. Each line in the JSONL file represents a single request and should have the following format:
{
  "custom_id": "request-1",
  "method": "POST",
  "url": "/v1/chat/completions",
  "body": {
    "model": "gpt-4o",
    "messages": [
      { "role": "system", "content": "You are a helpful assistant." },
      { "role": "user", "content": "What is 2+2?" }
    ]
  }
}
Once you have uploaded the JSONL file, you can create a new batch by providing the file ID, endpoint, and completion window:
response = client.batches.create(
  parameters: {
    input_file_id: "file-abc123",
    endpoint: "/v1/chat/completions",
    completion_window: "24h"
  }
)
batch_id = response["id"]
You can retrieve information about a specific batch using its ID:
batch = client.batches.retrieve(id: batch_id)To cancel a batch that is in progress:
client.batches.cancel(id: batch_id)You can also list all the batches:
client.batches.listOnce the batch["completed_at"] is present, you can fetch the output or error files:
batch = client.batches.retrieve(id: batch_id)
output_file_id = batch["output_file_id"]
output_response = client.files.content(id: output_file_id)
error_file_id = batch["error_file_id"]
error_response = client.files.content(id: error_file_id)
These files are in JSONL format, with each line representing the output or error for a single request. The lines can be in any order:
{
  "id": "response-1",
  "custom_id": "request-1",
  "response": {
    "id": "chatcmpl-abc123",
    "object": "chat.completion",
    "created": 1677858242,
    "model": "gpt-4o",
    "choices": [
      {
        "index": 0,
        "message": {
          "role": "assistant",
          "content": "2+2 equals 4."
        }
      }
    ]
  }
}
If a request fails with a non-HTTP error, the error object will contain more information about the cause of the failure.
Put your data in a .jsonl file like this:
{"prompt":"Overjoyed with my new phone! ->", "completion":" positive"}
{"prompt":"@lakers disappoint for a third straight night ->", "completion":" negative"}
and pass the path (or a StringIO object) to client.files.upload to upload it to OpenAI, and then interact with it:
client.files.upload(parameters: { file: "path/to/sentiment.jsonl", purpose: "fine-tune" })
client.files.list
client.files.retrieve(id: "file-123")
client.files.content(id: "file-123")
client.files.delete(id: "file-123")You can send a file path:
client.files.upload(parameters: { file: "path/to/file.pdf", purpose: "assistants" })or a File object
my_file = File.open("path/to/file.pdf", "rb")
client.files.upload(parameters: { file: my_file, purpose: "assistants" })
See supported file types on API documentation.
Upload your fine-tuning data in a .jsonl file as above and get its ID:
response = client.files.upload(parameters: { file: "path/to/sarcasm.jsonl", purpose: "fine-tune" })
file_id = JSON.parse(response.body)["id"]
You can then use this file ID to create a fine tuning job:
response = client.finetunes.create(
  parameters: {
  training_file: file_id,
  model: "gpt-4o"
})
fine_tune_id = response["id"]
That will give you the fine-tune ID. If you made a mistake you can cancel the fine-tune model before it is processed:
client.finetunes.cancel(id: fine_tune_id)You may need to wait a short time for processing to complete. Once processed, you can use list or retrieve to get the name of the fine-tuned model:
client.finetunes.list
response = client.finetunes.retrieve(id: fine_tune_id)
fine_tuned_model = response["fine_tuned_model"]
This fine-tuned model name can then be used in chat completions:
response = client.chat(
  parameters: {
    model: fine_tuned_model,
    messages: [{ role: "user", content: "I love Mondays!" }]
  }
)
response.dig("choices", 0, "message", "content")
You can also capture the events for a job:
client.finetunes.list_events(id: fine_tune_id)You can also delete any finetuned model you generated, if you're an account Owner on your OpenAI organization:
client.models.delete(id: fine_tune_id)Vector Store objects give the File Search tool the ability to search your files.
You can create a new vector store:
response = client.vector_stores.create(
  parameters: {
    name: "my vector store",
    file_ids: ["file-abc123", "file-def456"]
  }
)

vector_store_id = response["id"]
Given a vector_store_id you can retrieve the current field values:
client.vector_stores.retrieve(id: vector_store_id)You can get a list of all vector stores currently available under the organization:
client.vector_stores.listYou can modify an existing vector store, except for the file_ids:
response = client.vector_stores.modify(
  id: vector_store_id,
  parameters: {
    name: "Modified Test Vector Store",
  }
)
You can search a vector store for relevant chunks based on a query:
response = client.vector_stores.search(
  id: vector_store_id,
  parameters: {
    query: "What is the return policy?",
    max_num_results: 20,
    ranking_options: {
      # Add any ranking options here in line with the API documentation
    },
    rewrite_query: true,
    filters: {
      type: "eq",
      property: "region",
      value: "us"
    }
  }
)
You can delete vector stores:
client.vector_stores.delete(id: vector_store_id)Vector store files represent files inside a vector store.
You can create a new vector store file by attaching a File to a vector store.
response = client.vector_store_files.create(
  vector_store_id: "vector-store-abc123",
  parameters: {
    file_id: "file-abc123"
  }
)

vector_store_file_id = response["id"]
Given a vector_store_file_id you can retrieve the current field values:
client.vector_store_files.retrieve(
  vector_store_id: "vector-store-abc123",
  id: vector_store_file_id
)
You can get a list of all vector store files currently available under the vector store:
client.vector_store_files.list(vector_store_id: "vector-store-abc123")You can delete a vector store file:
client.vector_store_files.delete(
  vector_store_id: "vector-store-abc123",
  id: vector_store_file_id
)
Note: This will remove the file from the vector store but the file itself will not be deleted. To delete the file, use the delete file endpoint.
Vector store file batches represent operations to add multiple files to a vector store.
You can create a new vector store file batch by attaching multiple Files to a vector store.
response = client.vector_store_file_batches.create(
  vector_store_id: "vector-store-abc123",
  parameters: {
    file_ids: ["file-abc123", "file-def456"]
  }
)

file_batch_id = response["id"]
Given a file_batch_id you can retrieve the current field values:
client.vector_store_file_batches.retrieve(
  vector_store_id: "vector-store-abc123",
  id: file_batch_id
)
You can get a list of all vector store files in a batch currently available under the vector store:
client.vector_store_file_batches.list(
  vector_store_id: "vector-store-abc123",
  id: file_batch_id
)
You can cancel a vector store file batch (This attempts to cancel the processing of files in this batch as soon as possible):
client.vector_store_file_batches.cancel(
  vector_store_id: "vector-store-abc123",
  id: file_batch_id
)
Assistants are stateful actors that can have many conversations and use tools to perform tasks (see Assistant Overview).
To create a new assistant:
response = client.assistants.create(
  parameters: {
    model: "gpt-4o",
    name: "OpenAI-Ruby test assistant",
    description: nil,
    instructions: "You are a Ruby dev bot. When asked a question, write and run Ruby code to answer the question",
    tools: [
      { type: "code_interpreter" },
      { type: "file_search" }
    ],
    tool_resources: {
      code_interpreter: {
        file_ids: [] # See Files section above for how to upload files
      },
      file_search: {
        vector_store_ids: [] # See Vector Stores section above for how to add vector stores
      }
    },
    "metadata": { my_internal_version_id: "1.0.0" }
  }
)
assistant_id = response["id"]
Given an assistant_id you can retrieve the current field values:
client.assistants.retrieve(id: assistant_id)You can get a list of all assistants currently available under the organization:
client.assistants.listYou can modify an existing assistant using the assistant's id (see API documentation):
response = client.assistants.modify(
  id: assistant_id,
  parameters: {
    name: "Modified Test Assistant for OpenAI-Ruby",
    metadata: { my_internal_version_id: '1.0.1' }
  }
)
You can delete assistants:
client.assistants.delete(id: assistant_id)Once you have created an assistant as described above, you need to prepare a Thread of Messages for the assistant to work on (see introduction on Assistants). For example, as an initial setup you could do:
# Create thread
response = client.threads.create # Note: Once you create a thread, there is no way to list it
                                 # or recover it currently (as of 2023-12-10). So hold onto the `id`
thread_id = response["id"]

# Add initial message from user (see https://platform.openai.com/docs/api-reference/messages/createMessage)
message_id = client.messages.create(
  thread_id: thread_id,
  parameters: {
    role: "user", # Required for manually created messages
    content: "Can you help me write an API library to interact with the OpenAI API please?"
  }
)["id"]

# Retrieve individual message
message = client.messages.retrieve(thread_id: thread_id, id: message_id)

# Review all messages on the thread
messages = client.messages.list(thread_id: thread_id)
To clean up after a thread is no longer needed:
# To delete the thread (and all associated messages):
client.threads.delete(id: thread_id)

client.messages.retrieve(thread_id: thread_id, id: message_id) # -> Fails after thread is deletedTo submit a thread to be evaluated with the model of an assistant, create a Run as follows:
# Create run (will use instruction/model/tools from Assistant's definition)
response = client.runs.create(
  thread_id: thread_id,
  parameters: {
    assistant_id: assistant_id,
    max_prompt_tokens: 256,
    max_completion_tokens: 16
  }
)
run_id = response['id']
You can stream the message chunks as they come through:
client.runs.create(
  thread_id: thread_id,
  parameters: {
    assistant_id: assistant_id,
    max_prompt_tokens: 256,
    max_completion_tokens: 16,
    stream: proc do |chunk, _bytesize|
      if chunk["object"] == "thread.message.delta"
        print chunk.dig("delta", "content", 0, "text", "value")
      end
    end
  }
)
To get the status of a Run:
response = client.runs.retrieve(id: run_id, thread_id: thread_id)
status = response['status']
The status response can include the following strings queued, in_progress, requires_action, cancelling, cancelled, failed, completed, or expired which you can handle as follows:
while true do
  response = client.runs.retrieve(id: run_id, thread_id: thread_id)
  status = response['status']

  case status
  when 'queued', 'in_progress', 'cancelling'
    puts 'Sleeping'
    sleep 1 # Wait one second and poll again
  when 'completed'
    break # Exit loop and report result to user
  when 'requires_action'
    # Handle tool calls (see below)
  when 'cancelled', 'failed', 'expired'
    puts response['last_error'].inspect
    break # or `exit`
  else
    puts "Unknown status response: #{status}"
  end
end
If the status response indicates that the run is completed, the associated thread will have one or more new messages attached:
# Either retrieve all messages in bulk again, or...
messages = client.messages.list(thread_id: thread_id, parameters: { order: 'asc' })

# Alternatively retrieve the `run steps` for the run which link to the messages:
run_steps = client.run_steps.list(thread_id: thread_id, run_id: run_id, parameters: { order: 'asc' })
new_message_ids = run_steps['data'].filter_map do |step|
  if step['type'] == 'message_creation'
    step.dig('step_details', "message_creation", "message_id")
  end # Ignore tool calls, because they don't create new messages.
end

# Retrieve the individual messages
new_messages = new_message_ids.map do |msg_id|
  client.messages.retrieve(id: msg_id, thread_id: thread_id)
end

# Find the actual response text in the content array of the messages
new_messages.each do |msg|
  msg['content'].each do |content_item|
    case content_item['type']
    when 'text'
      puts content_item.dig('text', 'value')
      # Also handle annotations
    when 'image_file'
      # Use File endpoint to retrieve file contents via id
      id = content_item.dig('image_file', 'file_id')
    end
  end
end
You can also update the metadata on messages, including messages that come from the assistant.
metadata = {
  user_id: "abc123"
}
message = client.messages.modify(
  id: message_id,
  thread_id: thread_id,
  parameters: { metadata: metadata },
)
At any time you can list all runs which have been performed on a particular thread or are currently running:
client.runs.list(thread_id: thread_id, parameters: { order: "asc", limit: 3 })You can also create a thread and run in one call like this:
response = client.runs.create_thread_and_run(parameters: { assistant_id: assistant_id })
run_id = response['id']
thread_id = response['thread_id']You can include images in a thread and they will be described & read by the LLM. In this example I'm using this file:
require "openai"

# Make a client
client = OpenAI::Client.new(
  access_token: "access_token_goes_here",
  log_errors: true # Don't log errors in production.
)

# Upload image as a file
file_id = client.files.upload(
  parameters: {
    file: "path/to/example.png",
    purpose: "assistants",
  }
)["id"]

# Create assistant (You could also use an existing one here)
assistant_id = client.assistants.create(
  parameters: {
    model: "gpt-4o",
    name: "Image reader",
    instructions: "You are an image describer. You describe the contents of images.",
  }
)["id"]

# Create thread
thread_id = client.threads.create["id"]

# Add image in message
client.messages.create(
  thread_id: thread_id,
  parameters: {
    role: "user", # Required for manually created messages
    content: [
      {
        "type": "text",
        "text": "What's in this image?"
      },
      {
        "type": "image_file",
        "image_file": { "file_id": file_id }
      }
    ]
  }
)

# Run thread
run_id = client.runs.create(
  thread_id: thread_id,
  parameters: { assistant_id: assistant_id }
)["id"]

# Wait until run in complete
status = nil
until status == "completed" do
  sleep(0.1)
  status = client.runs.retrieve(id: run_id, thread_id: thread_id)['status']
end

# Get the response
messages = client.messages.list(thread_id: thread_id, parameters: { order: 'asc' })
messages.dig("data", -1, "content", 0, "text", "value")
=> "The image contains a placeholder graphic with a tilted, stylized representation of a postage stamp in the top part, which includes an abstract landscape with hills and a sun. Below the stamp, in the middle of the image, there is italicized text in a light golden color that reads, \"This is just an example.\" The background is a light pastel shade, and a yellow border frames the entire image."In case you are allowing the assistant to access function tools (they are defined in the same way as functions during chat completion), you might get a status code of requires_action when the assistant wants you to evaluate one or more function tools:
def get_current_weather(location:, unit: "celsius")
  # Your function code goes here
  if location =~ /San Francisco/i
    return unit == "celsius" ? "The weather is nice 🌞 at 27°C" : "The weather is nice 🌞 at 80°F"
  else
    return unit == "celsius" ? "The weather is icy 🥶 at -5°C" : "The weather is icy 🥶 at 23°F"
  end
end

if status == 'requires_action'
  tools_to_call = response.dig('required_action', 'submit_tool_outputs', 'tool_calls')

  my_tool_outputs = tools_to_call.map { |tool|
    # Call the functions based on the tool's name
    function_name = tool.dig('function', 'name')
    arguments = JSON.parse(
      tool.dig("function", "arguments"),
      { symbolize_names: true },
    )

    tool_output = case function_name
    when "get_current_weather"
      get_current_weather(**arguments)
    end

    {
      tool_call_id: tool['id'],
      output: tool_output,
    }
  }

  client.runs.submit_tool_outputs(
    thread_id: thread_id,
    run_id: run_id,
    parameters: { tool_outputs: my_tool_outputs }
  )
end
Note that you have 10 minutes to submit your tool output before the run expires.
Take a deep breath. You might need a drink for this one.
It's possible for OpenAI to share what chunks it used in its internal RAG Pipeline to create its filesearch results.
An example spec can be found here that does this, just so you know it's possible.
Here's how to get the chunks used in a file search. In this example I'm using this file:
require "openai"

# Make a client
client = OpenAI::Client.new(
  access_token: "access_token_goes_here",
  log_errors: true # Don't log errors in production.
)

# Upload your file(s)
file_id = client.files.upload(
  parameters: {
    file: "path/to/somatosensory.pdf",
    purpose: "assistants"
  }
)["id"]

# Create a vector store to store the vectorised file(s)
vector_store_id = client.vector_stores.create(parameters: {})["id"]

# Vectorise the file(s)
vector_store_file_id = client.vector_store_files.create(
  vector_store_id: vector_store_id,
  parameters: { file_id: file_id }
)["id"]

# Check that the file is vectorised (wait for status to be "completed")
client.vector_store_files.retrieve(vector_store_id: vector_store_id, id: vector_store_file_id)["status"]

# Create an assistant, referencing the vector store
assistant_id = client.assistants.create(
  parameters: {
    model: "gpt-4o",
    name: "Answer finder",
    instructions: "You are a file search tool. Find the answer in the given files, please.",
    tools: [
      { type: "file_search" }
    ],
    tool_resources: {
      file_search: {
        vector_store_ids: [vector_store_id]
      }
    }
  }
)["id"]

# Create a thread with your question
thread_id = client.threads.create(parameters: {
  messages: [
    { role: "user",
      content: "Find the description of a nociceptor." }
  ]
})["id"]

# Run the thread to generate the response. Include the "GIVE ME THE CHUNKS" incantation.
run_id = client.runs.create(
  thread_id: thread_id,
  parameters: {
    assistant_id: assistant_id
  },
  query_parameters: { include: ["step_details.tool_calls[*].file_search.results[*].content"] } # incantation
)["id"]

# Get the steps that happened in the run
steps = client.run_steps.list(
  thread_id: thread_id,
  run_id: run_id,
  parameters: { order: "asc" }
)

# Retrieve all the steps. Include the "GIVE ME THE CHUNKS" incantation again.
steps = steps["data"].map do |step|
  client.run_steps.retrieve(
    thread_id: thread_id,
    run_id: run_id,
    id: step["id"],
    parameters: { include: ["step_details.tool_calls[*].file_search.results[*].content"] } # incantation
  )
end

# Now we've got the chunk info, buried deep. Loop through the steps and find chunks if included:
chunks = steps.flat_map do |step|
  included_results = step.dig("step_details", "tool_calls", 0, "file_search", "results")

  next if included_results.nil? || included_results.empty?

  included_results.flat_map do |result|
    result["content"].map do |content|
      content["text"]
    end
  end
end.compact

# The first chunk will be the closest match to the prompt. Finally, if you want to view the completed message(s):
client.messages.list(thread_id: thread_id)Generate images using DALL·E 2 or DALL·E 3!
For DALL·E 2 the size of any generated images must be one of 256x256, 512x512 or 1024x1024 - if not specified the image will default to 1024x1024.
response = client.images.generate(
  parameters: {
    prompt: "A baby sea otter cooking pasta wearing a hat of some sort",
    size: "256x256",
  }
)
puts response.dig("data", 0, "url")
# => "https://oaidalleapiprodscus.blob.core.windows.net/private/org-Rf437IxKhh..."For DALL·E 3 the size of any generated images must be one of 1024x1024, 1024x1792 or 1792x1024. Additionally the quality of the image can be specified to either standard or hd.
response = client.images.generate(
  parameters: {
    prompt: "A springer spaniel cooking pasta wearing a hat of some sort",
    model: "dall-e-3",
    size: "1024x1792",
    quality: "standard",
  }
)
puts response.dig("data", 0, "url")
# => "https://oaidalleapiprodscus.blob.core.windows.net/private/org-Rf437IxKhh..."Fill in the transparent part of an image, or upload a mask with transparent sections to indicate the parts of an image that can be changed according to your prompt...
response = client.images.edit(
  parameters: {
    prompt: "A solid red Ruby on a blue background",
    image: "image.png",
    mask: "mask.png",
  }
)
puts response.dig("data", 0, "url")
# => "https://oaidalleapiprodscus.blob.core.windows.net/private/org-Rf437IxKhh..."Create n variations of an image.
response = client.images.variations(parameters: { image: "image.png", n: 2 })
puts response.dig("data", 0, "url")
# => "https://oaidalleapiprodscus.blob.core.windows.net/private/org-Rf437IxKhh..."Pass a string to check if it violates OpenAI's Content Policy:
response = client.moderations(parameters: { input: "I'm worried about that." })
puts response.dig("results", 0, "category_scores", "hate")
# => 5.505014632944949e-05
Whisper is a speech to text model that can be used to generate text based on audio files:
The translations API takes as input the audio file in any of the supported languages and transcribes the audio into English.
response = client.audio.translate(
  parameters: {
    model: "whisper-1",
    file: File.open("path_to_file", "rb"),
  }
)
puts response["text"]
# => "Translation of the text"The transcriptions API takes as input the audio file you want to transcribe and returns the text in the desired output file format.
You can pass the language of the audio file to improve transcription quality. Supported languages are listed here. You need to provide the language as an ISO-639-1 code, eg. "en" for English or "ne" for Nepali. You can look up the codes here.
response = client.audio.transcribe(
  parameters: {
    model: "whisper-1",
    file: File.open("path_to_file", "rb"),
    language: "en", # Optional
  }
)
puts response["text"]
# => "Transcription of the text"The speech API takes as input the text and a voice and returns the content of an audio file you can listen to.
response = client.audio.speech(
  parameters: {
    model: "tts-1",
    input: "This is a speech test!",
    voice: "alloy",
    response_format: "mp3", # Optional
    speed: 1.0, # Optional
  }
)
File.binwrite('demo.mp3', response)
# => mp3 file that plays: "This is a speech test!"The Usage API provides information about the cost of various OpenAI services within your organization. To use Admin APIs like Usage, you need to set an OPENAI_ADMIN_TOKEN, which can be generated here.
OpenAI.configure do |config|
  config.admin_token = ENV.fetch("OPENAI_ADMIN_TOKEN")
end

# or

client = OpenAI::Client.new(admin_token: "123abc")
You can retrieve usage data for different endpoints and time periods:
one_day_ago = Time.now.to_i - 86_400

# Retrieve costs data
response = client.usage.costs(parameters: { start_time: one_day_ago })
response["data"].each do |bucket|
  bucket["results"].each do |result|
    puts "#{Time.at(bucket["start_time"]).to_date}: $#{result.dig("amount", "value").round(2)}"
  end
end
=> 2025-02-09: $0.0
=> 2025-02-10: $0.42

# Retrieve completions usage data
response = client.usage.completions(parameters: { start_time: one_day_ago })
puts response["data"]

# Retrieve embeddings usage data
response = client.usage.embeddings(parameters: { start_time: one_day_ago })
puts response["data"]

# Retrieve moderations usage data
response = client.usage.moderations(parameters: { start_time: one_day_ago })
puts response["data"]

# Retrieve image generation usage data
response = client.usage.images(parameters: { start_time: one_day_ago })
puts response["data"]

# Retrieve audio speech usage data
response = client.usage.audio_speeches(parameters: { start_time: one_day_ago })
puts response["data"]

# Retrieve audio transcription usage data
response = client.usage.audio_transcriptions(parameters: { start_time: one_day_ago })
puts response["data"]

# Retrieve vector stores usage data
response = client.usage.vector_stores(parameters: { start_time: one_day_ago })
puts response["data"]HTTP errors can be caught like this:
begin
  OpenAI::Client.new.models.retrieve(id: "gpt-4o")
rescue Faraday::Error => e
  raise "Got a Faraday error: #{e}"
endAfter checking out the repo, run bin/setup to install dependencies. You can run bin/console for an interactive prompt that will allow you to experiment.
To install this gem onto your local machine, run bundle exec rake install.
To run all tests, execute the command bundle exec rake, which will also run the linter (Rubocop). This repository uses VCR to log API requests.
[!WARNING] If you have an
OPENAI_ACCESS_TOKENandOPENAI_ADMIN_TOKENin yourENV, running the specs will hit the actual API, which will be slow and cost you money - 2 cents or more! Remove them from your environment withunsetor similar if you just want to run the specs against the stored VCR responses.
bundle exec ruby -e "Warning[:deprecated] = true; require 'rspec'; exit RSpec::Core::Runner.run(['spec/openai/client/http_spec.rb:25'])"
First run the specs without VCR so they actually hit the API. This will cost 2 cents or more. Set OPENAI_ACCESS_TOKEN and OPENAI_ADMIN_TOKEN in your environment.
Then update the version number in version.rb, update CHANGELOG.md, run bundle install to update Gemfile.lock, and then run bundle exec rake release, which will create a git tag for the version, push git commits and tags, and push the .gem file to rubygems.org.
Bug reports and pull requests are welcome on GitHub at https://github.com/alexrudall/ruby-openai. This project is intended to be a safe, welcoming space for collaboration, and contributors are expected to adhere to the code of conduct.
The gem is available as open source under the terms of the MIT License.
Everyone interacting in the Ruby OpenAI project's codebases, issue trackers, chat rooms and mailing lists is expected to follow the code of conduct.
For Tasks:
Click tags to check more tools for each tasksFor Jobs:
Alternative AI tools for ruby-openai
Similar Open Source Tools

ruby-openai
Use the OpenAI API with Ruby! 🤖🩵 Stream text with GPT-4, transcribe and translate audio with Whisper, or create images with DALL·E... Hire me | 🎮 Ruby AI Builders Discord | 🐦 Twitter | 🧠 Anthropic Gem | 🚂 Midjourney Gem ## Table of Contents * Ruby OpenAI * Table of Contents * Installation * Bundler * Gem install * Usage * Quickstart * With Config * Custom timeout or base URI * Extra Headers per Client * Logging * Errors * Faraday middleware * Azure * Ollama * Counting Tokens * Models * Examples * Chat * Streaming Chat * Vision * JSON Mode * Functions * Edits * Embeddings * Batches * Files * Finetunes * Assistants * Threads and Messages * Runs * Runs involving function tools * Image Generation * DALL·E 2 * DALL·E 3 * Image Edit * Image Variations * Moderations * Whisper * Translate * Transcribe * Speech * Errors * Development * Release * Contributing * License * Code of Conduct
aiavatarkit
AIAvatarKit is a tool for building AI-based conversational avatars quickly. It supports various platforms like VRChat and cluster, along with real-world devices. The tool is extensible, allowing unlimited capabilities based on user needs. It requires VOICEVOX API, Google or Azure Speech Services API keys, and Python 3.10. Users can start conversations out of the box and enjoy seamless interactions with the avatars.
promptic
Promptic is a tool designed for LLM app development, providing a productive and pythonic way to build LLM applications. It leverages LiteLLM, allowing flexibility to switch LLM providers easily. Promptic focuses on building features by providing type-safe structured outputs, easy-to-build agents, streaming support, automatic prompt caching, and built-in conversation memory.
crush
Crush is a versatile tool designed to enhance coding workflows in your terminal. It offers support for multiple LLMs, allows for flexible switching between models, and enables session-based work management. Crush is extensible through MCPs and works across various operating systems. It can be installed using package managers like Homebrew and NPM, or downloaded directly. Crush supports various APIs like Anthropic, OpenAI, Groq, and Google Gemini, and allows for customization through environment variables. The tool can be configured locally or globally, and supports LSPs for additional context. Crush also provides options for ignoring files, allowing tools, and configuring local models. It respects `.gitignore` files and offers logging capabilities for troubleshooting and debugging.
vim-ai
vim-ai is a plugin that adds Artificial Intelligence (AI) capabilities to Vim and Neovim. It allows users to generate code, edit text, and have interactive conversations with GPT models powered by OpenAI's API. The plugin uses OpenAI's API to generate responses, requiring users to set up an account and obtain an API key. It supports various commands for text generation, editing, and chat interactions, providing a seamless integration of AI features into the Vim text editor environment.
mcp
Semgrep MCP Server is a beta server under active development for using Semgrep to scan code for security vulnerabilities. It provides a Model Context Protocol (MCP) for various coding tools to get specialized help in tasks. Users can connect to Semgrep AppSec Platform, scan code for vulnerabilities, customize Semgrep rules, analyze and filter scan results, and compare results. The tool is published on PyPI as semgrep-mcp and can be installed using pip, pipx, uv, poetry, or other methods. It supports CLI and Docker environments for running the server. Integration with VS Code is also available for quick installation. The project welcomes contributions and is inspired by core technologies like Semgrep and MCP, as well as related community projects and tools.
firecrawl-mcp-server
Firecrawl MCP Server is a Model Context Protocol (MCP) server implementation that integrates with Firecrawl for web scraping capabilities. It offers features such as web scraping, crawling, and discovery, search and content extraction, deep research and batch scraping, automatic retries and rate limiting, cloud and self-hosted support, and SSE support. The server can be configured to run with various tools like Cursor, Windsurf, SSE Local Mode, Smithery, and VS Code. It supports environment variables for cloud API and optional configurations for retry settings and credit usage monitoring. The server includes tools for scraping, batch scraping, mapping, searching, crawling, and extracting structured data from web pages. It provides detailed logging and error handling functionalities for robust performance.
deep-searcher
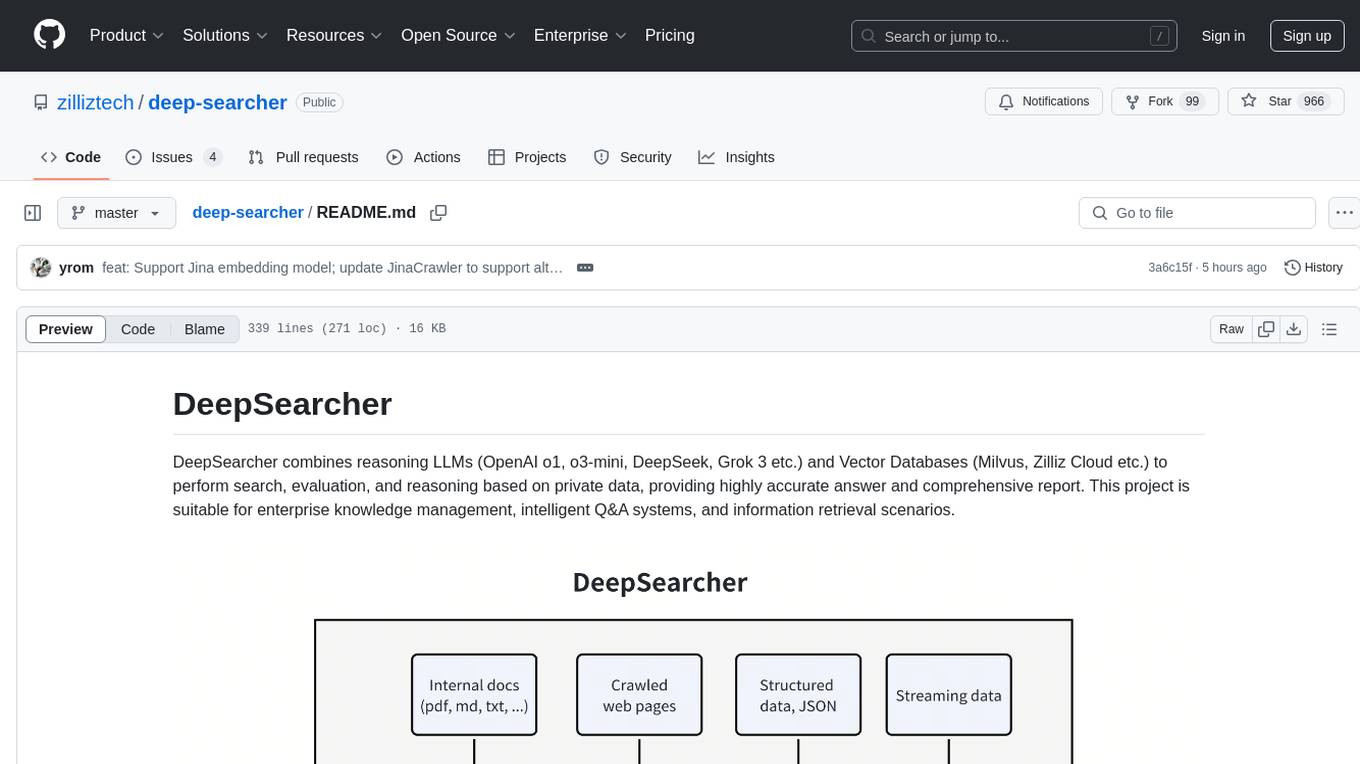
DeepSearcher is a tool that combines reasoning LLMs and Vector Databases to perform search, evaluation, and reasoning based on private data. It is suitable for enterprise knowledge management, intelligent Q&A systems, and information retrieval scenarios. The tool maximizes the utilization of enterprise internal data while ensuring data security, supports multiple embedding models, and provides support for multiple LLMs for intelligent Q&A and content generation. It also includes features like private data search, vector database management, and document loading with web crawling capabilities under development.
firecrawl-mcp-server
Firecrawl MCP Server is a Model Context Protocol (MCP) server implementation that integrates with Firecrawl for web scraping capabilities. It supports features like scrape, crawl, search, extract, and batch scrape. It provides web scraping with JS rendering, URL discovery, web search with content extraction, automatic retries with exponential backoff, credit usage monitoring, comprehensive logging system, support for cloud and self-hosted FireCrawl instances, mobile/desktop viewport support, and smart content filtering with tag inclusion/exclusion. The server includes configurable parameters for retry behavior and credit usage monitoring, rate limiting and batch processing capabilities, and tools for scraping, batch scraping, checking batch status, searching, crawling, and extracting structured information from web pages.
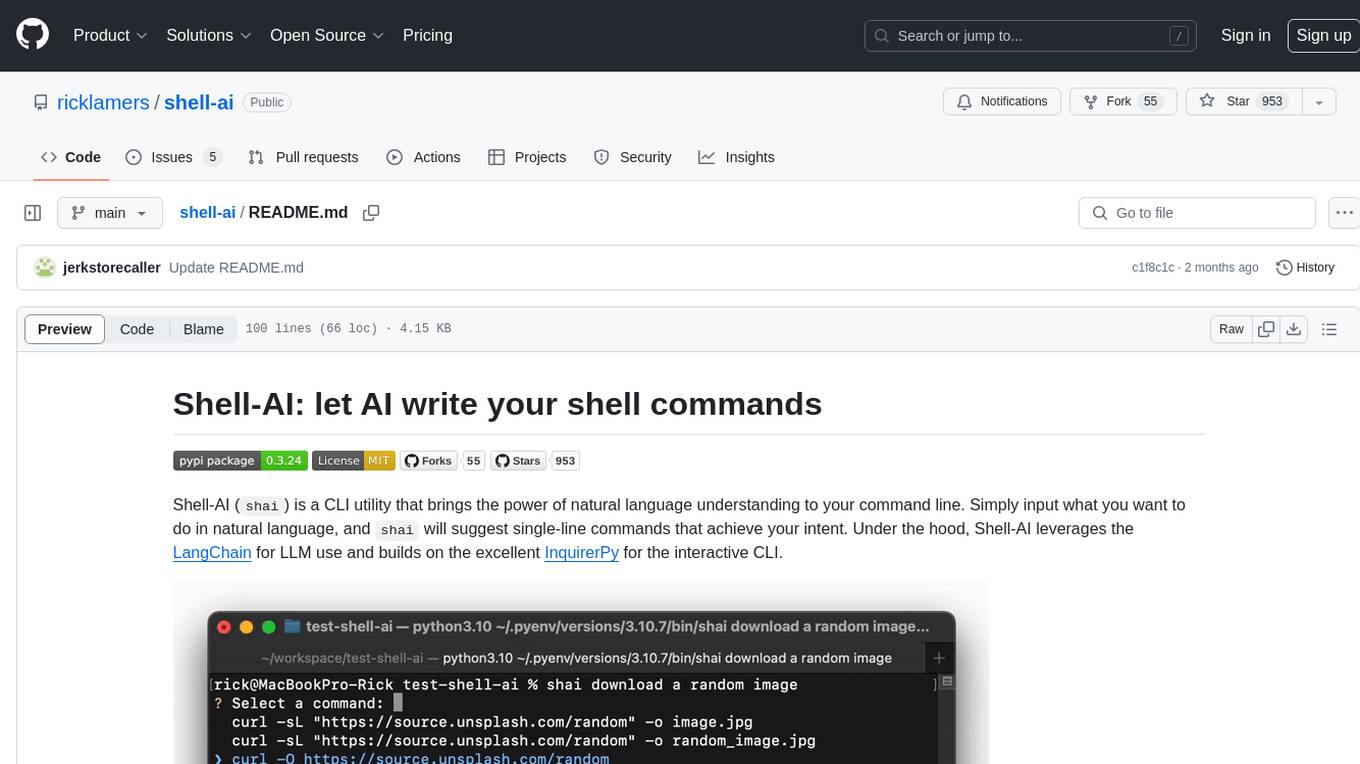
shell-ai
Shell-AI (`shai`) is a CLI utility that enables users to input commands in natural language and receive single-line command suggestions. It leverages natural language understanding and interactive CLI tools to enhance command line interactions. Users can describe tasks in plain English and receive corresponding command suggestions, making it easier to execute commands efficiently. Shell-AI supports cross-platform usage and is compatible with Azure OpenAI deployments, offering a user-friendly and efficient way to interact with the command line.
ollama-ex
Ollama is a powerful tool for running large language models locally or on your own infrastructure. It provides a full implementation of the Ollama API, support for streaming requests, and tool use capability. Users can interact with Ollama in Elixir to generate completions, chat messages, and perform streaming requests. The tool also supports function calling on compatible models, allowing users to define tools with clear descriptions and arguments. Ollama is designed to facilitate natural language processing tasks and enhance user interactions with language models.
langchainrb
Langchain.rb is a Ruby library that makes it easy to build LLM-powered applications. It provides a unified interface to a variety of LLMs, vector search databases, and other tools, making it easy to build and deploy RAG (Retrieval Augmented Generation) systems and assistants. Langchain.rb is open source and available under the MIT License.
openmacro
Openmacro is a multimodal personal agent that allows users to run code locally. It acts as a personal agent capable of completing and automating tasks autonomously via self-prompting. The tool provides a CLI natural-language interface for completing and automating tasks, analyzing and plotting data, browsing the web, and manipulating files. Currently, it supports API keys for models powered by SambaNova, with plans to add support for other hosts like OpenAI and Anthropic in future versions.
llmproxy
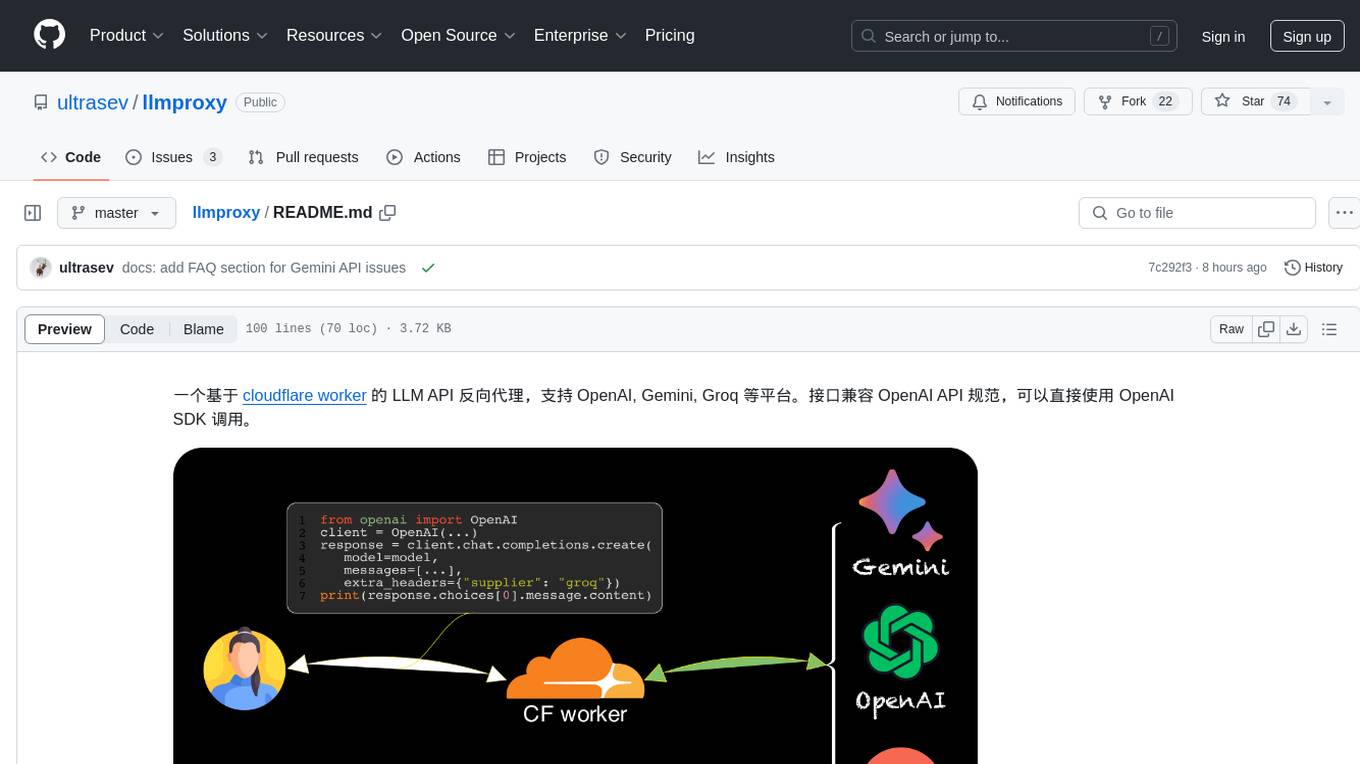
llmproxy is a reverse proxy for LLM API based on Cloudflare Worker, supporting platforms like OpenAI, Gemini, and Groq. The interface is compatible with the OpenAI API specification and can be directly accessed using the OpenAI SDK. It provides a convenient way to interact with various AI platforms through a unified API endpoint, enabling seamless integration and usage in different applications.
json-repair
JSON Repair is a toolkit designed to address JSON anomalies that can arise from Large Language Models (LLMs). It offers a comprehensive solution for repairing JSON strings, ensuring accuracy and reliability in your data processing. With its user-friendly interface and extensive capabilities, JSON Repair empowers developers to seamlessly integrate JSON repair into their workflows.
context7
Context7 is a powerful tool for analyzing and visualizing data in various formats. It provides a user-friendly interface for exploring datasets, generating insights, and creating interactive visualizations. With advanced features such as data filtering, aggregation, and customization, Context7 is suitable for both beginners and experienced data analysts. The tool supports a wide range of data sources and formats, making it versatile for different use cases. Whether you are working on exploratory data analysis, data visualization, or data storytelling, Context7 can help you uncover valuable insights and communicate your findings effectively.
For similar tasks
lollms-webui
LoLLMs WebUI (Lord of Large Language Multimodal Systems: One tool to rule them all) is a user-friendly interface to access and utilize various LLM (Large Language Models) and other AI models for a wide range of tasks. With over 500 AI expert conditionings across diverse domains and more than 2500 fine tuned models over multiple domains, LoLLMs WebUI provides an immediate resource for any problem, from car repair to coding assistance, legal matters, medical diagnosis, entertainment, and more. The easy-to-use UI with light and dark mode options, integration with GitHub repository, support for different personalities, and features like thumb up/down rating, copy, edit, and remove messages, local database storage, search, export, and delete multiple discussions, make LoLLMs WebUI a powerful and versatile tool.
daily-poetry-image
Daily Chinese ancient poetry and AI-generated images powered by Bing DALL-E-3. GitHub Action triggers the process automatically. Poetry is provided by Today's Poem API. The website is built with Astro.

InvokeAI
InvokeAI is a leading creative engine built to empower professionals and enthusiasts alike. Generate and create stunning visual media using the latest AI-driven technologies. InvokeAI offers an industry leading Web Interface, interactive Command Line Interface, and also serves as the foundation for multiple commercial products.
LocalAI
LocalAI is a free and open-source OpenAI alternative that acts as a drop-in replacement REST API compatible with OpenAI (Elevenlabs, Anthropic, etc.) API specifications for local AI inferencing. It allows users to run LLMs, generate images, audio, and more locally or on-premises with consumer-grade hardware, supporting multiple model families and not requiring a GPU. LocalAI offers features such as text generation with GPTs, text-to-audio, audio-to-text transcription, image generation with stable diffusion, OpenAI functions, embeddings generation for vector databases, constrained grammars, downloading models directly from Huggingface, and a Vision API. It provides a detailed step-by-step introduction in its Getting Started guide and supports community integrations such as custom containers, WebUIs, model galleries, and various bots for Discord, Slack, and Telegram. LocalAI also offers resources like an LLM fine-tuning guide, instructions for local building and Kubernetes installation, projects integrating LocalAI, and a how-tos section curated by the community. It encourages users to cite the repository when utilizing it in downstream projects and acknowledges the contributions of various software from the community.
classifai
Supercharge WordPress Content Workflows and Engagement with Artificial Intelligence. Tap into leading cloud-based services like OpenAI, Microsoft Azure AI, Google Gemini and IBM Watson to augment your WordPress-powered websites. Publish content faster while improving SEO performance and increasing audience engagement. ClassifAI integrates Artificial Intelligence and Machine Learning technologies to lighten your workload and eliminate tedious tasks, giving you more time to create original content that matters.
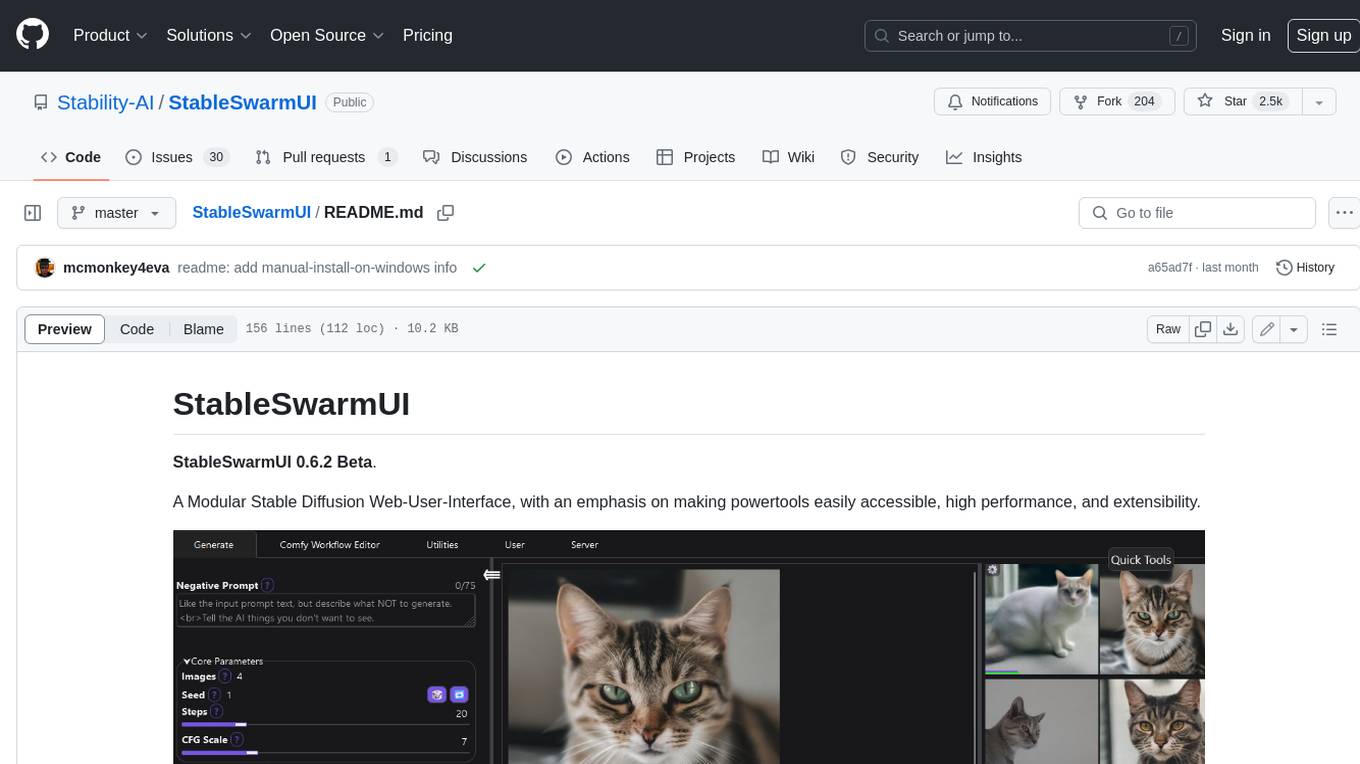
StableSwarmUI
StableSwarmUI is a modular Stable Diffusion web user interface that emphasizes making power tools easily accessible, high performance, and extensible. It is designed to be a one-stop-shop for all things Stable Diffusion, providing a wide range of features and capabilities to enhance the user experience.
civitai
Civitai is a platform where people can share their stable diffusion models (textual inversions, hypernetworks, aesthetic gradients, VAEs, and any other crazy stuff people do to customize their AI generations), collaborate with others to improve them, and learn from each other's work. The platform allows users to create an account, upload their models, and browse models that have been shared by others. Users can also leave comments and feedback on each other's models to facilitate collaboration and knowledge sharing.
generative-ai-python
The Google AI Python SDK is the easiest way for Python developers to build with the Gemini API. The Gemini API gives you access to Gemini models created by Google DeepMind. Gemini models are built from the ground up to be multimodal, so you can reason seamlessly across text, images, and code.
For similar jobs
h2ogpt
h2oGPT is an Apache V2 open-source project that allows users to query and summarize documents or chat with local private GPT LLMs. It features a private offline database of any documents (PDFs, Excel, Word, Images, Video Frames, Youtube, Audio, Code, Text, MarkDown, etc.), a persistent database (Chroma, Weaviate, or in-memory FAISS) using accurate embeddings (instructor-large, all-MiniLM-L6-v2, etc.), and efficient use of context using instruct-tuned LLMs (no need for LangChain's few-shot approach). h2oGPT also offers parallel summarization and extraction, reaching an output of 80 tokens per second with the 13B LLaMa2 model, HYDE (Hypothetical Document Embeddings) for enhanced retrieval based upon LLM responses, a variety of models supported (LLaMa2, Mistral, Falcon, Vicuna, WizardLM. With AutoGPTQ, 4-bit/8-bit, LORA, etc.), GPU support from HF and LLaMa.cpp GGML models, and CPU support using HF, LLaMa.cpp, and GPT4ALL models. Additionally, h2oGPT provides Attention Sinks for arbitrarily long generation (LLaMa-2, Mistral, MPT, Pythia, Falcon, etc.), a UI or CLI with streaming of all models, the ability to upload and view documents through the UI (control multiple collaborative or personal collections), Vision Models LLaVa, Claude-3, Gemini-Pro-Vision, GPT-4-Vision, Image Generation Stable Diffusion (sdxl-turbo, sdxl) and PlaygroundAI (playv2), Voice STT using Whisper with streaming audio conversion, Voice TTS using MIT-Licensed Microsoft Speech T5 with multiple voices and Streaming audio conversion, Voice TTS using MPL2-Licensed TTS including Voice Cloning and Streaming audio conversion, AI Assistant Voice Control Mode for hands-free control of h2oGPT chat, Bake-off UI mode against many models at the same time, Easy Download of model artifacts and control over models like LLaMa.cpp through the UI, Authentication in the UI by user/password via Native or Google OAuth, State Preservation in the UI by user/password, Linux, Docker, macOS, and Windows support, Easy Windows Installer for Windows 10 64-bit (CPU/CUDA), Easy macOS Installer for macOS (CPU/M1/M2), Inference Servers support (oLLaMa, HF TGI server, vLLM, Gradio, ExLLaMa, Replicate, OpenAI, Azure OpenAI, Anthropic), OpenAI-compliant, Server Proxy API (h2oGPT acts as drop-in-replacement to OpenAI server), Python client API (to talk to Gradio server), JSON Mode with any model via code block extraction. Also supports MistralAI JSON mode, Claude-3 via function calling with strict Schema, OpenAI via JSON mode, and vLLM via guided_json with strict Schema, Web-Search integration with Chat and Document Q/A, Agents for Search, Document Q/A, Python Code, CSV frames (Experimental, best with OpenAI currently), Evaluate performance using reward models, and Quality maintained with over 1000 unit and integration tests taking over 4 GPU-hours.
mistral.rs
Mistral.rs is a fast LLM inference platform written in Rust. We support inference on a variety of devices, quantization, and easy-to-use application with an Open-AI API compatible HTTP server and Python bindings.
ollama
Ollama is a lightweight, extensible framework for building and running language models on the local machine. It provides a simple API for creating, running, and managing models, as well as a library of pre-built models that can be easily used in a variety of applications. Ollama is designed to be easy to use and accessible to developers of all levels. It is open source and available for free on GitHub.
llama-cpp-agent
The llama-cpp-agent framework is a tool designed for easy interaction with Large Language Models (LLMs). Allowing users to chat with LLM models, execute structured function calls and get structured output (objects). It provides a simple yet robust interface and supports llama-cpp-python and OpenAI endpoints with GBNF grammar support (like the llama-cpp-python server) and the llama.cpp backend server. It works by generating a formal GGML-BNF grammar of the user defined structures and functions, which is then used by llama.cpp to generate text valid to that grammar. In contrast to most GBNF grammar generators it also supports nested objects, dictionaries, enums and lists of them.
llama_ros
This repository provides a set of ROS 2 packages to integrate llama.cpp into ROS 2. By using the llama_ros packages, you can easily incorporate the powerful optimization capabilities of llama.cpp into your ROS 2 projects by running GGUF-based LLMs and VLMs.
MITSUHA
OneReality is a virtual waifu/assistant that you can speak to through your mic and it'll speak back to you! It has many features such as: * You can speak to her with a mic * It can speak back to you * Has short-term memory and long-term memory * Can open apps * Smarter than you * Fluent in English, Japanese, Korean, and Chinese * Can control your smart home like Alexa if you set up Tuya (more info in Prerequisites) It is built with Python, Llama-cpp-python, Whisper, SpeechRecognition, PocketSphinx, VITS-fast-fine-tuning, VITS-simple-api, HyperDB, Sentence Transformers, and Tuya Cloud IoT.
wenxin-starter
WenXin-Starter is a spring-boot-starter for Baidu's "Wenxin Qianfan WENXINWORKSHOP" large model, which can help you quickly access Baidu's AI capabilities. It fully integrates the official API documentation of Wenxin Qianfan. Supports text-to-image generation, built-in dialogue memory, and supports streaming return of dialogue. Supports QPS control of a single model and supports queuing mechanism. Plugins will be added soon.
FlexFlow
FlexFlow Serve is an open-source compiler and distributed system for **low latency**, **high performance** LLM serving. FlexFlow Serve outperforms existing systems by 1.3-2.0x for single-node, multi-GPU inference and by 1.4-2.4x for multi-node, multi-GPU inference.


