
llm-subtrans
Open Source project using LLMs to translate subtitles (SRT, SSA/ASS, VTT)
Stars: 552
LLM-Subtrans is an open source subtitle translator that utilizes LLMs as a translation service. It supports translating subtitles between any language pairs supported by the language model. The application offers multiple subtitle formats support through a pluggable system, including .srt, .ssa/.ass, and .vtt files. Users can choose to use the packaged release for easy usage or install from source for more control over the setup. The tool requires an active internet connection as subtitles are sent to translation service providers' servers for translation.
README:
LLM-Subtrans is an open source subtitle translator that uses LLMs as a translation service. It can translate subtitles between any language pairs supported by the language model.
The application supports multiple subtitle formats through a pluggable system. Currently .srt, .ssa/.ass and .vtt files are supported.
Note: LLM-Subtrans requires an active internet connection. Subtitles are sent to the provider's servers for translation, so their privacy policy applies.
For most users the packaged release is the easiest way to use the program. Download a package from the releases page, unzip to a folder and run gui-subtrans. You will be prompted for some basic settings on first run.
If you want to use the command line tools, modify the code or just prefer to have more control over the setup you will need to install from source.
Every release is packaged for Windows as (gui-subtrans-x.x.x.zip).
Packaged builds are (usually) provided for MacOS with Apple Silicon (gui-subtrans-x.x.x.macos-arm64.zip). If you have an Intel Mac you will need to install from source.
Prebuilt Linux packages are not provided so you will need to install from source.
OpenRouter is a service which aggregates models from a wide range of providers. You will need an OpenRouter API Key to use the service, and a credit balance (though some quite capable models are provided free of charge).
You can choose to let OpenRouter select the model automatically (the "Use Default Model" setting in the GUI or --auto on the command line) or you can specify a specific model. Model preferences can also be specified in the OpenRouter dashboard.
Since hundreds of models are available they are grouped by model family. By default the list of available models is pulled from the "Translation" category, though this excludes many models that are perfectly capable of translation (including most free options).
Please note that regions restrictions may apply: https://ai.google.dev/available_regions
Gemini 2.5 Flash is perhaps the leading model for translation speed and fluency at time of writing, despite some censorship, and Preview models are often free to use.
You will need a Google Gemini API key from https://ai.google.dev/ or from a project created on https://console.cloud.google.com/. You must ensure that Generative AI is enabled for the api key and project.
Unfortunately Gemini will refuse to translate content that contains certain words or phrases, even with minimal safety settings. If you hit this you will need to use another provider or split the batch and manually translate the offending lines.
https://openai.com/policies/privacy-policy
You will need an OpenAI API key from https://platform.openai.com/account/api-keys to use OpenAI's GPT models. If the API key is associated with a free trial the translation speed will be severely restricted.
You can use the custom api_base parameter to access a custom OpenAI instance (or any other OpenAI-compatible endpoint, though the Custom Server option gives you more control).
You can use an OpenAI Azure installation as a translation provider, but this is only advisable if you know what you're doing - in which case hopefully it will be clear how to configure the Azure provider settings.
https://platform.deepseek.com/downloads/DeepSeek%20Open%20Platform%20Terms%20of%20Service.html
You will need a DeepSeek API key from https://platform.deepseek.com/api_keys to use this provider.
-
API Base: You can optionally specify a custom URL, e.g. if you are hosting your own DeepSeek instance. If this is not set, the official DeepSeek API endpoint will be used.
-
Model: The default model is
deepseek-chat, which is recommended for translation tasks.deepseek-reasonermay produce better results for source subtitles with OCR or transcription errors as it will spend longer trying to guess what the error is.
DeepSeek is quite simple to set up and offers reasonable performance at a very low price, though translation does not seem to be its strongest point.
https://support.anthropic.com/en/collections/4078534-privacy-legal
You will need an Anthropic API key from https://console.anthropic.com/settings/keys to use Claude as a provider. Translation is not Claude's strongest suit, and the API is expensive compared to others.
The API has strict rate limits based on your credit tier, both on requests per minutes and tokens per day.
You will need a Mistral API key from https://console.mistral.ai/api-keys/ to use this provider.
-
Server URL: If you are using a custom deployment of the Mistral API, you can specify the server URL using the
--server_urlargument. -
Model:
mistral-large-latestis recommended for translation. Smaller models tend to perform poorly and may not follow the system instructions well.
Mistral AI is straightforward to set up, but its performance as a translator is not particularly good.
LLM-Subtrans can interface directly with any server that supports an OpenAI compatible API, including locally hosted models e.g. LM Studio.
This is mainly for research and you should not expect particularly good results from local models. LLMs derive much of their power from their size, so the small, quantized models you can run on a consumer GPU are likely to produce poor translations, fail to generate valid responses or get stuck in endless loops. If you find a model that reliably producess good results, please post about it in the Discussions area!
Chat and completion endpoints are supported - you should configure the settings and endpoint based on the model the server is running (e.g. instruction tuned models will probably produce better results using the completions endpoint rather than chat). The prompt template can be edited in the GUI if you are using a model that requires a particular format - make sure to include at least the {prompt} tag in the template, as this is where the subtitles that need translating in each batch will be filled in!
https://aws.amazon.com/service-terms/
Bedrock is not recommended for most users: The setup process is complex, requiring AWS credentials, proper IAM permissions, and region configuration. Additionally, not all models on Bedrock support translation tasks or offer reliable results. Bedrock support will not be included in pre-packaged versions - if you can handle setting up AWS, you can handle installing llm-subtrans from source.
To use Bedrock, you must:
- Create an IAM user or role with appropriate permissions (e.g.,
bedrock:InvokeModel,bedrock:ListFoundationModels). - Ensure the model you wish to use is accessible in your selected AWS region and enabled for the IAM user.
If you want to use the command line tools or modify the program, you will need to have Python 3.10+ and pip installed on your system, then follow these steps.
Clone the LLM-Subtrans repository to your local machine using the following command or your preferred tool:
```sh
git clone https://github.com/machinewrapped/llm-subtrans.git
```
The easiest setup method is to run the unified installation script:
-
Windows: Run
install.bat -
MacOS/Linux: Run
install.sh
These scripts will create a virtual environment and offer install with GUI or install command line only options, with additional options to add support for specific providers. The script will guide you through the setup and generate command scripts to launch the application.
During the installing process, you can choose to input an API key for each selected provider when prompted, which will be saved in a .env file so that you don't need to provide it every time you run the program. This is largely redundant if you only plan to use the GUI, as keys can be saved in the app settings.
If you ran an install script you can skip the remaining steps. Continue reading only if you want to configure the environment manually instead.
-
Create a new file named .env in the root directory of the project. Add any required settings for your chosen provider to the .env file like this:
OPENROUTER_API_KEY=<your_openrouter_api_key>
OPENAI_API_KEY=<your_openai_api_key>
GEMINI_API_KEY=<your_gemini_api_key>
AZURE_API_KEY=<your_azure_api_key>
CLAUDE_API_KEY=<your_claude_api_key>
If you are using Azure:
AZURE_API_BASE=<your api_base, such as https://something.openai.azure.com>
AZURE_DEPLOYMENT_NAME=<deployment_name>
If you are using Bedrock:
AWS_ACCESS_KEY_ID=your-access-key-id
AWS_SECRET_ACCESS_KEY=your-secret-access-key
AWS_REGION=your-region
For OpenAI reasoning models you can set the reasoning effort (default is low):
OPENAI_REASONING_EFFORT=low/medium/high
-
Create a virtual environment for the project by running the following command in the root folder to create a local environment for the Python interpreter (optional, but highly recommended to avoid dependency conflicts with other Python applications):
python -m venv envsubtrans
-
Activate the virtual environment by running the appropriate command for your operating system. You will need to do this each time before running the app.
.\envsubtrans\Scripts\activate      # Windows
source ./envsubtrans/bin/activate   # Mac/Linux
-
Install the project (add the -e switch for an editable install if you want to modify the code):
pip install -e .                   # Minimal install of command line tools with support for OpenRouter or Custom Server
pip install -e ".[gui]"            # Core module and default provider with GUI module
pip install -e ".[gui,openai,gemini,claude,mistral,bedrock]"   # Full install with optional providers (delete to taste)
The program works by dividing the subtitles up into batches and sending each one to the translation service in turn.
It can potentially make many API calls for each subtitle file, depending on the batch size. Speed heavily depends on the selected model.
By default The translated subtitles will be written to a new file in the same directory with the target langugage appended to the original filename.
The Subtrans GUI is the best and easiest way to use the program.
After installation, launch the GUI with the gui-subtrans command or shell script, and hopefully the rest should be self-explanatory.
See the project wiki for further details on how to use the program.
LLM-Subtrans can be used as a console command or shell script. The install scripts create a cmd or sh file in the project root for each provider, which will take care of activating the virtual environment and calling the corresponding translation script.
The most basic usage is:
# Use OpenRouter with automatic model selection
llm-subtrans --auto -l <language> <path_to_subtitle_file>

# Use OpenRouter with a specific model
llm-subtrans --model google/gemini-2.5-flash -l <language> <path_to_subtitle_file>

# Convert format while translating (ASS to SRT in this example)
llm-subtrans -l <language> -o output.srt input.ass

# Use any server with an OpenAI-compatible API
llm-subtrans -s <server_address> -e <endpoint> -k <api_key> -l <language> <path_to_subtitle_file>

# Use specific providers
gpt-subtrans --model gpt-5-mini --target_language <target_language> <path_to_subtitle_file>
gemini-subtrans --model gemini-2.5-flash-latest --target_language <target_language> <path_to_subtitle_file>
claude-subtrans --model claude-3-5-haiku-latest --target_language <target_language> <path_to_subtitle_file>

# List supported subtitle formats
llm-subtrans --list-formats

# Batch process files in a folder tree (activate the virtual environment first)
python scripts/batch_translate.py ./subtitles ./translated --provider openai --model gpt-5-mini --apikey sk-... --language Spanish
The output format is inferred from file extensions. To convert between formats, provide an output path with the desired extension.
If the target language is not specified the default is English.
Other options that can be specified on the command line are detailed below.
Note: Project files are enabled by default in the GUI.
The --project argument or PROJECT_FILE .env setting control whether a project file will be written to disc for the command line.
If enabled, a file will be created with the .subtrans extension when a subtitle file is loaded, containing details of the project. It will be updated as the translation progresses. Writing a project file allows, amongst other things, resuming a translation that was interrupted. It is highly recommended.
# Use OpenRouter and create a persistent project
llm-subtrans --project --auto -l <language> <path_to_subtitle_file>

# Use OpenRouter and resume a persistent project
llm-subtrans --project --auto -l <language> <path_to_subtrans_file>
llm-subtrans --project --auto -l <language> <path_to_subtitle_file> # Project file will be detected automatically if it is in the same folderLLM-Subtrans is primarily a translation application, and format conversion is probably best handled by dedicated tools, but the option exists to read one format and write another.
# Use OpenRouter and convert from .ass to .srt
llm-subtrans --project --auto -l <language> -o <path_to_output_file.srt> <path_to_subtitle_file.ass>There are a number of command-line arguments that offer more control over the translation process.
To use any of these arguments, add them to the command-line after the path to the source file. For example:
llm-subtrans path/to/my/subtitles.srt --moviename "My Awesome Movie" --ratelimit 10 --substitution cat::dogDefault values for many settings can be set in the .env file, using a NAME_IN_CAPS format. See Options.py and the various Provider_XXX files for the full list.
-
-l,--target_language: The language to translate the subtitles to. -
-o,--output: Specify a filename for the translated subtitles. -
--project: Read or Write a project file for the subtitles being translated (see above for details) -
--ratelimit: Maximum number of requests to the translation service per minute (mainly relevant if you are using an OpenAI free trial account). -
--moviename: Optionally identify the source material to give context to the translator. -
--description: A brief description of the source material to give further context. Less is generally more here, or the AI can start improvising. -
--name,--names: Optionally provide (a list of) names to use in the translation (more powerful AI models are more likely to actually use them). -
--substitution: A pair of strings separated by::, to substitute in either source or translation, or the name of a file containing a list of such pairs. -
--scenethreshold: Number of seconds between lines to consider it a new scene. -
--minbatchsize: Minimum number of lines to consider starting a new batch to send to the translator. Higher values typically result in faster and cheaper translations but increase the risk of desyncs. -
--maxbatchsize: Maximum number of lines before starting a new batch is compulsory. This needs to take into account the token limit for the model being used, but the "optimal" value depends on many factors, so experimentation is encouraged. Larger batches are more cost-effective but increase the risk of the AI desynchronising, triggering expensive retries. -
--preprocess: Preprocess the subtitles prior to batching. This performs various actions to prepare the subtitles for more efficient translation, e.g. splitting long (duration) lines into multiple lines. Mainly intended for subtitles that have been automatically transcribed with e.g. Whisper. -
--postprocess: Post-process translated subtitles. Performs various actions like adding line breaks to long lines and normalising dialogue tags after a translation request. -
--instruction: An additional instruction for the AI indicating how it should approach the translation. -
--instructionfile: Name/path of a file to load AI system instructions from (otherwise the default instructions.txt is used). -
--maxlines: Maximum number of batches to process. To end the translation after a certain number of lines, e.g. to check the results. -
--temperature: A higher temperature increases the random variance of translations. Default 0. -
--reload: Subtitles will be reloaded from the source file rather than using the subtitles saved in the project (note: this implies--project) -
--retranslate: Existing translations will be ignored and all subtitles will be retranslated (note: this implies--project) -
--reparse: Existing translations will not be sent to the translator again but the translator's response will be reprocessed to extract the translations. This is mainly useful after a bug fix release, but can also be used to reset translations that have been hand-edited (note: this implies--project) -
--preview: Subtitles will be loaded and batched and the translation flow will run, but no calls to the translator will be made. Only useful for debug.
Some additional arguments are available for specific providers.
-
-k,--apikey: Your OpenRouter API Key (the app will look for OPENROUTER_API_KEY in the environment if this is not provided) -
--autoAutomatically select the model to use (selection criteria can be configured in the OpenRouter Dashboard)
-
-k,--apikey: Your OpenAI API Key (the app will look for OPENAI_API_KEY in the environment if this is not provided) -
-b,--apibase: API base URL if you are using a custom instance. if it is not set, the default URL will be used. -
-httpx: Use the HTTPX library for requests (only supported if apibase is specified) -
-m,--model: Specify the AI model to use for translation
-
-k,--apikey: Your Google Gemini API Key. (the app will look for GEMINI_API_KEY in the environment if this is not provided) -
-m,--model: Specify the AI model to use for translation
-
-k,--apikey: Your Anthropic API Key. (the app will look for ANTHROPIC_API_KEY in the environment if this is not provided) -
-m,--model: Specify the AI model to use for translation. This should be the full model name, e.g.claude-3-haiku-20240307
-
-k,--apikey: Your DeepSeek API Key. (the app will look for DEEPSEEK_API_KEY in the environment if this is not provided) -
-b,--apibase: Base URL if you are using a custom deployment of DeepSeek. if it is not set, the official URL will be used. -
-m,--model: Specify the model to use for translation. deepseek-chat is probably the only sensible choice (and default).
-
-k,--apikey: Your Mistral API Key. (the app will look for MISTRAL_API_KEY in the environment if this is not provided) -
--server_url: URL if you are using a custom deployment of Mistral. if unset, the official URL will be used. -
-m,--model: Specify the model to use for translation. mistral-large-latest is recommended, the small models are not very reliable.
-
--deploymentname: Azure deployment name -
-k,--apikey: API key for your deployment. -
-b,--apibase: API backend base address. -
-a,--apiversion: Azure API version.
-
-k,--accesskey: Your AWS Access Key ID. Not required if it is set in the.envfile. -
-s,--secretkey: Your AWS Secret Access Key. Not required if it is set in the.envfile. -
-r,--region: AWS Region where Bedrock is available. You can check the list of regions here. For example:us-east-1oreu-west-1. -
-m,--model: The ID of the Bedrock model to use for translation. Examples includeamazon.titan-text-lite-v1oramazon.titan-text-express-v1.
-
-s,--server: The address the server is running on, including port (e.g. http://localhost:1234). Should be provided by the server -
-e,--endpoint: The API function to call on the server, e.g./v1/completions. Choose an appropriate endpoint for the model running on the server. -
-k,--apikey: API key if required (local servers shouldn't need an api key) -
-m,--model: The model to use for translation if required (for local servers this is probably determined by the server) -
--chat: Specify this argument if the endpoint expects requests in a conversation format - otherwise it is assumed to be a completion endpoint. -
--systemmessages: If using a conversation endpoint, translation instructions will be sent as the "system" user if this flag is specified.
LLM-Subtrans has support for proxies across most providers.
You can configure a proxy using the following arguments:
-
--proxy <URL>: Specify the proxy URL. Supports both HTTP and SOCKS proxies. Example:--proxy http://127.0.0.1:8888or--proxy socks5://127.0.0.1:1080 -
--proxycert <PATH>: Path to a custom CA certificate bundle (PEM format). This is required when using an intercepting proxy (likemitmproxyorFiddler) that uses a self-signed certificate. Example:--proxycert C:\Users\name\.mitmproxy\mitmproxy-ca-cert.pem
# Use a SOCKS proxy for OpenRouter
llm-subtrans --auto -l Spanish input.srt --proxy socks5://127.0.0.1:1080

# Use mitmdump with a custom certificate
llm-subtrans --auto -l French input.srt --proxy http://127.0.0.1:8080 --proxycert ./mitmproxy-ca-cert.pemYou can process files with the following directory structure:
  #   -SRT
  #   --fold1
  #   ---1.srt
  #   ---2.srt
  #   ...
  #   --fold2
  #   ---1.srt
  #   ---2.srt
  #   ...
Use the batch_translate.py script to process multiple subtitle files:
You can modify the DEFAULT_OPTIONS values directly in the script file, or use a combination of script defaults and command line overrides.
# Preview mode to test settings without making API calls
python scripts/batch_translate.py --preview

# Basic usage with command line arguments
python scripts/batch_translate.py ./subtitles ./translated --provider openai --model gpt-5-mini --apikey sk-... --language Spanish

# Override output format
python scripts/batch_translate.py ./subtitles ./translated --provider openai --output-format srt

# Use additional options
python scripts/batch_translate.py ./subtitles ./translated --provider openai --option max_batch_size=40 --option preprocess_subtitles=falseIt is recommended to use an IDE such as Visual Studio Code to run the program when installed from source, and set up a launch.json file to specify the arguments.
Note: Remember to activate the virtual environment every time you work on the project.
Contributions from the community are welcome! To contribute, follow these steps:
Fork the repository onto your own GitHub account.
Clone the repository onto your local machine using the following command:
git clone https://github.com/your_username/llm-subtrans.gitCreate a new branch for your changes using the following command:
git checkout -b feature/your-new-featureInstall pyright as a pre-commit hook (optional but encouraged):
# Install pyright for type checking
pip install pyright

# Install git hooks (runs type checking before commits)
# Windows:
hooks\install.bat

# Linux/Mac:
./hooks/install.sh
Make your changes to the code and commit them with a descriptive commit message.
Push your changes to your forked repository.
Submit a pull request to the main LLM-Subtrans repository.
LLM-Subtrans uses GNU gettext for UI localization.
- Template (POT):
locales/gui-subtrans.pot - Per‑language catalogs:
locales/<lang>/LC_MESSAGES/gui-subtrans.po - Compiled catalogs:
locales/<lang>/LC_MESSAGES/gui-subtrans.mo
Strings in the code are marked with helpers (see codebase):
-
_("text")for simple strings -
tr("context", "text")for contextualized strings
Contributions are very welcome - you can add a new localization in minutes! See docs/localization_contributing.md for detailed instructions (tools, workflow, etc).
This project uses several useful libraries:
- srt (https://github.com/cdown/srt)
- pysubs2 (https://github.com/tkarabela/pysubs2)
- requests (https://github.com/psf/requests)
- regex (https://github.com/mrabarnett/mrab-regex)
- httpx (https://github.com/projectdiscovery/httpx)
- babel (https://github.com/python-babel/)
Translation providers:
- openai (https://platform.openai.com/docs/libraries/python-bindings)
- google-genai (https://github.com/googleapis/python-genai)
- anthropic (https://github.com/anthropics/anthropic-sdk-python)
- mistralai (https://github.com/mistralai/client-python)
- boto3 (Amazon Bedrock) (https://github.com/boto/boto3)
For the GUI:
- pyside6 (https://wiki.qt.io/Qt_for_Python)
- blinker (https://pythonhosted.org/blinker/)
- darkdetect (https://github.com/albertosottile/darkdetect)
- appdirs (https://github.com/ActiveState/appdirs)
For bundled versions:
- python (https://www.python.org/)
- pyinstaller (https://pyinstaller.org/)
Version 1.3 added OpenRouter as the default translation service, opening up access to many more
Version 1.2 added localization for the GUI and support for the GPT-5 model line.
Version 1.1 added support for a more flexible translation format for use with custom instructions.
Version 1.0 is (ironically) a minor update, updating the major version to 1.0 because the project has been stable for some time.
Version 0.7 introduced optional post-processing of translated subtitles to try to fix some of the common issues with LLM-translated subtitles (e.g. adding line breaks), along with new default instructions that tend to produce fewer errors.
Version 0.6 changes the architecture to a provider-based system, allowing multiple AI services to be used as translators. Settings are compartmentalised for each provider. For the intial release the only supported provider is OpenAI.
Version 0.5 adds support for gpt-instruct models and a refactored code base to support different translation engines. For most users, the recommendation is still to use the gpt-3.5-turbo-16k model with batch sizes of between (10,100) lines, for the best combination of performance/cost and translation quality.
Version 0.4 features significant optimisations to the GUI making it more responsive and usable, along with numerous bug fixes.
Version 0.3 featured a major effort to bring the GUI up to full functionality and usability, including adding options dialogs and more, plus many bug fixes.
Version 0.2 employs a new prompting approach that greatly reduces desyncs caused by GPT merging together source lines in the translation. This can reduce the naturalness of the translation when the source and target languages have very different grammar, but it provides a better base for a human to polish the output.
The instructions have also been made more detailed, with multiple examples of correct output for GPT to reference, and the generation of summaries has been improved so that GPT is better able to understand the context of the batch it is translating. Additionally, double-clicking a scene or batch now allows the summary to be edited by hand, which can greatly improve the results of a retranslation and of subsequent batches or scenes. Individually lines can also be edited by double-clicking them.
LLM-Subtrans is licensed under the MIT License. See LICENSE for the 3rd party library licenses.
For Tasks:
Click tags to check more tools for each tasksFor Jobs:
Alternative AI tools for llm-subtrans
Similar Open Source Tools
llm-subtrans
LLM-Subtrans is an open source subtitle translator that utilizes LLMs as a translation service. It supports translating subtitles between any language pairs supported by the language model. The application offers multiple subtitle formats support through a pluggable system, including .srt, .ssa/.ass, and .vtt files. Users can choose to use the packaged release for easy usage or install from source for more control over the setup. The tool requires an active internet connection as subtitles are sent to translation service providers' servers for translation.
gpt-subtrans
GPT-Subtrans is an open-source subtitle translator that utilizes large language models (LLMs) as translation services. It supports translation between any language pairs that the language model supports. Note that GPT-Subtrans requires an active internet connection, as subtitles are sent to the provider's servers for translation, and their privacy policy applies.
Open-LLM-VTuber
Open-LLM-VTuber is a project in early stages of development that allows users to interact with Large Language Models (LLM) using voice commands and receive responses through a Live2D talking face. The project aims to provide a minimum viable prototype for offline use on macOS, Linux, and Windows, with features like long-term memory using MemGPT, customizable LLM backends, speech recognition, and text-to-speech providers. Users can configure the project to chat with LLMs, choose different backend services, and utilize Live2D models for visual representation. The project supports perpetual chat, offline operation, and GPU acceleration on macOS, addressing limitations of existing solutions on macOS.
aisheets
Hugging Face AI Sheets is an open-source tool for building, enriching, and transforming datasets using AI models with no code. It can be deployed locally or on the Hub, providing access to thousands of open models. Users can easily generate datasets, run data generation scripts, and customize inference endpoints for text generation. The tool supports custom LLMs and offers advanced configuration options for authentication, inference, and miscellaneous settings. With AI Sheets, users can leverage the power of AI models without writing any code, making dataset management and transformation efficient and accessible.

CLI
Bito CLI provides a command line interface to the Bito AI chat functionality, allowing users to interact with the AI through commands. It supports complex automation and workflows, with features like long prompts and slash commands. Users can install Bito CLI on Mac, Linux, and Windows systems using various methods. The tool also offers configuration options for AI model type, access key management, and output language customization. Bito CLI is designed to enhance user experience in querying AI models and automating tasks through the command line interface.
warc-gpt
WARC-GPT is an experimental retrieval augmented generation pipeline for web archive collections. It allows users to interact with WARC files, extract text, generate text embeddings, visualize embeddings, and interact with a web UI and API. The tool is highly customizable, supporting various LLMs, providers, and embedding models. Users can configure the application using environment variables, ingest WARC files, start the server, and interact with the web UI and API to search for content and generate text completions. WARC-GPT is designed for exploration and experimentation in exploring web archives using AI.
jaison-core
J.A.I.son is a Python project designed for generating responses using various components and applications. It requires specific plugins like STT, T2T, TTSG, and TTSC to function properly. Users can customize responses, voice, and configurations. The project provides a Discord bot, Twitch events and chat integration, and VTube Studio Animation Hotkeyer. It also offers features for managing conversation history, training AI models, and monitoring conversations.
MultiPL-E
MultiPL-E is a system for translating unit test-driven neural code generation benchmarks to new languages. It is part of the BigCode Code Generation LM Harness and allows for evaluating Code LLMs using various benchmarks. The tool supports multiple versions with improvements and new language additions, providing a scalable and polyglot approach to benchmarking neural code generation. Users can access a tutorial for direct usage and explore the dataset of translated prompts on the Hugging Face Hub.

Mapperatorinator
Mapperatorinator is a multi-model framework that uses spectrogram inputs to generate fully featured osu! beatmaps for all gamemodes and assist modding beatmaps. The project aims to automatically generate rankable quality osu! beatmaps from any song with a high degree of customizability. The tool is built upon osuT5 and osu-diffusion, utilizing GPU compute and instances on vast.ai for development. Users can responsibly use AI in their beatmaps with this tool, ensuring disclosure of AI usage. Installation instructions include cloning the repository, creating a virtual environment, and installing dependencies. The tool offers a Web GUI for user-friendly experience and a Command-Line Inference option for advanced configurations. Additionally, an Interactive CLI script is available for terminal-based workflow with guided setup. The tool provides generation tips and features MaiMod, an AI-driven modding tool for osu! beatmaps. Mapperatorinator tokenizes beatmaps, utilizes a model architecture based on HF Transformers Whisper model, and offers multitask training format for conditional generation. The tool ensures seamless long generation, refines coordinates with diffusion, and performs post-processing for improved beatmap quality. Super timing generator enhances timing accuracy, and LoRA fine-tuning allows adaptation to specific styles or gamemodes. The project acknowledges credits and related works in the osu! community.

aider-composer
Aider Composer is a VSCode extension that integrates Aider into your development workflow. It allows users to easily add and remove files, toggle between read-only and editable modes, review code changes, use different chat modes, and reference files in the chat. The extension supports multiple models, code generation, code snippets, and settings customization. It has limitations such as lack of support for multiple workspaces, Git repository features, linting, testing, voice features, in-chat commands, and configuration options.
PolyMind
PolyMind is a multimodal, function calling powered LLM webui designed for various tasks such as internet searching, image generation, port scanning, Wolfram Alpha integration, Python interpretation, and semantic search. It offers a plugin system for adding extra functions and supports different models and endpoints. The tool allows users to interact via function calling and provides features like image input, image generation, and text file search. The application's configuration is stored in a `config.json` file with options for backend selection, compatibility mode, IP address settings, API key, and enabled features.
SeaGOAT
SeaGOAT is a local search tool that leverages vector embeddings to enable you to search your codebase semantically. It is designed to work on Linux, macOS, and Windows and can process files in various formats, including text, Markdown, Python, C, C++, TypeScript, JavaScript, HTML, Go, Java, PHP, and Ruby. SeaGOAT uses a vector database called ChromaDB and a local vector embedding engine to provide fast and accurate search results. It also supports regular expression/keyword-based matches. SeaGOAT is open-source and licensed under an open-source license, and users are welcome to examine the source code, raise concerns, or create pull requests to fix problems.

cognita
Cognita is an open-source framework to organize your RAG codebase along with a frontend to play around with different RAG customizations. It provides a simple way to organize your codebase so that it becomes easy to test it locally while also being able to deploy it in a production ready environment. The key issues that arise while productionizing RAG system from a Jupyter Notebook are: 1. **Chunking and Embedding Job** : The chunking and embedding code usually needs to be abstracted out and deployed as a job. Sometimes the job will need to run on a schedule or be trigerred via an event to keep the data updated. 2. **Query Service** : The code that generates the answer from the query needs to be wrapped up in a api server like FastAPI and should be deployed as a service. This service should be able to handle multiple queries at the same time and also autoscale with higher traffic. 3. **LLM / Embedding Model Deployment** : Often times, if we are using open-source models, we load the model in the Jupyter notebook. This will need to be hosted as a separate service in production and model will need to be called as an API. 4. **Vector DB deployment** : Most testing happens on vector DBs in memory or on disk. However, in production, the DBs need to be deployed in a more scalable and reliable way. Cognita makes it really easy to customize and experiment everything about a RAG system and still be able to deploy it in a good way. It also ships with a UI that makes it easier to try out different RAG configurations and see the results in real time. You can use it locally or with/without using any Truefoundry components. However, using Truefoundry components makes it easier to test different models and deploy the system in a scalable way. Cognita allows you to host multiple RAG systems using one app. ### Advantages of using Cognita are: 1. A central reusable repository of parsers, loaders, embedders and retrievers. 2. Ability for non-technical users to play with UI - Upload documents and perform QnA using modules built by the development team. 3. Fully API driven - which allows integration with other systems. > If you use Cognita with Truefoundry AI Gateway, you can get logging, metrics and feedback mechanism for your user queries. ### Features: 1. Support for multiple document retrievers that use `Similarity Search`, `Query Decompostion`, `Document Reranking`, etc 2. Support for SOTA OpenSource embeddings and reranking from `mixedbread-ai` 3. Support for using LLMs using `Ollama` 4. Support for incremental indexing that ingests entire documents in batches (reduces compute burden), keeps track of already indexed documents and prevents re-indexing of those docs.
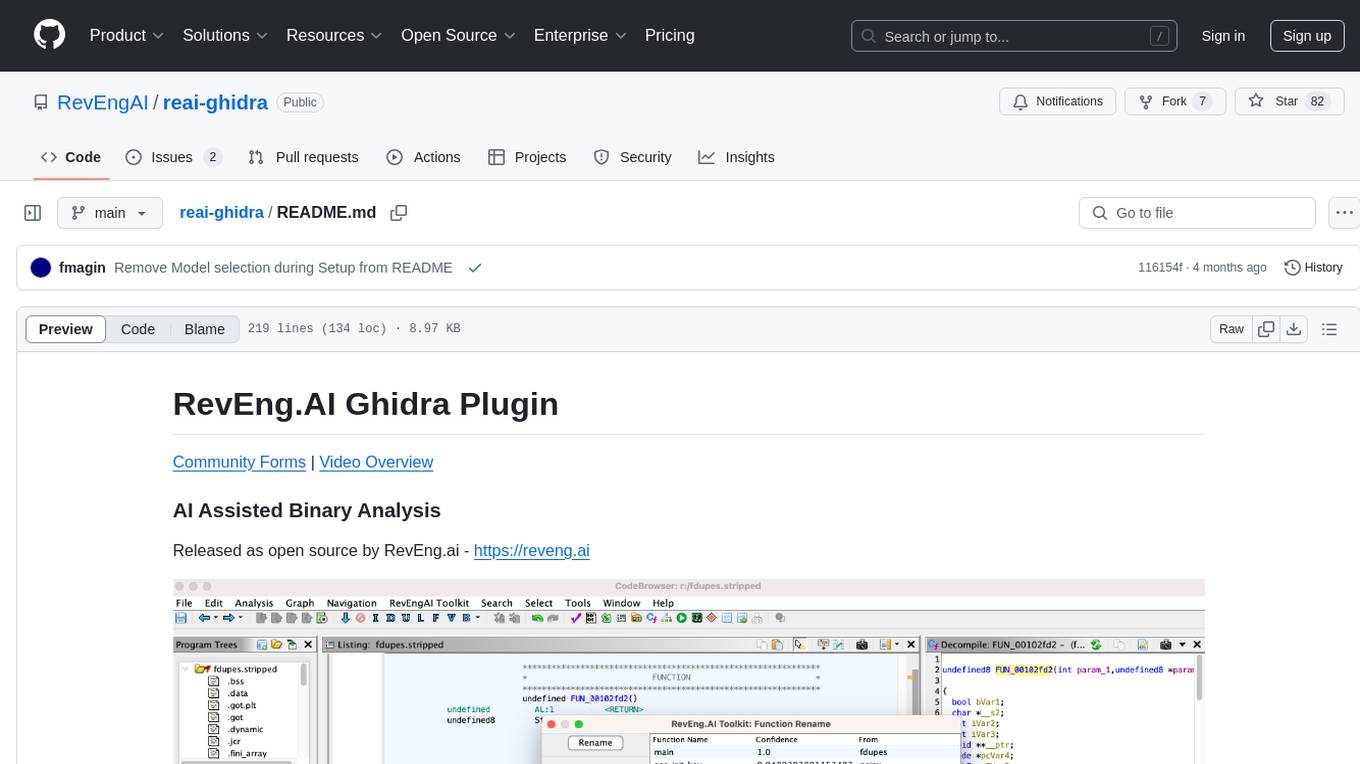
reai-ghidra
The RevEng.AI Ghidra Plugin by RevEng.ai allows users to interact with their API within Ghidra for Binary Code Similarity analysis to aid in Reverse Engineering stripped binaries. Users can upload binaries, rename functions above a confidence threshold, and view similar functions for a selected function.
0chain
Züs is a high-performance cloud on a fast blockchain offering privacy and configurable uptime. It uses erasure code to distribute data between data and parity servers, allowing flexibility for IT managers to design for security and uptime. Users can easily share encrypted data with business partners through a proxy key sharing protocol. The ecosystem includes apps like Blimp for cloud migration, Vult for personal cloud storage, and Chalk for NFT artists. Other apps include Bolt for secure wallet and staking, Atlus for blockchain explorer, and Chimney for network participation. The QoS protocol challenges providers based on response time, while the privacy protocol enables secure data sharing. Züs supports hybrid and multi-cloud architectures, allowing users to improve regulatory compliance and security requirements.
geti-sdk
The Intel® Geti™ SDK is a python package that enables teams to rapidly develop AI models by easing the complexities of model development and enhancing collaboration between teams. It provides tools to interact with an Intel® Geti™ server via the REST API, allowing for project creation, downloading, uploading, deploying for local inference with OpenVINO, setting project and model configuration, launching and monitoring training jobs, and media upload and prediction. The SDK also includes tutorial-style Jupyter notebooks demonstrating its usage.
For similar tasks
llm-subtrans
LLM-Subtrans is an open source subtitle translator that utilizes LLMs as a translation service. It supports translating subtitles between any language pairs supported by the language model. The application offers multiple subtitle formats support through a pluggable system, including .srt, .ssa/.ass, and .vtt files. Users can choose to use the packaged release for easy usage or install from source for more control over the setup. The tool requires an active internet connection as subtitles are sent to translation service providers' servers for translation.
open-autonomy
Open Autonomy is a framework for creating agent services that run as a multi-agent-system and offer enhanced functionalities on-chain. It enables executing complex operations like machine-learning algorithms in a decentralized, trust-minimized, transparent, and robust manner.
paperbanana
PaperBanana is an automated academic illustration tool designed for AI scientists. It implements an agentic framework for generating publication-quality academic diagrams and statistical plots from text descriptions. The tool utilizes a two-phase multi-agent pipeline with iterative refinement, Gemini-based VLM planning, and image generation. It offers a CLI, Python API, and MCP server for IDE integration, along with Claude Code skills for generating diagrams, plots, and evaluating diagrams. PaperBanana is not affiliated with or endorsed by the original authors or Google Research, and it may differ from the original system described in the paper.
gpt-subtrans
GPT-Subtrans is an open-source subtitle translator that utilizes large language models (LLMs) as translation services. It supports translation between any language pairs that the language model supports. Note that GPT-Subtrans requires an active internet connection, as subtitles are sent to the provider's servers for translation, and their privacy policy applies.
chatgpt-subtitle-translator
This tool utilizes the OpenAI ChatGPT API to translate text, with a focus on line-based translation, particularly for SRT subtitles. It optimizes token usage by removing SRT overhead and grouping text into batches, allowing for arbitrary length translations without excessive token consumption while maintaining a one-to-one match between line input and output.
TeroSubtitler
Tero Subtitler is an open source, cross-platform, and free subtitle editing software with a user-friendly interface. It offers fully fledged editing with SMPTE and MEDIA modes, support for various subtitle formats, multi-level undo/redo, search and replace, auto-backup, source and transcription modes, translation memory, audiovisual preview, timeline with waveform visualizer, manipulation tools, formatting options, quality control features, translation and transcription capabilities, validation tools, automation for correcting errors, and more. It also includes features like exporting subtitles to MP3, importing/exporting Blu-ray SUP format, generating blank video, generating video with hardcoded subtitles, video dubbing, and more. The tool utilizes powerful multimedia playback engines like mpv, advanced audio/video manipulation tools like FFmpeg, tools for automatic transcription like whisper.cpp/Faster-Whisper, auto-translation API like Google Translate, and ElevenLabs TTS for video dubbing.
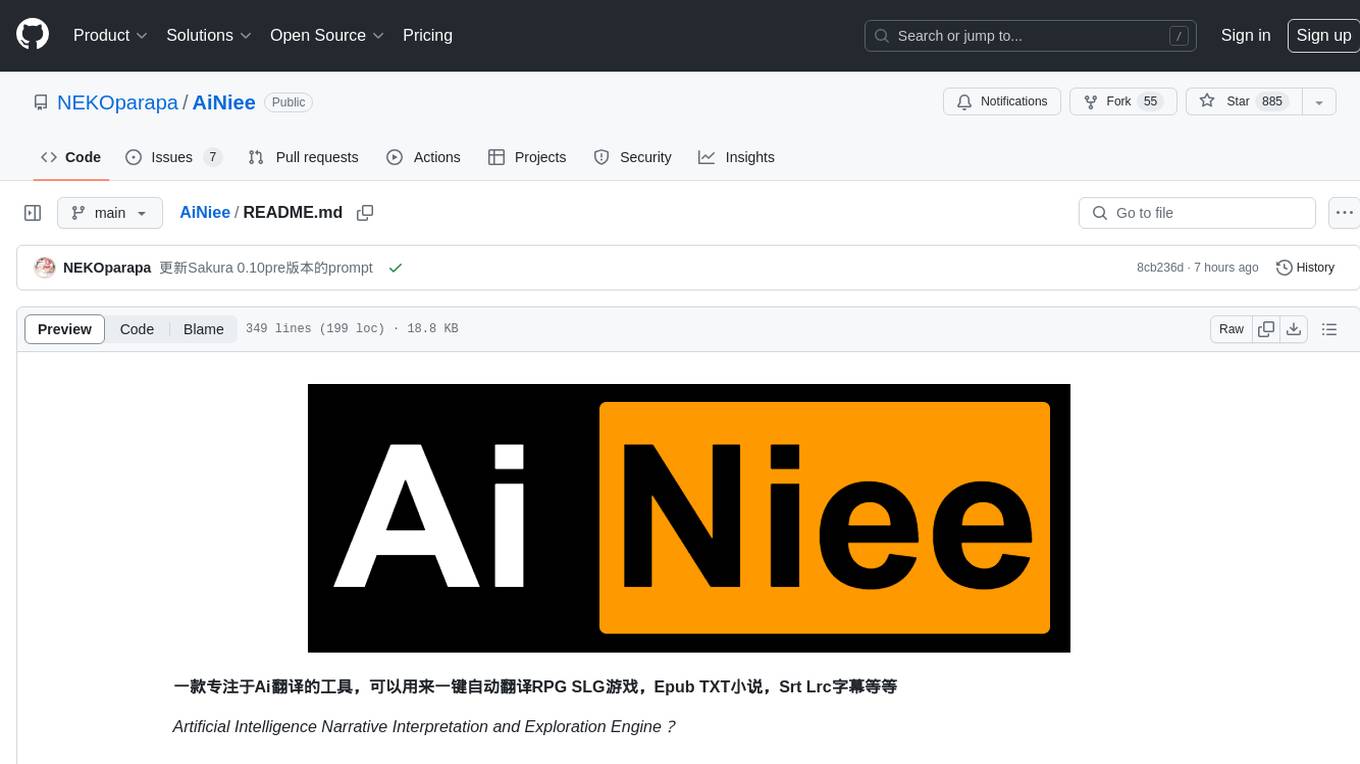
AiNiee
AiNiee is a tool focused on AI translation, capable of automatically translating RPG SLG games, Epub TXT novels, Srt Lrc subtitles, and more. It provides features for configuring AI platforms, proxies, and translation settings. Users can utilize this tool for translating game scripts, novels, and subtitles efficiently. The tool supports multiple AI platforms and offers tutorials for beginners. It also includes functionalities for extracting and translating game text, with options for customizing translation projects and managing translation tasks effectively.
video2blog
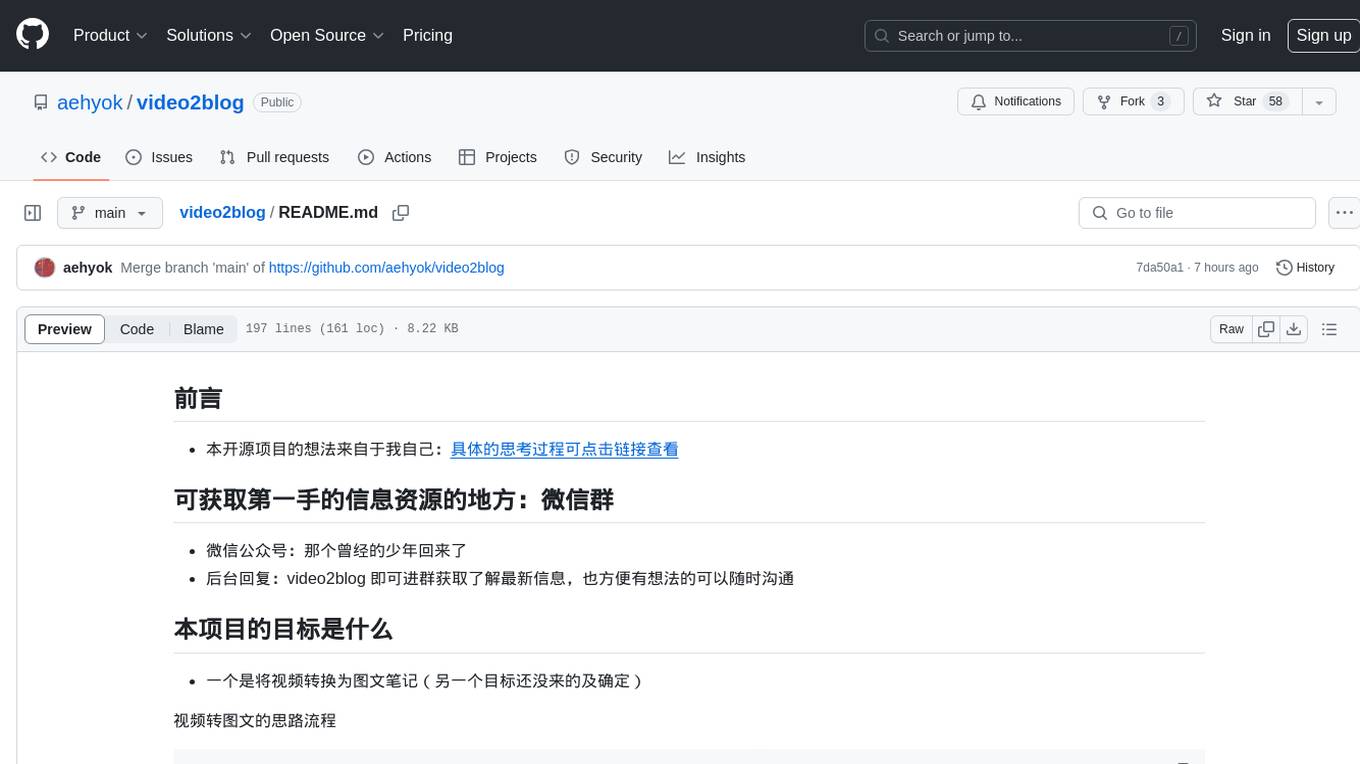
video2blog is an open-source project aimed at converting videos into textual notes. The tool follows a process of extracting video information using yt-dlp, downloading the video, downloading subtitles if available, translating subtitles if not in Chinese, generating Chinese subtitles using whisper if no subtitles exist, converting subtitles to articles using gemini, and manually inserting images from the video into the article. The tool provides a solution for creating blog content from video resources, enhancing accessibility and content creation efficiency.
For similar jobs
sweep
Sweep is an AI junior developer that turns bugs and feature requests into code changes. It automatically handles developer experience improvements like adding type hints and improving test coverage.
teams-ai
The Teams AI Library is a software development kit (SDK) that helps developers create bots that can interact with Teams and Microsoft 365 applications. It is built on top of the Bot Framework SDK and simplifies the process of developing bots that interact with Teams' artificial intelligence capabilities. The SDK is available for JavaScript/TypeScript, .NET, and Python.
ai-guide
This guide is dedicated to Large Language Models (LLMs) that you can run on your home computer. It assumes your PC is a lower-end, non-gaming setup.

classifai
Supercharge WordPress Content Workflows and Engagement with Artificial Intelligence. Tap into leading cloud-based services like OpenAI, Microsoft Azure AI, Google Gemini and IBM Watson to augment your WordPress-powered websites. Publish content faster while improving SEO performance and increasing audience engagement. ClassifAI integrates Artificial Intelligence and Machine Learning technologies to lighten your workload and eliminate tedious tasks, giving you more time to create original content that matters.
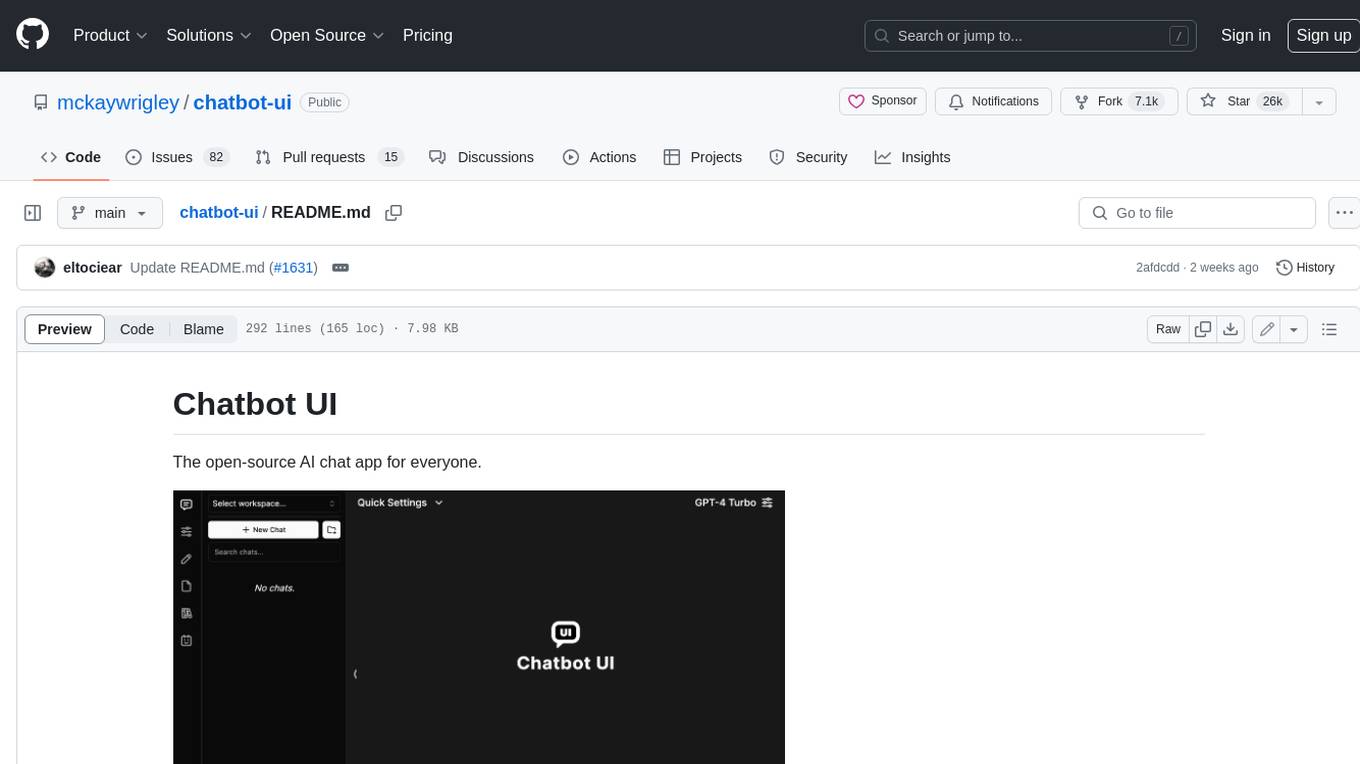
chatbot-ui
Chatbot UI is an open-source AI chat app that allows users to create and deploy their own AI chatbots. It is easy to use and can be customized to fit any need. Chatbot UI is perfect for businesses, developers, and anyone who wants to create a chatbot.
BricksLLM
BricksLLM is a cloud native AI gateway written in Go. Currently, it provides native support for OpenAI, Anthropic, Azure OpenAI and vLLM. BricksLLM aims to provide enterprise level infrastructure that can power any LLM production use cases. Here are some use cases for BricksLLM: * Set LLM usage limits for users on different pricing tiers * Track LLM usage on a per user and per organization basis * Block or redact requests containing PIIs * Improve LLM reliability with failovers, retries and caching * Distribute API keys with rate limits and cost limits for internal development/production use cases * Distribute API keys with rate limits and cost limits for students
uAgents
uAgents is a Python library developed by Fetch.ai that allows for the creation of autonomous AI agents. These agents can perform various tasks on a schedule or take action on various events. uAgents are easy to create and manage, and they are connected to a fast-growing network of other uAgents. They are also secure, with cryptographically secured messages and wallets.
griptape
Griptape is a modular Python framework for building AI-powered applications that securely connect to your enterprise data and APIs. It offers developers the ability to maintain control and flexibility at every step. Griptape's core components include Structures (Agents, Pipelines, and Workflows), Tasks, Tools, Memory (Conversation Memory, Task Memory, and Meta Memory), Drivers (Prompt and Embedding Drivers, Vector Store Drivers, Image Generation Drivers, Image Query Drivers, SQL Drivers, Web Scraper Drivers, and Conversation Memory Drivers), Engines (Query Engines, Extraction Engines, Summary Engines, Image Generation Engines, and Image Query Engines), and additional components (Rulesets, Loaders, Artifacts, Chunkers, and Tokenizers). Griptape enables developers to create AI-powered applications with ease and efficiency.