
MCP-Chinese-Getting-Started-Guide
Model Context Protocol(MCP) 编程极速入门
Stars: 513
The Model Context Protocol (MCP) is an innovative open-source protocol that redefines the interaction between large language models (LLMs) and the external world. MCP provides a standardized approach for any large language model to easily connect to various data sources and tools, enabling seamless access and processing of information. MCP acts as a USB-C interface for AI applications, offering a standardized way for AI models to connect to different data sources and tools. The core functionalities of MCP include Resources, Prompts, Tools, Sampling, Roots, and Transports. This guide focuses on developing an MCP server for network search using Python and uv management. It covers initializing the project, installing dependencies, creating a server, implementing tool execution methods, and running the server. Additionally, it explains how to debug the MCP server using the Inspector tool, how to call tools from the server, and how to connect multiple MCP servers. The guide also introduces the Sampling feature, which allows pre- and post-tool execution operations, and demonstrates how to integrate MCP servers into LangChain for AI applications.
README:
[TOC]
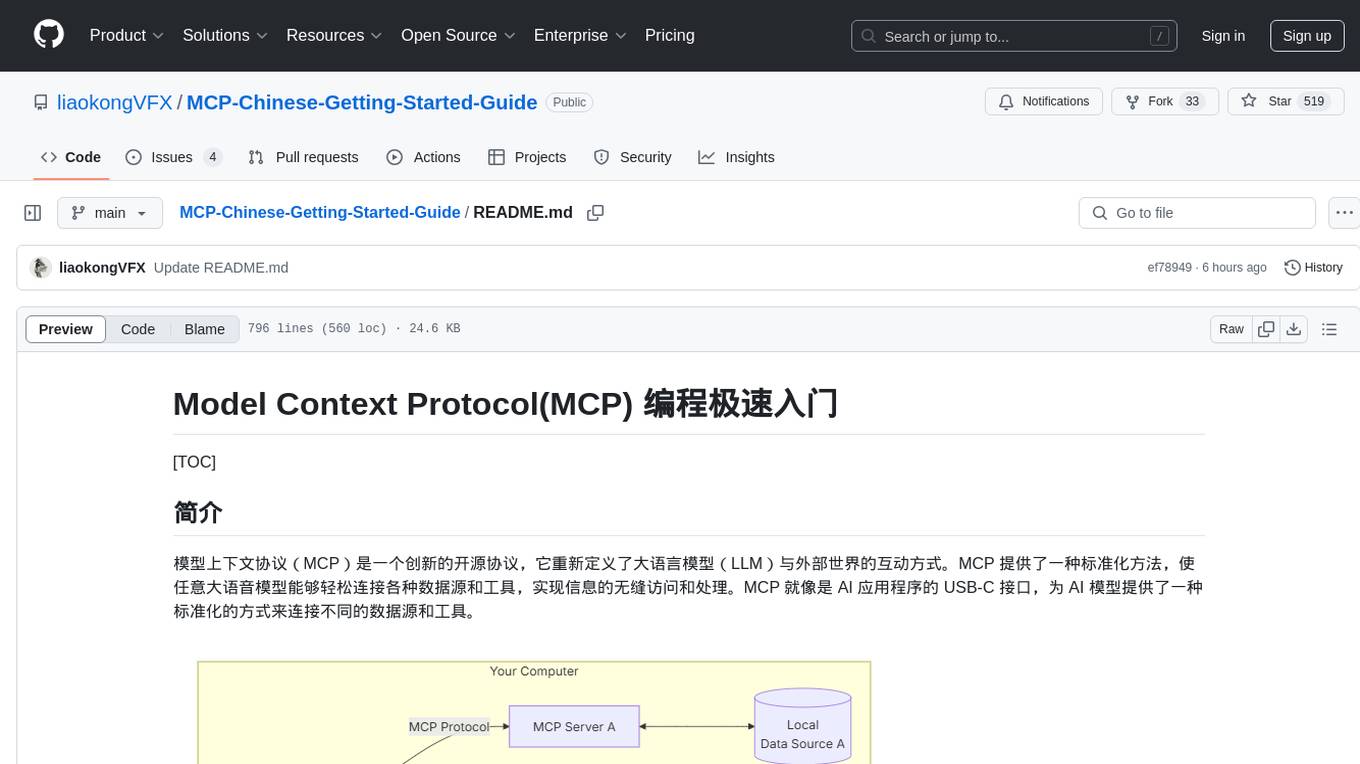
模型上下文协议(MCP)是一个创新的开源协议,它重新定义了大语言模型(LLM)与外部世界的互动方式。MCP 提供了一种标准化方法,使任意大语音模型能够轻松连接各种数据源和工具,实现信息的无缝访问和处理。MCP 就像是 AI 应用程序的 USB-C 接口,为 AI 模型提供了一种标准化的方式来连接不同的数据源和工具。

MCP 有以下几个核心功能:
- Resources 资源
- Prompts 提示词
- Tools 工具
- Sampling 采样
- Roots 根目录
- Transports 传输层
因为大部分功能其实都是服务于 Claude 客户端的,本文更希望编写的 MCP 服务器服务与通用大语言模型,所以本文将会主要以“工具”为重点,其他功能会放到最后进行简单讲解。
其中 MCP 的传输层支持了 2 种协议的实现:stdio(标准输入/输出)和 SSE(服务器发送事件),因为 stdio 更为常用,所以本文会以 stdio 为例进行讲解。
本文将会使用 3.11 的 Python 版本,并使用 uv 来管理 Python 项目。同时代码将会在文末放到 Github 上,废话不多说,我们这就开始吧~
在这一小节中,我们将会实现一个用于网络搜索的服务器。首先,我们先来通过 uv 初始化我们的项目。
uv 官方文档:https://docs.astral.sh/uv/
# 初始化项目
uv init mcp_getting_started
cd mcp_getting_started

# 创建虚拟环境并进入虚拟环境
uv venv
.venv\Scripts\activate.bat

# 安装依赖
uv add "mcp[cli]" httpx openai
然后我们来创建一个叫 web_search.py 文件,来实现我们的服务。MCP 为我们提供了2个对象:mcp.server.FastMCP 和 mcp.server.Server,mcp.server.FastMCP 是更高层的封装,我们这里就来使用它。
import httpx
from mcp.server import FastMCP

# # 初始化 FastMCP 服务器
app = FastMCP('web-search')
实现执行的方法非常简单,MCP 为我们提供了一个 @mcp.tool() 我们只需要将实现函数用这个装饰器装饰即可。函数名称将作为工具名称,参数将作为工具参数,并通过注释来描述工具与参数,以及返回值。
这里我们直接使用智普的接口,它这个接口不仅能帮我们搜索到相关的结果链接,并帮我们生成了对应链接中文章总结后的内容的,并且现阶段是免费的,非常适合我们。
官方文档:https://bigmodel.cn/dev/api/search-tool/web-search-pro
API Key 生成地址:https://bigmodel.cn/usercenter/proj-mgmt/apikeys
@app.tool()
async def web_search(query: str) -> str:
    """
    搜索互联网内容

    Args:
        query: 要搜索内容

    Returns:
        搜索结果的总结
    """

    async with httpx.AsyncClient() as client:
        response = await client.post(
            'https://open.bigmodel.cn/api/paas/v4/tools',
            headers={'Authorization': '换成你自己的API KEY'},
            json={
                'tool': 'web-search-pro',
                'messages': [
                    {'role': 'user', 'content': query}
                ],
                'stream': False
            }
        )

        res_data = []
        for choice in response.json()['choices']:
            for message in choice['message']['tool_calls']:
                search_results = message.get('search_result')
                if not search_results:
                    continue
                for result in search_results:
                    res_data.append(result['content'])

        return '\n\n\n'.join(res_data)
最后,我们来添加运行服务器的代码。
if __name__ == "__main__":
app.run(transport='stdio')此时,我们就完成了 MCP 服务端的编写。下面,我们来使用官方提供的 Inspector 可视化工具来调试我们的服务器。
我们可以通过两种方法来运行Inspector:
请先确保已经安装了 node 环境。
通过 npx:
npx -y @modelcontextprotocol/inspector <command> <arg1> <arg2>我们的这个代码运行命令为:
npx -y @modelcontextprotocol/inspector uv run web_search.py通过 mcp dev 来运行:
mcp dev PYTHONFILE我们的这个代码运行命令为:
mcp dev web_search.py当出现如下提示则代表运行成功。

然后,我们打开这个地址,点击左侧的 Connect 按钮,即可连接我们刚写的服务。然后我们切换到 Tools 栏中,点击 List Tools 按钮即可看到我们刚写的工具,我们就可以开始进行调试啦。

首先,我们先来看看如何在服务端如何调用我们刚才开发的 MCP 服务器中的工具。
import asyncio

from mcp.client.stdio import stdio_client
from mcp import ClientSession, StdioServerParameters

# 为 stdio 连接创建服务器参数
server_params = StdioServerParameters(
    # 服务器执行的命令,这里我们使用 uv 来运行 web_search.py
    command='uv',
    # 运行的参数
    args=['run', 'web_search.py'],
    # 环境变量,默认为 None,表示使用当前环境变量
    # env=None
)


async def main():
    # 创建 stdio 客户端
    async with stdio_client(server_params) as (stdio, write):
        # 创建 ClientSession 对象
        async with ClientSession(stdio, write) as session:
            # 初始化 ClientSession
            await session.initialize()

            # 列出可用的工具
            response = await session.list_tools()
            print(response)

            # 调用工具
            response = await session.call_tool('web_search', {'query': '今天杭州天气'})
            print(response)


if __name__ == '__main__':
    asyncio.run(main())
因为我们的python脚本需要在虚拟环境中才能运行,所以这里我们通过 uv 来启动我们的脚本。
下面我们来通过一个小例子来看看如何让 DeepSeek 来调用我们 MCP 服务器中的方法。
这里我们会用 dotenv 来管理我们相关的环境变量。.env 文件内容如下:
OPENAI_API_KEY=sk-89baxxxxxxxxxxxxxxxxxx
OPENAI_BASE_URL=https://api.deepseek.com
OPENAI_MODEL=deepseek-chat
首先我们来编写我们的 MCPClient 类。
import json
import asyncio
import os
from typing import Optional
from contextlib import AsyncExitStack

from openai import OpenAI
from dotenv import load_dotenv

from mcp import ClientSession, StdioServerParameters
from mcp.client.stdio import stdio_client


load_dotenv()


class MCPClient:
    def __init__(self):
        self.session: Optional[ClientSession] = None
        self.exit_stack = AsyncExitStack()
        self.client = OpenAI()
然后我们添加 connect_to_server 方法来初始化我们的 MCP 服务器的 session。
    async def connect_to_server(self):
        server_params = StdioServerParameters(
            command='uv',
            args=['run', 'web_search.py'],
            env=None
        )

        stdio_transport = await self.exit_stack.enter_async_context(
            stdio_client(server_params))
        stdio, write = stdio_transport
        self.session = await self.exit_stack.enter_async_context(
            ClientSession(stdio, write))

        await self.session.initialize()
然后我们再实现一个用于调用 MCP 服务器的方法来处理和 DeepSeek 之间的交互。
    async def process_query(self, query: str) -> str:
        # 这里需要通过 system prompt 来约束一下大语言模型,
        # 否则会出现不调用工具,自己乱回答的情况
        system_prompt = (
            "You are a helpful assistant."
            "You have the function of online search. "
            "Please MUST call web_search tool to search the Internet content before answering."
            "Please do not lose the user's question information when searching,"
            "and try to maintain the completeness of the question content as much as possible."
            "When there is a date related question in the user's question,"
            "please use the search function directly to search and PROHIBIT inserting specific time."
        )

        messages = [
            {"role": "system", "content": system_prompt},
            {"role": "user", "content": query}
        ]

        # 获取所有 mcp 服务器 工具列表信息
        response = await self.session.list_tools()
        # 生成 function call 的描述信息
        available_tools = [{
            "type": "function",
            "function": {
                "name": tool.name,
                "description": tool.description,
                "input_schema": tool.inputSchema
            }
        } for tool in response.tools]

        # 请求 deepseek,function call 的描述信息通过 tools 参数传入
        response = self.client.chat.completions.create(
            model=os.getenv("OPENAI_MODEL"),
            messages=messages,
            tools=available_tools
        )

        # 处理返回的内容
        content = response.choices[0]
        if content.finish_reason == "tool_calls":
            # 如何是需要使用工具,就解析工具
            tool_call = content.message.tool_calls[0]
            tool_name = tool_call.function.name
            tool_args = json.loads(tool_call.function.arguments)

            # 执行工具
            result = await self.session.call_tool(tool_name, tool_args)
            print(f"\n\n[Calling tool {tool_name} with args {tool_args}]\n\n")

            # 将 deepseek 返回的调用哪个工具数据和工具执行完成后的数据都存入messages中
            messages.append(content.message.model_dump())
            messages.append({
                "role": "tool",
                "content": result.content[0].text,
                "tool_call_id": tool_call.id,
            })

            # 将上面的结果再返回给 deepseek 用于生产最终的结果
            response = self.client.chat.completions.create(
                model=os.getenv("OPENAI_MODEL"),
                messages=messages,
            )
            return response.choices[0].message.content

        return content.message.content
接着,我们来实现循环提问和最后退出后关闭session的操作。
    async def chat_loop(self):
        while True:
            try:
                query = input("\nQuery: ").strip()

                if query.lower() == 'quit':
                    break

                response = await self.process_query(query)
                print("\n" + response)

            except Exception as e:
                import traceback
                traceback.print_exc()

    async def cleanup(self):
        """Clean up resources"""
        await self.exit_stack.aclose()
最后,我们来完成运行这个客户端相关的代码
async def main():
    client = MCPClient()
    try:
        await client.connect_to_server()
        await client.chat_loop()
    finally:
        await client.cleanup()


if __name__ == "__main__":
    import sys

    asyncio.run(main())
这是一个最精简的代码,里面没有实现记录上下文消息等功能,只是为了用最简单的代码来了解如何通过大语言模型来调动 CMP 服务器。这里只演示了如何连接单服务器,如果你期望连接多个 MCP 服务器,无非就是循环一下 connect_to_server 中的代码,可以将他们封装成一个类,然后将所有的 MCP 服务器中的工具循环遍历生成一个大的 available_tools,然后在通过大语言模型的返回结果进行调用即可,这里就不再赘述了。
MCP 还为我们提供了一个 Sampling 的功能,这个如果从字面来理解会让人摸不到头脑,但实际上这个功能就给了我们一个在执行工具的前后的接口,我们可以在工具执行前后来执行一些操作。比如,当调用本地文件的删除的工具的时候,肯定是期望我们确认后再进行删除。那么,此时就可以使用这个功能。
下面我们就来实现这个人工监督的小功能。
首先,我们来创建个模拟拥有删除文件的 CMP 服务器:
# 服务端
from mcp.server import FastMCP
from mcp.types import SamplingMessage, TextContent

app = FastMCP('file_server')


@app.tool()
async def delete_file(file_path: str):
    # 创建 SamplingMessage 用于触发 sampling callback 函数
    result = await app.get_context().session.create_message(
        messages=[
            SamplingMessage(
                role='user', content=TextContent(
                    type='text', text=f'是否要删除文件: {file_path} (Y)')
            )
        ],
        max_tokens=100
    )

    # 获取到 sampling callback 函数的返回值,并根据返回值进行处理
    if result.content.text == 'Y':
        return f'文件 {file_path} 已被删除!!'


if __name__ == '__main__':
app.run(transport='stdio')这里最重要的就是需要通过create_message方法来创建一个 SamplingMessage 类型的 message,他会将这个 message 发送给 sampling callback 对应的函数中。
接着,我们来创建客户端的代码:
# 客户端
import asyncio

from mcp.client.stdio import stdio_client
from mcp import ClientSession, StdioServerParameters
from mcp.shared.context import RequestContext
from mcp.types import (
    TextContent,
    CreateMessageRequestParams,
    CreateMessageResult,
)

server_params = StdioServerParameters(
    command='uv',
    args=['run', 'file_server.py'],
)


async def sampling_callback(
        context: RequestContext[ClientSession, None],
        params: CreateMessageRequestParams,
):
    # 获取工具发送的消息并显示给用户
    input_message = input(params.messages[0].content.text)
    # 将用户输入发送回工具
    return CreateMessageResult(
        role='user',
        content=TextContent(
            type='text',
            text=input_message.strip().upper() or 'Y'
        ),
        model='user-input',
        stopReason='endTurn'
    )


async def main():
    async with stdio_client(server_params) as (stdio, write):
        async with ClientSession(
                stdio, write,
                # 设置 sampling_callback 对应的方法
                sampling_callback=sampling_callback
        ) as session:
            await session.initialize()
            res = await session.call_tool(
                'delete_file',
                {'file_path': 'C:/xxx.txt'}
            )
            # 获取工具最后执行完的返回结果
            print(res)


if __name__ == '__main__':
    asyncio.run(main())
特别要注意的是,目前在工具里面打印的内容实际上使用 stdio_client 是无法显示到命令行窗口的。所以,我们调试的话,可以使用 mcp.shared.memory.create_connected_server_and_client_session。
具体代码如下:
# 客户端
from mcp.shared.memory import (
    create_connected_server_and_client_session as create_session
)
# 这里需要引入服务端的 app 对象
from file_server import app

async def sampling_callback(context, params):
    ...

async def main():
    async with create_session(
        app._mcp_server,
        sampling_callback=sampling_callback
    ) as client_session:
        await client_session.call_tool(
            'delete_file',
            {'file_path': 'C:/xxx.txt'}
        )

if __name__ == '__main__':
asyncio.run(main())因为后面的两个功能实际上都是为了提高给 Claude 桌面端用的,所以这里先说下如何加载我们自定义的 MCP Server 到 Claude 桌面端。
首先,我们先打开配置。

我们点击 Developer 菜单,然后点击 Edit Config 按钮打开 Claude 桌面端的配置文件 claude_desktop_config.json

然后开始添加我们的服务器,服务器需要在 mcpServers 层级下,参数有 command、args、env。实际上,参数和 StdioServerParameters 对象初始化时候的参数是一样的。
{
  "mcpServers": {
    "web-search-server": {
      "command": "uv",
      "args": [
        "--directory",
        "D:/projects/mcp_getting_started",
        "run",
        "web_search.py"
      ]
    }
  }
}
最后,我们保存文件后重启 Claude 桌面端就可以在这里看到我们的插件了。


当然,我们也可以直接在我们插件的目录下运行以下命令来直接安装:
mcp install web_search.pyMCP 还为我们提供了一个生成 Prompt 模板的功能。他使用起来也很简单,只需要使用 prompt 装饰器装饰一下即可,代码如下:
from mcp.server import FastMCP

app = FastMCP('prompt_and_resources')

@app.prompt('翻译专家')
async def translate_expert(
        target_language: str = 'Chinese',
) -> str:
    return f'你是一个翻译专家,擅长将任何语言翻译成{target_language}。请翻译以下内容:'


if __name__ == '__main__':
    app.run(transport='stdio')
然后我们用上一节讲到的配置 Claude 桌面端 MCP 服务器的方法添加下我们的新 MCP 服务器。然后我们就可以点击右下角的图标开始使用啦。
他会让我们设置一下我们传入的参数,然后他会在我们的聊天窗口上生成一个附件。

我们还可以在 Claude 客户端上选择我们为用户提供的预设资源,同时也支持自定义的协议。具体代码如下:
from mcp.server import FastMCP

app = FastMCP('prompt_and_resources')

@app.resource('echo://static')
async def echo_resource():
    # 返回的是,当用户使用这个资源时,资源的内容
    return 'Echo!'

@app.resource('greeting://{name}')
async def get_greeting(name):
    return f'Hello, {name}!'


if __name__ == '__main__':
    app.run(transport='stdio')
然后,我们到 Claude 桌面端上看看。

这里要特别注意的是,目前 Claude 桌面端是没法读到资源装饰器设置 greeting://{name} 这种通配符的路径,未来将会被支持。但是,在我们的客户端代码中是可以当做资源模板来使用的,具体代码如下:
import asyncio
from pydantic import AnyUrl

from mcp.client.stdio import stdio_client
from mcp import ClientSession, StdioServerParameters

server_params = StdioServerParameters(
    command='uv',
    args=['run', 'prompt_and_resources.py'],
)


async def main():
    async with stdio_client(server_params) as (stdio, write):
        async with ClientSession(stdio, write) as session:
            await session.initialize()

            # 获取无通配符的资源列表
            res = await session.list_resources()
            print(res)

            # 获取有通配符的资源列表(资源模板)
            res = await session.list_resource_templates()
            print(res)

            # 读取资源,会匹配通配符
            res = await session.read_resource(AnyUrl('greeting://liming'))
            print(res)

            # 获取 Prompt 模板列表
            res = await session.list_prompts()
            print(res)

            # 使用 Prompt 模板
            res = await session.get_prompt(
                '翻译专家', arguments={'target_language': '英语'})
            print(res)


if __name__ == '__main__':
asyncio.run(main())最近 LangChain 发布了一个新的开源项目 langchain-mcp-adapters,可以很方便的将 MCP 服务器集成到 LangChain 中。下面我们来看看如何使用它:
from mcp import ClientSession, StdioServerParameters
from mcp.client.stdio import stdio_client

from langchain_mcp_adapters.tools import load_mcp_tools
from langgraph.prebuilt import create_react_agent

from langchain_openai import ChatOpenAI
model = ChatOpenAI(model="gpt-4o")

server_params = StdioServerParameters(
    command='uv',
    args=['run', 'web_search.py'],
)

async with stdio_client(server_params) as (read, write):
    async with ClientSession(read, write) as session:
        await session.initialize()

        # 获取工具列表
        tools = await load_mcp_tools(session)

        # 创建并使用 ReAct agent
        agent = create_react_agent(model, tools)
agent_response = await agent.ainvoke({'messages': '杭州今天天气怎么样?'})更详细的使用方法请参考:https://github.com/langchain-ai/langchain-mcp-adapters
最后,我们来使用 VsCode 的 cline 插件,来通过 DeepSeek 和我们自定义的一个图片生成的 mcp 服务器来构建一个图文大师的应用。废话不多说,我们直接开始。
首先先来构建我们的图片生成的 mcp server,这里我们直接用 huggingface 上的 FLUX.1-schnell 模型,地址是:https://huggingface.co/spaces/black-forest-labs/FLUX.1-schnell 。这里我们不使用 gradio_client 库,而是会使用 httpx 手搓一个,因为使用 gradio_client 库可能会出现编码错误的bug。具体代码如下:
# image_server.py

import json
import httpx
from mcp.server import FastMCP


app = FastMCP('image_server')


@app.tool()
async def image_generation(image_prompt: str):
    """
    生成图片
    :param image_prompt: 图片描述,需要是英文
    :return: 图片保存到的本地路径
    """
    async with httpx.AsyncClient() as client:
        data = {'data': [image_prompt, 0, True, 512, 512, 3]}

        # 创建生成图片任务
        response1 = await client.post(
            'https://black-forest-labs-flux-1-schnell.hf.space/call/infer',
            json=data,
            headers={"Content-Type": "application/json"}
        )

        # 解析响应获取事件 ID
        response_data = response1.json()
        event_id = response_data.get('event_id')

        if not event_id:
            return '无法获取事件 ID'

        # 通过流式的方式拿到返回数据
        url = f'https://black-forest-labs-flux-1-schnell.hf.space/call/infer/{event_id}'
        full_response = ''
        async with client.stream('GET', url) as response2:
            async for chunk in response2.aiter_text():
                full_response += chunk

        return json.loads(full_response.split('data: ')[-1])[0]['url']

if __name__ == '__main__':
    app.run(transport='stdio')
然后我们可以在虚拟环境下使用下面的命令打开 MCP Inspector 进行调试下我们的工具。
mcp dev image_server.py
接着我们在 VsCode 中安装 cline 插件,当安装完插件后,我们配置一下我们的 deepseek 的 api key。接着,我们点击右上角的 MCP Server 按钮打开 mcp server 列表。

然后切换到 Installed Tab 点击 Configure MCP Servers 按钮来编辑自定义的 mcp 服务器。

配置如下:
{
  "mcpServers": {
    "image_server": {
      "command": "uv",
      "args": [
        "--directory",
        "D:/projects/mcp_getting_started",
        "run",
        "image_server.py"
      ],
      "env": {},
      "disabled": false,
      "autoApprove": []
    }
  }
}
我们保存后,这里的这个小点是绿色的就表示我们的服务器已连接,然后我们就可以开始使用啦。

然后,我们就打开输入框,来输入我们的要写的文章的内容:

我们可以看到,他正确的调用了我们的工具

最后,就是可以看到生成的文章啦。

至此,整个 MCP 入门教程就到这里啦。相关代码会放到 github 仓库中:https://github.com/liaokongVFX/MCP-Chinese-Getting-Started-Guide
For Tasks:
Click tags to check more tools for each tasksFor Jobs:
Alternative AI tools for MCP-Chinese-Getting-Started-Guide
Similar Open Source Tools
MCP-Chinese-Getting-Started-Guide
The Model Context Protocol (MCP) is an innovative open-source protocol that redefines the interaction between large language models (LLMs) and the external world. MCP provides a standardized approach for any large language model to easily connect to various data sources and tools, enabling seamless access and processing of information. MCP acts as a USB-C interface for AI applications, offering a standardized way for AI models to connect to different data sources and tools. The core functionalities of MCP include Resources, Prompts, Tools, Sampling, Roots, and Transports. This guide focuses on developing an MCP server for network search using Python and uv management. It covers initializing the project, installing dependencies, creating a server, implementing tool execution methods, and running the server. Additionally, it explains how to debug the MCP server using the Inspector tool, how to call tools from the server, and how to connect multiple MCP servers. The guide also introduces the Sampling feature, which allows pre- and post-tool execution operations, and demonstrates how to integrate MCP servers into LangChain for AI applications.
MateChat
MateChat is a UI library for intelligent scenarios in front-end development, allowing easy construction of AI applications. It has been used in the intelligent transformation of multiple applications within Huawei and has supported the development of intelligent assistants such as CodeArts and InsCode AI IDE. The library offers components tailored for intelligent scenarios, out-of-the-box functionality, support for multiple scenarios and themes, and continuous evolution of features.

SwiftAgent
A type-safe, declarative framework for building AI agents in Swift, SwiftAgent is built on Apple FoundationModels. It allows users to compose agents by combining Steps in a declarative syntax similar to SwiftUI. The framework ensures compile-time checked input/output types, native Apple AI integration, structured output generation, and built-in security features like permission, sandbox, and guardrail systems. SwiftAgent is extensible with MCP integration, distributed agents, and a skills system. Users can install SwiftAgent with Swift 6.2+ on iOS 26+, macOS 26+, or Xcode 26+ using Swift Package Manager.

lagent
Lagent is a lightweight open-source framework that allows users to efficiently build large language model(LLM)-based agents. It also provides some typical tools to augment LLM. The overview of our framework is shown below:
Webscout
Webscout is an all-in-one Python toolkit for web search, AI interaction, digital utilities, and more. It provides access to diverse search engines, cutting-edge AI models, temporary communication tools, media utilities, developer helpers, and powerful CLI interfaces through a unified library. With features like comprehensive search leveraging Google and DuckDuckGo, AI powerhouse for accessing various AI models, YouTube toolkit for video and transcript management, GitAPI for GitHub data extraction, Tempmail & Temp Number for privacy, Text-to-Speech conversion, GGUF conversion & quantization, SwiftCLI for CLI interfaces, LitPrinter for styled console output, LitLogger for logging, LitAgent for user agent generation, Text-to-Image generation, Scout for web parsing and crawling, Awesome Prompts for specialized tasks, Weather Toolkit, and AI Search Providers.
openai-scala-client
This is a no-nonsense async Scala client for OpenAI API supporting all the available endpoints and params including streaming, chat completion, vision, and voice routines. It provides a single service called OpenAIService that supports various calls such as Models, Completions, Chat Completions, Edits, Images, Embeddings, Batches, Audio, Files, Fine-tunes, Moderations, Assistants, Threads, Thread Messages, Runs, Run Steps, Vector Stores, Vector Store Files, and Vector Store File Batches. The library aims to be self-contained with minimal dependencies and supports API-compatible providers like Azure OpenAI, Azure AI, Anthropic, Google Vertex AI, Groq, Grok, Fireworks AI, OctoAI, TogetherAI, Cerebras, Mistral, Deepseek, Ollama, FastChat, and more.
aigcpanel
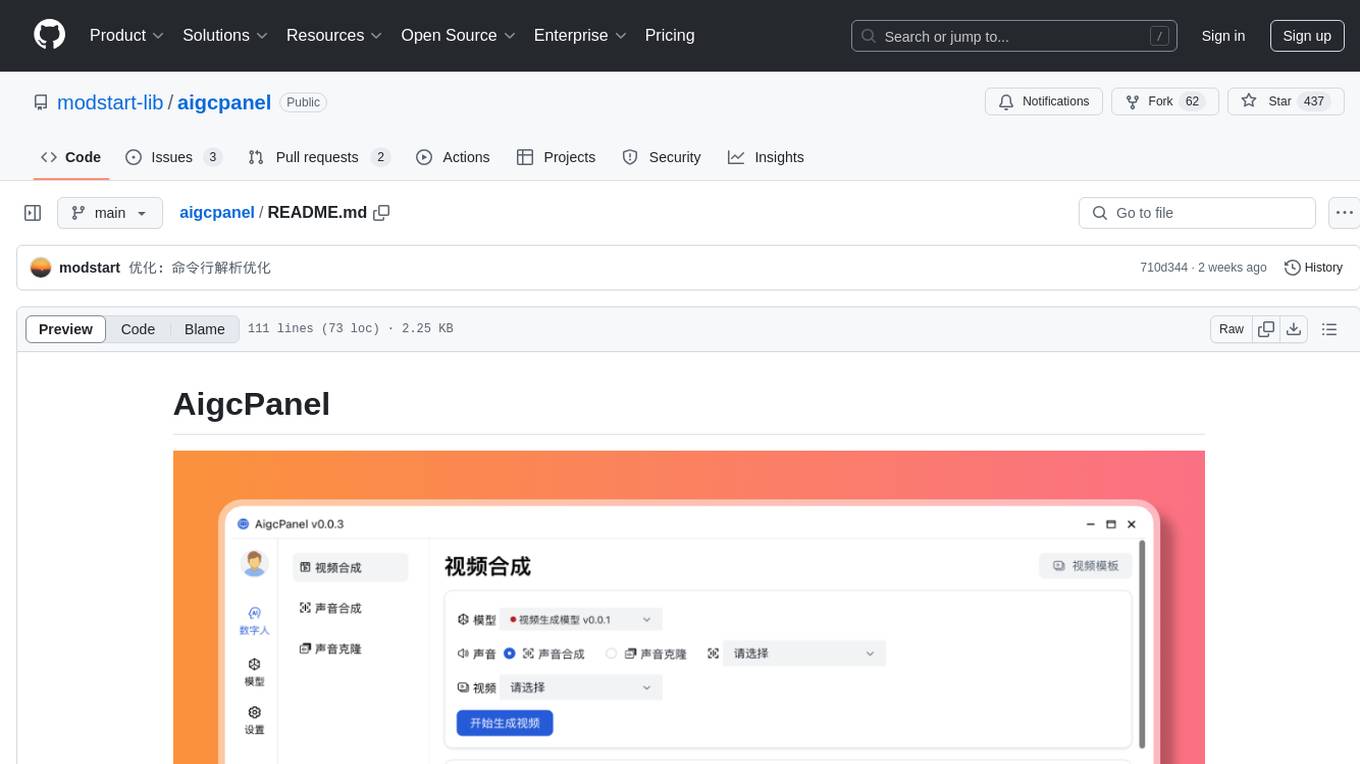
AigcPanel is a simple and easy-to-use all-in-one AI digital human system that even beginners can use. It supports video synthesis, voice synthesis, voice cloning, simplifies local model management, and allows one-click import and use of AI models. It prohibits the use of this product for illegal activities and users must comply with the laws and regulations of the People's Republic of China.
opencode.nvim
Opencode.nvim is a Neovim plugin that provides a simple and efficient way to browse, search, and open files in a project. It enhances the file navigation experience by offering features like fuzzy finding, file preview, and quick access to frequently used files. With Opencode.nvim, users can easily navigate through their project files, jump to specific locations, and manage their workflow more effectively. The plugin is designed to improve productivity and streamline the development process by simplifying file handling tasks within Neovim.
Webscout
WebScout is a versatile tool that allows users to search for anything using Google, DuckDuckGo, and phind.com. It contains AI models, can transcribe YouTube videos, generate temporary email and phone numbers, has TTS support, webai (terminal GPT and open interpreter), and offline LLMs. It also supports features like weather forecasting, YT video downloading, temp mail and number generation, text-to-speech, advanced web searches, and more.
superagent
Superagent is an open-source AI assistant framework and API that allows developers to add powerful AI assistants to their applications. These assistants use large language models (LLMs), retrieval augmented generation (RAG), and generative AI to help users with a variety of tasks, including question answering, chatbot development, content generation, data aggregation, and workflow automation. Superagent is backed by Y Combinator and is part of YC W24.

nextlint
Nextlint is a rich text editor (WYSIWYG) written in Svelte, using MeltUI headless UI and tailwindcss CSS framework. It is built on top of tiptap editor (headless editor) and prosemirror. Nextlint is easy to use, develop, and maintain. It has a prompt engine that helps to integrate with any AI API and enhance the writing experience. Dark/Light theme is supported and customizable.
context7
Context7 is a powerful tool for analyzing and visualizing data in various formats. It provides a user-friendly interface for exploring datasets, generating insights, and creating interactive visualizations. With advanced features such as data filtering, aggregation, and customization, Context7 is suitable for both beginners and experienced data analysts. The tool supports a wide range of data sources and formats, making it versatile for different use cases. Whether you are working on exploratory data analysis, data visualization, or data storytelling, Context7 can help you uncover valuable insights and communicate your findings effectively.
llama_ros
This repository provides a set of ROS 2 packages to integrate llama.cpp into ROS 2. By using the llama_ros packages, you can easily incorporate the powerful optimization capabilities of llama.cpp into your ROS 2 projects by running GGUF-based LLMs and VLMs.
gemini-ai
Gemini AI is a Ruby Gem designed to provide low-level access to Google's generative AI services through Vertex AI, Generative Language API, or AI Studio. It allows users to interact with Gemini to build abstractions on top of it. The Gem provides functionalities for tasks such as generating content, embeddings, predictions, and more. It supports streaming capabilities, server-sent events, safety settings, system instructions, JSON format responses, and tools (functions) calling. The Gem also includes error handling, development setup, publishing to RubyGems, updating the README, and references to resources for further learning.
For similar tasks
MCP-Chinese-Getting-Started-Guide
The Model Context Protocol (MCP) is an innovative open-source protocol that redefines the interaction between large language models (LLMs) and the external world. MCP provides a standardized approach for any large language model to easily connect to various data sources and tools, enabling seamless access and processing of information. MCP acts as a USB-C interface for AI applications, offering a standardized way for AI models to connect to different data sources and tools. The core functionalities of MCP include Resources, Prompts, Tools, Sampling, Roots, and Transports. This guide focuses on developing an MCP server for network search using Python and uv management. It covers initializing the project, installing dependencies, creating a server, implementing tool execution methods, and running the server. Additionally, it explains how to debug the MCP server using the Inspector tool, how to call tools from the server, and how to connect multiple MCP servers. The guide also introduces the Sampling feature, which allows pre- and post-tool execution operations, and demonstrates how to integrate MCP servers into LangChain for AI applications.
solon-ai
Solon-AI is a Java AI & MCP application development framework that supports various AI development capabilities. It is designed to be versatile, efficient, and open for integration with frameworks like SpringBoot, jFinal, and Vert.x. The framework provides examples of embedding solon-ai(& mcp) and showcases interfaces for chat models, function calling, vision, RAG (EmbeddingModel, Repository, DocumentLoader, RerankingModel), Ai Flow, MCP server, MCP client, and MCP Proxy. Solon-AI is part of the Solon project ecosystem, which includes other repositories for different functionalities.
For similar jobs
promptflow
**Prompt flow** is a suite of development tools designed to streamline the end-to-end development cycle of LLM-based AI applications, from ideation, prototyping, testing, evaluation to production deployment and monitoring. It makes prompt engineering much easier and enables you to build LLM apps with production quality.
deepeval
DeepEval is a simple-to-use, open-source LLM evaluation framework specialized for unit testing LLM outputs. It incorporates various metrics such as G-Eval, hallucination, answer relevancy, RAGAS, etc., and runs locally on your machine for evaluation. It provides a wide range of ready-to-use evaluation metrics, allows for creating custom metrics, integrates with any CI/CD environment, and enables benchmarking LLMs on popular benchmarks. DeepEval is designed for evaluating RAG and fine-tuning applications, helping users optimize hyperparameters, prevent prompt drifting, and transition from OpenAI to hosting their own Llama2 with confidence.
MegaDetector
MegaDetector is an AI model that identifies animals, people, and vehicles in camera trap images (which also makes it useful for eliminating blank images). This model is trained on several million images from a variety of ecosystems. MegaDetector is just one of many tools that aims to make conservation biologists more efficient with AI. If you want to learn about other ways to use AI to accelerate camera trap workflows, check out our of the field, affectionately titled "Everything I know about machine learning and camera traps".
leapfrogai
LeapfrogAI is a self-hosted AI platform designed to be deployed in air-gapped resource-constrained environments. It brings sophisticated AI solutions to these environments by hosting all the necessary components of an AI stack, including vector databases, model backends, API, and UI. LeapfrogAI's API closely matches that of OpenAI, allowing tools built for OpenAI/ChatGPT to function seamlessly with a LeapfrogAI backend. It provides several backends for various use cases, including llama-cpp-python, whisper, text-embeddings, and vllm. LeapfrogAI leverages Chainguard's apko to harden base python images, ensuring the latest supported Python versions are used by the other components of the stack. The LeapfrogAI SDK provides a standard set of protobuffs and python utilities for implementing backends and gRPC. LeapfrogAI offers UI options for common use-cases like chat, summarization, and transcription. It can be deployed and run locally via UDS and Kubernetes, built out using Zarf packages. LeapfrogAI is supported by a community of users and contributors, including Defense Unicorns, Beast Code, Chainguard, Exovera, Hypergiant, Pulze, SOSi, United States Navy, United States Air Force, and United States Space Force.
llava-docker
This Docker image for LLaVA (Large Language and Vision Assistant) provides a convenient way to run LLaVA locally or on RunPod. LLaVA is a powerful AI tool that combines natural language processing and computer vision capabilities. With this Docker image, you can easily access LLaVA's functionalities for various tasks, including image captioning, visual question answering, text summarization, and more. The image comes pre-installed with LLaVA v1.2.0, Torch 2.1.2, xformers 0.0.23.post1, and other necessary dependencies. You can customize the model used by setting the MODEL environment variable. The image also includes a Jupyter Lab environment for interactive development and exploration. Overall, this Docker image offers a comprehensive and user-friendly platform for leveraging LLaVA's capabilities.

carrot
The 'carrot' repository on GitHub provides a list of free and user-friendly ChatGPT mirror sites for easy access. The repository includes sponsored sites offering various GPT models and services. Users can find and share sites, report errors, and access stable and recommended sites for ChatGPT usage. The repository also includes a detailed list of ChatGPT sites, their features, and accessibility options, making it a valuable resource for ChatGPT users seeking free and unlimited GPT services.
TrustLLM
TrustLLM is a comprehensive study of trustworthiness in LLMs, including principles for different dimensions of trustworthiness, established benchmark, evaluation, and analysis of trustworthiness for mainstream LLMs, and discussion of open challenges and future directions. Specifically, we first propose a set of principles for trustworthy LLMs that span eight different dimensions. Based on these principles, we further establish a benchmark across six dimensions including truthfulness, safety, fairness, robustness, privacy, and machine ethics. We then present a study evaluating 16 mainstream LLMs in TrustLLM, consisting of over 30 datasets. The document explains how to use the trustllm python package to help you assess the performance of your LLM in trustworthiness more quickly. For more details about TrustLLM, please refer to project website.
AI-YinMei
AI-YinMei is an AI virtual anchor Vtuber development tool (N card version). It supports fastgpt knowledge base chat dialogue, a complete set of solutions for LLM large language models: [fastgpt] + [one-api] + [Xinference], supports docking bilibili live broadcast barrage reply and entering live broadcast welcome speech, supports Microsoft edge-tts speech synthesis, supports Bert-VITS2 speech synthesis, supports GPT-SoVITS speech synthesis, supports expression control Vtuber Studio, supports painting stable-diffusion-webui output OBS live broadcast room, supports painting picture pornography public-NSFW-y-distinguish, supports search and image search service duckduckgo (requires magic Internet access), supports image search service Baidu image search (no magic Internet access), supports AI reply chat box [html plug-in], supports AI singing Auto-Convert-Music, supports playlist [html plug-in], supports dancing function, supports expression video playback, supports head touching action, supports gift smashing action, supports singing automatic start dancing function, chat and singing automatic cycle swing action, supports multi scene switching, background music switching, day and night automatic switching scene, supports open singing and painting, let AI automatically judge the content.