
ReasonablePlanningAI
Designer Driven Unreal Engine 4 & 5 - UE4 / UE5 - AIModule Extension Plugin using Data Driven Design for Utility AI and Goal Oriented Action Planning - GOAP
Stars: 95
Reasonable Planning AI is a robust design and data-driven AI solution for game developers. It provides an AI Editor that allows creating AI without Blueprints or C++. The AI can think for itself, plan actions, adapt to the game environment, and act dynamically. It consists of Core components like RpaiGoalBase, RpaiActionBase, RpaiPlannerBase, RpaiReasonerBase, and RpaiBrainComponent, as well as Composer components for easier integration by Game Designers. The tool is extensible, cross-compatible with Behavior Trees, and offers debugging features like visual logging and heuristics testing. It follows a simple path of execution and supports versioning for stability and compatibility with Unreal Engine versions.
README:
Discuss the future of this project with us in real time on our Discord
Create an AI that can think for itself and plan a series of actions using only a data driven Editor. Your players will be astounded by the smart responsiveness of the AI to your game environment and marvel at it's ability to adapt and act on the fly!
Reasonable Planning AI is a drop in solution to provide a robust design and data driven AI that thinks for itself and plans it's actions accordingly. One can create AI with no Blueprints nor C++. Reasonable Planning AI acheives this through the Reasonable Planning AI Editor. A robust Unreal Engine editor that lets you predefine a set of actions, a set of goals, and a state. All logic is achieved through the use of various data driven constructs. These components put together are known as Reasonable Planning AI Composer.
Reasonable Planning AI is also extensible using either Blueprints or C++. You can opt to extend composer with custom RpaiComposerActionTasks or go a pure code route and implement the Core Rpai components.
Reasonable Planning AI is also cross-compatible with Behavior Trees and can execute AITasks. It also comes with an extension to integrate Composer designed Reasonable Planning AI into an existing Behavior Tree through a pre-defined BTTask node within the plugin.
Reasonable Planning AI utilizes the visual logger for easier debugging of your AI. Reasonable Planning AI Editor also has a builtin hueristics testing tool. You can define a given starting state, and ending desired state, and visual the goal the AI will select under those conditions as well as the action plan it will execute.
The core design of the Reasonable Planning AI when using the Core components and the Core RpaiBrainComponent follows a very simple path of execution. This path of execution is illustrated in the below flow chart.
Text description of the above flowchart. A Start Logic method is invoked. A goal is selected, determined by the current state. If a goal is not determined, then the AI will idle once, else the goal defines it's desired state and it is applied to a planner used to determine an action plan. If a plan is not able to be formulated, then it will attempt a new evaluation of a desired goal. If a plan is found, it will continue to execute the plan until there are no more actions available within the plan or a command to interrupt the execution of the plan is received. After any of those exit conditions, a goal is determined from a current state and the process repeats.
There are two layers to the Reasonable Planning AI that make it a robust AI solution for your project. These layers are known as Core and Composer.
There are five (5) Core components implementing Reasonable Planning AI that builds the foundation of the plugin.
- RpaiGoalBase
- RpaiActionBase
- RpaiPlannerBase
- RpaiReasonerBase
- RpaiBrainComponent
The main execution engine for Reasonable Planning AI is the RpaiBrainComponent. This is a UBrainComponent from the AIModule used to execute AI logic and interact with the rest of the AIModule defined components. The two logic driving classes are RpaiRpaiReasonerBase and RpaiRpaiPlannerBase. The RpaiRpaiReasonerBase class is used to provide implementations for determining goals. Out of the box, there are two implementations provided RpaiReasoners/RpaiRpaiReasoner_DualUtility and RpaiReasoners/RpaiRpaiReasoner_AbsoluteUtility. Please read the documentation of each class to understand thier capabilities. For goal reasoning there is one provided solution. This solution is RpaiPlanners/RpaiRpaiPlanner_AStar. This implementation determines an action plan by using the RpaiGoalBase::DistanceToCompletion and RpaiActionBase::ExecutionWeight functions for the cost heuristic.
RpaiGoalBase and RpaiActionBase are the classes most developers will implement when not using Composer classes to build a data drive AI within the editor. RpaiGoalBase provides functions for determining value (commonly referred to as utility) for a given desired outcome. It also provides functions for determining the effort to accomplish the given goal from a given current state. RpaiActionBase provides functions for heuristics to calculate the effort to do an action given a state. It also provides methods for execution. These execution methods are the primary drivers for having the AI act. These functions are similar to the UE baked in AI BTTasks.
The Composer layer is built on top of the Core layer of Reasonable Planning AI. Composer brings the value of Reasonable Planning AI to Game Designers and others without needing to wire Blueprints or write C++. Because Composer is built on top of Core, any Programmers will be able to intergrate into the Composer framework by simply by inheriting from one of the Core classes or from the extend Composer defined classes. The Composer defined classes are listed below.
- RpaiComposerGoal
- RpaiComposerAction
- RpaiComposerBrainComponent
- RpaiComposerActionTask
- RpaiComposerActionTaskBase
- RpaiComposerStateQuery
- RpaiComposerStateMutator
- RpaiComposerDistance
- RpaiComposerWeight
- RpaiComposerBehavior
The relationship of these classes to each other are defined below. For additonal details please refer to the documentation of the classes either in the Unreal Engine Editor or C++ comments. Ultimately the classes are used to configure data queries to provide cost, weight, applicability, and mutations during the goal selection and action planning processes. RpaiActionTasks are predefined actions your AI can do within the game world. RpaiComposerBrianComponent is an extension of RpaiBrainComponent that adds a factory method to create goals and actions plans from the defined RpaiComposerBehavior data asset.
-
RpaiComposerGoal
- RpaiStateQuery
- RpaiComposerDistance
- RpaiComposerWeight
-
RpaiComposerAction
- RpaiComposerStateQuery
- RpaiComposerWeight
- RpaiComposerStateMutator
- RpaiComposerActionTask
-
RpaiComposerBehavior
- RpaiComposerAction[]
- RpaiComposerGoal[]
- RpaiState: SubclassOf
-
RpaiComposerBrainComponent
- RpaiComposerBehavior
To start using Reasonable Planning AI Composer within the Editor, simply create a new DataAsset within your Content folder and select the type RpaiCmposerBehavior. From there you will be able to define and configure your new AI! See below for a simple tutorial.
Reasonable Planning AI releases are versioned. In source code they are tagged commits. The versioning follows the below format (akin to Semantic Versioning)
major.minor.patch-d.d-{alpha|beta|gold}
The first tuple of major.minor.patch is the Reasonable Planning AI version. Explanations of the numbers are as below:
major Breaking changes were introduced, significant changes to the behavior of functions, and deprecated functions and fields have been removed.
minor New fields or functions were added. Some fields or functions may be marked as deprecated. No breaking changes introduced.
patch Bug fixes, no new field additions or functions introduced. May have a change in behavior.
The second tuple of d.d is the version of Unreal Engine this release is compatible with. This means there could be multiple versions of Reasonable Planning AI to indicate UE compatibility.
The last part is the {alpha|beta|gold} indicating the stability of the release.
alpha builds DO NOT honor the
major.minor.patchpromises of changes. These releases compile and pass all tests. Releases marked asalphacan be dramatically different in between versions and upgrades are not advised. DO NOT use alpha for your game project or product.
beta builds are stable releases that are anticapted to be upgraded to
gold. They meet all requirements and are fully featured. Breaking changes are not anticpated and beta builds will honor the versioning promises.
gold A production release. Fully featured and ready to go. May be up on the Marketplace (pending approval)
You can give Reasonable Planning AI a quick try by configuring a simple AI by following the steps below. The simple AI will have a goal to move towards a target location and an action that involves having the AI walk to that target location. When a Reasonable Planning AI is designed with a 1:1 Goal to Action design, it is the equivalent of creating a Utility AI. This is what this tutorial will create.
This works for both Unreal Engine 4.27.2 and Unreal Engine 5.0.2. Screenshots are taken in UE5, but the workflow is the same with the exception of step 1.a where the Place Actors window should already be open in 4.27.2.
- Create a New Project (Third Person C++) with Starter Content or open an existing project and create a new Basic world with Navigation
- In your project select New -> Level. In the dialogue select "Basic".
- Place a Navigation Volume from the "Place Actors" panel. If you do not see it, open by selecting Window -> Place Actors. Search for "Nav" and drag and drop "NavMeshBoundsVolume" into the Level Viewport.
- Set Location to 0,0,0
- Set the Brush X and Y values to 10000.0 and the Z value to 1000.0
- To confirm navigation covers the floor, press
Pto visualize the NavMesh. It should have a green overlay.
- Create an
RpaiComposerBehavior - Right click your Content Browser drawer and select Miscelaneous > Data Asset
- Search for "Rpai" and select
RpaiComposerBehavior
- Configure your newly named Composer Behavior
- For the
ConstructedStateTypeselectRpaiState_Map - For the
ReasonerselectRpai Reasoner Dual Utility - For the
PlannerselectRpai Planner AStar
- Add a Goal by clicking the plus sign to the right of the
Goalsfield.
Note within Rpai Vector to Vector comparisons are done via the squared value of the distance between the two vectors.
FVector::DistSquared.
- Select the arrow to the left of
Index [ 0 ] - For
Distance CalculatorselectRpai Distance State. Select the arrow to the left to expand details if necessary, also expand the Rpai details if necessary. - For
Right Hand Side State Reference Key, expand details and setState Key Nameto "CurrentLocation" andExpected Value Typeto "Vector" - For
Left Hand Side State Reference Key, expand details and setState Key Nameto "TargetLocation" andExpected Value Typeto "Vector"
- For
WeightselectRpai Weight Distance. Select the arrow to the left to expand details if necessary, also expand the Rpai details if necessary. - For
DistanceselectRpai Distance State. Select the arrow to the left to expand details if necessary, also expand the Rpai details if necessar - For
Right Hand Side State Reference Key, expand details and setState Key Nameto "CurrentLocation" andExpected Value Typeto "Vector" - For
Left Hand Side State Reference Key, expand details and setState Key Nameto "TargetLocation" andExpected Value Typeto "Vector"
Because there are no other goals configured in this tutorial, the Weight is somewhat of a throw away configuration. Ideally, the weight of a goal represents the value of choosing this goal.
- For
Is Applicable QueryselectRpai State Query Compare Distance Float. Select the arrow to the left to expand details if necessary, also expand the Rpai details if necessary. - For
Comparison Operationselect "Greater Than" - For
DistanceselectRpai Distance State. Select the arrow to the left to expand details if necessary, also expand the Rpai details if necessar - For
Right Hand Side State Reference Key, expand details and setState Key Nameto "CurrentLocation" andExpected Value Typeto "Vector" - For
Left Hand Side State Reference Key, expand details and setState Key Nameto "TargetLocation" andExpected Value Typeto "Vector" - For
RHSset the value to "90000.0" (this is 300.0 squared)
- For
Is in Desired State QueryselectRpai State Query Compare Distance Float. Select the arrow to the left to expand details if necessary, also expand the Rpai details if necessary. Configure these fields the same as the step above. - For
Comparison Operationselect "Less Than Or Equal To" - For
DistanceselectRpai Distance State. Select the arrow to the left to expand details if necessary, also expand the Rpai details if necessary - For
Right Hand Side State Reference Key, expand details and setState Key Nameto "CurrentLocation" andExpected Value Typeto "Vector" - For
Left Hand Side State Reference Key, expand details and setState Key Nameto "TargetLocation" andExpected Value Typeto "Vector" - For
RHSset the value to "90000.0" (this is 300.0 squared)
- Set the
Categoryto 0 (this is the Highest Priority Group) - Set the
Goal Nameto "TravelToTargetLocation". - Add an Action by clicking the plus sign
- For
Weight AlgorithmselectRpai Weight Distance - For
DistanceselectRpai Distance State. Select the arrow to the left to expand details if necessary, also expand the Rpai details if necessary - For
Right Hand Side State Reference Key, expand details and setState Key Nameto "CurrentLocation" andExpected Value Typeto "Vector" - For
Left Hand Side State Reference Key, expand details and setState Key Nameto "TargetLocation" andExpected Value Typeto "Vector"
- For
Action TaskselectRpai Action Task Move To. Select the arrow to the left to expand details if necessary, also expand the Rpai details if necessary - Change
Action Task State Key Value Referenceby settingState Key Nameto "TargetLocation".
- For
Apply to State Mutators, press the plus icon to add a new element and expand using the dropdown arrow on the left side, then expandIndex [ 0 ]in the same manner as before. - For the element select
Rpai State Mutator Copy State. Select the arrow to the left to expand details if necessary, also expand the Rpai details if necessary. - Expand
State Property to Copyand setState Key Nameto "TargetLocation" andExpected Value Typeto "Vector" - Expand
State Property to Mutateand setState Key Nameto "CurrentLocation" andExpected Value Typeto "Vector"
Keep in Mind: The action mutators only have an impact in the hueristics of planning an action plan. Do not think of this as actions happening over time in your game. Rather, consider the state of the AI after the action has fully completed. So for this tutorial, when the action is completed, the AI agent will be at the location of "TargetLocation" (or at least near it). Do not try to make everything exact, fuzzy values work best here.
- For
Is Applicable Queryset the value toRpai State Query Every.
Note: An empty
Rpai State Query Everyis equivalent to an Always True configuration. An emptyRpai State Query Anyis equivalent to an Always False configuration.
- Set the
Action Nameto "WalkToTargetLocation" - Save and close your new behavior data asset
- Create a child class of
RpaiComposerBrainComponent.
Important Note: At this state the generation of current state does occur in code or Blueprints. This is a temporary stop gap and will be data driven in the future.
- Open your newly created Blueprint Class
- Hover over Functions and select Override and
Set State from Ai
- Configure the function definition as pictured below
- In the "Event Graph" call
Start Logicin theEvent Begin Playnode.
- In the Details panel for your component, expand the
Rpaisection and set theReasonable Planning Behaviorfield to your newly createdRpaiComposerBehaviordata asset. - Create a new AIController child class.
- Add your newly created Brain Component as a component to the newly created AIController class.
- Create a new Character Blueprint.
- Set the AI Controller class for your new Character Blueprint to your newly created AIController class.
- Set the SkeletalMeshComponent Mesh to the Mannequin Mesh
- Set the Animation to Use Anim Blueprint and select the Third Person Anim Blueprint (if not already configured)
- Place your new AI Character in the World and Press "Play" or "Simulate" (Alt+S on Windows)
- Marvel and your AI walks to the defined "TargetLocation"!
- Now go out there and create some fascinating AI and shared it on the Troll Purse Discord in the #trollpurse-oss channel!
Porting Utility AI design patterns to Goal selection in Reasonable Planning AI as based on the reasearch found in neu.edu. Since planning uses a lot of the same structures, one may also consider adding these patterns to the actions for planning. All of the patterns referenced are the same as described in the referenced whitepaper.
The opt out pattern is a means to signal a consideration for a goal must not be considered regardless of utility. To accomplish this pattern assign a StateQuery to the IsApplicable array as those return boolean results. To utilize the concept of a logical and, use the StateQuery_Every.
The opt in pattern can be included by using an RpaiWeight_Select in the Weight configuration. This allows the concept of "only one of those reasons needs to be true in order for the option to be valid." Additionally, it can also be implemented by using a StateQuery_Any within the IsApplicable configuration.
Apply a state variable specific to the action. Then in the StateMutator amplify a float value that will be applied to a UWeight_CurveFloat that returns a reducing weight value as the float value increases. Use a polynomial to settle down the commitment after repeated uses.
Use a UWeight_CurveFloat on your goal. Set a float value within your state that changes over time. Have a shorter plan of actions for the goal.
Many answers to follow this design pattern. One can use a boolean toggle on the state and use a combination of StateMutator and StateQuery within IsApplicable. However that is not a scalable soution and couples many actions with each other via state properties. Rather, just consider how goals and actions are weighed and distance is determined and this will be accomplished via careful planning.
There is no concept of time natively built into the framework. One could implement this by using a float state value and a history to determine last time a goal was chosen. This is only in consideration of heuristics. ActionTask_Wait can implement this as part of a ActionTask_Sequence.
Use a boolean value on the state and an IsApplicable StateQuery to test for this value. Once entered, set to false and the Goal or Action will not be considered.
A weight based on a depreciating float value on the state can accomplish this pattern.
A combination of an incrementing integer on the state and a curve can accomplish this.
Below you will find a collection of topics going deep into the details and possible implementations of actions within RPAI.
Because Reasonable Planning AI was built with flexibilty in mind and parity with the features offered by Behavior Trees, AITasks are a natural integration supported by the Reasonable Planning AI Composer Action Task class. To add an AI Task Action Task to Reasonable Planning AI, simple extend from the parent class RpaiActionTask_GameplayTaskBase. Here is an example in Unreal Engine 5 (UE5) on how to add the Smart Objects Module to your game using Reasonable Planning AI.
First, follow the instructions in the above link to active Smart Objects in your project. In your Build.cs file add the "SmartObjectModule" (if you haven't already) as a Build Dependency. Then create a C++ class similar to what is defined below.
#pragma once

#include "CoreMinimal.h"
#include "AI/AITask_UseSmartObject.h"
#include "Composer/ActionTasks/RpaiActionTask_GameplayTaskBase.h"
#include "MyActionTask_WalkToUseSmartObject.generated.h"

/**
 * Navigate to and Use a Smart Object
 */
UCLASS()
class MY_API UMyActionTask_WalkToUseSmartObject : public URpaiActionTask_GameplayTaskBase
{
	GENERATED_BODY()

protected:
	virtual void ReceiveStartActionTask_Implementation(AAIController* ActionInstigator, URpaiState* CurrentState, AActor* ActionTargetActor, UWorld* ActionWorld) override;

	UPROPERTY(EditAnywhere, Category = SmartObjects)
	FGameplayTagQuery ActivityRequirements;

	UPROPERTY(EditAnywhere, Category = SmartObjects)
	float Radius;
};#include "ActionTask_WalkToUseSmartObject.h"
#include "AI/AITask_UseSmartObject.h"
#include "AIController.h"
#include "GameplayTagAssetInterface.h"
#include "SmartObjectSubsystem.h"
#include "SmartObjectDefinition.h"
void UMyActionTask_WalkToUseSmartObject::ReceiveStartActionTask_Implementation(AAIController* ActionInstigator, URpaiState* CurrentState, AActor* ActionTargetActor = nullptr, UWorld* ActionWorld = nullptr)
{
USmartObjectSubsystem* SOSubsystem = USmartObjectSubsystem::GetCurrent(ActionWorld);
if (!SOSubsystem)
{
CancelActionTask(ActionInstigator, CurrentState, ActionTargetActor, ActionWorld);
}
if (auto AIPawn = ActionInstigator->GetPawn())
{
FSmartObjectRequestFilter Filter(ActivityRequirements);
Filter.BehaviorDefinitionClass = USmartObjectGameplayBehaviorDefinition::StaticClass();
if (const IGameplayTagAssetInterface* TagsSource = Cast<const IGameplayTagAssetInterface>(AIPawn))
{
TagsSource->GetOwnedGameplayTags(Filter.UserTags);
}
auto Location = AIPawn->GetActorLocation();
FSmartObjectRequest Request(FBox(Location, Location).ExpandBy(FVector(Radius), FVector(Radius)), Filter);
TArray<FSmartObjectRequestResult> Results;
if (SOSubsystem->FindSmartObjects(Request, Results))
{
for (const auto& Result : Results)
{
auto ClaimHandle = SOSubsystem->Claim(Result);
if (ClaimHandle.IsValid())
{
if (auto SOTask = UAITask::NewAITask<UAITask_UseSmartObject>(*ActionInstigator, *this))
{
SOTask->SetClaimHandle(ClaimHandle);
SOTask->ReadyForActivation();
StartTask(CurrentState, SOTask);
return;
}
}
}
}
}
CancelActionTask(ActionInstigator, CurrentState, ActionTargetActor, ActionWorld);
}In the code base you will run across a common function interface for Action and ActionTask which will look something like this:
virtual void SomeFunctionName(AAIController* ActionInstigator, URpaiState* CurrentState, FRpaiMemorySlice ActionMemory, AActor* ActionTargetActor = nullptr, UWorld* ActionWorld = nullptr);
This is the standard function interface (which may also include float DeltaSeconds) used for runtime execution of Actions and ActionTasks. There is a clear and intended idea of scoping within each of the parameters of the function explained below. This may help you during design of your extensions to RPAI where data should live.
-
AAIController* ActionInstigator: The lifetime of this controller object is managed by the lifetime defined by Unreal Engine or the AIModule. It is ideal to include variables and functions in your implementation and cast it to you implementation for your Action and ActionTask implementations. Use this for functions and variables that must persist beyond the planning or execution of RPAI. -
URpaiState* CurrentState: The lifetime of this object is scoped to the lifetime of an executing plan. If you want to share data across actions scoped to the execution of the plan, put the variable here. You may also use any variables here to assist in planning and goal determination (see tutorial above). Once a plan finishes, the state is reset. -
FRpaiMemorySlice ActionMemory: For those familiar with Behavior Tree C++ instancing of Tasks, this is a similar construct. For those not familiar, this memory object is used as a generic storage container of arbitrary data that must persist across function calls for the defined Action or ActionTask. The lifetime of this memory is a single execution lifecycle (Start -> Update -> Complete | Cancel) of a defined Action or ActionTask. -
AActor* ActionTargetActor: Same lifetime scope as `AAIController* ActionInstigator*. Defaults to owned pawn of the AI Controller, but could be any AActor of interest. -
UWorld* ActionWorld: Same lifetime scope as theAAIController* ActionInstigatorWorld. An Action or ActionTask is not guarenteed to execute within the same world scope as the AI agent. Therefore, use this if you want to be sure to execute within World scope of the AI Agent.
For Tasks:
Click tags to check more tools for each tasksFor Jobs:
Alternative AI tools for ReasonablePlanningAI
Similar Open Source Tools

ReasonablePlanningAI
Reasonable Planning AI is a robust design and data-driven AI solution for game developers. It provides an AI Editor that allows creating AI without Blueprints or C++. The AI can think for itself, plan actions, adapt to the game environment, and act dynamically. It consists of Core components like RpaiGoalBase, RpaiActionBase, RpaiPlannerBase, RpaiReasonerBase, and RpaiBrainComponent, as well as Composer components for easier integration by Game Designers. The tool is extensible, cross-compatible with Behavior Trees, and offers debugging features like visual logging and heuristics testing. It follows a simple path of execution and supports versioning for stability and compatibility with Unreal Engine versions.
vulnerability-analysis
The NVIDIA AI Blueprint for Vulnerability Analysis for Container Security showcases accelerated analysis on common vulnerabilities and exposures (CVE) at an enterprise scale, reducing mitigation time from days to seconds. It enables security analysts to determine software package vulnerabilities using large language models (LLMs) and retrieval-augmented generation (RAG). The blueprint is designed for security analysts, IT engineers, and AI practitioners in cybersecurity. It requires NVAIE developer license and API keys for vulnerability databases, search engines, and LLM model services. Hardware requirements include L40 GPU for pipeline operation and optional LLM NIM and Embedding NIM. The workflow involves LLM pipeline for CVE impact analysis, utilizing LLM planner, agent, and summarization nodes. The blueprint uses NVIDIA NIM microservices and Morpheus Cybersecurity AI SDK for vulnerability analysis.
eval-dev-quality
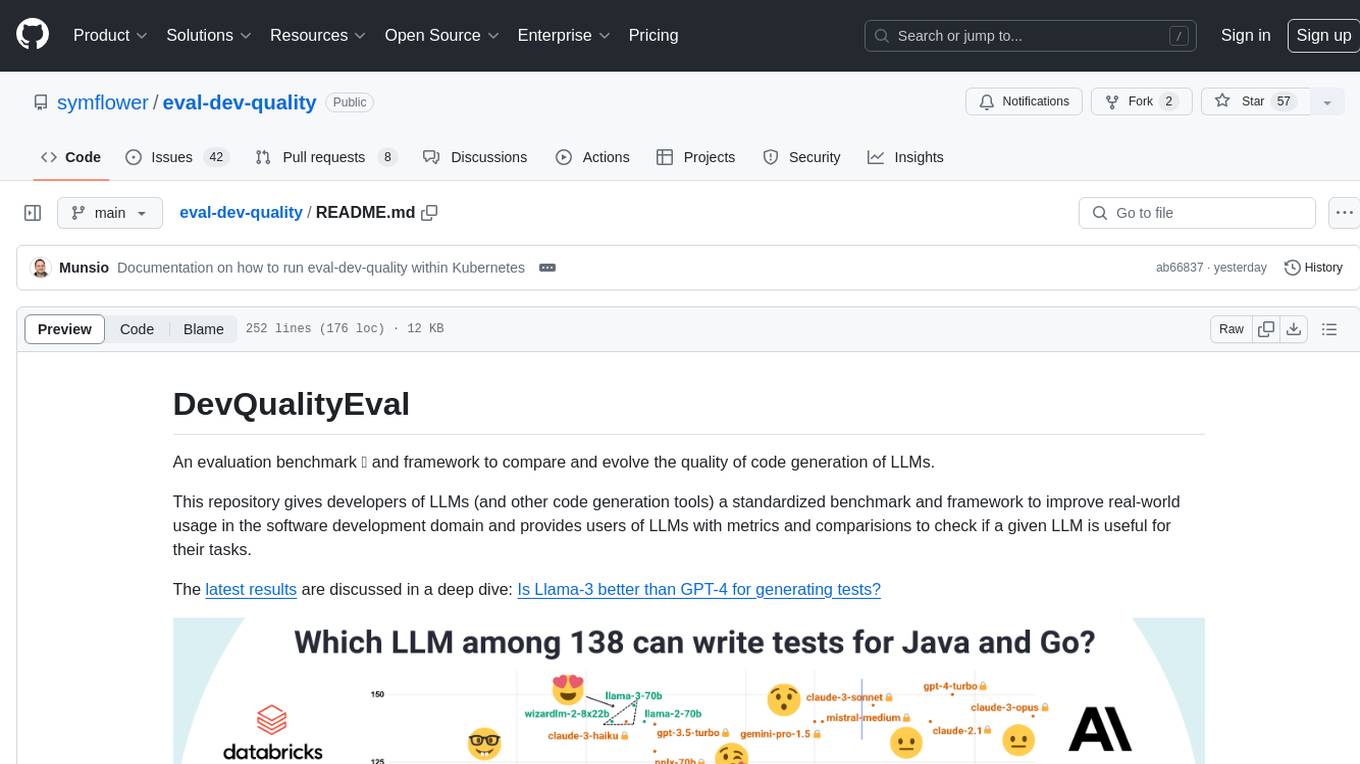
DevQualityEval is an evaluation benchmark and framework designed to compare and improve the quality of code generation of Language Model Models (LLMs). It provides developers with a standardized benchmark to enhance real-world usage in software development and offers users metrics and comparisons to assess the usefulness of LLMs for their tasks. The tool evaluates LLMs' performance in solving software development tasks and measures the quality of their results through a point-based system. Users can run specific tasks, such as test generation, across different programming languages to evaluate LLMs' language understanding and code generation capabilities.
OlympicArena
OlympicArena is a comprehensive benchmark designed to evaluate advanced AI capabilities across various disciplines. It aims to push AI towards superintelligence by tackling complex challenges in science and beyond. The repository provides detailed data for different disciplines, allows users to run inference and evaluation locally, and offers a submission platform for testing models on the test set. Additionally, it includes an annotation interface and encourages users to cite their paper if they find the code or dataset helpful.
ScreenAgent
ScreenAgent is a project focused on creating an environment for Visual Language Model agents (VLM Agent) to interact with real computer screens. The project includes designing an automatic control process for agents to interact with the environment and complete multi-step tasks. It also involves building the ScreenAgent dataset, which collects screenshots and action sequences for various daily computer tasks. The project provides a controller client code, configuration files, and model training code to enable users to control a desktop with a large model.
PolyMind
PolyMind is a multimodal, function calling powered LLM webui designed for various tasks such as internet searching, image generation, port scanning, Wolfram Alpha integration, Python interpretation, and semantic search. It offers a plugin system for adding extra functions and supports different models and endpoints. The tool allows users to interact via function calling and provides features like image input, image generation, and text file search. The application's configuration is stored in a `config.json` file with options for backend selection, compatibility mode, IP address settings, API key, and enabled features.
llm-subtrans
LLM-Subtrans is an open source subtitle translator that utilizes LLMs as a translation service. It supports translating subtitles between any language pairs supported by the language model. The application offers multiple subtitle formats support through a pluggable system, including .srt, .ssa/.ass, and .vtt files. Users can choose to use the packaged release for easy usage or install from source for more control over the setup. The tool requires an active internet connection as subtitles are sent to translation service providers' servers for translation.
LLM-LieDetector
This repository contains code for reproducing experiments on lie detection in black-box LLMs by asking unrelated questions. It includes Q/A datasets, prompts, and fine-tuning datasets for generating lies with language models. The lie detectors rely on asking binary 'elicitation questions' to diagnose whether the model has lied. The code covers generating lies from language models, training and testing lie detectors, and generalization experiments. It requires access to GPUs and OpenAI API calls for running experiments with open-source models. Results are stored in the repository for reproducibility.
MultiPL-E
MultiPL-E is a system for translating unit test-driven neural code generation benchmarks to new languages. It is part of the BigCode Code Generation LM Harness and allows for evaluating Code LLMs using various benchmarks. The tool supports multiple versions with improvements and new language additions, providing a scalable and polyglot approach to benchmarking neural code generation. Users can access a tutorial for direct usage and explore the dataset of translated prompts on the Hugging Face Hub.
LiveBench
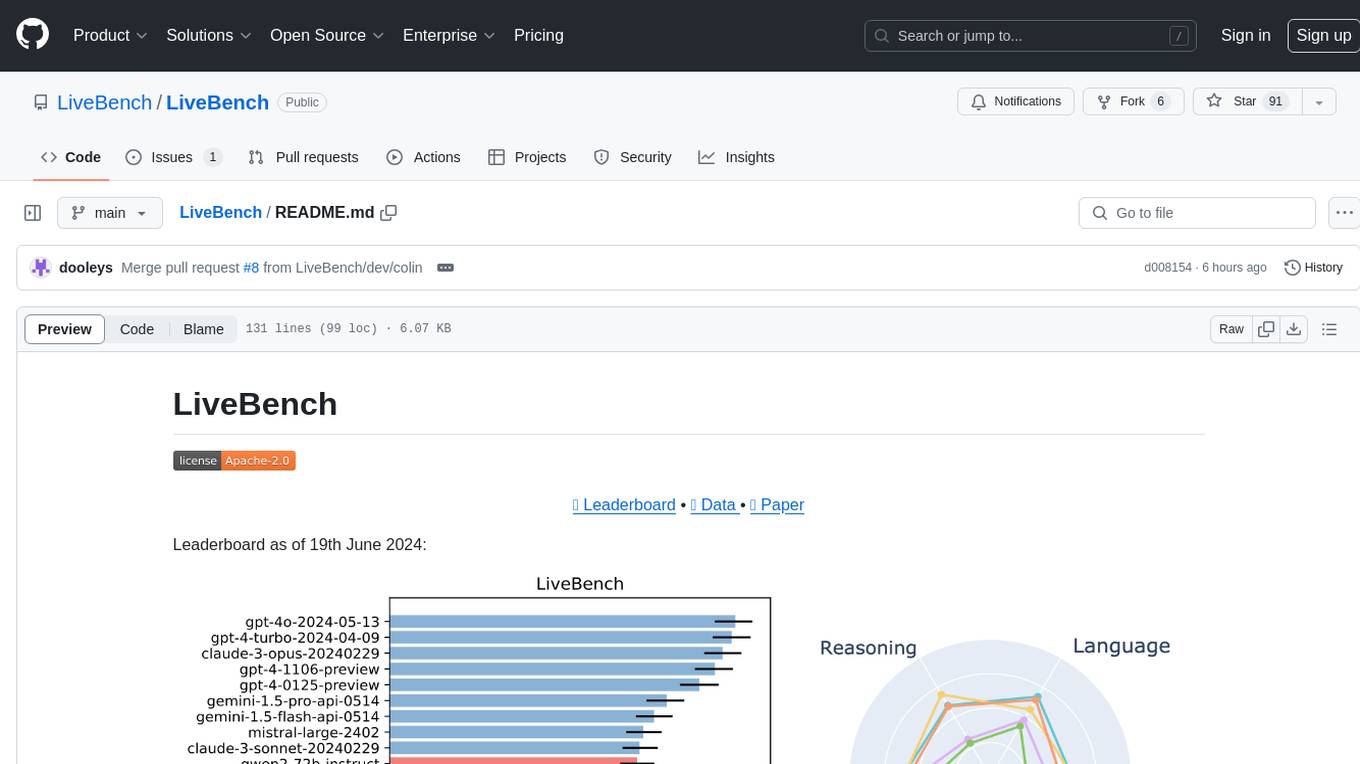
LiveBench is a benchmark tool designed for Language Model Models (LLMs) with a focus on limiting contamination through monthly new questions based on recent datasets, arXiv papers, news articles, and IMDb movie synopses. It provides verifiable, objective ground-truth answers for accurate scoring without an LLM judge. The tool offers 18 diverse tasks across 6 categories and promises to release more challenging tasks over time. LiveBench is built on FastChat's llm_judge module and incorporates code from LiveCodeBench and IFEval.
gpt-subtrans
GPT-Subtrans is an open-source subtitle translator that utilizes large language models (LLMs) as translation services. It supports translation between any language pairs that the language model supports. Note that GPT-Subtrans requires an active internet connection, as subtitles are sent to the provider's servers for translation, and their privacy policy applies.
LongRAG
This repository contains the code for LongRAG, a framework that enhances retrieval-augmented generation with long-context LLMs. LongRAG introduces a 'long retriever' and a 'long reader' to improve performance by using a 4K-token retrieval unit, offering insights into combining RAG with long-context LLMs. The repo provides instructions for installation, quick start, corpus preparation, long retriever, and long reader.
llamabot
LlamaBot is a Pythonic bot interface to Large Language Models (LLMs), providing an easy way to experiment with LLMs in Jupyter notebooks and build Python apps utilizing LLMs. It supports all models available in LiteLLM. Users can access LLMs either through local models with Ollama or by using API providers like OpenAI and Mistral. LlamaBot offers different bot interfaces like SimpleBot, ChatBot, QueryBot, and ImageBot for various tasks such as rephrasing text, maintaining chat history, querying documents, and generating images. The tool also includes CLI demos showcasing its capabilities and supports contributions for new features and bug reports from the community.
aiac
AIAC is a library and command line tool to generate Infrastructure as Code (IaC) templates, configurations, utilities, queries, and more via LLM providers such as OpenAI, Amazon Bedrock, and Ollama. Users can define multiple 'backends' targeting different LLM providers and environments using a simple configuration file. The tool allows users to ask a model to generate templates for different scenarios and composes an appropriate request to the selected provider, storing the resulting code to a file and/or printing it to standard output.
llm-rank-optimizer
This repository contains code for manipulating Large Language Models (LLMs) to increase the visibility of specific content or products in search engine recommendations. By adding a Strategic Text Sequence (STS) to a product's information page, the target product's rank in the LLM's recommendation can be optimized. The code includes scripts for generating and evaluating the STS, as well as plotting the results. The tool requires NVIDIA A100 GPUs for optimization and can be run in a Conda environment.
curate-gpt
CurateGPT is a prototype web application and framework for performing general purpose AI-guided curation and curation-related operations over collections of objects. It allows users to load JSON, YAML, or CSV data, build vector database indexes for ontologies, and interact with various data sources like GitHub, Google Drives, Google Sheets, and more. The tool supports ontology curation, knowledge base querying, term autocompletion, and all-by-all comparisons for objects in a collection.
For similar tasks

ReasonablePlanningAI
Reasonable Planning AI is a robust design and data-driven AI solution for game developers. It provides an AI Editor that allows creating AI without Blueprints or C++. The AI can think for itself, plan actions, adapt to the game environment, and act dynamically. It consists of Core components like RpaiGoalBase, RpaiActionBase, RpaiPlannerBase, RpaiReasonerBase, and RpaiBrainComponent, as well as Composer components for easier integration by Game Designers. The tool is extensible, cross-compatible with Behavior Trees, and offers debugging features like visual logging and heuristics testing. It follows a simple path of execution and supports versioning for stability and compatibility with Unreal Engine versions.
machine-learning
Ocademy is an AI learning community dedicated to Python, Data Science, Machine Learning, Deep Learning, and MLOps. They promote equal opportunities for everyone to access AI through open-source educational resources. The repository contains curated AI courses, tutorials, books, tools, and resources for learning and creating Generative AI. It also offers an interactive book to help adults transition into AI. Contributors are welcome to join and contribute to the community by following guidelines. The project follows a code of conduct to ensure inclusivity and welcomes contributions from those passionate about Data Science and AI.
mistreevous
Mistreevous is a library written in TypeScript for Node and browsers, used to declaratively define, build, and execute behaviour trees for creating complex AI. It allows defining trees with JSON or a minimal DSL, providing in-browser editor and visualizer. The tool offers methods for tree state, stepping, resetting, and getting node details, along with various composite, decorator, leaf nodes, callbacks, guards, and global functions/subtrees. Version history includes updates for node types, callbacks, global functions, and TypeScript conversion.
nerve
Nerve is a tool that allows creating stateful agents with any LLM of your choice without writing code. It provides a framework of functionalities for planning, saving, or recalling memories by dynamically adapting the prompt. Nerve is experimental and subject to changes. It is valuable for learning and experimenting but not recommended for production environments. The tool aims to instrument smart agents without code, inspired by projects like Dreadnode's Rigging framework.
dogoap
Data-Oriented GOAP (Goal-Oriented Action Planning) is a library that implements GOAP in a data-oriented way, allowing for dynamic setup of states, actions, and goals. It includes bevy_dogoap for Bevy integration. It is useful for NPCs performing tasks dependent on each other, enabling NPCs to improvise reaching goals, and offers a middle ground between Utility AI and HTNs. The library is inspired by the F.E.A.R GDC talk and provides a minimal Bevy example for implementation.
Awesome-World-Models
This repository is a curated list of papers related to World Models for General Video Generation, Embodied AI, and Autonomous Driving. It includes foundation papers, blog posts, technical reports, surveys, benchmarks, and specific world models for different applications. The repository serves as a valuable resource for researchers and practitioners interested in world models and their applications in robotics and AI.
For similar jobs
sweep
Sweep is an AI junior developer that turns bugs and feature requests into code changes. It automatically handles developer experience improvements like adding type hints and improving test coverage.
teams-ai
The Teams AI Library is a software development kit (SDK) that helps developers create bots that can interact with Teams and Microsoft 365 applications. It is built on top of the Bot Framework SDK and simplifies the process of developing bots that interact with Teams' artificial intelligence capabilities. The SDK is available for JavaScript/TypeScript, .NET, and Python.
ai-guide
This guide is dedicated to Large Language Models (LLMs) that you can run on your home computer. It assumes your PC is a lower-end, non-gaming setup.
classifai
Supercharge WordPress Content Workflows and Engagement with Artificial Intelligence. Tap into leading cloud-based services like OpenAI, Microsoft Azure AI, Google Gemini and IBM Watson to augment your WordPress-powered websites. Publish content faster while improving SEO performance and increasing audience engagement. ClassifAI integrates Artificial Intelligence and Machine Learning technologies to lighten your workload and eliminate tedious tasks, giving you more time to create original content that matters.
chatbot-ui
Chatbot UI is an open-source AI chat app that allows users to create and deploy their own AI chatbots. It is easy to use and can be customized to fit any need. Chatbot UI is perfect for businesses, developers, and anyone who wants to create a chatbot.
BricksLLM
BricksLLM is a cloud native AI gateway written in Go. Currently, it provides native support for OpenAI, Anthropic, Azure OpenAI and vLLM. BricksLLM aims to provide enterprise level infrastructure that can power any LLM production use cases. Here are some use cases for BricksLLM: * Set LLM usage limits for users on different pricing tiers * Track LLM usage on a per user and per organization basis * Block or redact requests containing PIIs * Improve LLM reliability with failovers, retries and caching * Distribute API keys with rate limits and cost limits for internal development/production use cases * Distribute API keys with rate limits and cost limits for students
uAgents
uAgents is a Python library developed by Fetch.ai that allows for the creation of autonomous AI agents. These agents can perform various tasks on a schedule or take action on various events. uAgents are easy to create and manage, and they are connected to a fast-growing network of other uAgents. They are also secure, with cryptographically secured messages and wallets.
griptape
Griptape is a modular Python framework for building AI-powered applications that securely connect to your enterprise data and APIs. It offers developers the ability to maintain control and flexibility at every step. Griptape's core components include Structures (Agents, Pipelines, and Workflows), Tasks, Tools, Memory (Conversation Memory, Task Memory, and Meta Memory), Drivers (Prompt and Embedding Drivers, Vector Store Drivers, Image Generation Drivers, Image Query Drivers, SQL Drivers, Web Scraper Drivers, and Conversation Memory Drivers), Engines (Query Engines, Extraction Engines, Summary Engines, Image Generation Engines, and Image Query Engines), and additional components (Rulesets, Loaders, Artifacts, Chunkers, and Tokenizers). Griptape enables developers to create AI-powered applications with ease and efficiency.


