
mobile-use
AI agents can now use real Android and iOS apps, just like a human.
Stars: 1666
Mobile-use is an open-source AI agent that controls Android or IOS devices using natural language. It understands commands to perform tasks like sending messages and navigating apps. Features include natural language control, UI-aware automation, data scraping, and extensibility. Users can automate their mobile experience by setting up environment variables, customizing LLM configurations, and launching the tool via Docker or manually for development. The tool supports physical Android phones, Android simulators, and iOS simulators. Contributions are welcome, and the project is licensed under MIT.
README:


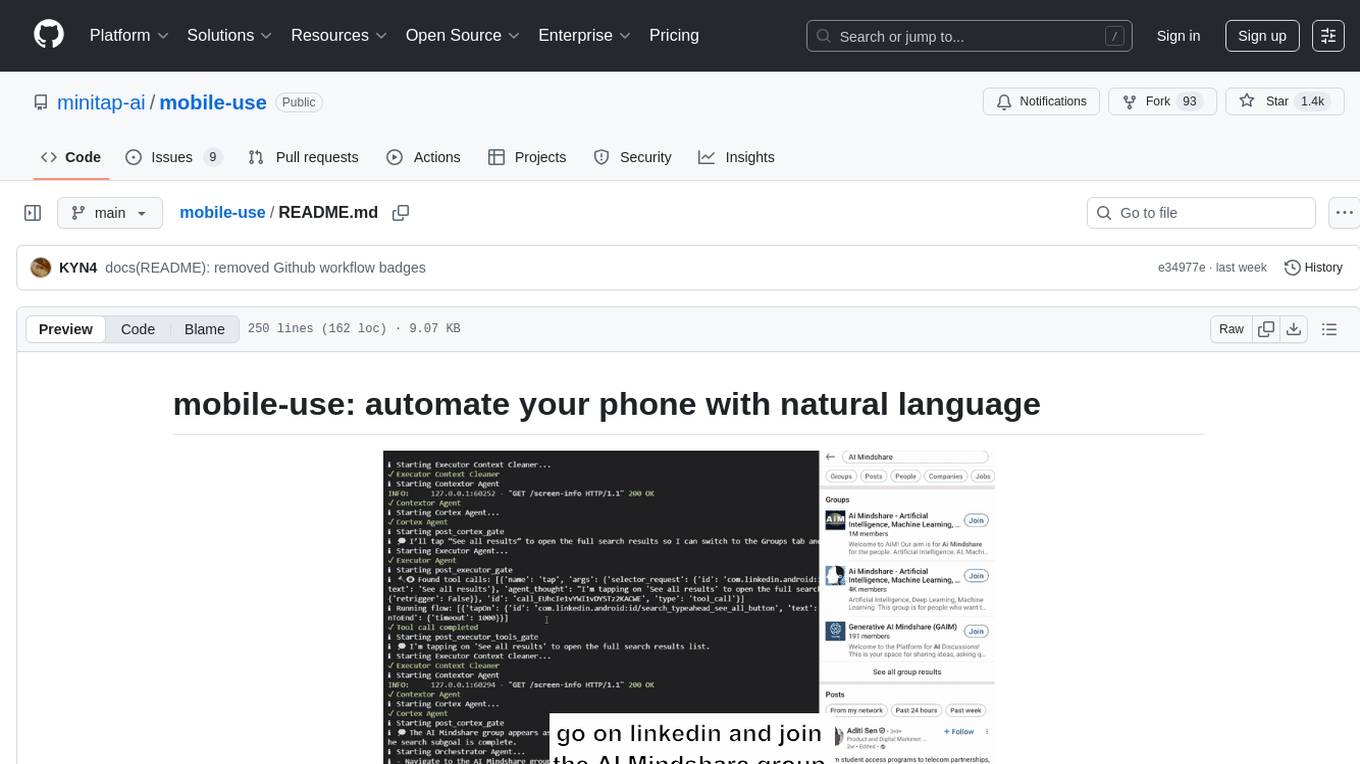
Mobile-use is a powerful, open-source AI agent that controls your Android or IOS device using natural language. It understands your commands and interacts with the UI to perform tasks, from sending messages to navigating complex apps.
Mobile-use is quickly evolving. Your suggestions, ideas, and reported bugs will shape this project. Do not hesitate to join in the conversation on Discord or contribute directly, we will reply to everyone! ❤️
- 🗣️ Natural Language Control: Interact with your phone using your native language.
- 📱 UI-Aware Automation: Intelligently navigates through app interfaces (note: currently has limited effectiveness with games as they don't provide accessibility tree data).
- 📊 Data Scraping: Extract information from any app and structure it into your desired format (e.g., JSON) using a natural language description.
- 🔧 Extensible & Customizable: Easily configure different LLMs to power the agents that power mobile-use.

We are global number 1 Opensource pass@1 on the AndroidWorld benchmark.
More info here: https://minitap.ai/research/mobile-ai-agents-benchmark
The official leaderboard is available here
Ready to automate your mobile experience? Follow these steps to get mobile-use up and running.
-
Set up Environment Variables: Copy the example
.env.examplefile to.envand add your API keys.cp .env.example .env
-
(Optional) Customize LLM Configuration: To use different models or providers, create your own LLM configuration file.
cp llm-config.override.template.jsonc llm-config.override.jsonc
Then, edit
llm-config.override.jsoncto fit your needs.You can also use local LLMs or any other openai-api compatible providers :
- Set
OPENAI_BASE_URLandOPENAI_API_KEYin your.env - In your
llm-config.override.jsonc, setopenaias the provider for the agent nodes you want, and choose a model supported by your provider.
[!NOTE]
If you want to use Google Vertex AI, you must either:- Have credentials configured for your environment (gcloud, workload identity, etc…)
- Store the path to a service account JSON file as the GOOGLE_APPLICATION_CREDENTIALS environment variable
More information: - Credential types - google.auth API reference
- Set
[!NOTE]
This quickstart, is only available for Android devices/emulators as of now, and you must have Docker installed.
First:
- Either plug your Android device and enable USB-debugging via the Developer Options
- Or launch an Android emulator
[!IMPORTANT]
At some point, the terminal will HANG, and Maestro will ask youMaestro CLI would like to collect anonymous usage data to improve the product.It's up to you whether you accept (i.e enter 'Y') or not (i.e. enter 'n').
Then run in your terminal:
- For Linux/macOS:
chmod +x mobile-use.sh
bash ./mobile-use.sh \
  "Open Gmail, find first 3 unread emails, and list their sender and subject line" \
--output-description "A JSON list of objects, each with 'sender' and 'subject' keys"- For Windows (inside a Powershell terminal):
powershell.exe -ExecutionPolicy Bypass -File mobile-use.ps1 `
  "Open Gmail, find first 3 unread emails, and list their sender and subject line" `
  --output-description "A JSON list of objects, each with 'sender' and 'subject' keys"
[!NOTE]
If using your own device, make sure to accept the ADB-related connection requests that will pop up on your device. Similarly, Maestro will need to install its APK on your device, which will also require you to accept the installation request.
The script will try to connect to your device via IP.
Therefore, your device must be connected to the same Wi-Fi network as your computer.
If the script fails with the following message:
Could not get device IP. Is a device connected via USB and on the same Wi-Fi network?
Then it couldn't find one of the common Wi-Fi interfaces on your device.
Therefore, you must determine what WLAN interface your phone is using via adb shell ip addr show up.
Then add the --interface <YOUR_INTERFACE_NAME> option to the script.
This is most probably an issue with your firewall blocking the connection. Therefore there is no clear fix for this.
Since UV docker images rely on a ghcr.io public repositories, you may have an expired token if you used ghcr.io before for private repositories.
Try running docker logout ghcr.io and then run the script again.
For developers who want to set up the environment manually:
Mobile-use currently supports the following devices:
- Physical Android Phones: Connect via USB with USB debugging enabled.
- Android Simulators: Set up through Android Studio.
- iOS Simulators: Supported for macOS users.
[!NOTE]
Physical iOS devices are not yet supported.
For Android:
- Android Debug Bridge (ADB): A tool to connect to your device.
For iOS:
- Xcode: Apple's IDE for iOS development.
Before you begin, ensure you have the following installed:
- uv: A lightning-fast Python package manager.
- Maestro: The framework we use to interact with your device.
-
Clone the repository:
git clone https://github.com/minitap-ai/mobile-use.git && cd mobile-use
-
Create & activate the virtual environment:
# This will create a .venv directory using the Python version in .python-version
uv venv

# Activate the environment
# On macOS/Linux:
source .venv/bin/activate
# On Windows:
.venv\Scripts\activate
-
Install dependencies:
# Sync with the locked dependencies for a consistent setup
uv sync
To run mobile-use, simply pass your command as an argument.
Example 1: Basic Command
python ./src/mobile_use/main.py "Go to settings and tell me my current battery level"Example 2: Data Scraping
Extract specific information and get it back in a structured format. For instance, to get a list of your unread emails:
python ./src/mobile_use/main.py \
  "Open Gmail, find all unread emails, and list their sender and subject line" \
  --output-description "A JSON list of objects, each with 'sender' and 'subject' keys"
[!NOTE]
If you haven't configured a specific model, mobile-use will prompt you to choose one from the available options.

This diagram is automatically updated from the codebase. This is our current agentic system architecture.
We love contributions! Whether you're fixing a bug, adding a feature, or improving documentation, your help is welcome. Please read our Contributing Guidelines to get started.
This project is licensed under the MIT License - see the LICENSE file for details.
For Tasks:
Click tags to check more tools for each tasksFor Jobs:
Alternative AI tools for mobile-use
Similar Open Source Tools
mobile-use
Mobile-use is an open-source AI agent that controls Android or IOS devices using natural language. It understands commands to perform tasks like sending messages and navigating apps. Features include natural language control, UI-aware automation, data scraping, and extensibility. Users can automate their mobile experience by setting up environment variables, customizing LLM configurations, and launching the tool via Docker or manually for development. The tool supports physical Android phones, Android simulators, and iOS simulators. Contributions are welcome, and the project is licensed under MIT.
ChatGPT-desktop
ChatGPT Desktop Application is a multi-platform tool that provides a powerful AI wrapper for generating text. It offers features like text-to-speech, exporting chat history in various formats, automatic application upgrades, system tray hover window, support for slash commands, customization of global shortcuts, and pop-up search. The application is built using Tauri and aims to enhance user experience by simplifying text generation tasks. It is available for Mac, Windows, and Linux, and is designed for personal learning and research purposes.
lexido
Lexido is an innovative assistant for the Linux command line, designed to boost your productivity and efficiency. Powered by Gemini Pro 1.0 and utilizing the free API, Lexido offers smart suggestions for commands based on your prompts and importantly your current environment. Whether you're installing software, managing files, or configuring system settings, Lexido streamlines the process, making it faster and more intuitive.
joinly
joinly.ai is a connector middleware designed to enable AI agents to actively participate in video calls, providing essential meeting tools for AI agents to perform tasks and interact in real time. It supports live interaction, conversational flow, cross-platform compatibility, bring-your-own-LLM, and choose-your-preferred-TTS/STT services. The tool is 100% open-source, self-hosted, and privacy-first, aiming to make meetings accessible to AI agents by joining and participating in video calls.
DesktopCommanderMCP
Desktop Commander MCP is a server that allows the Claude desktop app to execute long-running terminal commands on your computer and manage processes through Model Context Protocol (MCP). It is built on top of MCP Filesystem Server to provide additional search and replace file editing capabilities. The tool enables users to execute terminal commands with output streaming, manage processes, perform full filesystem operations, and edit code with surgical text replacements or full file rewrites. It also supports vscode-ripgrep based recursive code or text search in folders.
sd-webui-agent-scheduler
AgentScheduler is an Automatic/Vladmandic Stable Diffusion Web UI extension designed to enhance image generation workflows. It allows users to enqueue prompts, settings, and controlnets, manage queued tasks, prioritize, pause, resume, and delete tasks, view generation results, and more. The extension offers hidden features like queuing checkpoints, editing queued tasks, and custom checkpoint selection. Users can access the functionality through HTTP APIs and API callbacks. Troubleshooting steps are provided for common errors. The extension is compatible with latest versions of A1111 and Vladmandic. It is licensed under Apache License 2.0.
ChatGPT
The ChatGPT API Free Reverse Proxy provides free self-hosted API access to ChatGPT (`gpt-3.5-turbo`) with OpenAI's familiar structure, eliminating the need for code changes. It offers streaming response, API endpoint compatibility, and complimentary access without an API key. Installation options include Docker, PC/Server, and Termux on Android devices. The API can be accessed through a self-hosted local server or a pre-hosted API with an API key obtained from the Discord server. Usage examples are provided for Python and Node.js, and the project is licensed under AGPL-3.0.
gitingest
GitIngest is a tool that allows users to turn any Git repository into a prompt-friendly text ingest for LLMs. It provides easy code context by generating a text digest from a git repository URL or directory. The tool offers smart formatting for optimized output format for LLM prompts and provides statistics about file and directory structure, size of the extract, and token count. GitIngest can be used as a CLI tool on Linux and as a Python package for code integration. The tool is built using Tailwind CSS for frontend, FastAPI for backend framework, tiktoken for token estimation, and apianalytics.dev for simple analytics. Users can self-host GitIngest by building the Docker image and running the container. Contributions to the project are welcome, and the tool aims to be beginner-friendly for first-time contributors with a simple Python and HTML codebase.
preswald
Preswald is a full-stack platform for building, deploying, and managing interactive data applications in Python. It simplifies the process by combining ingestion, storage, transformation, and visualization into one lightweight SDK. With Preswald, users can connect to various data sources, customize app themes, and easily deploy apps locally. The platform focuses on code-first simplicity, end-to-end coverage, and efficiency by design, making it suitable for prototyping internal tools or deploying production-grade apps with reduced complexity and cost.
Cerebr
Cerebr is an intelligent AI assistant browser extension designed to enhance work efficiency and learning experience. It integrates powerful AI capabilities from various sources to provide features such as smart sidebar, multiple API support, cross-browser API configuration synchronization, comprehensive Q&A support, elegant rendering, real-time response, theme switching, and more. With a minimalist design and focus on delivering a seamless, distraction-free browsing experience, Cerebr aims to be your second brain for deep reading and understanding.
echokit_server
Echokit_server is a lightweight and efficient server-side implementation of the Amazon Alexa Voice Service (AVS) SDK. It allows developers to easily integrate Alexa voice capabilities into their own applications or devices. The server handles the communication with the Alexa Voice Service API, manages user interactions, and processes voice commands. Echokit_server provides a simple and flexible solution for adding voice-controlled features to a wide range of projects, such as smart home devices, IoT applications, and voice-enabled services.
rag-gpt
RAG-GPT is a tool that allows users to quickly launch an intelligent customer service system with Flask, LLM, and RAG. It includes frontend, backend, and admin console components. The tool supports cloud-based and local LLMs, enables deployment of conversational service robots in minutes, integrates diverse knowledge bases, offers flexible configuration options, and features an attractive user interface.

steel-browser
Steel is an open-source browser API designed for AI agents and applications, simplifying the process of building live web agents and browser automation tools. It serves as a core building block for a production-ready, containerized browser sandbox with features like stealth capabilities, text-to-markdown session management, UI for session viewing/debugging, and full browser control through popular automation frameworks. Steel allows users to control, run, and manage a production-ready browser environment via a REST API, offering features such as full browser control, session management, proxy support, extension support, debugging tools, anti-detection mechanisms, resource management, and various browser tools. It aims to streamline complex browsing tasks programmatically, enabling users to focus on their AI applications while Steel handles the underlying complexity.
bedrock-claude-chat
This repository is a sample chatbot using the Anthropic company's LLM Claude, one of the foundational models provided by Amazon Bedrock for generative AI. It allows users to have basic conversations with the chatbot, personalize it with their own instructions and external knowledge, and analyze usage for each user/bot on the administrator dashboard. The chatbot supports various languages, including English, Japanese, Korean, Chinese, French, German, and Spanish. Deployment is straightforward and can be done via the command line or by using AWS CDK. The architecture is built on AWS managed services, eliminating the need for infrastructure management and ensuring scalability, reliability, and security.
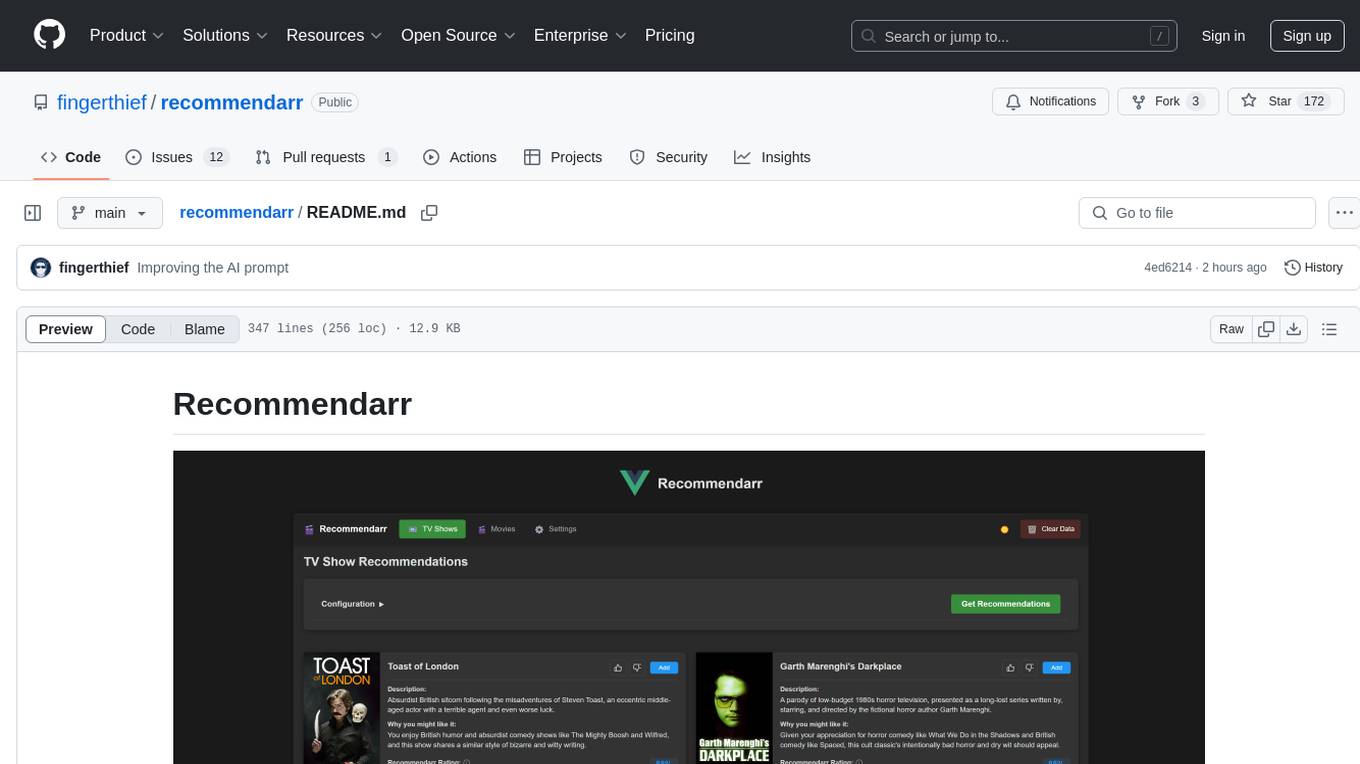
recommendarr
Recommendarr is a tool that generates personalized TV show and movie recommendations based on your Sonarr, Radarr, Plex, and Jellyfin libraries using AI. It offers AI-powered recommendations, media server integration, flexible AI support, watch history analysis, customization options, and dark/light mode toggle. Users can connect their media libraries and watch history services, configure AI service settings, and get personalized recommendations based on genre, language, and mood/vibe preferences. The tool works with any OpenAI-compatible API and offers various recommended models for different cost options and performance levels. It provides personalized suggestions, detailed information, filter options, watch history analysis, and one-click adding of recommended content to Sonarr/Radarr.
AIRAVAT
AIRAVAT is a multifunctional Android Remote Access Tool (RAT) with a GUI-based Web Panel that does not require port forwarding. It allows users to access various features on the victim's device, such as reading files, downloading media, retrieving system information, managing applications, SMS, call logs, contacts, notifications, keylogging, admin permissions, phishing, audio recording, music playback, device control (vibration, torch light, wallpaper), executing shell commands, clipboard text retrieval, URL launching, and background operation. The tool requires a Firebase account and tools like ApkEasy Tool or ApkTool M for building. Users can set up Firebase, host the web panel, modify Instagram.apk for RAT functionality, and connect the victim's device to the web panel. The tool is intended for educational purposes only, and users are solely responsible for its use.
For similar tasks
mobile-use
Mobile-use is an open-source AI agent that controls Android or IOS devices using natural language. It understands commands to perform tasks like sending messages and navigating apps. Features include natural language control, UI-aware automation, data scraping, and extensibility. Users can automate their mobile experience by setting up environment variables, customizing LLM configurations, and launching the tool via Docker or manually for development. The tool supports physical Android phones, Android simulators, and iOS simulators. Contributions are welcome, and the project is licensed under MIT.
dspy.rb
DSPy.rb is a Ruby framework for building reliable LLM applications using composable, type-safe modules. It enables developers to define typed signatures and compose them into pipelines, offering a more structured approach compared to traditional prompting. The framework embraces Ruby conventions and adds innovations like CodeAct agents and enhanced production instrumentation, resulting in scalable LLM applications that are robust and efficient. DSPy.rb is actively developed, with a focus on stability and real-world feedback through the 0.x series before reaching a stable v1.0 API.
tuui
TUUI is a desktop MCP client designed for accelerating AI adoption through the Model Context Protocol (MCP) and enabling cross-vendor LLM API orchestration. It is an LLM chat desktop application based on MCP, created using AI-generated components with strict syntax checks and naming conventions. The tool integrates AI tools via MCP, orchestrates LLM APIs, supports automated application testing, TypeScript, multilingual, layout management, global state management, and offers quick support through the GitHub community and official documentation.
TTP-Threat-Feeds
TTP-Threat-Feeds is a script-powered threat feed generator that automates the discovery and parsing of threat actor behavior from security research. It scrapes URLs from trusted sources, extracts observable adversary behaviors, and outputs structured YAML files to help detection engineers and threat researchers derive detection opportunities and correlation logic. The tool supports multiple LLM providers for text extraction and includes OCR functionality for extracting content from images. Users can configure URLs, run the extractor, and save results as YAML files. Cloud provider SDKs are optional. Contributions are welcome for improvements and enhancements to the tool.

blurr
Panda is a proactive, on-device AI agent for Android that autonomously understands natural language commands and operates your phone's UI to achieve them. It acts as a personal operator, handling complex, multi-step tasks across different applications. With intelligent UI automation, high-quality voice, and personalized local memory, Panda simplifies interactions with technology. Built on Kotlin, Panda's architecture includes Eyes & Hands for physical device connection, The Brain for reasoning, and The Agent for execution. The project is a proof-of-concept aiming to become an indispensable assistant.
PythonPark
PythonPark is a paradise for learning Python, providing babysitter-level tutorials on AI labs, treasure videos, data structures, study guides, machine learning practicals, deep learning practicals, Python basics, web scraping, big company interview experiences, programming life, and resource sharing. Original articles are published at least twice a week, with the latest articles being first released on WeChat and videos on Bilibili. Join the WeChat group for technical discussions or to provide feedback. Continuously improving and outputting content!
Fyin
Fyin is an open-source tool that serves as an alternative to Perplexity AI, allowing users to run it locally for faster answers. It features the ability to run locally using ollama or OpenAI API, a local VectorDB for fast search, quick searching, scraping & answering due to parallelism, configurable number of search results to parse, and local scraping of websites. The tool aims to provide a more efficient and customizable solution for obtaining answers through search and scraping functionalities.
ArcadiaScriptPublic
ArcadiaScriptPublic is a repository containing various scripts for learning and practicing JavaScript, Python, and Shell scripting. It is intended for testing and educational purposes only, and not for commercial use. The repository does not guarantee the legality, accuracy, completeness, or effectiveness of the scripts, and users are advised to use them at their own discretion. No resources from the repository are allowed to be republished or redistributed by any public account or self-media. The repository owner disclaims any responsibility for script-related issues, including losses or damages resulting from script errors. Users indirectly utilizing the scripts, such as setting up VPS or engaging in activities that violate national/regional laws or regulations, are solely responsible for any privacy leaks or consequences. If any entity or individual believes that the scripts in the project may infringe upon their rights, they should promptly notify and provide proof of identity and ownership, upon which the relevant scripts will be removed after verification. Anyone viewing or using the scripts in this project should carefully read and accept the disclaimer provided by zjk2017/ArcadiaScriptPublic, as the repository reserves the right to change or supplement the disclaimer at any time. Users must completely delete the downloaded content from their computers or phones within 24 hours of downloading, and any form of profit chain generation is strictly prohibited.
For similar jobs
sweep
Sweep is an AI junior developer that turns bugs and feature requests into code changes. It automatically handles developer experience improvements like adding type hints and improving test coverage.
teams-ai
The Teams AI Library is a software development kit (SDK) that helps developers create bots that can interact with Teams and Microsoft 365 applications. It is built on top of the Bot Framework SDK and simplifies the process of developing bots that interact with Teams' artificial intelligence capabilities. The SDK is available for JavaScript/TypeScript, .NET, and Python.
ai-guide
This guide is dedicated to Large Language Models (LLMs) that you can run on your home computer. It assumes your PC is a lower-end, non-gaming setup.

classifai
Supercharge WordPress Content Workflows and Engagement with Artificial Intelligence. Tap into leading cloud-based services like OpenAI, Microsoft Azure AI, Google Gemini and IBM Watson to augment your WordPress-powered websites. Publish content faster while improving SEO performance and increasing audience engagement. ClassifAI integrates Artificial Intelligence and Machine Learning technologies to lighten your workload and eliminate tedious tasks, giving you more time to create original content that matters.
chatbot-ui
Chatbot UI is an open-source AI chat app that allows users to create and deploy their own AI chatbots. It is easy to use and can be customized to fit any need. Chatbot UI is perfect for businesses, developers, and anyone who wants to create a chatbot.
BricksLLM
BricksLLM is a cloud native AI gateway written in Go. Currently, it provides native support for OpenAI, Anthropic, Azure OpenAI and vLLM. BricksLLM aims to provide enterprise level infrastructure that can power any LLM production use cases. Here are some use cases for BricksLLM: * Set LLM usage limits for users on different pricing tiers * Track LLM usage on a per user and per organization basis * Block or redact requests containing PIIs * Improve LLM reliability with failovers, retries and caching * Distribute API keys with rate limits and cost limits for internal development/production use cases * Distribute API keys with rate limits and cost limits for students
uAgents
uAgents is a Python library developed by Fetch.ai that allows for the creation of autonomous AI agents. These agents can perform various tasks on a schedule or take action on various events. uAgents are easy to create and manage, and they are connected to a fast-growing network of other uAgents. They are also secure, with cryptographically secured messages and wallets.
griptape
Griptape is a modular Python framework for building AI-powered applications that securely connect to your enterprise data and APIs. It offers developers the ability to maintain control and flexibility at every step. Griptape's core components include Structures (Agents, Pipelines, and Workflows), Tasks, Tools, Memory (Conversation Memory, Task Memory, and Meta Memory), Drivers (Prompt and Embedding Drivers, Vector Store Drivers, Image Generation Drivers, Image Query Drivers, SQL Drivers, Web Scraper Drivers, and Conversation Memory Drivers), Engines (Query Engines, Extraction Engines, Summary Engines, Image Generation Engines, and Image Query Engines), and additional components (Rulesets, Loaders, Artifacts, Chunkers, and Tokenizers). Griptape enables developers to create AI-powered applications with ease and efficiency.