hayhooks
Easily deploy Haystack pipelines as REST APIs and MCP Tools.
Stars: 111

Hayhooks is a tool that simplifies the deployment and serving of Haystack pipelines as REST APIs. It allows users to wrap their pipelines with custom logic and expose them via HTTP endpoints, including OpenAI-compatible chat completion endpoints. With Hayhooks, users can easily convert their Haystack pipelines into API services with minimal boilerplate code.
README:
Hayhooks makes it easy to deploy and serve Haystack Pipelines and Agents.
With Hayhooks, you can:
- 📦 Deploy your Haystack pipelines and agents as REST APIs with maximum flexibility and minimal boilerplate code.
- 🛠️ Expose your Haystack pipelines and agents over the MCP protocol, making them available as tools in AI dev environments like Cursor or Claude Desktop. Under the hood, Hayhooks runs as an MCP Server, exposing each pipeline and agent as an MCP Tool.
- 💬 Integrate your Haystack pipelines and agents with open-webui as OpenAI-compatible chat completion backends with streaming support.
- 🕹️ Control Hayhooks core API endpoints through chat - deploy, undeploy, list, or run Haystack pipelines and agents by chatting with Claude Desktop, Cursor, or any other MCP client.
- Quick Start with Docker Compose
- Quick Start
- Install the package
- Configuration
- Logging
- CLI Commands
- Start Hayhooks
- Deploy a Pipeline
- Deploy an Agent
- Support file uploads
- Run pipelines from the CLI
- MCP support
-
Hayhooks as an OpenAPI Tool Server in
open-webui
-
OpenAI Compatibility and
open-webui
integration - Sending
open-webui
events enhancing the user experience - Hooks
- Advanced Usage
- Deployment Guidelines
- Legacy Features
- License
To quickly get started with Hayhooks, we provide a ready-to-use Docker Compose 🐳 setup with pre-configured integration with open-webui.
It's available here.
Start by installing the package:
pip install hayhooks
If you want to use the MCP Server, you need to install the hayhooks[mcp]
package:
pip install hayhooks[mcp]
NOTE: You'll need to run at least Python 3.10+ to use the MCP Server.
Currently, you can configure Hayhooks by:
- Set the environment variables in an
.env
file in the root of your project. - Pass the supported arguments and options to
hayhooks run
command. - Pass the environment variables to the
hayhooks
command.
The following environment variables are supported:
-
HAYHOOKS_HOST
: The host on which the server will listen. -
HAYHOOKS_PORT
: The port on which the server will listen. -
HAYHOOKS_MCP_PORT
: The port on which the MCP Server will listen. -
HAYHOOKS_MCP_HOST
: The host on which the MCP Server will listen. -
HAYHOOKS_PIPELINES_DIR
: The path to the directory containing the pipelines. -
HAYHOOKS_ROOT_PATH
: The root path of the server. -
HAYHOOKS_ADDITIONAL_PYTHON_PATH
: Additional Python path to be added to the Python path. -
HAYHOOKS_DISABLE_SSL
: Boolean flag to disable SSL verification when making requests from the CLI. -
HAYHOOKS_USE_HTTPS
: Boolean flag to use HTTPS when using CLI commands to interact with the server (e.g.hayhooks status
will callhttps://HAYHOOKS_HOST:HAYHOOKS_PORT/status
). -
HAYHOOKS_SHOW_TRACEBACKS
: Boolean flag to show tracebacks on errors during pipeline execution and deployment. -
LOG
: The log level to use (default:INFO
).
-
HAYHOOKS_CORS_ALLOW_ORIGINS
: List of allowed origins (default: ["*"]) -
HAYHOOKS_CORS_ALLOW_METHODS
: List of allowed HTTP methods (default: ["*"]) -
HAYHOOKS_CORS_ALLOW_HEADERS
: List of allowed headers (default: ["*"]) -
HAYHOOKS_CORS_ALLOW_CREDENTIALS
: Allow credentials (default: false) -
HAYHOOKS_CORS_ALLOW_ORIGIN_REGEX
: Regex pattern for allowed origins (default: null) -
HAYHOOKS_CORS_EXPOSE_HEADERS
: Headers to expose in response (default: []) -
HAYHOOKS_CORS_MAX_AGE
: Maximum age for CORS preflight responses in seconds (default: 600)
Hayhooks comes with a default logger based on loguru.
To use it, you can import the log
object from the hayhooks
package:
from hayhooks import log
To change the log level, you can set the LOG
environment variable to one of the levels supported by loguru.
For example, to use the DEBUG
level, you can set:
LOG=DEBUG hayhooks run
# or
LOG=debug hayhooks run
# or in an .env file
LOG=debug
The hayhooks
package provides a CLI to manage the server and the pipelines.
Any command can be run with hayhooks <command> --help
to get more information.
CLI commands are basically wrappers around the HTTP API of the server. The full API reference is available at //HAYHOOKS_HOST:HAYHOOKS_PORT/docs or //HAYHOOKS_HOST:HAYHOOKS_PORT/redoc.
hayhooks run # Start the server
hayhooks status # Check the status of the server and show deployed pipelines
hayhooks pipeline deploy-files <path_to_dir> # Deploy a pipeline using PipelineWrapper
hayhooks pipeline deploy <pipeline_name> # Deploy a pipeline from a YAML file
hayhooks pipeline undeploy <pipeline_name> # Undeploy a pipeline
hayhooks pipeline run <pipeline_name> # Run a pipeline
Let's start Hayhooks:
hayhooks run
This will start the Hayhooks server on HAYHOOKS_HOST:HAYHOOKS_PORT
.
Now, we will deploy a pipeline to chat with a website. We have created an example in the examples/pipeline_wrappers/chat_with_website_streaming folder.
In the example folder, we have two files:
-
chat_with_website.yml
: The pipeline definition in YAML format. -
pipeline_wrapper.py
(mandatory): A pipeline wrapper that uses the pipeline definition.
The pipeline wrapper provides a flexible foundation for deploying Haystack pipelines, agents or any other component by allowing users to:
- Choose their preferred initialization method (YAML files, Haystack templates, or inline code)
- Define custom execution logic with configurable inputs and outputs
- Optionally expose OpenAI-compatible chat endpoints with streaming support for integration with interfaces like open-webui
The pipeline_wrapper.py
file must contain an implementation of the BasePipelineWrapper
class (see here for more details).
A minimal PipelineWrapper
looks like this:
from pathlib import Path
from typing import List
from haystack import Pipeline
from hayhooks import BasePipelineWrapper
class PipelineWrapper(BasePipelineWrapper):
def setup(self) -> None:
pipeline_yaml = (Path(__file__).parent / "chat_with_website.yml").read_text()
self.pipeline = Pipeline.loads(pipeline_yaml)
def run_api(self, urls: List[str], question: str) -> str:
result = self.pipeline.run({"fetcher": {"urls": urls}, "prompt": {"query": question}})
return result["llm"]["replies"][0]
It contains two methods:
This method will be called when the pipeline is deployed. It should initialize the self.pipeline
attribute as a Haystack pipeline.
You can initialize the pipeline in many ways:
- Load it from a YAML file.
- Define it inline as a Haystack pipeline code.
- Load it from a Haystack pipeline template.
This method will be used to run the pipeline in API mode, when you call the {pipeline_name}/run
endpoint.
You can define the input arguments of the method according to your needs.
def run_api(self, urls: List[str], question: str, any_other_user_defined_argument: Any) -> str:
...
The input arguments will be used to generate a Pydantic model that will be used to validate the request body. The same will be done for the response type.
NOTE: Since Hayhooks will dynamically create the Pydantic models, you need to make sure that the input arguments are JSON-serializable.
This method is the asynchronous version of run_api
. It will be used to run the pipeline in API mode when you call the {pipeline_name}/run
endpoint, but handles requests asynchronously for better performance under high load.
You can define the input arguments of the method according to your needs, just like with run_api
.
async def run_api_async(self, urls: List[str], question: str, any_other_user_defined_argument: Any) -> str:
# Use async/await with AsyncPipeline or async operations
result = await self.pipeline.run_async({"fetcher": {"urls": urls}, "prompt": {"query": question}})
return result["llm"]["replies"][0]
This is particularly useful when:
- Working with
AsyncPipeline
instances that support async execution - Integrating with async-compatible Haystack components (e.g.,
OpenAIChatGenerator
with async support) - Handling I/O-bound operations more efficiently
- Deploying pipelines that need to handle many concurrent requests
NOTE: You can implement either run_api
, run_api_async
, or both. Hayhooks will automatically detect which methods are implemented and route requests accordingly.
You can find complete working examples of async pipeline wrappers in the test files and async streaming examples.
To deploy the pipeline, run:
hayhooks pipeline deploy-files -n chat_with_website examples/pipeline_wrappers/chat_with_website_streaming
This will deploy the pipeline with the name chat_with_website
. Any error encountered during development will be printed to the console and show in the server logs.
During development, you can use the --overwrite
flag to redeploy your pipeline without restarting the Hayhooks server:
hayhooks pipeline deploy-files -n {pipeline_name} --overwrite {pipeline_dir}
This is particularly useful when:
- Iterating on your pipeline wrapper implementation
- Debugging pipeline setup issues
- Testing different pipeline configurations
The --overwrite
flag will:
- Remove the existing pipeline from the registry
- Delete the pipeline files from disk
- Deploy the new version of your pipeline
For even faster development iterations, you can combine --overwrite
with --skip-saving-files
to avoid writing files to disk:
hayhooks pipeline deploy-files -n {pipeline_name} --overwrite --skip-saving-files {pipeline_dir}
This is useful when:
- You're making frequent changes during development
- You want to test a pipeline without persisting it
- You're running in an environment with limited disk access
After installing the Hayhooks package, it might happen that during pipeline deployment you need to install additional dependencies in order to correctly initialize the pipeline instance when calling the wrapper's setup()
method. For instance, the chat_with_website
pipeline requires the trafilatura
package, which is not installed by default.
HAYHOOKS_SHOW_TRACEBACKS
environment variable to true
or 1
.
Then, assuming you've installed the Hayhooks package in a virtual environment, you will need to install the additional required dependencies yourself by running:
pip install trafilatura
Deploying a Haystack Agent is very similar to deploying a pipeline.
You simply need to create a PipelineWrapper
which will wrap the Haystack Agent instance. The following example is the bare minimum to deploy an agent and make it usable through open-webui
, supporting streaming responses:
from typing import AsyncGenerator
from haystack.components.agents import Agent
from haystack.dataclasses import ChatMessage
from haystack.components.generators.chat import OpenAIChatGenerator
from hayhooks import BasePipelineWrapper, async_streaming_generator
class PipelineWrapper(BasePipelineWrapper):
def setup(self) -> None:
self.agent = Agent(
chat_generator=OpenAIChatGenerator(model="gpt-4o-mini"),
system_prompt="You're a helpful agent",
)
async def run_chat_completion_async(
self, model: str, messages: list[dict], body: dict
) -> AsyncGenerator[str, None]:
chat_messages = [
ChatMessage.from_openai_dict_format(message) for message in messages
]
return async_streaming_generator(
pipeline=self.agent,
pipeline_run_args={
"messages": chat_messages,
},
)
As you can see, the run_chat_completion_async
method is the one that will be used to run the agent. You can of course implement also run_api
or run_api_async
methods if you need to.
The async_streaming_generator
function is a utility function that will handle the streaming of the agent's responses.
Hayhooks can easily handle uploaded files in your pipeline wrapper run_api
method by adding files: Optional[List[UploadFile]] = None
as an argument.
Here's a simple example:
def run_api(self, files: Optional[List[UploadFile]] = None) -> str:
if files and len(files) > 0:
filenames = [f.filename for f in files if f.filename is not None]
file_contents = [f.file.read() for f in files]
return f"Received files: {', '.join(filenames)}"
return "No files received"
This will make Hayhooks handle automatically the file uploads (if they are present) and pass them to the run_api
method.
This also means that the HTTP request needs to be a multipart/form-data
request.
Note also that you can handle both files and parameters in the same request, simply adding them as arguments to the run_api
method.
def run_api(self, files: Optional[List[UploadFile]] = None, additional_param: str = "default") -> str:
...
You can find a full example in the examples/rag_indexing_query folder.
You can run a pipeline by using the hayhooks pipeline run
command. Under the hood, this will call the run_api
method of the pipeline wrapper, passing parameters as the JSON body of the request.
This is convenient when you want to do a test run of the deployed pipeline from the CLI without having to write any code.
To run a pipeline from the CLI, you can use the following command:
hayhooks pipeline run <pipeline_name> --param 'question="is this recipe vegan?"'
This is useful when you want to run a pipeline that requires a file as input. In that case, the request will be a multipart/form-data
request. You can pass both files and parameters in the same request.
NOTE: To use this feature, you need to deploy a pipeline which is handling files (see Support file uploads and examples/rag_indexing_query for more details).
# Upload a whole directory
hayhooks pipeline run <pipeline_name> --dir files_to_index
# Upload a single file
hayhooks pipeline run <pipeline_name> --file file.pdf
# Upload multiple files
hayhooks pipeline run <pipeline_name> --dir files_to_index --file file1.pdf --file file2.pdf
# Upload a single file passing also a parameter
hayhooks pipeline run <pipeline_name> --file file.pdf --param 'question="is this recipe vegan?"'
NOTE: You'll need to run at least Python 3.10+ to use the MCP Server.
Hayhooks now supports the Model Context Protocol and can act as a MCP Server.
It will:
- Expose Core Tools to make it possible to control Hayhooks directly from an IDE like Cursor or any other MCP client.
- Expose the deployed Haystack pipelines as usable MCP Tools, using both Server-Sent Events (SSE) and (stateless) Streamable HTTP MCP transports.
(Note that SSE transport is deprecated and it's maintained only for backward compatibility).
To run the Hayhooks MCP Server, you can use the following command:
hayhooks mcp run
# Hint: check --help to see all the available options
This will start the Hayhooks MCP Server on HAYHOOKS_MCP_HOST:HAYHOOKS_MCP_PORT
.
A MCP Tool requires the following properties:
-
name
: The name of the tool. -
description
: The description of the tool. -
inputSchema
: A JSON Schema object describing the tool's input parameters.
For each deployed pipeline, Hayhooks will:
- Use the pipeline wrapper
name
as MCP Toolname
(always present). - Parse
run_api
method docstring:- If you use Google-style or reStructuredText-style docstrings, use the first line as MCP Tool
description
and the rest asparameters
(if present). - Each parameter description will be used as the
description
of the corresponding Pydantic model field (if present).
- If you use Google-style or reStructuredText-style docstrings, use the first line as MCP Tool
- Generate a Pydantic model from the
inputSchema
using therun_api
method arguments as fields.
Here's an example of a PipelineWrapper implementation for the chat_with_website
pipeline which can be used as a MCP Tool:
from pathlib import Path
from typing import List
from haystack import Pipeline
from hayhooks import BasePipelineWrapper
class PipelineWrapper(BasePipelineWrapper):
def setup(self) -> None:
pipeline_yaml = (Path(__file__).parent / "chat_with_website.yml").read_text()
self.pipeline = Pipeline.loads(pipeline_yaml)
def run_api(self, urls: List[str], question: str) -> str:
#
# NOTE: The following docstring will be used as MCP Tool description
#
"""
Ask a question about one or more websites using a Haystack pipeline.
"""
result = self.pipeline.run({"fetcher": {"urls": urls}, "prompt": {"query": question}})
return result["llm"]["replies"][0]
You can skip the MCP Tool listing by setting the skip_mcp
class attribute to True
in your PipelineWrapper
class.
This way, the pipeline will be deployed on Hayhooks but will not be listed as a MCP Tool when you run the hayhooks mcp run
command.
class PipelineWrapper(BasePipelineWrapper):
# This will skip the MCP Tool listing
skip_mcp = True
def setup(self) -> None:
...
def run_api(self, urls: List[str], question: str) -> str:
...
As stated in Anthropic's documentation, Claude Desktop supports SSE and Streamable HTTP as MCP Transports only on "Claude.ai & Claude for Desktop for the Pro, Max, Teams, and Enterprise tiers".
If you are using the free tier, only STDIO transport is supported, so you need to use supergateway to connect to the Hayhooks MCP Server via SSE or Streamable HTTP.
After starting the Hayhooks MCP Server, open Settings → Developer in Claude Desktop and update the config file with the following examples:
{
"mcpServers": {
"hayhooks": {
"command": "npx",
"args": [
"-y",
"supergateway",
"--streamableHttp",
"http://HAYHOOKS_MCP_HOST:HAYHOOKS_MCP_PORT/mcp"
]
}
}
}
{
"mcpServers": {
"hayhooks": {
"command": "npx",
"args": [
"-y",
"supergateway",
"--sse",
"http://HAYHOOKS_MCP_HOST:HAYHOOKS_MCP_PORT/sse"
]
}
}
}
Make sure Node.js is installed, as the npx
command depends on it.
Since Hayhooks MCP Server provides by default a set of Core MCP Tools, the MCP server will enable one to interact with Hayhooks in an agentic manner using IDEs like Cursor.
The exposed tools are:
-
get_all_pipeline_statuses
: Get the status of all pipelines and list available pipeline names. -
get_pipeline_status
: Get status of a specific pipeline. Requirespipeline_name
as an argument. -
undeploy_pipeline
: Undeploy a pipeline. Removes a pipeline from the registry, its API routes, and deletes its files. Requirespipeline_name
as an argument. -
deploy_pipeline
: Deploy a pipeline from files (pipeline_wrapper.py
and other files). Requiresname
(pipeline name),files
(list of file contents),save_files
(boolean), andoverwrite
(boolean) as arguments.
From Cursor Settings -> MCP
, you can add a new MCP Server by specifying the following parameters (assuming you have Hayhooks MCP Server running on http://localhost:1417
with Streamable HTTP transport):
{
"mcpServers": {
"hayhooks": {
"url": "http://localhost:1417/mcp"
}
}
}
Or if you need to use the SSE transport:
{
"mcpServers": {
"hayhooks": {
"url": "http://localhost:1417/sse"
}
}
}
After adding the MCP Server, you should see the Hayhooks Core MCP Tools in the list of available tools:
Now in the Cursor chat interface you can use the Hayhooks Core MCP Tools by mentioning them in your messages.
Here's a video example of how to develop and deploy a Haystack pipeline directly from Cursor:
Since Hayhooks expose openapi-schema at /openapi.json
, it can be used as an OpenAPI Tool Server.
open-webui has recently added support for OpenAPI Tool Servers, meaning that you can use the API endpoints of Hayhooks as tools in your chat interface.
You simply need to configure the OpenAPI Tool Server in the Settings -> Tools
section, adding the URL of the Hayhooks server and the path to the openapi.json
file:
Here's a video example of how to deploy a Haystack pipeline from the open-webui
chat interface:
Hayhooks now can automatically generate OpenAI-compatible endpoints if you implement the run_chat_completion
method in your pipeline wrapper.
This will make Hayhooks compatible with fully-featured chat interfaces like open-webui, so you can use it as a backend for your chat interface.
Requirements:
- Ensure you have open-webui up and running (you can do it easily using
docker
, check their quick start guide). - Ensure you have Hayhooks server running somewhere. We will run it locally on
http://localhost:1416
.
First, you need to turn off tags
, title
and follow-up
generation from Admin settings -> Interface
:
This is needed to avoid open-webui
to make calls to your deployed pipelines or agents asking for generating tags, title and follow-up messages (they may be not suited for this use case). Of course, if you want to use them, you can leave them enabled.
Then you have two options to connect Hayhooks as a backend.
Add a Direct Connection from Settings -> Connections
:
NOTE: Fill a random value as API key as it's not needed
Alternatively, you can add an additional OpenAI API Connections from Admin settings -> Connections
:
Even in this case, remember to Fill a random value as API key.
To enable the automatic generation of OpenAI-compatible endpoints, you need only to implement the run_chat_completion
method in your pipeline wrapper.
def run_chat_completion(self, model: str, messages: List[dict], body: dict) -> Union[str, Generator]:
...
Let's update the previous example to add a streaming response:
from pathlib import Path
from typing import Generator, List, Union
from haystack import Pipeline
from hayhooks import get_last_user_message, BasePipelineWrapper, log
URLS = ["https://haystack.deepset.ai", "https://www.redis.io", "https://ssi.inc"]
class PipelineWrapper(BasePipelineWrapper):
def setup(self) -> None:
... # Same as before
def run_api(self, urls: List[str], question: str) -> str:
... # Same as before
def run_chat_completion(self, model: str, messages: List[dict], body: dict) -> Union[str, Generator]:
log.trace(f"Running pipeline with model: {model}, messages: {messages}, body: {body}")
question = get_last_user_message(messages)
log.trace(f"Question: {question}")
# Plain pipeline run, will return a string
result = self.pipeline.run({"fetcher": {"urls": URLS}, "prompt": {"query": question}})
return result["llm"]["replies"][0]
Differently from the run_api
method, the run_chat_completion
has a fixed signature and will be called with the arguments specified in the OpenAI-compatible endpoint.
-
model
: Thename
of the Haystack pipeline which is called. -
messages
: The list of messages from the chat in the OpenAI format. -
body
: The full body of the request.
Some notes:
- Since we have only the user messages as input here, the
question
is extracted from the last user message and theurls
argument is hardcoded. - In this example, the
run_chat_completion
method is returning a string, so theopen-webui
will receive a string as response and show the pipeline output in the chat all at once. - The
body
argument contains the full request body, which may be used to extract more information like thetemperature
or themax_tokens
(see the OpenAI API reference for more information).
Finally, to use non-streaming responses in open-webui
you need also to turn off Stream Chat Response
chat settings.
Here's a video example:
This method is the asynchronous version of run_chat_completion
. It handles OpenAI-compatible chat completion requests asynchronously, which is particularly useful for streaming responses and high-concurrency scenarios.
from hayhooks import async_streaming_generator, get_last_user_message, log
async def run_chat_completion_async(self, model: str, messages: List[dict], body: dict) -> Union[str, AsyncGenerator]:
log.trace(f"Running pipeline with model: {model}, messages: {messages}, body: {body}")
question = get_last_user_message(messages)
log.trace(f"Question: {question}")
# For async streaming responses
return async_streaming_generator(
pipeline=self.pipeline,
pipeline_run_args={"fetcher": {"urls": URLS}, "prompt": {"query": question}},
)
Like run_chat_completion
, this method has a fixed signature and will be called with the same arguments. The key differences are:
- It's declared as
async
and can useawait
for asynchronous operations - It can return an
AsyncGenerator
for streaming responses usingasync_streaming_generator
- It provides better performance for concurrent chat requests
- It's required when using async streaming with components that support async streaming callbacks
NOTE: You can implement either run_chat_completion
, run_chat_completion_async
, or both. When both are implemented, Hayhooks will prefer the async version for better performance.
You can find complete working examples combining async chat completion with streaming in the async streaming test examples.
Hayhooks provides streaming_generator
and async_streaming_generator
utility functions that can be used to stream the pipeline output to the client.
Let's update the run_chat_completion
method of the previous example:
from pathlib import Path
from typing import Generator, List, Union
from haystack import Pipeline
from hayhooks import get_last_user_message, BasePipelineWrapper, log, streaming_generator
URLS = ["https://haystack.deepset.ai", "https://www.redis.io", "https://ssi.inc"]
class PipelineWrapper(BasePipelineWrapper):
def setup(self) -> None:
... # Same as before
def run_api(self, urls: List[str], question: str) -> str:
... # Same as before
def run_chat_completion(self, model: str, messages: List[dict], body: dict) -> Union[str, Generator]:
log.trace(f"Running pipeline with model: {model}, messages: {messages}, body: {body}")
question = get_last_user_message(messages)
log.trace(f"Question: {question}")
# Streaming pipeline run, will return a generator
return streaming_generator(
pipeline=self.pipeline,
pipeline_run_args={"fetcher": {"urls": URLS}, "prompt": {"query": question}},
)
Now, if you run the pipeline and call one of the following endpoints:
{pipeline_name}/chat
/chat/completions
/v1/chat/completions
You will see the pipeline output being streamed in OpenAI-compatible format to the client and you'll be able to see the output in chunks.
Since output will be streamed to open-webui
there's no need to change Stream Chat Response
chat setting (leave it as Default
or On
).
You can find a complete working example of streaming_generator
usage in the examples/pipeline_wrappers/chat_with_website_streaming directory.
Here's a video example:
For asynchronous pipelines or agents, Hayhooks also provides an async_streaming_generator
utility function:
from pathlib import Path
from typing import AsyncGenerator, List, Union
from haystack import AsyncPipeline
from hayhooks import get_last_user_message, BasePipelineWrapper, log, async_streaming_generator
URLS = ["https://haystack.deepset.ai", "https://www.redis.io", "https://ssi.inc"]
class PipelineWrapper(BasePipelineWrapper):
def setup(self) -> None:
pipeline_yaml = (Path(__file__).parent / "chat_with_website.yml").read_text()
self.pipeline = AsyncPipeline.loads(pipeline_yaml) # Note: AsyncPipeline
async def run_chat_completion_async(self, model: str, messages: List[dict], body: dict) -> AsyncGenerator:
log.trace(f"Running pipeline with model: {model}, messages: {messages}, body: {body}")
question = get_last_user_message(messages)
log.trace(f"Question: {question}")
# Async streaming pipeline run, will return an async generator
return async_streaming_generator(
pipeline=self.pipeline,
pipeline_run_args={"fetcher": {"urls": URLS}, "prompt": {"query": question}},
)
The async_streaming_generator
function:
- Works with both
Pipeline
andAsyncPipeline
instances - Requires components that support async streaming callbacks (e.g.,
OpenAIChatGenerator
instead ofOpenAIGenerator
) - Provides better performance for concurrent streaming requests
- Returns an
AsyncGenerator
that yields chunks asynchronously - Automatically handles async pipeline execution and cleanup
NOTE: The streaming component in your pipeline must support async streaming callbacks. If you get an error about async streaming support, either use the sync streaming_generator
or switch to async-compatible components.
Since Hayhooks is OpenAI-compatible, it can be used as a backend for the haystack OpenAIChatGenerator.
Assuming you have a Haystack pipeline named chat_with_website_streaming
and you have deployed it using Hayhooks, here's an example script of how to use it with the OpenAIChatGenerator
:
from haystack.components.generators.chat.openai import OpenAIChatGenerator
from haystack.utils import Secret
from haystack.dataclasses import ChatMessage
from haystack.components.generators.utils import print_streaming_chunk
client = OpenAIChatGenerator(
model="chat_with_website_streaming",
api_key=Secret.from_token("not-relevant"), # This is not used, you can set it to anything
api_base_url="http://localhost:1416/v1/",
streaming_callback=print_streaming_chunk,
)
client.run([ChatMessage.from_user("Where are the offices or SSI?")])
# > The offices of Safe Superintelligence Inc. (SSI) are located in Palo Alto, California, and Tel Aviv, Israel.
# > {'replies': [ChatMessage(_role=<ChatRole.ASSISTANT: 'assistant'>, _content=[TextContent(text='The offices of Safe >Superintelligence Inc. (SSI) are located in Palo Alto, California, and Tel Aviv, Israel.')], _name=None, _meta={'model': >'chat_with_website_streaming', 'index': 0, 'finish_reason': 'stop', 'completion_start_time': '2025-02-11T15:31:44.599726', >'usage': {}})]}
Hayhooks provides support to some open-webui
events to enhance the user experience.
The idea is to enhance the user experience by sending events to the client before, after or when the pipeline is running.
You can use those events to:
- 🔄 Show a loading spinner
- 💬 Update the chat messages
- 🍞 Show a toast notification
You can find a complete example in the examples/pipeline_wrappers/open_webui_agent_events folder.
Here's a preview:
When using open-webui
and streaming responses, both streaming_generator
and async_streaming_generator
provide hooks to intercept tool calls.
The hooks (parameters of streaming_generator
and async_streaming_generator
) are:
-
on_tool_call_start
: Called when a tool call starts. It receives the following arguments:-
tool_name
: The name of the tool that is being called. -
arguments
: The arguments passed to the tool. -
id
: The id of the tool call.
-
-
on_tool_call_end
: Called when a tool call ends. It receives the following arguments:-
tool_name
: The name of the tool that is being called. -
arguments
: The arguments passed to the tool. -
result
: The result of the tool call. -
error
: Whether the tool call ended with an error.
-
You can find a complete example in the examples/pipeline_wrappers/open_webui_agent_on_tool_calls folder.
Here's a preview:
A Hayhooks app instance can be programmatically created by using the create_app
function. This is useful if you want to add custom routes or middleware to Hayhooks.
Here's an example script:
import uvicorn
from hayhooks.settings import settings
from fastapi import Request
from hayhooks import create_app
# Create the Hayhooks app
hayhooks = create_app()
# Add a custom route
@hayhooks.get("/custom")
async def custom_route():
return {"message": "Hi, this is a custom route!"}
# Add a custom middleware
@hayhooks.middleware("http")
async def custom_middleware(request: Request, call_next):
response = await call_next(request)
response.headers["X-Custom-Header"] = "custom-header-value"
return response
if __name__ == "__main__":
uvicorn.run("app:hayhooks", host=settings.host, port=settings.port)
Hayhooks allows you to use your custom code in your pipeline wrappers adding a specific path to the Hayhooks Python Path.
You can do this in three ways:
- Set the
HAYHOOKS_ADDITIONAL_PYTHON_PATH
environment variable to the path of the folder containing your custom code. - Add
HAYHOOKS_ADDITIONAL_PYTHON_PATH
to the.env
file. - Use the
--additional-python-path
flag when launching Hayhooks.
For example, if you have a folder called common
with a my_custom_lib.py
module which contains the my_function
function, you can deploy your pipelines by using the following command:
export HAYHOOKS_ADDITIONAL_PYTHON_PATH='./common'
hayhooks run
Then you can use the custom code in your pipeline wrappers by importing it like this:
from my_custom_lib import my_function
Note that you can use both absolute and relative paths (relative to the current working directory).
You can check out a complete example in the examples/shared_code_between_wrappers folder.
We have some dedicated documentation for deployment:
- Docker-based deployments: https://docs.haystack.deepset.ai/docs/docker
- Kubernetes-based deployments: https://docs.haystack.deepset.ai/docs/kubernetes
We also have some additional deployment guidelines, see deployment_guidelines.md.
We're still supporting the Hayhooks former way to deploy a pipeline.
The former command hayhooks deploy
is now changed to hayhooks pipeline deploy
and can be used to deploy a pipeline only from a YAML definition file.
For example:
hayhooks pipeline deploy -n chat_with_website examples/pipeline_wrappers/chat_with_website/chat_with_website.yml
This will deploy the pipeline with the name chat_with_website
from the YAML definition file examples/pipeline_wrappers/chat_with_website/chat_with_website.yml
. You then can check the generated docs at http://HAYHOOKS_HOST:HAYHOOKS_PORT/docs
or http://HAYHOOKS_HOST:HAYHOOKS_PORT/redoc
, looking at the POST /chat_with_website
endpoint.
This project is licensed under the Apache License 2.0 - see the LICENSE file for details.
For Tasks:
Click tags to check more tools for each tasksFor Jobs:
Alternative AI tools for hayhooks
Similar Open Source Tools
hayhooks
Hayhooks is a tool that simplifies the deployment and serving of Haystack pipelines as REST APIs. It allows users to wrap their pipelines with custom logic and expose them via HTTP endpoints, including OpenAI-compatible chat completion endpoints. With Hayhooks, users can easily convert their Haystack pipelines into API services with minimal boilerplate code.
hyper-mcp
hyper-mcp is a fast and secure MCP server that enables adding AI capabilities to applications through WebAssembly plugins. It supports writing plugins in various languages, distributing them via standard OCI registries, and running them in resource-constrained environments. The tool offers sandboxing with WASM for limiting access, cross-platform compatibility, and deployment flexibility. Security features include sandboxed plugins, memory-safe execution, secure plugin distribution, and fine-grained access control. Users can configure the tool for global or project-specific use, start the server with different transport options, and utilize available plugins for tasks like time calculations, QR code generation, hash generation, IP retrieval, and webpage fetching.

aiounifi
Aiounifi is a Python library that provides a simple interface for interacting with the Unifi Controller API. It allows users to easily manage their Unifi network devices, such as access points, switches, and gateways, through automated scripts or applications. With Aiounifi, users can retrieve device information, perform configuration changes, monitor network performance, and more, all through a convenient and efficient API wrapper. This library simplifies the process of integrating Unifi network management into custom solutions, making it ideal for network administrators, developers, and enthusiasts looking to automate and streamline their network operations.

aigne-hub
AIGNE Hub is a unified AI gateway that manages connections to multiple LLM and AIGC providers, eliminating the complexity of handling API keys, usage tracking, and billing across different AI services. It provides self-hosting capabilities, multi-provider management, unified security, usage analytics, flexible billing, and seamless integration with the AIGNE framework. The tool supports various AI providers and deployment scenarios, catering to both enterprise self-hosting and service provider modes. Users can easily deploy and configure AI providers, enable billing, and utilize core capabilities such as chat completions, image generation, embeddings, and RESTful APIs. AIGNE Hub ensures secure access, encrypted API key management, user permissions, and audit logging. Built with modern technologies like AIGNE Framework, Node.js, TypeScript, React, SQLite, and Blocklet for cloud-native deployment.

CodeWebChat
Code Web Chat is a versatile, free, and open-source AI pair programming tool with a unique web-based workflow. Users can select files, type instructions, and initialize various chatbots like ChatGPT, Gemini, Claude, and more hands-free. The tool helps users save money with free tiers and subscription-based billing and save time with multi-file edits from a single prompt. It supports chatbot initialization through the Connector browser extension and offers API tools for code completions, editing context, intelligent updates, and commit messages. Users can handle AI responses, code completions, and version control through various commands. The tool is privacy-focused, operates locally, and supports any OpenAI-API compatible provider for its utilities.

llms
LLMs is a universal LLM API transformation server designed to standardize requests and responses between different LLM providers such as Anthropic, Gemini, and Deepseek. It uses a modular transformer system to handle provider-specific API formats, supporting real-time streaming responses and converting data into standardized formats. The server transforms requests and responses to and from unified formats, enabling seamless communication between various LLM providers.

nexus
Nexus is a tool that acts as a unified gateway for multiple LLM providers and MCP servers. It allows users to aggregate, govern, and control their AI stack by connecting multiple servers and providers through a single endpoint. Nexus provides features like MCP Server Aggregation, LLM Provider Routing, Context-Aware Tool Search, Protocol Support, Flexible Configuration, Security features, Rate Limiting, and Docker readiness. It supports tool calling, tool discovery, and error handling for STDIO servers. Nexus also integrates with AI assistants, Cursor, Claude Code, and LangChain for seamless usage.

nndeploy
nndeploy is a tool that allows you to quickly build your visual AI workflow without the need for frontend technology. It provides ready-to-use algorithm nodes for non-AI programmers, including large language models, Stable Diffusion, object detection, image segmentation, etc. The workflow can be exported as a JSON configuration file, supporting Python/C++ API for direct loading and running, deployment on cloud servers, desktops, mobile devices, edge devices, and more. The framework includes mainstream high-performance inference engines and deep optimization strategies to help you transform your workflow into enterprise-level production applications.

aide
Aide is a code-first API documentation and utility library for Rust, along with other related utility crates for web-servers. It provides tools for creating API documentation and handling JSON request validation. The repository contains multiple crates that offer drop-in replacements for existing libraries, ensuring compatibility with Aide. Contributions are welcome, and the code is dual licensed under MIT and Apache-2.0. If Aide does not meet your requirements, you can explore similar libraries like paperclip, utoipa, and okapi.

mcp-server-mysql
The MCP Server for MySQL based on NodeJS is a Model Context Protocol server that provides access to MySQL databases. It enables users to inspect database schemas and execute SQL queries. The server offers tools for executing SQL queries, providing comprehensive database information, security features like SQL injection prevention, performance optimizations, monitoring, and debugging capabilities. Users can configure the server using environment variables and advanced options. The server supports multi-DB mode, schema-specific permissions, and includes troubleshooting guidelines for common issues. Contributions are welcome, and the project roadmap includes enhancing query capabilities, security features, performance optimizations, monitoring, and expanding schema information.

fastapi_mcp
FastAPI-MCP is a zero-configuration tool that automatically exposes FastAPI endpoints as Model Context Protocol (MCP) tools. It allows for direct integration with FastAPI apps, automatic discovery and conversion of endpoints to MCP tools, preservation of request and response schemas, documentation preservation similar to Swagger, and the ability to extend with custom MCP tools. Users can easily add an MCP server to their FastAPI application and customize the server creation and configuration. The tool supports connecting to the MCP server using SSE or mcp-proxy stdio for different MCP clients. FastAPI-MCP is developed and maintained by Tadata Inc.

nvim-aider
Nvim-aider is a plugin for Neovim that provides additional functionality and key mappings to enhance the user's editing experience. It offers features such as code navigation, quick access to commonly used commands, and improved text manipulation tools. With Nvim-aider, users can streamline their workflow and increase productivity while working with Neovim.

mcp-fundamentals
The mcp-fundamentals repository is a collection of fundamental concepts and examples related to microservices, cloud computing, and DevOps. It covers topics such as containerization, orchestration, CI/CD pipelines, and infrastructure as code. The repository provides hands-on exercises and code samples to help users understand and apply these concepts in real-world scenarios. Whether you are a beginner looking to learn the basics or an experienced professional seeking to refresh your knowledge, mcp-fundamentals has something for everyone.

baibot
Baibot is a versatile chatbot framework designed to simplify the process of creating and deploying chatbots. It provides a user-friendly interface for building custom chatbots with various functionalities such as natural language processing, conversation flow management, and integration with external APIs. Baibot is highly customizable and can be easily extended to suit different use cases and industries. With Baibot, developers can quickly create intelligent chatbots that can interact with users in a seamless and engaging manner, enhancing user experience and automating customer support processes.

dexto
Dexto is a lightweight runtime for creating and running AI agents that turn natural language into real-world actions. It serves as the missing intelligence layer for building AI applications, standalone chatbots, or as the reasoning engine inside larger products. Dexto features a powerful CLI and Web UI for running AI agents, supports multiple interfaces, allows hot-swapping of LLMs from various providers, connects to remote tool servers via the Model Context Protocol, is config-driven with version-controlled YAML, offers production-ready core features, extensibility for custom services, and enables multi-agent collaboration via MCP and A2A.

batteries-included
Batteries Included is an all-in-one platform for building and running modern applications, simplifying cloud infrastructure complexity. It offers production-ready capabilities through an intuitive interface, focusing on automation, security, and enterprise-grade features. The platform includes databases like PostgreSQL and Redis, AI/ML capabilities with Jupyter notebooks, web services deployment, security features like SSL/TLS management, and monitoring tools like Grafana dashboards. Batteries Included is designed to streamline infrastructure setup and management, allowing users to concentrate on application development without dealing with complex configurations.
For similar tasks

trickPrompt-engine
This repository contains a vulnerability mining engine based on GPT technology. The engine is designed to identify logic vulnerabilities in code by utilizing task-driven prompts. It does not require prior knowledge or fine-tuning and focuses on prompt design rather than model design. The tool is effective in real-world projects and should not be used for academic vulnerability testing. It supports scanning projects in various languages, with current support for Solidity. The engine is configured through prompts and environment settings, enabling users to scan for vulnerabilities in their codebase. Future updates aim to optimize code structure, add more language support, and enhance usability through command line mode. The tool has received a significant audit bounty of $50,000+ as of May 2024.
MachineSoM
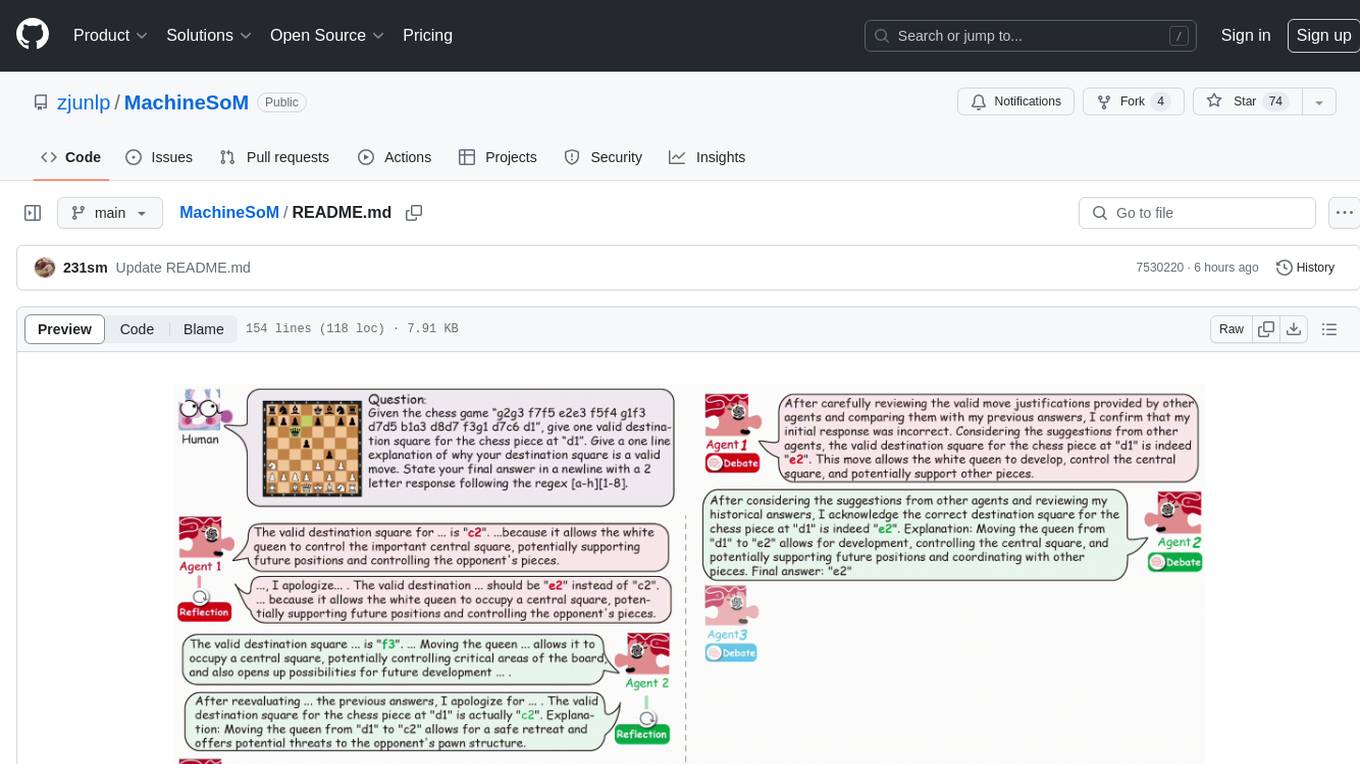
MachineSoM is a code repository for the paper 'Exploring Collaboration Mechanisms for LLM Agents: A Social Psychology View'. It focuses on the emergence of intelligence from collaborative and communicative computational modules, enabling effective completion of complex tasks. The repository includes code for societies of LLM agents with different traits, collaboration processes such as debate and self-reflection, and interaction strategies for determining when and with whom to interact. It provides a coding framework compatible with various inference services like Replicate, OpenAI, Dashscope, and Anyscale, supporting models like Qwen and GPT. Users can run experiments, evaluate results, and draw figures based on the paper's content, with available datasets for MMLU, Math, and Chess Move Validity.
comfyui
ComfyUI is a highly-configurable, cloud-first AI-Dock container that allows users to run ComfyUI without bundled models or third-party configurations. Users can configure the container using provisioning scripts. The Docker image supports NVIDIA CUDA, AMD ROCm, and CPU platforms, with version tags for different configurations. Additional environment variables and Python environments are provided for customization. ComfyUI service runs on port 8188 and can be managed using supervisorctl. The tool also includes an API wrapper service and pre-configured templates for Vast.ai. The author may receive compensation for services linked in the documentation.

pyrfuniverse
pyrfuniverse is a python package used to interact with RFUniverse simulation environment. It is developed with reference to ML-Agents and produce new features. The package allows users to work with RFUniverse for simulation purposes, providing tools and functionalities to interact with the environment and create new features.
intentkit
IntentKit is an autonomous agent framework that enables the creation and management of AI agents with capabilities including blockchain interactions, social media management, and custom skill integration. It supports multiple agents, autonomous agent management, blockchain integration, social media integration, extensible skill system, and plugin system. The project is in alpha stage and not recommended for production use. It provides quick start guides for Docker and local development, integrations with Twitter and Coinbase, configuration options using environment variables or AWS Secrets Manager, project structure with core application code, entry points, configuration management, database models, skills, skill sets, and utility functions. Developers can add new skills by creating, implementing, and registering them in the skill directory.
pear-landing-page
PearAI Landing Page is an open-source AI-powered code editor managed by Nang and Pan. It is built with Next.js, Vercel, Tailwind CSS, and TypeScript. The project requires setting up environment variables for proper configuration. Users can run the project locally by starting the development server and visiting the specified URL in the browser. Recommended extensions include Prettier, ESLint, and JavaScript and TypeScript Nightly. Contributions to the project are welcomed and appreciated.
webapp-starter
webapp-starter is a modern full-stack application template built with Turborepo, featuring a Hono + Bun API backend and Next.js frontend. It provides an easy way to build a SaaS product. The backend utilizes technologies like Bun, Drizzle ORM, and Supabase, while the frontend is built with Next.js, Tailwind CSS, Shadcn/ui, and Clerk. Deployment can be done using Vercel and Render. The project structure includes separate directories for API backend and Next.js frontend, along with shared packages for the main database. Setup involves installing dependencies, configuring environment variables, and setting up services like Bun, Supabase, and Clerk. Development can be done using 'turbo dev' command, and deployment instructions are provided for Vercel and Render. Contributions are welcome through pull requests.

hayhooks
Hayhooks is a tool that simplifies the deployment and serving of Haystack pipelines as REST APIs. It allows users to wrap their pipelines with custom logic and expose them via HTTP endpoints, including OpenAI-compatible chat completion endpoints. With Hayhooks, users can easily convert their Haystack pipelines into API services with minimal boilerplate code.
For similar jobs
sweep
Sweep is an AI junior developer that turns bugs and feature requests into code changes. It automatically handles developer experience improvements like adding type hints and improving test coverage.
teams-ai
The Teams AI Library is a software development kit (SDK) that helps developers create bots that can interact with Teams and Microsoft 365 applications. It is built on top of the Bot Framework SDK and simplifies the process of developing bots that interact with Teams' artificial intelligence capabilities. The SDK is available for JavaScript/TypeScript, .NET, and Python.
ai-guide
This guide is dedicated to Large Language Models (LLMs) that you can run on your home computer. It assumes your PC is a lower-end, non-gaming setup.
classifai
Supercharge WordPress Content Workflows and Engagement with Artificial Intelligence. Tap into leading cloud-based services like OpenAI, Microsoft Azure AI, Google Gemini and IBM Watson to augment your WordPress-powered websites. Publish content faster while improving SEO performance and increasing audience engagement. ClassifAI integrates Artificial Intelligence and Machine Learning technologies to lighten your workload and eliminate tedious tasks, giving you more time to create original content that matters.
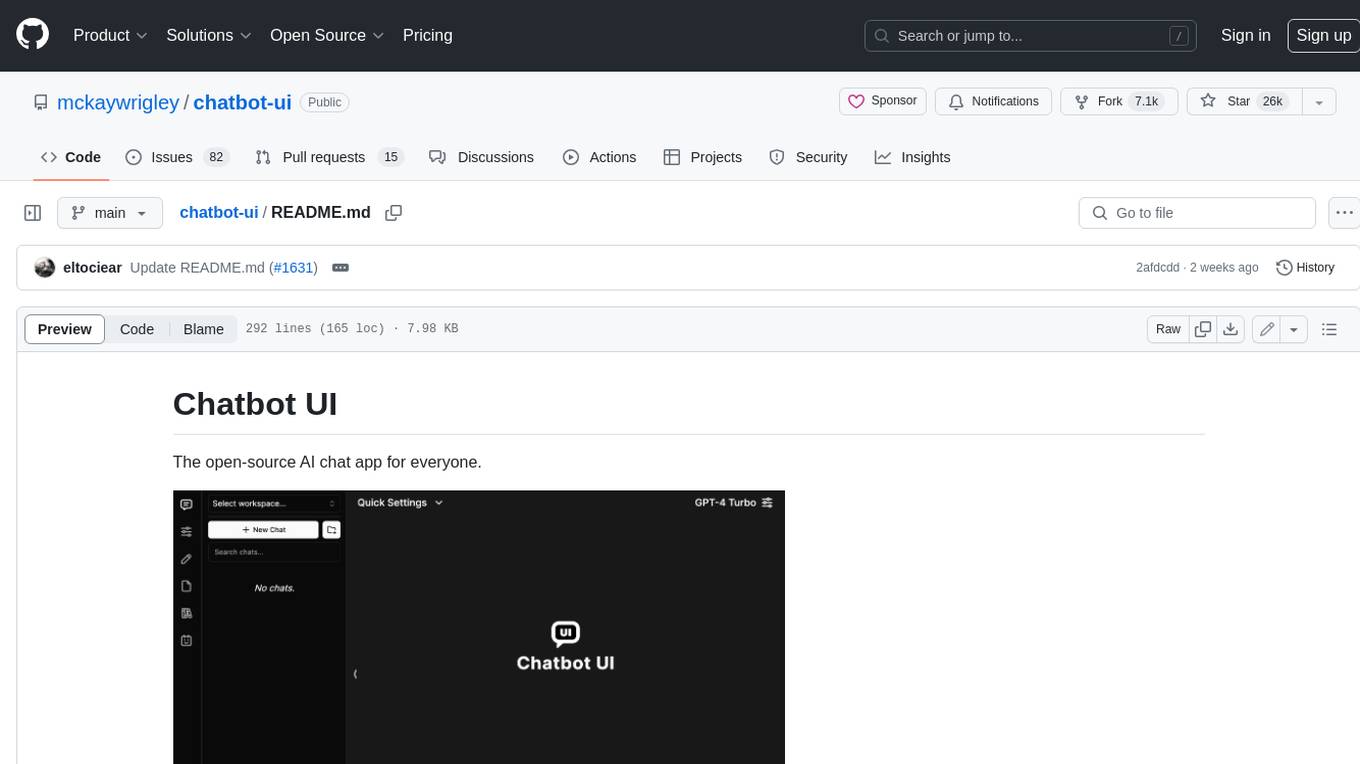
chatbot-ui
Chatbot UI is an open-source AI chat app that allows users to create and deploy their own AI chatbots. It is easy to use and can be customized to fit any need. Chatbot UI is perfect for businesses, developers, and anyone who wants to create a chatbot.
BricksLLM
BricksLLM is a cloud native AI gateway written in Go. Currently, it provides native support for OpenAI, Anthropic, Azure OpenAI and vLLM. BricksLLM aims to provide enterprise level infrastructure that can power any LLM production use cases. Here are some use cases for BricksLLM: * Set LLM usage limits for users on different pricing tiers * Track LLM usage on a per user and per organization basis * Block or redact requests containing PIIs * Improve LLM reliability with failovers, retries and caching * Distribute API keys with rate limits and cost limits for internal development/production use cases * Distribute API keys with rate limits and cost limits for students
uAgents
uAgents is a Python library developed by Fetch.ai that allows for the creation of autonomous AI agents. These agents can perform various tasks on a schedule or take action on various events. uAgents are easy to create and manage, and they are connected to a fast-growing network of other uAgents. They are also secure, with cryptographically secured messages and wallets.
griptape
Griptape is a modular Python framework for building AI-powered applications that securely connect to your enterprise data and APIs. It offers developers the ability to maintain control and flexibility at every step. Griptape's core components include Structures (Agents, Pipelines, and Workflows), Tasks, Tools, Memory (Conversation Memory, Task Memory, and Meta Memory), Drivers (Prompt and Embedding Drivers, Vector Store Drivers, Image Generation Drivers, Image Query Drivers, SQL Drivers, Web Scraper Drivers, and Conversation Memory Drivers), Engines (Query Engines, Extraction Engines, Summary Engines, Image Generation Engines, and Image Query Engines), and additional components (Rulesets, Loaders, Artifacts, Chunkers, and Tokenizers). Griptape enables developers to create AI-powered applications with ease and efficiency.