
OpenAI-DotNet
A Non-Official OpenAI RESTful API Client for DotNet
Stars: 732
OpenAI-DotNet is a simple C# .NET client library for OpenAI to use through their RESTful API. It is independently developed and not an official library affiliated with OpenAI. Users need an OpenAI API account to utilize this library. The library targets .NET 6.0 and above, working across various platforms like console apps, winforms, wpf, asp.net, etc., and on Windows, Linux, and Mac. It provides functionalities for authentication, interacting with models, assistants, threads, chat, audio, images, files, fine-tuning, embeddings, and moderations.
README:
A simple C# .NET client library for OpenAI to use though their RESTful API. Independently developed, this is not an official library and I am not affiliated with OpenAI. An OpenAI API account is required.
Originally Forked from OpenAI-API-dotnet. More context on Roger Pincombe's blog.
- This library targets .NET 8.0 and above.
- It should work across console apps, winforms, wpf, asp.net, etc.
- It should also work across Windows, Linux, and Mac.
Install package OpenAI-DotNet from Nuget. Here's how via command line:
powershell:
Install-Package OpenAI-DotNet
dotnet:
dotnet add package OpenAI-DotNet
Looking to use OpenAI-DotNet in the Unity Game Engine? Check out our unity package on OpenUPM:
Check out our new api docs!
https://rageagainstthepixel.github.io/OpenAI-DotNet
- Authentication
- Azure OpenAI
- OpenAI API Proxy
- Models
- Realtime
-
Assistants
- List Assistants
- Create Assistant
- Retrieve Assistant
- Modify Assistant
- Delete Assistant
- Assistant Streaming
- Threads
- Vector Stores
- Chat
- Audio
- Images
- Files
- Fine Tuning
- Batches
- Embeddings
- Moderations
There are 3 ways to provide your API keys, in order of precedence:
[!WARNING] We recommended using the environment variables to load the API key instead of having it hard coded in your source. It is not recommended use this method in production, but only for accepting user credentials, local testing and quick start scenarios.
-
Pass keys directly with constructor
⚠️ - Load key from configuration file
- Use System Environment Variables
[!WARNING] We recommended using the environment variables to load the API key instead of having it hard coded in your source. It is not recommended use this method in production, but only for accepting user credentials, local testing and quick start scenarios.
using var api = new OpenAIClient("sk-apiKey");Or create a OpenAIAuthentication object manually
using var api = new OpenAIClient(new OpenAIAuthentication("sk-apiKey", "org-yourOrganizationId", "proj_yourProjectId"));Attempts to load api keys from a configuration file, by default .openai in the current directory, optionally traversing up the directory tree or in the user's home directory.
To create a configuration file, create a new text file named .openai and containing the line:
[!NOTE] Organization and project id entries are optional.
{
  "apiKey": "sk-aaaabbbbbccccddddd",
  "organizationId": "org-yourOrganizationId",
  "projectId": "proj_yourProjectId"
}OPENAI_API_KEY=sk-aaaabbbbbccccddddd
OPENAI_ORGANIZATION_ID=org-yourOrganizationId
OPENAI_PROJECT_ID=proj_yourProjectIdYou can also load the configuration file directly with known path by calling static methods in OpenAIAuthentication:
- Loads the default
.openaiconfig in the specified directory:
using var api = new OpenAIClient(OpenAIAuthentication.LoadFromDirectory("path/to/your/directory"));- Loads the configuration file from a specific path. File does not need to be named
.openaias long as it conforms to the json format:
using var api = new OpenAIClient(OpenAIAuthentication.LoadFromPath("path/to/your/file.json"));Use your system's environment variables specify an api key and organization to use.
- Use
OPENAI_API_KEYfor your api key. - Use
OPENAI_ORGANIZATION_IDto specify an organization. - Use
OPENAI_PROJECT_IDto specify a project.
using var api = new OpenAIClient(OpenAIAuthentication.LoadFromEnv());OpenAIClient implements IDisposable to manage the lifecycle of the resources it uses, including HttpClient. When you initialize OpenAIClient, it will create an internal HttpClient instance if one is not provided. This internal HttpClient is disposed of when OpenAIClient is disposed of. If you provide an external HttpClient instance to OpenAIClient, you are responsible for managing its disposal.
- If
OpenAIClientcreates its ownHttpClient, it will also take care of disposing it when you disposeOpenAIClient. - If an external
HttpClientis passed toOpenAIClient, it will not be disposed of byOpenAIClient. You must manage the disposal of theHttpClientyourself.
Please ensure to appropriately dispose of OpenAIClient to release resources timely and to prevent any potential memory or resource leaks in your application.
Typical usage with an internal HttpClient:
using var api = new OpenAIClient();Custom HttpClient (which you must dispose of yourself):
using var customHttpClient = new HttpClient();
// set custom http client properties here
var api = new OpenAIClient(client: customHttpClient);You can also choose to use Microsoft's Azure OpenAI deployments as well.
You can find the required information in the Azure Playground by clicking the View Code button and view a URL like this:
https://{your-resource-name}.openai.azure.com/openai/deployments/{deployment-id}/chat/completions?api-version={api-version}-
your-resource-nameThe name of your Azure OpenAI Resource. -
deployment-idThe deployment name you chose when you deployed the model. -
api-versionThe API version to use for this operation. This follows the YYYY-MM-DD format.
To setup the client to use your deployment, you'll need to pass in OpenAIClientSettings into the client constructor.
var auth = new OpenAIAuthentication("sk-apiKey");
var settings = new OpenAIClientSettings(resourceName: "your-resource-name", deploymentId: "deployment-id", apiVersion: "api-version");
using var api = new OpenAIClient(auth, settings);Authenticate with MSAL as usual and get access token, then use the access token when creating your OpenAIAuthentication. Then be sure to set useAzureActiveDirectory to true when creating your OpenAIClientSettings.
Tutorial: Desktop app that calls web APIs: Acquire a token
// get your access token using any of the MSAL methods
var accessToken = result.AccessToken;
var auth = new OpenAIAuthentication(accessToken);
var settings = new OpenAIClientSettings(resourceName: "your-resource", deploymentId: "deployment-id", apiVersion: "api-version", useActiveDirectoryAuthentication: true);
using var api = new OpenAIClient(auth, settings);Using either the OpenAI-DotNet or com.openai.unity packages directly in your front-end app may expose your API keys and other sensitive information. To mitigate this risk, it is recommended to set up an intermediate API that makes requests to OpenAI on behalf of your front-end app. This library can be utilized for both front-end and intermediary host configurations, ensuring secure communication with the OpenAI API.
In the front end example, you will need to securely authenticate your users using your preferred OAuth provider. Once the user is authenticated, exchange your custom auth token with your API key on the backend.
Follow these steps:
- Setup a new project using either the OpenAI-DotNet or com.openai.unity packages.
- Authenticate users with your OAuth provider.
- After successful authentication, create a new
OpenAIAuthenticationobject and pass in the custom token with the prefixsess-. - Create a new
OpenAIClientSettingsobject and specify the domain where your intermediate API is located. - Pass your new
authandsettingsobjects to theOpenAIClientconstructor when you create the client instance.
Here's an example of how to set up the front end:
var authToken = await LoginAsync();
var auth = new OpenAIAuthentication($"sess-{authToken}");
var settings = new OpenAIClientSettings(domain: "api.your-custom-domain.com");
using var api = new OpenAIClient(auth, settings);
This setup allows your front end application to securely communicate with your backend that will be using the OpenAI-DotNet-Proxy, which then forwards requests to the OpenAI API. This ensures that your OpenAI API keys and other sensitive information remain secure throughout the process.
In this example, we demonstrate how to set up and use OpenAIProxy in a new ASP.NET Core web app. The proxy server will handle authentication and forward requests to the OpenAI API, ensuring that your API keys and other sensitive information remain secure.
- Create a new ASP.NET Core minimal web API project.
- Add the OpenAI-DotNet nuget package to your project.
- Powershell install:
Install-Package OpenAI-DotNet-Proxy - Dotnet install:
dotnet add package OpenAI-DotNet-Proxy - Manually editing .csproj:
<PackageReference Include="OpenAI-DotNet-Proxy" />
- Powershell install:
- Create a new class that inherits from
AbstractAuthenticationFilterand override theValidateAuthenticationmethod. This will implement theIAuthenticationFilterthat you will use to check user session token against your internal server. - In
Program.cs, create a new proxy web application by callingOpenAIProxy.CreateWebApplicationmethod, passing your customAuthenticationFilteras a type argument. - Create
OpenAIAuthenticationandOpenAIClientSettingsas you would normally with your API keys, org id, or Azure settings.
public partial class Program
{
    private class AuthenticationFilter : AbstractAuthenticationFilter
    {
        public override async Task ValidateAuthenticationAsync(IHeaderDictionary request)
        {
            await Task.CompletedTask; // remote resource call to verify token

            // You will need to implement your own class to properly test
            // custom issued tokens you've setup for your end users.
            if (!request.Authorization.ToString().Contains(TestUserToken))
            {
                throw new AuthenticationException("User is not authorized");
            }
        }
    }

    public static void Main(string[] args)
    {
        var auth = OpenAIAuthentication.LoadFromEnv();
        var settings = new OpenAIClientSettings(/* your custom settings if using Azure OpenAI */);
        using var openAIClient = new OpenAIClient(auth, settings);
        OpenAIProxy.CreateWebApplication<AuthenticationFilter>(args, openAIClient).Run();
    }
}
Once you have set up your proxy server, your end users can now make authenticated requests to your proxy api instead of directly to the OpenAI API. The proxy server will handle authentication and forward requests to the OpenAI API, ensuring that your API keys and other sensitive information remain secure.
List and describe the various models available in the API. You can refer to the Models documentation to understand what models are available and the differences between them.
Also checkout model endpoint compatibility to understand which models work with which endpoints.
To specify a custom model not pre-defined in this library:
var model = new Model("model-id");The Models API is accessed via OpenAIClient.ModelsEndpoint
Lists the currently available models, and provides basic information about each one such as the owner and availability.
using var api = new OpenAIClient();
var models = await api.ModelsEndpoint.GetModelsAsync();

foreach (var model in models)
{
    Console.WriteLine(model.ToString());
}Retrieves a model instance, providing basic information about the model such as the owner and permissions.
using var api = new OpenAIClient();
var model = await api.ModelsEndpoint.GetModelDetailsAsync("gpt-4o");
Console.WriteLine(model.ToString());
Delete a fine-tuned model. You must have the Owner role in your organization.
using var api = new OpenAIClient();
var isDeleted = await api.ModelsEndpoint.DeleteFineTuneModelAsync("your-fine-tuned-model");
Assert.IsTrue(isDeleted);[!WARNING] Beta Feature. API subject to breaking changes.
The Realtime API enables you to build low-latency, multi-modal conversational experiences. It currently supports text and audio as both input and output, as well as function calling.
The Assistants API is accessed via OpenAIClient.RealtimeEndpoint
Here is a simple example of how to create a realtime session and to send and receive messages from the model.
using var api = new OpenAIClient();
var cancellationTokenSource = new CancellationTokenSource();
var tools = new List<Tool>
{
    Tool.FromFunc("goodbye", () =>
    {
        cancellationTokenSource.Cancel();
        return "Goodbye!";
    })
};
var configuration = new SessionConfiguration(Model.GPT4oRealtime, tools: tools);
using var session = await api.RealtimeEndpoint.CreateSessionAsync(configuration);
var responseTask = session.ReceiveUpdatesAsync<IServerEvent>(ServerEvents, cancellationTokenSource.Token);
await session.SendAsync(new ConversationItemCreateRequest("Hello!"));
await session.SendAsync(new CreateResponseRequest());
await session.SendAsync(new InputAudioBufferAppendRequest(new ReadOnlyMemory<byte>(new byte[1024 * 4])), cancellationTokenSource.Token);
await session.SendAsync(new ConversationItemCreateRequest("GoodBye!"));
await session.SendAsync(new CreateResponseRequest());
await responseTask;

void ServerEvents(IServerEvent @event)
{
    switch (@event)
    {
        case ResponseAudioTranscriptResponse transcriptResponse:
            Console.WriteLine(transcriptResponse.ToString());
            break;
        case ResponseFunctionCallArgumentsResponse functionCallResponse:
            if (functionCallResponse.IsDone)
            {
                ToolCall toolCall = functionCallResponse;
                toolCall.InvokeFunction();
            }

            break;
    }
}The library implements IClientEvent interface for outgoing client sent events.
-
UpdateSessionRequest: Update the session with new session options. -
InputAudioBufferAppendRequest: Append audio to the input audio buffer. (Unlike made other client events, the server will not send a confirmation response to this event). -
InputAudioBufferCommitRequest: Commit the input audio buffer. (When in Server VAD mode, the client does not need to send this event). -
InputAudioBufferClearRequest: Clear the input audio buffer. -
ConversationItemCreateRequest: Create a new conversation item. This is the main way to send user content to the model. -
ConversationItemTruncateRequest: Send this event to truncate a previous assistant message’s audio. -
ConversationItemDeleteRequest: Delete a conversation item. This is useful when you want to remove a message from the conversation history. -
CreateResponseRequest: Create a response from the model. Send this event after creating new conversation items or invoking tool calls. This will trigger the model to generate a response. -
ResponseCancelRequest-Send this event to cancel an in-progress response.
You can send client events at any time to the server by calling the RealtimeSession.SendAsync method on the session object. The send call will return a IServerEvent handle that best represents the appropriate response from the server for that event. This is useful if you want to handle server responses in a more granular way.
Ideally though, you may want to handle all server responses with RealtimeSession.ReceiveUpdatesAsync.
[!NOTE] The server will not send a confirmation response to the
InputAudioBufferAppendRequestevent.
[!IMPORTANT] You will also need to send
CreateResponseRequestto trigger the model to generate a response.
var serverEvent = await session.SendAsync(new ConversationItemCreateRequest("Hello!"));
Console.WriteLine(serverEvent.ToJsonString());
serverEvent = await session.SendAsync(new CreateResponseRequest());
Console.WriteLine(serverEvent.ToJsonString());The library implements IServerEvent interface for incoming server sent events.
-
RealtimeEventError: Returned when an error occurs, which could be a client problem or a server problem. -
SessionResponse: Returned for both asession.createdandsession.updatedevent. -
RealtimeConversationResponse: Returned when a new conversation item is created. -
ConversationItemCreatedResponse: Returned when a new conversation item is created. -
ConversationItemInputAudioTranscriptionResponse: Returned when the input audio transcription is completed or failed. -
ConversationItemTruncatedResponse: Returned when a conversation item is truncated. -
ConversationItemDeletedResponse: Returned when a conversation item is deleted. -
InputAudioBufferCommittedResponse: Returned when an input audio buffer is committed, either by the client or automatically in server VAD mode. -
InputAudioBufferClearedResponse: Returned when an input audio buffer is cleared. -
InputAudioBufferStartedResponse: Sent by the server when in server_vad mode to indicate that speech has been detected in the audio buffer. This can happen any time audio is added to the buffer (unless speech is already detected). The client may want to use this event to interrupt audio playback or provide visual feedback to the user. -
InputAudioBufferStoppedResponse: Returned in server_vad mode when the server detects the end of speech in the audio buffer. -
RealtimeResponse: Returned when a response is created or done. -
ResponseOutputItemResponse: Returned when a response output item is added or done. -
ResponseContentPartResponse: Returned when a response content part is added or done. -
ResponseTextResponse: Returned when a response text is updated or done. -
ResponseAudioTranscriptResponse: Returned when a response audio transcript is updated or done. -
ResponseAudioResponse: Returned when a response audio is updated or done. -
ResponseFunctionCallArgumentsResponse: Returned when a response function call arguments are updated or done. -
RateLimitsResponse: Returned when rate limits are updated.
To receive server events, you will need to call the RealtimeSession.ReceiveUpdatesAsync method on the session object. This method will return a Task or IAsyncEnumerable<T> that will complete when the session is closed or when the cancellation token is triggered. Ideally this method should be called once and runs for the duration of the session.
[!NOTE] You can also get sent
IClientEventcallbacks as well by using theIRealtimeEventinterface instead ofIServerEvent.
await foreach (var @event in session.ReceiveUpdatesAsync<IServerEvent>(cts.Token))
{
    switch (@event)
    {
        case RealtimeEventError error:
            // raised anytime an error occurs
            break;
        case SessionResponse sessionResponse:
            // raised when a session is created or updated
            break;
        case RealtimeConversationResponse conversationResponse:
            // raised when a new conversation is created
            break;
        case ConversationItemCreatedResponse conversationItemCreated:
            // raised when a new conversation item is created
            break;
        case ConversationItemInputAudioTranscriptionResponse conversationItemTranscription:
            // raised when the input audio transcription is completed or failed
            break;
        case ConversationItemTruncatedResponse conversationItemTruncated:
            // raised when a conversation item is truncated
            break;
        case ConversationItemDeletedResponse conversationItemDeleted:
            // raised when a conversation item is deleted
            break;
        case InputAudioBufferCommittedResponse committedResponse:
            // raised when an input audio buffer is committed
            break;
        case InputAudioBufferClearedResponse clearedResponse:
            // raised when an input audio buffer is cleared
            break;
        case InputAudioBufferStartedResponse startedResponse:
            // raised when speech is detected in the audio buffer
            break;
        case InputAudioBufferStoppedResponse stoppedResponse:
            // raised when speech stops in the audio buffer
            break;
        case RealtimeResponse realtimeResponse:
            // raised when a response is created or done
            break;
        case ResponseOutputItemResponse outputItemResponse:
            // raised when a response output item is added or done
            break;
        case ResponseContentPartResponse contentPartResponse:
            // raised when a response content part is added or done
            break;
        case ResponseTextResponse textResponse:
            // raised when a response text is updated or done
            break;
        case ResponseAudioTranscriptResponse transcriptResponse:
            // raised when a response audio transcript is updated or done
            break;
        case ResponseFunctionCallArgumentsResponse functionCallResponse:
            // raised when a response function call arguments are updated or done
            break;
        case RateLimitsResponse rateLimitsResponse:
            // raised when rate limits are updated
            break;
    }
}[!WARNING] Beta Feature. API subject to breaking changes.
Build assistants that can call models and use tools to perform tasks.
The Assistants API is accessed via OpenAIClient.AssistantsEndpoint
Returns a list of assistants.
using var api = new OpenAIClient();
var assistantsList = await api.AssistantsEndpoint.ListAssistantsAsync();

foreach (var assistant in assistantsList.Items)
{
    Console.WriteLine($"{assistant} -> {assistant.CreatedAt}");
}
Create an assistant with a model and instructions.
using var api = new OpenAIClient();
var request = new CreateAssistantRequest(Model.GPT4o);
var assistant = await api.AssistantsEndpoint.CreateAssistantAsync(request);Retrieves an assistant.
using var api = new OpenAIClient();
var assistant = await api.AssistantsEndpoint.RetrieveAssistantAsync("assistant-id");
Console.WriteLine($"{assistant} -> {assistant.CreatedAt}");Modifies an assistant.
using var api = new OpenAIClient();
var createRequest = new CreateAssistantRequest(Model.GPT4_Turbo);
var assistant = await api.AssistantsEndpoint.CreateAssistantAsync(createRequest);
var modifyRequest = new CreateAssistantRequest(Model.GPT4o);
var modifiedAssistant = await api.AssistantsEndpoint.ModifyAssistantAsync(assistant.Id, modifyRequest);
// OR AssistantExtension for easier use!
var modifiedAssistantEx = await assistant.ModifyAsync(modifyRequest);
Delete an assistant.
using var api = new OpenAIClient();
var isDeleted = await api.AssistantsEndpoint.DeleteAssistantAsync("assistant-id");
// OR AssistantExtension for easier use!
var isDeleted = await assistant.DeleteAsync();
Assert.IsTrue(isDeleted);[!NOTE] Assistant stream events can be easily added to existing thread calls by passing
Func<IServerSentEvent, Task> streamEventHandlercallback to any existing method that supports streaming.
Create Threads that Assistants can interact with.
The Threads API is accessed via OpenAIClient.ThreadsEndpoint
Create a thread.
using var api = new OpenAIClient();
var thread = await api.ThreadsEndpoint.CreateThreadAsync();
Console.WriteLine($"Create thread {thread.Id} -> {thread.CreatedAt}");
Create a thread and run it in one request.
See also: Thread Runs
using var api = new OpenAIClient();
var assistant = await api.AssistantsEndpoint.CreateAssistantAsync(
    new CreateAssistantRequest(
        name: "Math Tutor",
        instructions: "You are a personal math tutor. Answer questions briefly, in a sentence or less.",
        model: Model.GPT4o));
var messages = new List<Message> { "I need to solve the equation `3x + 11 = 14`. Can you help me?" };
var threadRequest = new CreateThreadRequest(messages);
var run = await assistant.CreateThreadAndRunAsync(threadRequest);
Console.WriteLine($"Created thread and run: {run.ThreadId} -> {run.Id} -> {run.CreatedAt}");
Create a thread and run it in one request while streaming events.
using var api = new OpenAIClient();
var tools = new List<Tool>
{
    Tool.GetOrCreateTool(typeof(WeatherService), nameof(WeatherService.GetCurrentWeatherAsync))
};
var assistantRequest = new CreateAssistantRequest(tools: tools, instructions: "You are a helpful weather assistant. Use the appropriate unit based on geographical location.");
var assistant = await api.AssistantsEndpoint.CreateAssistantAsync(assistantRequest);
ThreadResponse thread = null;
async Task StreamEventHandler(IServerSentEvent streamEvent)
{
    switch (streamEvent)
    {
        case ThreadResponse threadResponse:
            thread = threadResponse;
            break;
        case RunResponse runResponse:
            if (runResponse.Status == RunStatus.RequiresAction)
            {
                var toolOutputs = await assistant.GetToolOutputsAsync(runResponse);

                foreach (var toolOutput in toolOutputs)
                {
                    Console.WriteLine($"Tool Output: {toolOutput}");
                }

                await runResponse.SubmitToolOutputsAsync(toolOutputs, StreamEventHandler);
            }
            break;
        default:
            Console.WriteLine(streamEvent.ToJsonString());
            break;
    }
}

var run = await assistant.CreateThreadAndRunAsync("I'm in Kuala-Lumpur, please tell me what's the temperature now?", StreamEventHandler);
run = await run.WaitForStatusChangeAsync();
var messages = await thread.ListMessagesAsync();
foreach (var response in messages.Items.Reverse())
{
    Console.WriteLine($"{response.Role}: {response.PrintContent()}");
}Retrieves a thread.
using var api = new OpenAIClient();
var thread = await api.ThreadsEndpoint.RetrieveThreadAsync("thread-id");
// OR if you simply wish to get the latest state of a thread
thread = await thread.UpdateAsync();
Console.WriteLine($"Retrieve thread {thread.Id} -> {thread.CreatedAt}");Modifies a thread.
[!NOTE] Only the metadata can be modified.
using var api = new OpenAIClient();
var thread = await api.ThreadsEndpoint.CreateThreadAsync();
var metadata = new Dictionary<string, string>
{
    { "key", "custom thread metadata" }
}
thread = await api.ThreadsEndpoint.ModifyThreadAsync(thread.Id, metadata);
// OR use extension method for convenience!
thread = await thread.ModifyAsync(metadata);
Console.WriteLine($"Modify thread {thread.Id} -> {thread.Metadata["key"]}");
Delete a thread.
using var api = new OpenAIClient();
var isDeleted = await api.ThreadsEndpoint.DeleteThreadAsync("thread-id");
// OR use extension method for convenience!
var isDeleted = await thread.DeleteAsync();
Assert.IsTrue(isDeleted);Create messages within threads.
Returns a list of messages for a given thread.
using var api = new OpenAIClient();
var messageList = await api.ThreadsEndpoint.ListMessagesAsync("thread-id");
// OR use extension method for convenience!
var messageList = await thread.ListMessagesAsync();

foreach (var message in messageList.Items)
{
    Console.WriteLine($"{message.Id}: {message.Role}: {message.PrintContent()}");
}
Create a message.
using var api = new OpenAIClient();
var thread = await api.ThreadsEndpoint.CreateThreadAsync();
var request = new CreateMessageRequest("Hello world!");
var message = await api.ThreadsEndpoint.CreateMessageAsync(thread.Id, request);
// OR use extension method for convenience!
var message = await thread.CreateMessageAsync("Hello World!");
Console.WriteLine($"{message.Id}: {message.Role}: {message.PrintContent()}");
Retrieve a message.
using var api = new OpenAIClient();
var message = await api.ThreadsEndpoint.RetrieveMessageAsync("thread-id", "message-id");
// OR use extension methods for convenience!
var message = await thread.RetrieveMessageAsync("message-id");
var message = await message.UpdateAsync();
Console.WriteLine($"{message.Id}: {message.Role}: {message.PrintContent()}");
Modify a message.
[!NOTE] Only the metadata can be modified.
using var api = new OpenAIClient();
var metadata = new Dictionary<string, string>
{
    { "key", "custom message metadata" }
};
var message = await api.ThreadsEndpoint.ModifyMessageAsync("thread-id", "message-id", metadata);
// OR use extension method for convenience!
var message = await message.ModifyAsync(metadata);
Console.WriteLine($"Modify message metadata: {message.Id} -> {message.Metadata["key"]}");Represents an execution run on a thread.
Returns a list of runs belonging to a thread.
using var api = new OpenAIClient();
var runList = await api.ThreadsEndpoint.ListRunsAsync("thread-id");
// OR use extension method for convenience!
var runList = await thread.ListRunsAsync();

foreach (var run in runList.Items)
{
    Console.WriteLine($"[{run.Id}] {run.Status} | {run.CreatedAt}");
}
Create a run.
using var api = new OpenAIClient();
var assistant = await api.AssistantsEndpoint.CreateAssistantAsync(
    new CreateAssistantRequest(
        name: "Math Tutor",
        instructions: "You are a personal math tutor. Answer questions briefly, in a sentence or less.",
        model: Model.GPT4o));
var thread = await api.ThreadsEndpoint.CreateThreadAsync();
var message = await thread.CreateMessageAsync("I need to solve the equation `3x + 11 = 14`. Can you help me?");
var run = await thread.CreateRunAsync(assistant);
Console.WriteLine($"[{run.Id}] {run.Status} | {run.CreatedAt}");
Create a run and stream the events.
using var api = new OpenAIClient();
var assistant = await api.AssistantsEndpoint.CreateAssistantAsync(
    new CreateAssistantRequest(
        name: "Math Tutor",
        instructions: "You are a personal math tutor. Answer questions briefly, in a sentence or less. Your responses should be formatted in JSON.",
        model: Model.GPT4o,
        responseFormat: ChatResponseFormat.Json));
var thread = await api.ThreadsEndpoint.CreateThreadAsync();
var message = await thread.CreateMessageAsync("I need to solve the equation `3x + 11 = 14`. Can you help me?");
var run = await thread.CreateRunAsync(assistant, async streamEvent =>
{
    Console.WriteLine(streamEvent.ToJsonString());
    await Task.CompletedTask;
});
var messages = await thread.ListMessagesAsync();

foreach (var response in messages.Items.Reverse())
{
    Console.WriteLine($"{response.Role}: {response.PrintContent()}");
}Retrieves a run.
using var api = new OpenAIClient();
var run = await api.ThreadsEndpoint.RetrieveRunAsync("thread-id", "run-id");
// OR use extension method for convenience!
var run = await thread.RetrieveRunAsync("run-id");
var run = await run.UpdateAsync();
Console.WriteLine($"[{run.Id}] {run.Status} | {run.CreatedAt}");Modifies a run.
[!NOTE] Only the metadata can be modified.
using var api = new OpenAIClient();
var metadata = new Dictionary<string, string>
{
    { "key", "custom run metadata" }
};
var run = await api.ThreadsEndpoint.ModifyRunAsync("thread-id", "run-id", metadata);
// OR use extension method for convenience!
var run = await run.ModifyAsync(metadata);
Console.WriteLine($"Modify run {run.Id} -> {run.Metadata["key"]}");When a run has the status: requires_action and required_action.type is submit_tool_outputs, this endpoint can be used to submit the outputs from the tool calls once they're all completed.
All outputs must be submitted in a single request.
[!NOTE] See Create Thread and Run Streaming example on how to stream tool output events.
using var api = new OpenAIClient();
var tools = new List<Tool>
{
    // Use a predefined tool
    Tool.Retrieval, Tool.CodeInterpreter,
    // Or create a tool from a type and the name of the method you want to use for function calling
    Tool.GetOrCreateTool(typeof(WeatherService), nameof(WeatherService.GetCurrentWeatherAsync)),
    // Pass in an instance of an object to call a method on it
    Tool.GetOrCreateTool(api.ImagesEndPoint, nameof(ImagesEndpoint.GenerateImageAsync)),
    // Define func<,> callbacks
    Tool.FromFunc("name_of_func", () => { /* callback function */ }),
    Tool.FromFunc<T1,T2,TResult>("func_with_multiple_params", (t1, t2) => { /* logic that calculates return value */ return tResult; })
};
var assistantRequest = new CreateAssistantRequest(tools: tools, instructions: "You are a helpful weather assistant. Use the appropriate unit based on geographical location.");
var testAssistant = await api.AssistantsEndpoint.CreateAssistantAsync(assistantRequest);
var run = await testAssistant.CreateThreadAndRunAsync("I'm in Kuala-Lumpur, please tell me what's the temperature now?");
// waiting while run is Queued and InProgress
run = await run.WaitForStatusChangeAsync();

// Invoke all of the tool call functions and return the tool outputs.
var toolOutputs = await testAssistant.GetToolOutputsAsync(run.RequiredAction.SubmitToolOutputs.ToolCalls);

foreach (var toolOutput in toolOutputs)
{
    Console.WriteLine($"tool call output: {toolOutput.Output}");
}
// submit the tool outputs
run = await run.SubmitToolOutputsAsync(toolOutputs);
// waiting while run in Queued and InProgress
run = await run.WaitForStatusChangeAsync();
var messages = await run.ListMessagesAsync();

foreach (var message in messages.Items.OrderBy(response => response.CreatedAt))
{
    Console.WriteLine($"{message.Role}: {message.PrintContent()}");
}Structured Outputs is the evolution of JSON mode. While both ensure valid JSON is produced, only Structured Outputs ensure schema adherence.
[!IMPORTANT]
- When using JSON mode, always instruct the model to produce JSON via some message in the conversation, for example via your system message. If you don't include an explicit instruction to generate JSON, the model may generate an unending stream of whitespace and the request may run continually until it reaches the token limit. To help ensure you don't forget, the API will throw an error if the string "JSON" does not appear somewhere in the context.
- The JSON in the message the model returns may be partial (i.e. cut off) if
finish_reasonis length, which indicates the generation exceeded max_tokens or the conversation exceeded the token limit. To guard against this, checkfinish_reasonbefore parsing the response.
First define the structure of your responses. These will be used as your schema. These are the objects you'll deserialize to, so be sure to use standard Json object models.
public class MathResponse
{
    [JsonInclude]
    [JsonPropertyName("steps")]
    public IReadOnlyList<MathStep> Steps { get; private set; }

    [JsonInclude]
    [JsonPropertyName("final_answer")]
    public string FinalAnswer { get; private set; }
}

public class MathStep
{
    [JsonInclude]
    [JsonPropertyName("explanation")]
    public string Explanation { get; private set; }

    [JsonInclude]
    [JsonPropertyName("output")]
    public string Output { get; private set; }
}
To use, simply specify the MathResponse type as a generic constraint in either CreateAssistantAsync, CreateRunAsync, or CreateThreadAndRunAsync.
using var api = new OpenAIClient();
var assistant = await api.AssistantsEndpoint.CreateAssistantAsync<MathResponse>(
    new CreateAssistantRequest(
        name: "Math Tutor",
        instructions: "You are a helpful math tutor. Guide the user through the solution step by step.",
        model: "gpt-4o-2024-08-06"));
ThreadResponse thread = null;

try
{
    async Task StreamEventHandler(IServerSentEvent @event)
    {
        try
        {
            switch (@event)
            {
                case MessageResponse message:
                    if (message.Status != MessageStatus.Completed)
                    {
                        Console.WriteLine(@event.ToJsonString());
                        break;
                    }

                    var mathResponse = message.FromSchema<MathResponse>();

                    for (var i = 0; i < mathResponse.Steps.Count; i++)
                    {
                        var step = mathResponse.Steps[i];
                        Console.WriteLine($"Step {i}: {step.Explanation}");
                        Console.WriteLine($"Result: {step.Output}");
                    }

                    Console.WriteLine($"Final Answer: {mathResponse.FinalAnswer}");
                    break;
                default:
                    Console.WriteLine(@event.ToJsonString());
                    break;
            }
        }
        catch (Exception e)
        {
            Console.WriteLine(e);
            throw;
        }

        await Task.CompletedTask;
    }

    var run = await assistant.CreateThreadAndRunAsync("how can I solve 8x + 7 = -23", StreamEventHandler);
    thread = await run.GetThreadAsync();
    run = await run.WaitForStatusChangeAsync();
    Console.WriteLine($"Created thread and run: {run.ThreadId} -> {run.Id} -> {run.CreatedAt}");
    var messages = await thread.ListMessagesAsync();

    foreach (var response in messages.Items.OrderBy(response => response.CreatedAt))
    {
        Console.WriteLine($"{response.Role}: {response.PrintContent()}");
    }
}
finally
{
    await assistant.DeleteAsync(deleteToolResources: thread == null);

    if (thread != null)
    {
        var isDeleted = await thread.DeleteAsync(deleteToolResources: true);
    }
}
You can also manually create json schema json string as well, but you will be responsible for deserializing your response data:
using var api = new OpenAIClient();
var mathSchema = new JsonSchema("math_response", @"
{
  ""type"": ""object"",
  ""properties"": {
    ""steps"": {
      ""type"": ""array"",
      ""items"": {
        ""type"": ""object"",
        ""properties"": {
          ""explanation"": {
            ""type"": ""string""
          },
          ""output"": {
            ""type"": ""string""
          }
        },
        ""required"": [
          ""explanation"",
          ""output""
        ],
        ""additionalProperties"": false
      }
    },
    ""final_answer"": {
      ""type"": ""string""
    }
  },
  ""required"": [
    ""steps"",
    ""final_answer""
  ],
  ""additionalProperties"": false
}");
var assistant = await api.AssistantsEndpoint.CreateAssistantAsync(
    new CreateAssistantRequest(
        name: "Math Tutor",
        instructions: "You are a helpful math tutor. Guide the user through the solution step by step.",
        model: "gpt-4o-2024-08-06",
        jsonSchema: mathSchema));
ThreadResponse thread = null;

try
{
    var run = await assistant.CreateThreadAndRunAsync("how can I solve 8x + 7 = -23",
        async @event =>
        {
            Console.WriteLine(@event.ToJsonString());
            await Task.CompletedTask;
        });
    thread = await run.GetThreadAsync();
    run = await run.WaitForStatusChangeAsync();
    Console.WriteLine($"Created thread and run: {run.ThreadId} -> {run.Id} -> {run.CreatedAt}");
    var messages = await thread.ListMessagesAsync();

    foreach (var response in messages.Items)
    {
        Console.WriteLine($"{response.Role}: {response.PrintContent()}");
    }
}
finally
{
    await assistant.DeleteAsync(deleteToolResources: thread == null);

    if (thread != null)
    {
        var isDeleted = await thread.DeleteAsync(deleteToolResources: true);
        Assert.IsTrue(isDeleted);
    }
}Returns a list of run steps belonging to a run.
using var api = new OpenAIClient();
var runStepList = await api.ThreadsEndpoint.ListRunStepsAsync("thread-id", "run-id");
// OR use extension method for convenience!
var runStepList = await run.ListRunStepsAsync();

foreach (var runStep in runStepList.Items)
{
    Console.WriteLine($"[{runStep.Id}] {runStep.Status} {runStep.CreatedAt} -> {runStep.ExpiresAt}");
}Retrieves a run step.
using var api = new OpenAIClient();
var runStep = await api.ThreadsEndpoint.RetrieveRunStepAsync("thread-id", "run-id", "step-id");
// OR use extension method for convenience!
var runStep = await run.RetrieveRunStepAsync("step-id");
var runStep = await runStep.UpdateAsync();
Console.WriteLine($"[{runStep.Id}] {runStep.Status} {runStep.CreatedAt} -> {runStep.ExpiresAt}");Cancels a run that is in_progress.
using var api = new OpenAIClient();
var isCancelled = await api.ThreadsEndpoint.CancelRunAsync("thread-id", "run-id");
// OR use extension method for convenience!
var isCancelled = await run.CancelAsync();
Assert.IsTrue(isCancelled);
Vector stores are used to store files for use by the file_search tool.
The Vector Stores API is accessed via OpenAIClient.VectorStoresEndpoint
Returns a list of vector stores.
using var api = new OpenAIClient();
var vectorStores = await api.VectorStoresEndpoint.ListVectorStoresAsync();

foreach (var vectorStore in vectorStores.Items)
{
    Console.WriteLine(vectorStore);
}
Create a vector store.
using var api = new OpenAIClient();
var createVectorStoreRequest = new CreateVectorStoreRequest("test-vector-store");
var vectorStore = await api.VectorStoresEndpoint.CreateVectorStoreAsync(createVectorStoreRequest);
Console.WriteLine(vectorStore);Retrieves a vector store.
using var api = new OpenAIClient();
var vectorStore = await api.VectorStoresEndpoint.GetVectorStoreAsync("vector-store-id");
Console.WriteLine(vectorStore);Modifies a vector store.
using var api = new OpenAIClient();
var metadata = new Dictionary<string, object> { { "Test", DateTime.UtcNow } };
var vectorStore = await api.VectorStoresEndpoint.ModifyVectorStoreAsync("vector-store-id", metadata: metadata);
Console.WriteLine(vectorStore);
Delete a vector store.
using var api = new OpenAIClient();
var isDeleted = await api.VectorStoresEndpoint.DeleteVectorStoreAsync("vector-store-id");
Assert.IsTrue(isDeleted);
Vector store files represent files inside a vector store.
Returns a list of vector store files.
using var api = new OpenAIClient();
var files = await api.VectorStoresEndpoint.ListVectorStoreFilesAsync("vector-store-id");

foreach (var file in vectorStoreFiles.Items)
{
    Console.WriteLine(file);
}
Create a vector store file by attaching a file to a vector store.
using var api = new OpenAIClient();
var file = await api.VectorStoresEndpoint.CreateVectorStoreFileAsync("vector-store-id", "file-id", new ChunkingStrategy(ChunkingStrategyType.Static));
Console.WriteLine(file);Retrieves a vector store file.
using var api = new OpenAIClient();
var file = await api.VectorStoresEndpoint.GetVectorStoreFileAsync("vector-store-id", "vector-store-file-id");
Console.WriteLine(file);
Delete a vector store file. This will remove the file from the vector store but the file itself will not be deleted. To delete the file, use the delete file endpoint.
using var api = new OpenAIClient();
var isDeleted = await api.VectorStoresEndpoint.DeleteVectorStoreFileAsync("vector-store-id", vectorStoreFile);
Assert.IsTrue(isDeleted);
Vector store files represent files inside a vector store.
Create a vector store file batch.
using var api = new OpenAIClient();
var files = new List<string> { "file_id_1","file_id_2" };
var vectorStoreFileBatch = await api.VectorStoresEndpoint.CreateVectorStoreFileBatchAsync("vector-store-id", files);
Console.WriteLine(vectorStoreFileBatch);Retrieves a vector store file batch.
using var api = new OpenAIClient();
var vectorStoreFileBatch = await api.VectorStoresEndpoint.GetVectorStoreFileBatchAsync("vector-store-id", "vector-store-file-batch-id");
// you can also use convenience methods!
vectorStoreFileBatch = await vectorStoreFileBatch.UpdateAsync();
vectorStoreFileBatch = await vectorStoreFileBatch.WaitForStatusChangeAsync();Returns a list of vector store files in a batch.
using var api = new OpenAIClient();
var files = await api.VectorStoresEndpoint.ListVectorStoreBatchFilesAsync("vector-store-id", "vector-store-file-batch-id");

foreach (var file in files.Items)
{
    Console.WriteLine(file);
}
Cancel a vector store file batch. This attempts to cancel the processing of files in this batch as soon as possible.
using var api = new OpenAIClient();
var isCancelled = await api.VectorStoresEndpoint.CancelVectorStoreFileBatchAsync("vector-store-id", "vector-store-file-batch-id");Given a chat conversation, the model will return a chat completion response.
The Chat API is accessed via OpenAIClient.ChatEndpoint
Creates a completion for the chat message
using var api = new OpenAIClient();
var messages = new List<Message>
{
    new Message(Role.System, "You are a helpful assistant."),
    new Message(Role.User, "Who won the world series in 2020?"),
    new Message(Role.Assistant, "The Los Angeles Dodgers won the World Series in 2020."),
    new Message(Role.User, "Where was it played?"),
};
var chatRequest = new ChatRequest(messages, Model.GPT4o);
var response = await api.ChatEndpoint.GetCompletionAsync(chatRequest);
var choice = response.FirstChoice;
Console.WriteLine($"[{choice.Index}] {choice.Message.Role}: {choice.Message} | Finish Reason: {choice.FinishReason}");using var api = new OpenAIClient();
var messages = new List<Message>
{
new Message(Role.System, "You are a helpful assistant."),
new Message(Role.User, "Who won the world series in 2020?"),
new Message(Role.Assistant, "The Los Angeles Dodgers won the World Series in 2020."),
new Message(Role.User, "Where was it played?"),
};
var chatRequest = new ChatRequest(messages);
var response = await api.ChatEndpoint.StreamCompletionAsync(chatRequest, async partialResponse =>
{
Console.Write(partialResponse.FirstChoice.Delta.ToString());
await Task.CompletedTask;
});
var choice = response.FirstChoice;
Console.WriteLine($"[{choice.Index}] {choice.Message.Role}: {choice.Message} | Finish Reason: {choice.FinishReason}");Or if using IAsyncEnumerable{T} (C# 8.0+)
using var api = new OpenAIClient();
var messages = new List<Message>
{
    new Message(Role.System, "You are a helpful assistant."),
    new Message(Role.User, "Who won the world series in 2020?"),
    new Message(Role.Assistant, "The Los Angeles Dodgers won the World Series in 2020."),
    new Message(Role.User, "Where was it played?"),
};
var cumulativeDelta = string.Empty;
var chatRequest = new ChatRequest(messages);
await foreach (var partialResponse in api.ChatEndpoint.StreamCompletionEnumerableAsync(chatRequest))
{
    foreach (var choice in partialResponse.Choices.Where(choice => choice.Delta?.Content != null))
    {
        cumulativeDelta += choice.Delta.Content;
    }
}

Console.WriteLine(cumulativeDelta);using var api = new OpenAIClient();
var messages = new List<Message>
{
new(Role.System, "You are a helpful weather assistant. Always prompt the user for their location."),
new Message(Role.User, "What's the weather like today?"),
};
foreach (var message in messages)
{
Console.WriteLine($"{message.Role}: {message}");
}
// Define the tools that the assistant is able to use:
// 1. Get a list of all the static methods decorated with FunctionAttribute
var tools = Tool.GetAllAvailableTools(includeDefaults: false, forceUpdate: true, clearCache: true);
// 2. Define a custom list of tools:
var tools = new List<Tool>
{
Tool.GetOrCreateTool(objectInstance, "TheNameOfTheMethodToCall"),
Tool.FromFunc("a_custom_name_for_your_function", ()=> { /* Some logic to run */ })
};
var chatRequest = new ChatRequest(messages, tools: tools, toolChoice: "auto");
var response = await api.ChatEndpoint.GetCompletionAsync(chatRequest);
messages.Add(response.FirstChoice.Message);
Console.WriteLine($"{response.FirstChoice.Message.Role}: {response.FirstChoice} | Finish Reason: {response.FirstChoice.FinishReason}");
var locationMessage = new Message(Role.User, "I'm in Glasgow, Scotland");
messages.Add(locationMessage);
Console.WriteLine($"{locationMessage.Role}: {locationMessage.Content}");
chatRequest = new ChatRequest(messages, tools: tools, toolChoice: "auto");
response = await api.ChatEndpoint.GetCompletionAsync(chatRequest);
messages.Add(response.FirstChoice.Message);
if (response.FirstChoice.FinishReason == "stop")
{
Console.WriteLine($"{response.FirstChoice.Message.Role}: {response.FirstChoice} | Finish Reason: {response.FirstChoice.FinishReason}");
var unitMessage = new Message(Role.User, "Fahrenheit");
messages.Add(unitMessage);
Console.WriteLine($"{unitMessage.Role}: {unitMessage.Content}");
chatRequest = new ChatRequest(messages, tools: tools, toolChoice: "auto");
response = await api.ChatEndpoint.GetCompletionAsync(chatRequest);
}
// iterate over all tool calls and invoke them
foreach (var toolCall in response.FirstChoice.Message.ToolCalls)
{
Console.WriteLine($"{response.FirstChoice.Message.Role}: {toolCall.Function.Name} | Finish Reason: {response.FirstChoice.FinishReason}");
Console.WriteLine($"{toolCall.Function.Arguments}");
// Invokes function to get a generic json result to return for tool call.
var functionResult = await toolCall.InvokeFunctionAsync();
// If you know the return type and do additional processing you can use generic overload
var functionResult = await toolCall.InvokeFunctionAsync<string>();
messages.Add(new Message(toolCall, functionResult));
Console.WriteLine($"{Role.Tool}: {functionResult}");
}
// System: You are a helpful weather assistant.
// User: What's the weather like today?
// Assistant: Sure, may I know your current location? | Finish Reason: stop
// User: I'm in Glasgow, Scotland
// Assistant: GetCurrentWeather | Finish Reason: tool_calls
// {
// "location": "Glasgow, Scotland",
// "unit": "celsius"
// }
// Tool: The current weather in Glasgow, Scotland is 39°C.[!WARNING] Beta Feature. API subject to breaking changes.
using var api = new OpenAIClient();
var messages = new List<Message>
{
    new Message(Role.System, "You are a helpful assistant."),
    new Message(Role.User, new List<Content>
    {
        "What's in this image?",
        new ImageUrl("https://upload.wikimedia.org/wikipedia/commons/thumb/d/dd/Gfp-wisconsin-madison-the-nature-boardwalk.jpg/2560px-Gfp-wisconsin-madison-the-nature-boardwalk.jpg", ImageDetail.Low)
    })
};
var chatRequest = new ChatRequest(messages, model: Model.GPT4o);
var response = await api.ChatEndpoint.GetCompletionAsync(chatRequest);
Console.WriteLine($"{response.FirstChoice.Message.Role}: {response.FirstChoice.Message.Content} | Finish Reason: {response.FirstChoice.FinishDetails}");using var api = new OpenAIClient();
var messages = new List<Message>
{
new Message(Role.System, "You are a helpful assistant."),
new Message(Role.User, "Is a golden retriever a good family dog?")
};
var chatRequest = new ChatRequest(messages, Model.GPT4oAudio, audioConfig: Voice.Alloy);
var response = await api.ChatEndpoint.GetCompletionAsync(chatRequest);
Console.WriteLine($"{response.FirstChoice.Message.Role}: {response.FirstChoice} | Finish Reason: {response.FirstChoice.FinishDetails}");
// todo play response.FirstChoice.Message.AudioOutput.DataThe evolution of Json Mode. While both ensure valid JSON is produced, only Structured Outputs ensure schema adherence.
[!IMPORTANT]
- When using JSON mode, always instruct the model to produce JSON via some message in the conversation, for example via your system message. If you don't include an explicit instruction to generate JSON, the model may generate an unending stream of whitespace and the request may run continually until it reaches the token limit. To help ensure you don't forget, the API will throw an error if the string "JSON" does not appear somewhere in the context.
- The JSON in the message the model returns may be partial (i.e. cut off) if
finish_reasonis length, which indicates the generation exceeded max_tokens or the conversation exceeded the token limit. To guard against this, checkfinish_reasonbefore parsing the response.
First define the structure of your responses. These will be used as your schema. These are the objects you'll deserialize to, so be sure to use standard Json object models.
public class MathResponse
{
    [JsonInclude]
    [JsonPropertyName("steps")]
    public IReadOnlyList<MathStep> Steps { get; private set; }

    [JsonInclude]
    [JsonPropertyName("final_answer")]
    public string FinalAnswer { get; private set; }
}

public class MathStep
{
    [JsonInclude]
    [JsonPropertyName("explanation")]
    public string Explanation { get; private set; }

    [JsonInclude]
    [JsonPropertyName("output")]
    public string Output { get; private set; }
}
To use, simply specify the MathResponse type as a generic constraint when requesting a completion.
using var api = new OpenAIClient();
var messages = new List<Message>
{
    new(Role.System, "You are a helpful math tutor. Guide the user through the solution step by step."),
    new(Role.User, "how can I solve 8x + 7 = -23")
};

var chatRequest = new ChatRequest(messages, model: "gpt-4o-2024-08-06");
var (mathResponse, chatResponse) = await api.ChatEndpoint.GetCompletionAsync<MathResponse>(chatRequest);

for (var i = 0; i < mathResponse.Steps.Count; i++)
{
    var step = mathResponse.Steps[i];
    Console.WriteLine($"Step {i}: {step.Explanation}");
    Console.WriteLine($"Result: {step.Output}");
}

Console.WriteLine($"Final Answer: {mathResponse.FinalAnswer}");
chatResponse.GetUsage();[!IMPORTANT]
- When using JSON mode, always instruct the model to produce JSON via some message in the conversation, for example via your system message. If you don't include an explicit instruction to generate JSON, the model may generate an unending stream of whitespace and the request may run continually until it reaches the token limit. To help ensure you don't forget, the API will throw an error if the string "JSON" does not appear somewhere in the context.
- The JSON in the message the model returns may be partial (i.e. cut off) if
finish_reasonis length, which indicates the generation exceeded max_tokens or the conversation exceeded the token limit. To guard against this, checkfinish_reasonbefore parsing the response.- JSON mode will not guarantee the output matches any specific schema, only that it is valid and parses without errors.
var messages = new List<Message>
{
    new Message(Role.System, "You are a helpful assistant designed to output JSON."),
    new Message(Role.User, "Who won the world series in 2020?"),
};
var chatRequest = new ChatRequest(messages, Model.GPT4o, responseFormat: ChatResponseFormat.Json);
var response = await api.ChatEndpoint.GetCompletionAsync(chatRequest);

foreach (var choice in response.Choices)
{
    Console.WriteLine($"[{choice.Index}] {choice.Message.Role}: {choice} | Finish Reason: {choice.FinishReason}");
}

response.GetUsage();Converts audio into text.
The Audio API is accessed via OpenAIClient.AudioEndpoint
Generates audio from the input text.
using var api = new OpenAIClient();
var request = new SpeechRequest("Hello World!");
async Task ChunkCallback(ReadOnlyMemory<byte> chunkCallback)
{
    // TODO Implement audio playback as chunks arrive
    await Task.CompletedTask;
}

var response = await api.AudioEndpoint.CreateSpeechAsync(request, ChunkCallback);
await File.WriteAllBytesAsync("../../../Assets/HelloWorld.mp3", response.ToArray());Transcribes audio into the input language.
using var api = new OpenAIClient();
using var request = new AudioTranscriptionRequest(Path.GetFullPath(audioAssetPath), language: "en");
var response = await api.AudioEndpoint.CreateTranscriptionTextAsync(request);
Console.WriteLine(response);
You can also get detailed information using verbose_json to get timestamp granularities:
using var api = new OpenAIClient();
using var request = new AudioTranscriptionRequest(transcriptionAudio, responseFormat: AudioResponseFormat.Verbose_Json, timestampGranularity: TimestampGranularity.Word, temperature: 0.1f, language: "en");
var response = await api.AudioEndpoint.CreateTranscriptionTextAsync(request);

foreach (var word in response.Words)
{
    Console.WriteLine($"[{word.Start}-{word.End}] \"{word.Word}\"");
}Translates audio into into English.
using var api = new OpenAIClient();
using var request = new AudioTranslationRequest(Path.GetFullPath(audioAssetPath));
var response = await api.AudioEndpoint.CreateTranslationTextAsync(request);
Console.WriteLine(response);Given a prompt and/or an input image, the model will generate a new image.
The Images API is accessed via OpenAIClient.ImagesEndpoint
Creates an image given a prompt.
using var api = new OpenAIClient();
var request = new ImageGenerationRequest("A house riding a velociraptor", Models.Model.DallE_3);
var imageResults = await api.ImagesEndPoint.GenerateImageAsync(request);

foreach (var image in imageResults)
{
    Console.WriteLine(image);
    // image == url or b64_string
}Creates an edited or extended image given an original image and a prompt.
using var api = new OpenAIClient();
var request = new ImageEditRequest(imageAssetPath, maskAssetPath, "A sunlit indoor lounge area with a pool containing a flamingo", size: ImageSize.Small);
var imageResults = await api.ImagesEndPoint.CreateImageEditAsync(request);

foreach (var image in imageResults)
{
    Console.WriteLine(image);
    // image == url or b64_string
}Creates a variation of a given image.
using var api = new OpenAIClient();
var request = new ImageVariationRequest(imageAssetPath, size: ImageSize.Small);
var imageResults = await api.ImagesEndPoint.CreateImageVariationAsync(request);

foreach (var image in imageResults)
{
    Console.WriteLine(image);
    // image == url or b64_string
}
Files are used to upload documents that can be used with features like Fine-tuning.
The Files API is accessed via OpenAIClient.FilesEndpoint
Returns a list of files that belong to the user's organization.
using var api = new OpenAIClient();
var fileList = await api.FilesEndpoint.ListFilesAsync();

foreach (var file in fileList)
{
    Console.WriteLine($"{file.Id} -> {file.Object}: {file.FileName} | {file.Size} bytes");
}
Upload a file that can be used across various endpoints. The size of all the files uploaded by one organization can be up to 100 GB.
The size of individual files can be a maximum of 512 MB. See the Assistants Tools guide to learn more about the types of files supported. The Fine-tuning API only supports .jsonl files.
using var api = new OpenAIClient();
var file = await api.FilesEndpoint.UploadFileAsync("path/to/your/file.jsonl", FilePurpose.FineTune);
Console.WriteLine(file.Id);
Delete a file.
using var api = new OpenAIClient();
var isDeleted = await api.FilesEndpoint.DeleteFileAsync(fileId);
Assert.IsTrue(isDeleted);Returns information about a specific file.
using var api = new OpenAIClient();
var file = await api.FilesEndpoint.GetFileInfoAsync(fileId);
Console.WriteLine($"{file.Id} -> {file.Object}: {file.FileName} | {file.Size} bytes");Downloads the file content to the specified directory.
using var api = new OpenAIClient();
var downloadedFilePath = await api.FilesEndpoint.DownloadFileAsync(fileId, "path/to/your/save/directory");
Console.WriteLine(downloadedFilePath);
Assert.IsTrue(File.Exists(downloadedFilePath));Manage fine-tuning jobs to tailor a model to your specific training data.
Related guide: Fine-tune models
The Files API is accessed via OpenAIClient.FineTuningEndpoint
Creates a job that fine-tunes a specified model from a given dataset.
Response includes details of the enqueued job including job status and the name of the fine-tuned models once complete.
using var api = new OpenAIClient();
var fileId = "file-abc123";
var request = new CreateFineTuneRequest(fileId);
var job = await api.FineTuningEndpoint.CreateJobAsync(Model.GPT3_5_Turbo, request);
Console.WriteLine($"Started {job.Id} | Status: {job.Status}");
List your organization's fine-tuning jobs.
using var api = new OpenAIClient();
var jobList = await api.FineTuningEndpoint.ListJobsAsync();

foreach (var job in jobList.Items.OrderByDescending(job => job.CreatedAt))
{
    Console.WriteLine($"{job.Id} -> {job.CreatedAt} | {job.Status}");
}Gets info about the fine-tune job.
using var api = new OpenAIClient();
var job = await api.FineTuningEndpoint.GetJobInfoAsync(fineTuneJob);
Console.WriteLine($"{job.Id} -> {job.CreatedAt} | {job.Status}");Immediately cancel a fine-tune job.
using var api = new OpenAIClient();
var isCancelled = await api.FineTuningEndpoint.CancelFineTuneJobAsync(fineTuneJob);
Assert.IsTrue(isCancelled);Get status updates for a fine-tuning job.
using var api = new OpenAIClient();
var eventList = await api.FineTuningEndpoint.ListJobEventsAsync(fineTuneJob);
Console.WriteLine($"{fineTuneJob.Id} -> status: {fineTuneJob.Status} | event count: {eventList.Events.Count}");

foreach (var @event in eventList.Items.OrderByDescending(@event => @event.CreatedAt))
{
    Console.WriteLine($"  {@event.CreatedAt} [{@event.Level}] {@event.Message}");
}Create large batches of API requests for asynchronous processing. The Batch API returns completions within 24 hours for a 50% discount.
The Batches API is accessed via OpenAIClient.BatchesEndpoint
List your organization's batches.
using var api = new OpenAIClient();
var batches = await api.BatchEndpoint.ListBatchesAsync();

foreach (var batch in listResponse.Items)
{
    Console.WriteLine(batch);
}Creates and executes a batch from an uploaded file of requests
using var api = new OpenAIClient();
var batchRequest = new CreateBatchRequest("file-id", Endpoint.ChatCompletions);
var batch = await api.BatchEndpoint.CreateBatchAsync(batchRequest);Retrieves a batch.
using var api = new OpenAIClient();
var batch = await api.BatchEndpoint.RetrieveBatchAsync("batch-id");
// you can also use convenience methods!
batch = await batch.UpdateAsync();
batch = await batch.WaitForStatusChangeAsync();Cancels an in-progress batch. The batch will be in status cancelling for up to 10 minutes, before changing to cancelled, where it will have partial results (if any) available in the output file.
using var api = new OpenAIClient();
var isCancelled = await api.BatchEndpoint.CancelBatchAsync(batch);
Assert.IsTrue(isCancelled);Get a vector representation of a given input that can be easily consumed by machine learning models and algorithms.
Related guide: Embeddings
The Edits API is accessed via OpenAIClient.EmbeddingsEndpoint
Creates an embedding vector representing the input text.
using var api = new OpenAIClient();
var response = await api.EmbeddingsEndpoint.CreateEmbeddingAsync("The food was delicious and the waiter...", Models.Embedding_Ada_002);
Console.WriteLine(response);Given a input text, outputs if the model classifies it as violating OpenAI's content policy.
Related guide: Moderations
The Moderations API can be accessed via OpenAIClient.ModerationsEndpoint
Classifies if text violates OpenAI's Content Policy.
using var api = new OpenAIClient();
var isViolation = await api.ModerationsEndpoint.GetModerationAsync("I want to kill them.");
Assert.IsTrue(isViolation);
Additionally you can also get the scores of a given input.
using var api = new OpenAIClient();
var response = await api.ModerationsEndpoint.CreateModerationAsync(new ModerationsRequest("I love you"));
Assert.IsNotNull(response);
Console.WriteLine(response.Results?[0]?.Scores?.ToString());
For Tasks:
Click tags to check more tools for each tasksFor Jobs:
Alternative AI tools for OpenAI-DotNet
Similar Open Source Tools
OpenAI-DotNet
OpenAI-DotNet is a simple C# .NET client library for OpenAI to use through their RESTful API. It is independently developed and not an official library affiliated with OpenAI. Users need an OpenAI API account to utilize this library. The library targets .NET 6.0 and above, working across various platforms like console apps, winforms, wpf, asp.net, etc., and on Windows, Linux, and Mac. It provides functionalities for authentication, interacting with models, assistants, threads, chat, audio, images, files, fine-tuning, embeddings, and moderations.
com.openai.unity
com.openai.unity is an OpenAI package for Unity that allows users to interact with OpenAI's API through RESTful requests. It is independently developed and not an official library affiliated with OpenAI. Users can fine-tune models, create assistants, chat completions, and more. The package requires Unity 2021.3 LTS or higher and can be installed via Unity Package Manager or Git URL. Various features like authentication, Azure OpenAI integration, model management, thread creation, chat completions, audio processing, image generation, file management, fine-tuning, batch processing, embeddings, and content moderation are available.
ElevenLabs-DotNet
ElevenLabs-DotNet is a non-official Eleven Labs voice synthesis RESTful client that allows users to convert text to speech. The library targets .NET 8.0 and above, working across various platforms like console apps, winforms, wpf, and asp.net, and across Windows, Linux, and Mac. Users can authenticate using API keys directly, from a configuration file, or system environment variables. The tool provides functionalities for text to speech conversion, streaming text to speech, accessing voices, dubbing audio or video files, generating sound effects, managing history of synthesized audio clips, and accessing user information and subscription status.
java-genai
Java idiomatic SDK for the Gemini Developer APIs and Vertex AI APIs. The SDK provides a Client class for interacting with both APIs, allowing seamless switching between the 2 backends without code rewriting. It supports features like generating content, embedding content, generating images, upscaling images, editing images, and generating videos. The SDK also includes options for setting API versions, HTTP request parameters, client behavior, and response schemas.
UniChat
UniChat is a pipeline tool for creating online and offline chat-bots in Unity. It leverages Unity.Sentis and text vector embedding technology to enable offline mode text content search based on vector databases. The tool includes a chain toolkit for embedding LLM and Agent in games, along with middleware components for Text to Speech, Speech to Text, and Sub-classifier functionalities. UniChat also offers a tool for invoking tools based on ReActAgent workflow, allowing users to create personalized chat scenarios and character cards. The tool provides a comprehensive solution for designing flexible conversations in games while maintaining developer's ideas.
dashscope-sdk
DashScope SDK for .NET is an unofficial SDK maintained by Cnblogs, providing various APIs for text embedding, generation, multimodal generation, image synthesis, and more. Users can interact with the SDK to perform tasks such as text completion, chat generation, function calls, file operations, and more. The project is under active development, and users are advised to check the Release Notes before upgrading.
deepgram-js-sdk
Deepgram JavaScript SDK. Power your apps with world-class speech and Language AI models.
whetstone.chatgpt
Whetstone.ChatGPT is a simple light-weight library that wraps the Open AI API with support for dependency injection. It supports features like GPT 4, GPT 3.5 Turbo, chat completions, audio transcription and translation, vision completions, files, fine tunes, images, embeddings, moderations, and response streaming. The library provides a video walkthrough of a Blazor web app built on it and includes examples such as a command line bot. It offers quickstarts for dependency injection, chat completions, completions, file handling, fine tuning, image generation, and audio transcription.
bellman
Bellman is a unified interface to interact with language and embedding models, supporting various vendors like VertexAI/Gemini, OpenAI, Anthropic, VoyageAI, and Ollama. It consists of a library for direct interaction with models and a service 'bellmand' for proxying requests with one API key. Bellman simplifies switching between models, vendors, and common tasks like chat, structured data, tools, and binary input. It addresses the lack of official SDKs for major players and differences in APIs, providing a single proxy for handling different models. The library offers clients for different vendors implementing common interfaces for generating and embedding text, enabling easy interchangeability between models.
Ollama
Ollama SDK for .NET is a fully generated C# SDK based on OpenAPI specification using OpenApiGenerator. It supports automatic releases of new preview versions, source generator for defining tools natively through C# interfaces, and all modern .NET features. The SDK provides support for all Ollama API endpoints including chats, embeddings, listing models, pulling and creating new models, and more. It also offers tools for interacting with weather data and providing weather-related information to users.
js-genai
The Google Gen AI JavaScript SDK is an experimental SDK for TypeScript and JavaScript developers to build applications powered by Gemini. It supports both the Gemini Developer API and Vertex AI. The SDK is designed to work with Gemini 2.0 features. Users can access API features through the GoogleGenAI classes, which provide submodules for querying models, managing caches, creating chats, uploading files, and starting live sessions. The SDK also allows for function calling to interact with external systems. Users can find more samples in the GitHub samples directory.
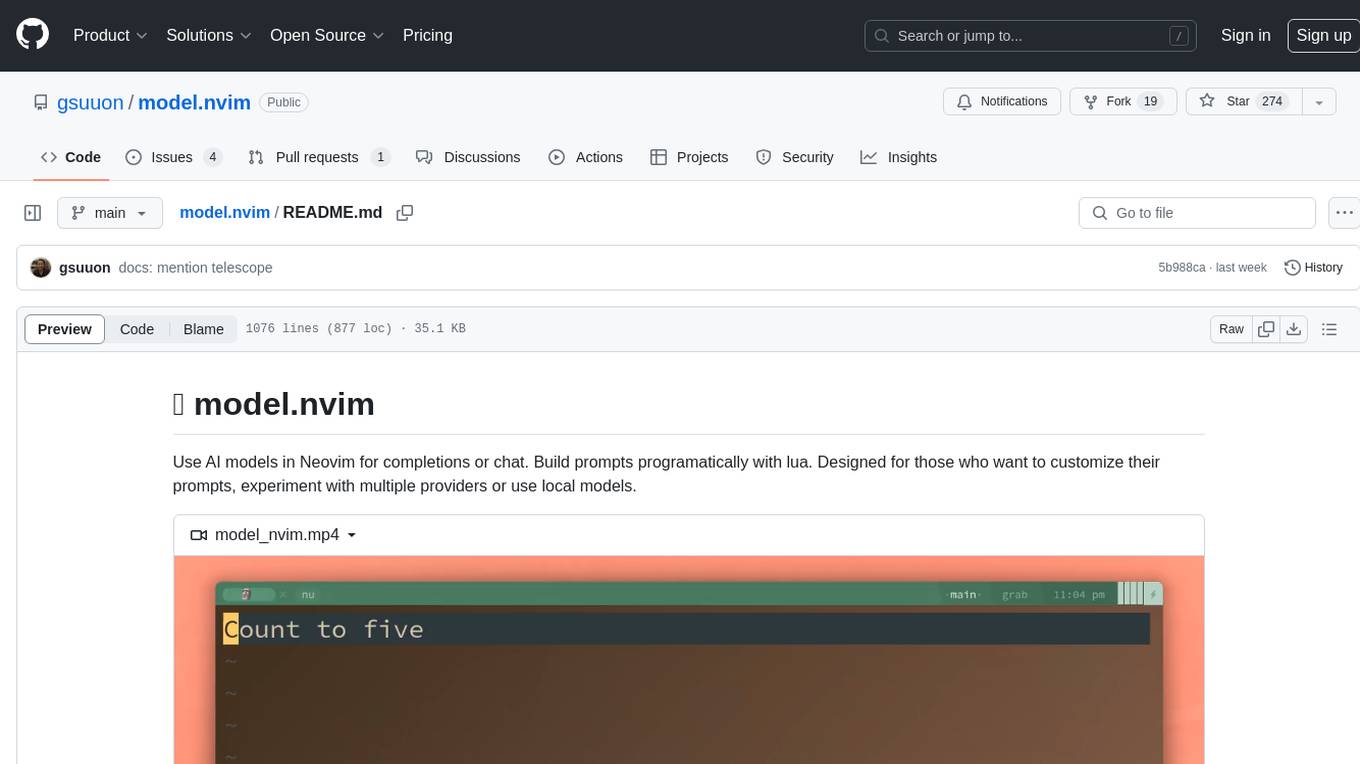
model.nvim
model.nvim is a tool designed for Neovim users who want to utilize AI models for completions or chat within their text editor. It allows users to build prompts programmatically with Lua, customize prompts, experiment with multiple providers, and use both hosted and local models. The tool supports features like provider agnosticism, programmatic prompts in Lua, async and multistep prompts, streaming completions, and chat functionality in 'mchat' filetype buffer. Users can customize prompts, manage responses, and context, and utilize various providers like OpenAI ChatGPT, Google PaLM, llama.cpp, ollama, and more. The tool also supports treesitter highlights and folds for chat buffers.
genaiscript
GenAIScript is a scripting environment designed to facilitate file ingestion, prompt development, and structured data extraction. Users can define metadata and model configurations, specify data sources, and define tasks to extract specific information. The tool provides a convenient way to analyze files and extract desired content in a structured format. It offers a user-friendly interface for working with data and automating data extraction processes, making it suitable for various data processing tasks.
mcp-go
MCP Go is a Go implementation of the Model Context Protocol (MCP), facilitating seamless integration between LLM applications and external data sources and tools. It handles complex protocol details and server management, allowing developers to focus on building tools. The tool is designed to be fast, simple, and complete, aiming to provide a high-level and easy-to-use interface for developing MCP servers. MCP Go is currently under active development, with core features working and advanced capabilities in progress.
client-js
The Mistral JavaScript client is a library that allows you to interact with the Mistral AI API. With this client, you can perform various tasks such as listing models, chatting with streaming, chatting without streaming, and generating embeddings. To use the client, you can install it in your project using npm and then set up the client with your API key. Once the client is set up, you can use it to perform the desired tasks. For example, you can use the client to chat with a model by providing a list of messages. The client will then return the response from the model. You can also use the client to generate embeddings for a given input. The embeddings can then be used for various downstream tasks such as clustering or classification.
extrapolate
Extrapolate is an app that uses Artificial Intelligence to show you how your face ages over time. It generates a 3-second GIF of your aging face and allows you to store and retrieve photos from Cloudflare R2 using Workers. Users can deploy their own version of Extrapolate on Vercel by setting up ReplicateHQ and Upstash accounts, as well as creating a Cloudflare R2 instance with a Cloudflare Worker to handle uploads and reads. The tool provides a fun and interactive way to visualize the aging process through AI technology.
For similar tasks
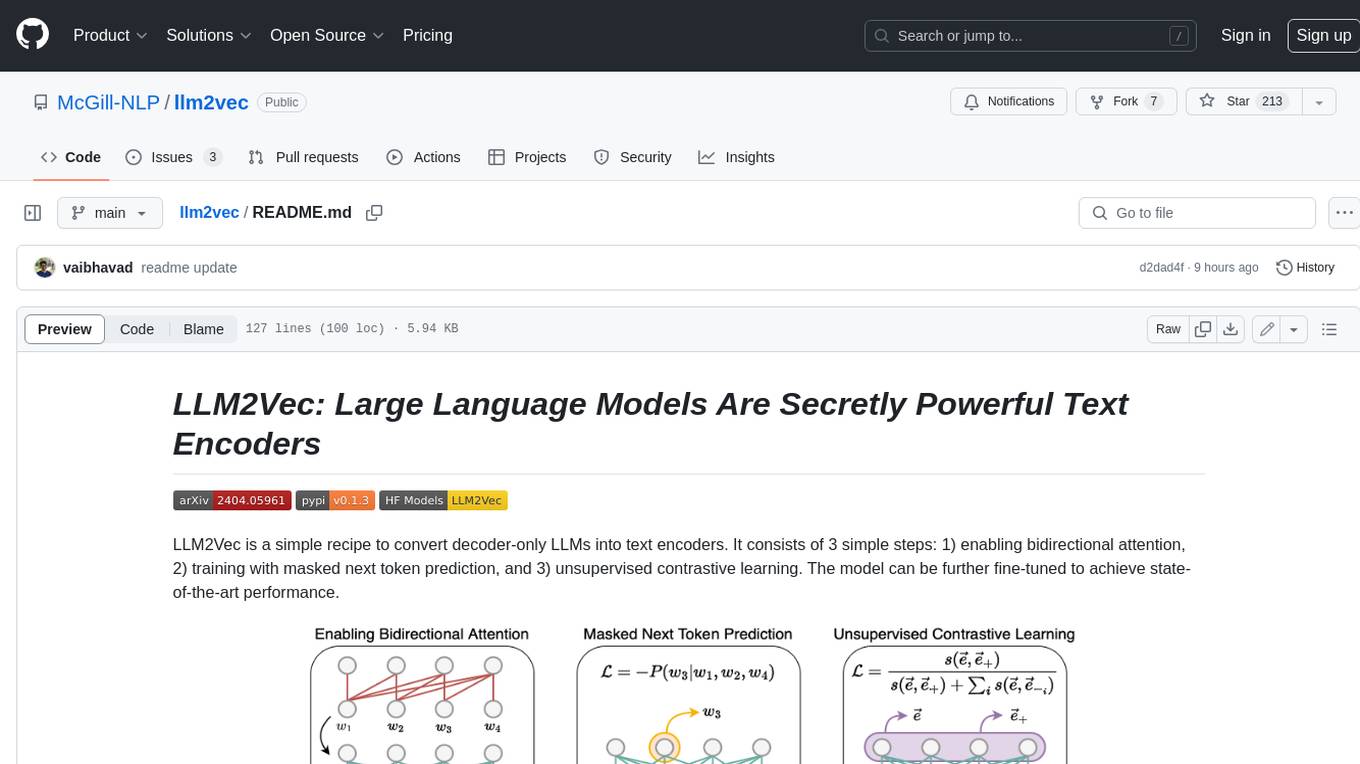
llm2vec
LLM2Vec is a simple recipe to convert decoder-only LLMs into text encoders. It consists of 3 simple steps: 1) enabling bidirectional attention, 2) training with masked next token prediction, and 3) unsupervised contrastive learning. The model can be further fine-tuned to achieve state-of-the-art performance.
marvin
Marvin is a lightweight AI toolkit for building natural language interfaces that are reliable, scalable, and easy to trust. Each of Marvin's tools is simple and self-documenting, using AI to solve common but complex challenges like entity extraction, classification, and generating synthetic data. Each tool is independent and incrementally adoptable, so you can use them on their own or in combination with any other library. Marvin is also multi-modal, supporting both image and audio generation as well using images as inputs for extraction and classification. Marvin is for developers who care more about _using_ AI than _building_ AI, and we are focused on creating an exceptional developer experience. Marvin users should feel empowered to bring tightly-scoped "AI magic" into any traditional software project with just a few extra lines of code. Marvin aims to merge the best practices for building dependable, observable software with the best practices for building with generative AI into a single, easy-to-use library. It's a serious tool, but we hope you have fun with it. Marvin is open-source, free to use, and made with 💙 by the team at Prefect.
curated-transformers
Curated Transformers is a transformer library for PyTorch that provides state-of-the-art models composed of reusable components. It supports various transformer architectures, including encoders like ALBERT, BERT, and RoBERTa, and decoders like Falcon, Llama, and MPT. The library emphasizes consistent type annotations, minimal dependencies, and ease of use for education and research. It has been production-tested by Explosion and will be the default transformer implementation in spaCy 3.7.
txtai
Txtai is an all-in-one embeddings database for semantic search, LLM orchestration, and language model workflows. It combines vector indexes, graph networks, and relational databases to enable vector search with SQL, topic modeling, retrieval augmented generation, and more. Txtai can stand alone or serve as a knowledge source for large language models (LLMs). Key features include vector search with SQL, object storage, topic modeling, graph analysis, multimodal indexing, embedding creation for various data types, pipelines powered by language models, workflows to connect pipelines, and support for Python, JavaScript, Java, Rust, and Go. Txtai is open-source under the Apache 2.0 license.
bert4torch
**bert4torch** is a high-level framework for training and deploying transformer models in PyTorch. It provides a simple and efficient API for building, training, and evaluating transformer models, and supports a wide range of pre-trained models, including BERT, RoBERTa, ALBERT, XLNet, and GPT-2. bert4torch also includes a number of useful features, such as data loading, tokenization, and model evaluation. It is a powerful and versatile tool for natural language processing tasks.
private-llm-qa-bot
This is a production-grade knowledge Q&A chatbot implementation based on AWS services and the LangChain framework, with optimizations at various stages. It supports flexible configuration and plugging of vector models and large language models. The front and back ends are separated, making it easy to integrate with IM tools (such as Feishu).
openai-cf-workers-ai
OpenAI for Workers AI is a simple, quick, and dirty implementation of OpenAI's API on Cloudflare's new Workers AI platform. It allows developers to use the OpenAI SDKs with the new LLMs without having to rewrite all of their code. The API currently supports completions, chat completions, audio transcription, embeddings, audio translation, and image generation. It is not production ready but will be semi-regularly updated with new features as they roll out to Workers AI.
FlagEmbedding
FlagEmbedding focuses on retrieval-augmented LLMs, consisting of the following projects currently: * **Long-Context LLM** : Activation Beacon * **Fine-tuning of LM** : LM-Cocktail * **Embedding Model** : Visualized-BGE, BGE-M3, LLM Embedder, BGE Embedding * **Reranker Model** : llm rerankers, BGE Reranker * **Benchmark** : C-MTEB
For similar jobs
sweep
Sweep is an AI junior developer that turns bugs and feature requests into code changes. It automatically handles developer experience improvements like adding type hints and improving test coverage.
teams-ai
The Teams AI Library is a software development kit (SDK) that helps developers create bots that can interact with Teams and Microsoft 365 applications. It is built on top of the Bot Framework SDK and simplifies the process of developing bots that interact with Teams' artificial intelligence capabilities. The SDK is available for JavaScript/TypeScript, .NET, and Python.
ai-guide
This guide is dedicated to Large Language Models (LLMs) that you can run on your home computer. It assumes your PC is a lower-end, non-gaming setup.
classifai
Supercharge WordPress Content Workflows and Engagement with Artificial Intelligence. Tap into leading cloud-based services like OpenAI, Microsoft Azure AI, Google Gemini and IBM Watson to augment your WordPress-powered websites. Publish content faster while improving SEO performance and increasing audience engagement. ClassifAI integrates Artificial Intelligence and Machine Learning technologies to lighten your workload and eliminate tedious tasks, giving you more time to create original content that matters.
chatbot-ui
Chatbot UI is an open-source AI chat app that allows users to create and deploy their own AI chatbots. It is easy to use and can be customized to fit any need. Chatbot UI is perfect for businesses, developers, and anyone who wants to create a chatbot.
BricksLLM
BricksLLM is a cloud native AI gateway written in Go. Currently, it provides native support for OpenAI, Anthropic, Azure OpenAI and vLLM. BricksLLM aims to provide enterprise level infrastructure that can power any LLM production use cases. Here are some use cases for BricksLLM: * Set LLM usage limits for users on different pricing tiers * Track LLM usage on a per user and per organization basis * Block or redact requests containing PIIs * Improve LLM reliability with failovers, retries and caching * Distribute API keys with rate limits and cost limits for internal development/production use cases * Distribute API keys with rate limits and cost limits for students
uAgents
uAgents is a Python library developed by Fetch.ai that allows for the creation of autonomous AI agents. These agents can perform various tasks on a schedule or take action on various events. uAgents are easy to create and manage, and they are connected to a fast-growing network of other uAgents. They are also secure, with cryptographically secured messages and wallets.
griptape
Griptape is a modular Python framework for building AI-powered applications that securely connect to your enterprise data and APIs. It offers developers the ability to maintain control and flexibility at every step. Griptape's core components include Structures (Agents, Pipelines, and Workflows), Tasks, Tools, Memory (Conversation Memory, Task Memory, and Meta Memory), Drivers (Prompt and Embedding Drivers, Vector Store Drivers, Image Generation Drivers, Image Query Drivers, SQL Drivers, Web Scraper Drivers, and Conversation Memory Drivers), Engines (Query Engines, Extraction Engines, Summary Engines, Image Generation Engines, and Image Query Engines), and additional components (Rulesets, Loaders, Artifacts, Chunkers, and Tokenizers). Griptape enables developers to create AI-powered applications with ease and efficiency.


