
Linly-Talker
Digital Avatar Conversational System - Linly-Talker. 😄✨ Linly-Talker is an intelligent AI system that combines large language models (LLMs) with visual models to create a novel human-AI interaction method. 🤝🤖 It integrates various technologies like Whisper, Linly, Microsoft Speech Services, and SadTalker talking head generation system. 🌟🔬
Stars: 2197
Linly-Talker is an innovative digital human conversation system that integrates the latest artificial intelligence technologies, including Large Language Models (LLM) 🤖, Automatic Speech Recognition (ASR) 🎙️, Text-to-Speech (TTS) 🗣️, and voice cloning technology 🎤. This system offers an interactive web interface through the Gradio platform 🌐, allowing users to upload images 📷 and engage in personalized dialogues with AI 💬.
README:
Digital Human Intelligent Dialogue System - Linly-Talker — 'Interactive Dialogue with Your Virtual Self'
2023.12 Update 📆
Users can upload any images for the conversation
2024.01 Update 📆📆
- Exciting news! I've now incorporated both the powerful GeminiPro and Qwen large models into our conversational scene. Users can now upload images during the conversation, adding a whole new dimension to the interactions.
- The deployment invocation method for FastAPI has been updated.
- The advanced settings options for Microsoft TTS have been updated, increasing the variety of voice types. Additionally, video subtitles have been introduced to enhance visualization.
- Updated the GPT multi-turn conversation system to establish contextual connections in dialogue, enhancing the interactivity and realism of the digital persona.
2024.02 Update 📆
- Updated Gradio to the latest version 4.16.0, providing the interface with additional functionalities such as capturing images from the camera to create digital personas, among others.
- ASR and THG have been updated. FunASR from Alibaba has been integrated into ASR, enhancing its speed significantly. Additionally, the THG section now incorporates the Wav2Lip model, while ER-NeRF is currently in preparation (Coming Soon).
- I have incorporated the GPT-SoVITS model, which is a voice cloning method. By fine-tuning it with just one minute of a person's speech data, it can effectively clone their voice. The results are quite impressive and worth recommending.
- I have integrated a web user interface (WebUI) that allows for better execution of Linly-Talker.
2024.04 Update 📆
- Updated the offline mode for Paddle TTS, excluding Edge TTS.
- Updated ER-NeRF as one of the choices for Avatar generation.
- Updated app_talk.py to allow for the free upload of voice and images/videos for generation without being based on a dialogue scenario.
2024.05 Update 📆
- Updated the beginner-friendly AutoDL deployment tutorial, and also updated the codewithgpu image, allowing for one-click experience and learning.
- Updated WebUI.py: Linly-Talker WebUI now supports multiple modules, multiple models, and multiple options
2024.06 Update 📆
- Integrated MuseTalk into Linly-Talker and updated the WebUI, enabling basic real-time conversation capabilities.
- The refined WebUI defaults to not loading the LLM model to reduce GPU memory usage. It directly responds with text to complete voiceovers. The enhanced WebUI features three main functions: personalized character generation, multi-turn intelligent dialogue with digital humans, and real-time MuseTalk conversations. These improvements reduce previous GPU memory redundancies and add more prompts to assist users effectively.
2024.08 Update 📆
- Updated CosyVoice to offer high-quality text-to-speech (TTS) functionality and voice cloning capabilities; also upgraded to Wav2Lipv2 to enhance overall performance.
2024.09 Update 📆
- Added Linly-Talker API documentation, providing detailed interface descriptions to help users access Linly-Talker’s features via the API.
2024.12 Update 📆
- Implemented a simple fix for the Edge-TTS bug, resolved several issues with MuseTalk, and plan to integrate fishTTS for more stable TTS performance, along with incorporating advanced digital human technologies.
Content
- Digital Human Intelligent Dialogue System - Linly-Talker — 'Interactive Dialogue with Your Virtual Self'
Linly-Talker is an innovative digital human conversation system that integrates the latest artificial intelligence technologies, including Large Language Models (LLM) 🤖, Automatic Speech Recognition (ASR) 🎙️, Text-to-Speech (TTS) 🗣️, and voice cloning technology 🎤. This system offers an interactive web interface through the Gradio platform 🌐, allowing users to upload images 📷 and engage in personalized dialogues with AI 💬.
The core features of the system include:
- Multi-Model Integration: Linly-Talker combines major models such as Linly, GeminiPro, Qwen, as well as visual models like Whisper, SadTalker, to achieve high-quality dialogues and visual generation.
- Multi-Turn Conversational Ability: Through the multi-turn dialogue system powered by GPT models, Linly-Talker can understand and maintain contextually relevant and coherent conversations, significantly enhancing the authenticity of the interaction.
- Voice Cloning: Utilizing technologies like GPT-SoVITS, users can upload a one-minute voice sample for fine-tuning, and the system will clone the user's voice, enabling the digital human to converse in the user's voice.
- Real-Time Interaction: The system supports real-time speech recognition and video captioning, allowing users to communicate naturally with the digital human via voice.
- Visual Enhancement: With digital human generation technologies, Linly-Talker can create realistic digital human avatars, providing a more immersive experience.
The design philosophy of Linly-Talker is to create a new form of human-computer interaction that goes beyond simple Q&A. By integrating advanced technologies, it offers an intelligent digital human capable of understanding, responding to, and simulating human communication.
[!NOTE]
You can watch the demo video here.
I have recorded a series of videos on Bilibili, which also represent every step of my updates and methods of use. For detailed information, please refer to Digital Human Dialogue System - Linly-Talker Collection.
- 🔥🔥🔥 Digital Human Dialogue System Linly-Talker 🔥🔥🔥
- 🚀 The Future of Digital Humans: The Empowerment Path of Linly-Talker + GPT-SoVIT Voice Cloning Technology
- Deploying Linly-Talker on AutoDL Platform (Super Detailed Tutorial for Beginners)
- Linly-Talker Update: Offline TTS Integration and Customized Digital Human Solutions
- [x] Completed the basic conversation system flow, capable of
voice interactions. - [x] Integrated the LLM large model, including the usage of
Linly,Qwen, andGeminiPro. - [x] Enabled the ability to upload
any digital person's photofor conversation. - [x] Integrated
FastAPIinvocation for Linly. - [x] Utilized Microsoft
TTSwith advanced options, allowing customization of voice and tone parameters to enhance audio diversity. - [x]
Added subtitlesto video generation for improved visualization. - [x] GPT
Multi-turn Dialogue System(Enhance the interactivity and realism of digital entities, bolstering their intelligence) - [x] Optimized the Gradio interface by incorporating additional models such as Wav2Lip, FunASR, and others.
- [x]
Voice CloningTechnology (Synthesize one's own voice using voice cloning to enhance the realism and interactive experience of digital entities) - [x] Integrate offline TTS (Text-to-Speech) along with NeRF-based methods and models.
- [x] Linly-Talker WebUI supports multiple modules, multiple models, and multiple options
- [x] Added MuseTalk functionality to Linly-Talker, achieving near real-time speed with very fast communication.
- [x] Integrated MuseTalk into the Linly-Talker WebUI.
- [x] Added CosyVoice, which provides high-quality text-to-speech (TTS) functionality and voice cloning capabilities. Additionally, updated to Wav2Lipv2 to enhance image quality effects.
- [x] Added Linly-Talker API documentation with detailed interface descriptions.
- [ ]
Real-timeSpeech Recognition (Enable conversation and communication between humans and digital entities using voice)
[!IMPORTANT]
🔆 The Linly-Talker project is ongoing - pull requests are welcome! If you have any suggestions regarding new model approaches, research, techniques, or if you discover any runtime errors, please feel free to edit and submit a pull request. You can also open an issue or contact me directly via email. 📩⭐ If you find this repository useful, please give it a star! 🤩
[!TIP]
If you encounter any issues during deployment, please consult the Common Issues Summary section, where I have compiled a list of all potential problems. Additionally, a discussion group is available here, and I will provide regular updates. Thank you for your attention and use of Linly-Talker!
| 文字/语音对话 | 数字人回答 |
|---|---|
| 应对压力最有效的方法是什么? | |
| 如何进行时间管理? | |
| 撰写一篇交响乐音乐会评论,讨论乐团的表演和观众的整体体验。 | |
| 翻译成中文:Luck is a dividend of sweat. The more you sweat, the luckier you get. |
[!NOTE]
AutoDL has released an image, which can be used directly at https://www.codewithgpu.com/i/Kedreamix/Linly-Talker/Kedreamix-Linly-Talker. You can also create an environment directly using Docker. I will continue to update the image.
docker pull registry.cn-beijing.aliyuncs.com/codewithgpu2/kedreamix-linly-talker:afGA8RPDLfFor Windows, I've included an all-in-one Python package. You can run the steps in sequence to install the necessary dependencies and download the corresponding model to get it running. Follow the instructions using
condaand start installing PyTorch from step 02. If you encounter any issues, please feel free to contact me.
Download the code:
git clone https://github.com/Kedreamix/Linly-Talker.git --depth 1

cd Linly-Talker
git submodule update --init --recursive
If you are using Linly-Talker, you can set up the environment directly with Anaconda, which covers almost all the dependencies required by the models. The specific steps are as follows:
conda create -n linly python=3.10
conda activate linly

# PyTorch Installation Option 1: Using conda
# CUDA 11.8
# conda install pytorch==2.4.1 torchvision==0.19.1 torchaudio==2.4.1 pytorch-cuda=11.8 -c pytorch -c nvidia
# CUDA 12.1
# conda install pytorch==2.4.1 torchvision==0.19.1 torchaudio==2.4.1 pytorch-cuda=12.1 -c pytorch -c nvidia
# CUDA 12.4
# conda install pytorch==2.4.1 torchvision==0.19.1 torchaudio==2.4.1 pytorch-cuda=12.4 -c pytorch -c nvidia

# PyTorch Installation Option 2: Using pip
# CUDA 11.8
# pip install torch==2.4.1 torchvision==0.19.1 torchaudio==2.4.1 --index-url https://download.pytorch.org/whl/cu118
# CUDA 12.1
# pip install torch==2.4.1 torchvision==0.19.1 torchaudio==2.4.1 --index-url https://download.pytorch.org/whl/cu121
# CUDA 12.4
# pip install torch==2.4.1 torchvision==0.19.1 torchaudio==2.4.1 --index-url https://download.pytorch.org/whl/cu124
pip install torch==2.0.1 torchvision==0.15.2 torchaudio==2.0.2 --index-url https://download.pytorch.org/whl/cu118

conda install -q ffmpeg==4.2.2 # ffmpeg==4.2.2

# Upgrade pip
python -m pip install --upgrade pip
# Change the PyPI source to speed up the installation of packages
pip config set global.index-url https://pypi.tuna.tsinghua.edu.cn/simple

pip install tb-nightly -i https://mirrors.aliyun.com/pypi/simple
pip install -r requirements_webui.txt

# Install dependencies related to musetalk
pip install --no-cache-dir -U openmim
mim install mmengine
mim install "mmcv==2.1.0"
mim install "mmdet>=3.1.0"
mim install "mmpose>=1.1.0"

# 💡The ttsfrd from CosyVoice can be replaced with WeTextProcessing, so a few steps can be omitted, while ensuring compatibility with other Python versions

# ⚠️ Note: You must first download CosyVoice-ttsfrd. Complete the model download before proceeding with these steps.
# mkdir -p CosyVoice/pretrained_models # Create directory CosyVoice/pretrained_models
# mv checkpoints/CosyVoice_ckpt/CosyVoice-ttsfrd CosyVoice/pretrained_models # Move directory
# unzip CosyVoice/pretrained_models/CosyVoice-ttsfrd/resource.zip # Unzip
# This .whl library is only compatible with Python 3.8
# pip install CosyVoice/pretrained_models/CosyVoice-ttsfrd/ttsfrd-0.3.6-cp38-cp38-linux_x86_64.whl

# Install NeRF-based dependencies, which might have several issues and can be skipped initially
pip install "git+https://github.com/facebookresearch/pytorch3d.git"
# If you encounter problems installing PyTorch3D, you can use the following command to install it:
# python scripts/install_pytorch3d.py
pip install -r TFG/requirements_nerf.txt

# If you encouter issues with pyaudio
sudo apt-get update
sudo apt-get install libasound-dev portaudio19-dev libportaudio2 libportaudiocpp0

# Note the following modules. If installation fails, you can enter the directory and use pip install . or python setup.py install to compile and install:
# NeRF/freqencoder
# NeRF/gridencoder
# NeRF/raymarching
# NeRF/shencoder

# If you encounter sox compatibility issues
# ubuntu
sudo apt-get install sox libsox-dev
# centos
sudo yum install sox sox-devel
[!NOTE]
The installation process is very slow.
Below are some older installation methods, which might cause dependency conflicts, but they generally don't produce many bugs. For an easier and better installation, I've updated the above version. You can ignore the following versions or refer to them if you encounter issues.
To install the environment using Anaconda and PyTorch, follow the steps below:
conda create -n linly python=3.10
conda activate linly

# PyTorch Installation Method 1: Conda Installation (Recommended)
conda install pytorch==1.12.1 torchvision==0.13.1 torchaudio==0.12.1 cudatoolkit=11.3 -c pytorch

# PyTorch Installation Method 2: Pip Installation
pip install torch==1.12.1+cu113 torchvision==0.13.1+cu113 torchaudio==0.12.1 --extra-index-url https://download.pytorch.org/whl/cu113

conda install -q ffmpeg # ffmpeg==4.2.2

pip install -r requirements_app.txt
If you want to use models like voice cloning, you may need a higher version of PyTorch. However, the functionality will be more diverse. You may need to use CUDA 11.8 as the driver version, which you can choose.
conda create -n linly python=3.10
conda activate linly

pip install torch==2.0.1 torchvision==0.15.2 torchaudio==2.0.2 --index-url https://download.pytorch.org/whl/cu118

conda install -q ffmpeg # ffmpeg==4.2.2

pip install -r requirements_app.txt

# Install dependencies for voice cloning
pip install -r VITS/requirements_gptsovits.txt
If you wish to use NeRF-based models, you may need to set up the corresponding environment:
# Install dependencies for NeRF
pip install "git+https://github.com/facebookresearch/pytorch3d.git"
pip install -r TFG/requirements_nerf.txt

# If there are issues with PyAudio, you can install the corresponding dependencies
# sudo apt-get install libasound-dev portaudio19-dev libportaudio2 libportaudiocpp0

# Note the following modules. If installation is unsuccessful, you can navigate to the path and use pip install . or python setup.py install to compile and install.
# NeRF/freqencoder
# NeRF/gridencoder
# NeRF/raymarching
# NeRF/shencoder
If you are using PaddleTTS, you can set up the corresponding environment with:
pip install -r TTS/requirements_paddle.txtIf you are using the FunASR speech recognition model, you can install the environment with:
pip install -r ASR/requirements_funasr.txtIf using the MuesTalk model, you can set up the environment with the following commands:
pip install --no-cache-dir -U openmim
mim install mmengine
mim install "mmcv>=2.0.1"
mim install "mmdet>=3.1.0"
mim install "mmpose>=1.1.0"
pip install -r TFG/requirements_musetalk.txt
[!NOTE]
Next, you need to install the corresponding models. You can download them using the following methods. Once downloaded, place the files in the specified folder structure (explained at the end of this document).
We recommend downloading from modelscope for the latest updates.
- Baidu (百度云盘) (Password:
linl)- huggingface
- modelscope
- Quark(夸克网盘)
I made a script that can download all the models mentioned below without requiring much input from the user. This method is suitable for stable network conditions, especially for Linux users. For Windows users, Git can also be used to download the models. If the network connection is unstable, users can choose to manually download the models or try running a Shell script to complete the download. The script has the following features:
- Choose Download Method: Users can choose to download models from three different sources: ModelScope, Huggingface, or Huggingface mirror site.
- Download Models: Based on the user's selection, the script executes the corresponding download command.
- Move Model Files: After downloading, the script moves the model files to the specified directory.
- Error Handling: Error checks are included in each step of the operation. If any step fails, the script will output an error message and stop execution.
sh scripts/download_models.shHuggingFace Download
If the download speed is too slow, consider using a mirror site. For more information, refer to Efficiently Obtain Hugging Face Models Using Mirror Sites.
# Download pre-trained models from HuggingFace
git lfs install
git clone https://huggingface.co/Kedreamix/Linly-Talker --depth 1
# git lfs clone https://huggingface.co/Kedreamix/Linly-Talker --depth 1

# pip install -U huggingface_hub
# export HF_ENDPOINT=https://hf-mirror.com # Use a mirror site
huggingface-cli download --resume-download --local-dir-use-symlinks False Kedreamix/Linly-Talker --local-dir Linly-Talker
ModelScope Download
# Download pre-trained models from Modelscope
# 1. Using git
git lfs install
git clone https://www.modelscope.cn/Kedreamix/Linly-Talker.git --depth 1
# git lfs clone https://www.modelscope.cn/Kedreamix/Linly-Talker.git

# 2. Download using Python code
pip install modelscope
from modelscope import snapshot_download
model_dir = snapshot_download('Kedreamix/Linly-Talker')
Move All Models to the Current Directory
If you downloaded from Baidu Netdisk, you can refer to the directory structure at the end of the document to move the models.
# Move all models to the current directory
# Checkpoints contain SadTalker and Wav2Lip
mv Linly-Talker/checkpoints/* ./checkpoints

# Enhanced GFPGAN for SadTalker
# pip install gfpgan
# mv Linly-Talker/gfpan ./

# Voice cloning models
mv Linly-Talker/GPT_SoVITS/pretrained_models/* ./GPT_SoVITS/pretrained_models/

# Qwen large language model
mv Linly-Talker/Qwen ./

# MuseTalk model
mkdir -p ./Musetalk/models
mv Linly-Talker/MuseTalk/* ./Musetalk/models
For the convenience of deployment and usage, an configs.py file has been updated. You can modify some hyperparameters in this file for customization:
# Device Running Port
port = 7870

# API Running Port and IP
# Localhost port is 127.0.0.1; for global port forwarding, use "0.0.0.0"
ip = '127.0.0.1'
api_port = 7871

# Linly Model Path
mode = 'api'  # For 'api', Linly-api-fast.py must be run first
mode = 'offline'
model_path = 'Linly-AI/Chinese-LLaMA-2-7B-hf'

# SSL Certificate (required for microphone interaction)
# Preferably an absolute path
ssl_certfile = "./https_cert/cert.pem"
ssl_keyfile = "./https_cert/key.pem"
This file allows you to adjust parameters such as the device running port, API running port, Linly model path, and SSL certificate paths for ease of deployment and configuration.
In the api/README.md file, we provide detailed information about the usage and configuration of the Linly-Talker API. This documentation includes information on how to call the API, the required parameters, and the format of the returned data. By reviewing these documents, users can gain a comprehensive understanding of how to utilize the API to implement various Linly-Talker functionalities, including starting conversations, uploading images, performing speech recognition, and generating speech.
For detailed API interface descriptions, please refer to the api/README.md file.
For detailed information about the usage and code implementation of Automatic Speech Recognition (ASR), please refer to ASR - Bridging the Gap with Digital Humans.
To implement ASR (Automatic Speech Recognition) using OpenAI's Whisper, you can refer to the specific usage methods provided in the GitHub repository: https://github.com/openai/whisper
The speech recognition performance of Alibaba's FunASR is quite impressive and it is actually better than Whisper in terms of Chinese language. Additionally, FunASR is capable of achieving real-time results, making it a great choice. You can experience FunASR by accessing the FunASR file in the ASR folder. Please refer to https://github.com/alibaba-damo-academy/FunASR for more information.
Welcome everyone to provide suggestions, motivating me to continuously update the models and enrich the functionality of Linly-Talker.
For detailed information about the usage and code implementation of Text-to-Speech (TTS), please refer to TTS - Empowering Digital Humans with Natural Speech Interaction.
To use Microsoft Edge's online text-to-speech service from Python without needing Microsoft Edge or Windows or an API key, you can refer to the GitHub repository at https://github.com/rany2/edge-tts. It provides a Python module called "edge-tts" that allows you to utilize the service. You can find detailed installation instructions and usage examples in the repository's README file.
[!Warning]
Due to some issues with the Edge TTS repository, it seems that Microsoft has restricted certain IPs. For more details, refer to 403 error is back/need to implement Sec-MS-GEC token and Add support for clock adjustment for Sec-MS-GEC token. The solution is still unstable for now. I have made some modifications, but if it continues to be unstable, please consider using alternative methods. I recommend using the CosyVoice method.
In practical use, there may be scenarios that require offline operation. Since Edge TTS requires an online environment to generate speech, we have chosen PaddleSpeech, another open-source alternative, for Text-to-Speech (TTS). Although there might be some differences in the quality, PaddleSpeech supports offline operations. For more information, you can refer to the GitHub page of PaddleSpeech: https://github.com/PaddlePaddle/PaddleSpeech.
Welcome everyone to provide suggestions, motivating me to continuously update the models and enrich the functionality of Linly-Talker.
For detailed information about the usage and code implementation of Voice Clone, please refer to Voice Clone - Stealing Your Voice Quietly During Conversations.
Thank you for your open source contribution. I have also found the GPT-SoVITS voice cloning model to be quite impressive. You can find the project at https://github.com/RVC-Boss/GPT-SoVITS.
Coqui XTTS is a leading deep learning toolkit for Text-to-Speech (TTS) tasks, allowing for voice cloning and voice transfer to different languages using a 5-second or longer audio clip.
🐸 TTS is a library for advanced text-to-speech generation.
🚀 Over 1100 pre-trained models for various languages.
🛠️ Tools for training new models and fine-tuning existing models in any language.
📚 Utility programs for dataset analysis and management.
- Experience XTTS online https://huggingface.co/spaces/coqui/xtts
- Official GitHub repository: https://github.com/coqui-ai/TTS
CosyVoice is an open-source multilingual speech understanding model developed by Alibaba’s Tongyi Lab, focusing on high-quality speech synthesis. The model has been trained on over 150,000 hours of data and supports speech synthesis in multiple languages, including Chinese, English, Japanese, Cantonese, and Korean. CosyVoice excels in multilingual speech generation, zero-shot voice generation, cross-lingual voice synthesis, and command execution capabilities.
CosyVoice supports one-shot voice cloning technology, enabling the generation of realistic and natural-sounding voices with details such as prosody and emotion using only 3 to 10 seconds of original audio.
GitHub project link: CosyVoice GitHub
CosyVoice includes several pre-trained speech synthesis models, mainly:
- CosyVoice-300M: Supports zero-shot and cross-lingual speech synthesis in Chinese, English, Japanese, Cantonese, Korean, and other languages.
- CosyVoice-300M-SFT: A model focused on supervised fine-tuning (SFT) inference.
- CosyVoice-300M-Instruct: A model that supports command-based inference, capable of generating speech with specific tones, emotions, and other elements.
Key Features
- Multilingual Support: Capable of handling various languages including Chinese, English, Japanese, Cantonese, and Korean.
- Multi-style Speech Synthesis: Allows control over the tone and emotion of the generated speech through commands.
- Streaming Inference Support: Future updates will include streaming inference modes, such as KV caching and SDPA, for real-time optimization.
Currently, Linly-Talker integrates three features from CosyVoice: pre-trained voice cloning, 3s rapid cloning, and cross-lingual cloning. Stay tuned for more exciting updates on Linly-Talker. Below are some examples of CosyVoice's capabilities:
| PROMPT TEXT | PROMPT SPEECH | TARGET TEXT | RESULT | |
|---|---|---|---|---|
| Pre-trained Voice | 中文女 音色('中文女', '中文男', '日语男', '粤语女', '英文女', '英文男', '韩语女') | — | 你好,我是通义生成式语音大模型,请问有什么可以帮您的吗? | |
| 3s Language Cloning | 希望你以后能够做的比我还好呦。 | 收到好友从远方寄来的生日礼物,那份意外的惊喜与深深的祝福让我心中充满了甜蜜的快乐,笑容如花儿般绽放。 | ||
| Cross-lingual Cloning | 在那之后,完全收购那家公司,因此保持管理层的一致性,利益与即将加入家族的资产保持一致。这就是我们有时不买下全部的原因。 | < |en|>And then later on, fully acquiring that company. So keeping management in line, interest in line with the asset that's coming into the family is a reason why sometimes we don't buy the whole thing. |
Welcome everyone to provide suggestions, motivating me to continuously update the models and enrich the functionality of Linly-Talker.
Detailed information about the usage and code implementation of digital human generation can be found in THG - Building Intelligent Digital Humans.
Digital persona generation can utilize SadTalker (CVPR 2023). For detailed information, please visit https://sadtalker.github.io.
Before usage, download the SadTalker model:
bash scripts/sadtalker_download_models.sh Baidu (百度云盘) (Password: linl)
If downloading from Baidu Cloud, remember to place it in the
checkpointsfolder. The model downloaded from Baidu Cloud is namedsadtalkerby default, but it should be renamed tocheckpoints.
Digital persona generation can also utilize Wav2Lip (ACM 2020). For detailed information, refer to https://github.com/Rudrabha/Wav2Lip.
Before usage, download the Wav2Lip model:
| Model | Description | Link to the model |
|---|---|---|
| Wav2Lip | Highly accurate lip-sync | Link |
| Wav2Lip + GAN | Slightly inferior lip-sync, but better visual quality | Link |
| Expert Discriminator | Weights of the expert discriminator | Link |
| Visual Quality Discriminator | Weights of the visual disc trained in a GAN setup | Link |
Inspired by the repository https://github.com/primepake/wav2lip_288x288, Wav2Lipv2 uses a newly trained 288 model to achieve higher quality results.
Additionally, by employing YOLO for facial detection, the overall effect is improved. You can compare and test the results in Linly-Talker. The model has been updated, and the comparison is as follows:
| Wav2Lip | Wav2Lipv2 |
|---|---|
ER-NeRF (ICCV 2023) is a digital human built using the latest NeRF technology. It allows for the customization of digital characters and can reconstruct them using just a five-minute video of a person. For more details, please refer to https://github.com/Fictionarry/ER-NeRF.
Updated: Taking inspiration from the likeness of Obama, for better results, consider cloning and customizing the voice of digital personas for improved effectiveness.
MuseTalk is a real-time, high-quality audio-driven lip synchronization model capable of running at over 30 frames per second on an NVIDIA Tesla V100 GPU. This model can be integrated with input videos generated by MuseV, forming a part of a comprehensive virtual human solution. For more details, please refer to https://github.com/TMElyralab/MuseTalk.
MuseTalk is trained to operate within the latent space of ft-mse-vae and offers the following features:
- Unseen Face Synchronization: It can modify unseen faces based on input audio, with a face region size of 256 x 256.
- Multi-language Support: Supports audio inputs in various languages, including Chinese, English, and Japanese.
- High-performance Real-time Inference: Achieves real-time inference at over 30 frames per second on an NVIDIA Tesla V100.
- Facial Center Point Adjustment: Allows the adjustment of the facial region's center point, significantly impacting the generated results.
- HDTF Dataset Training: Provides model checkpoints trained on the HDTF dataset.
- Upcoming Training Code Release: Training code will be released soon, facilitating further development and research.
MuseTalk offers an efficient and versatile tool for precise audio synchronization with facial expressions in virtual humans, marking a significant step towards fully interactive virtual personas.
In Linly-Talker, MuseTalk has been integrated to perform inference on videos based on MuseV, achieving an ideal speed for conversations with near real-time performance. This approach works very well and supports streaming-based inference.
Welcome everyone to provide suggestions, motivating me to continuously update the models and enrich the functionality of Linly-Talker.
For detailed information about the usage and code implementation of Large Language Models (LLM), please refer to LLM - Empowering Digital Humans with Powerful Language Models.
Linly-AI is a Large Language model developed by CVI at Shenzhen University. You can find more information about Linly-AI on their GitHub repository: https://github.com/CVI-SZU/Linly
Download Linly models: https://huggingface.co/Linly-AI/Chinese-LLaMA-2-7B-hf
You can use git to download:
git lfs install
git clone https://huggingface.co/Linly-AI/Chinese-LLaMA-2-7B-hf
Alternatively, you can use the huggingface download tool huggingface-cli:
pip install -U huggingface_hub

# Set up mirror acceleration
# Linux
export HF_ENDPOINT="https://hf-mirror.com"
# Windows PowerShell
$env:HF_ENDPOINT="https://hf-mirror.com"

huggingface-cli download --resume-download Linly-AI/Chinese-LLaMA-2-7B-hf --local-dir Linly-AI/Chinese-LLaMA-2-7B-hf
Qwen is an AI model developed by Alibaba Cloud. You can check out the GitHub repository for Qwen here: https://github.com/QwenLM/Qwen
If you want to quickly use Qwen, you can choose the 1.8B model, which has fewer parameters and can run smoothly even with limited GPU memory. Of course, this part can be replaced with other options.
You can download the Qwen 1.8B model from this link: https://huggingface.co/Qwen/Qwen-1_8B-Chat
You can use git to download:
git lfs install
git clone https://huggingface.co/Qwen/Qwen-1_8B-Chat
Alternatively, you can use the huggingface download tool huggingface-cli:
pip install -U huggingface_hub

# Set up mirror acceleration
# Linux
export HF_ENDPOINT="https://hf-mirror.com"
# Windows PowerShell
$env:HF_ENDPOINT="https://hf-mirror.com"

huggingface-cli download --resume-download Qwen/Qwen-1_8B-Chat --local-dir Qwen/Qwen-1_8B-Chat
Gemini-Pro is an AI model developed by Google. To learn more about Gemini-Pro, you can visit their website: https://deepmind.google/technologies/gemini/
If you want to request an API key for Gemini-Pro, you can visit this link: https://makersuite.google.com/
From OpenAI, requires API application. For more information, please visit https://platform.openai.com/docs/introduction.
From Tsinghua University, for more information please visit https://github.com/THUDM/ChatGLM3.
For free access to GPT-4 and other models, you can refer to https://github.com/xtekky/gpt4free. This resource provides methods to utilize these models without cost.
In the webui.py file, easily select the model you need.
Welcome everyone to provide suggestions, motivating me to continuously update the models and enrich the functionality of Linly-Talker.
Some optimizations:
- Use fixed input face images, extract features beforehand to avoid reading each time
- Remove unnecessary libraries to reduce total time
- Only save final video output, don't save intermediate results to improve performance
- Use OpenCV to generate final video instead of mimwrite for faster runtime
Gradio is a Python library that provides an easy way to deploy machine learning models as interactive web apps.
For Linly-Talker, Gradio serves two main purposes:
-
Visualization & Demo: Gradio provides a simple web GUI for the model, allowing users to see the results intuitively by uploading an image and entering text. This is an effective way to showcase the capabilities of the system.
-
User Interaction: The Gradio GUI can serve as a frontend to allow end users to interact with Linly-Talker. Users can upload their own images and ask arbitrary questions or have conversations to get real-time responses. This provides a more natural speech interaction method.
Specifically, we create a Gradio Interface in app.py that takes image and text inputs, calls our function to generate the response video, and displays it in the GUI. This enables browser interaction without needing to build complex frontend.
In summary, Gradio provides visualization and user interaction interfaces for Linly-Talker, serving as effective means for showcasing system capabilities and enabling end users.
If considering real-time conversation, it may be necessary to switch to a different framework or customize Gradio. Looking forward to working together with everyone.
Previously, I had separated many versions, but it became cumbersome to run multiple versions. Therefore, I have added a WebUI feature to provide a single interface for a seamless experience. I will continue to update it in the future.
The current features available in the WebUI are as follows:
-
[x] Text/Voice-based dialogue with virtual characters (fixed characters with male and female roles)
-
[x] Dialogue with virtual characters using any image (you can upload any character image)
-
[x] Multi-turn GPT dialogue (incorporating historical dialogue data to maintain context)
-
[x] Voice cloning dialogue (based on GPT-SoVITS settings for voice cloning, including a built-in smoky voice that can be cloned based on the voice of the dialogue)
-
[x] Digital Persona Text/Voice Playback (based on input text/voice)
-
[x] Multiple modules➕Multiple models➕Multiple choices
- [x] Multiple role selections: Female/Male/Custom (each part can automatically upload images) Coming Soon
- [x] Multiple TTS model selections: EdgeTTS / PaddleTTS / GPT-SoVITS / CosyVoice / Coming Soon
- [x] Multiple LLM model selections: Linly / Qwen / ChatGLM / GeminiPro / ChatGPT / Coming Soon
- [x] Multiple Talker model selections: Wav2Lip / Wav2Lipv2 / SadTalker / ERNeRF / MuseTalk/ Coming Soon
- [x] Multiple ASR model selections: Whisper / FunASR / Coming Soon
You can directly run the web UI to obtain results. The page you will see is as follows:
# WebUI
python webui.py
This time, we've updated the interface. We can freely select the fine-tuned model of GPT-SoVITS to achieve voice cloning. Simply upload a reference audio file to clone the voice.
There are three modes for the current startup, and you can choose a specific setting based on the scenario.
The first mode involves fixed Q&A with a predefined character, eliminating preprocessing time.
python app.pyThe first mode has recently been updated to include the Wav2Lip model for dialogue.
python appv2.pyThe second mode allows for conversing with any uploaded image.
python app_img.pyThe third mode builds upon the first one by incorporating a large language model for multi-turn GPT conversations.
python app_multi.pyNow, the part of voice cloning has been added, allowing for freely switching between cloned voice models and corresponding person images. Here, I have chosen a deep, smoky voice and an image of a male.
python app_vits.pyA fourth method has been added, which does not fixate on a specific scenario for conversation. Instead, it allows for direct input of voice or the generation of voice for the creation of a digital human. It incorporates methods such as Sadtalker, Wav2Lip, and ER-NeRF.
ER-NeRF is trained on videos of a single individual, so a specific model needs to be replaced to render and obtain the correct results. It comes with pre-installed weights for Obama, which can be used directly with the following command:
python app_talk.pyMuseTalk has been integrated into Linly-Talker, enabling efficient preprocessing of MuseV-generated videos. Once preprocessed, these videos facilitate conversations at speeds that meet near real-time requirements, providing very fast performance. MuseTalk is now available within the WebUI.
To run the application, use the following command:
python app_musetalk.py[!NOTE]
The folder structure of the weight files is as follows:
Linly-Talker/
├── checkpoints
│   ├── audio_visual_encoder.pth
│   ├── hub
│   │   └── checkpoints
│   │       └── s3fd-619a316812.pth
│   ├── lipsync_expert.pth
│   ├── mapping_00109-model.pth.tar
│   ├── mapping_00229-model.pth.tar
│   ├── May.json
│   ├── May.pth
│   ├── Obama_ave.pth
│   ├── Obama.json
│   ├── Obama.pth
│   ├── ref_eo.npy
│   ├── ref.npy
│   ├── ref.wav
│   ├── SadTalker_V0.0.2_256.safetensors
│   ├── visual_quality_disc.pth
│   ├── wav2lip_gan.pth
│   └── wav2lip.pth
├── gfpgan
│   └── weights
│       ├── alignment_WFLW_4HG.pth
│       └── detection_Resnet50_Final.pth
├── GPT_SoVITS
│   └── pretrained_models
│       ├── chinese-hubert-base
│       │   ├── config.json
│       │   ├── preprocessor_config.json
│       │   └── pytorch_model.bin
│       ├── chinese-roberta-wwm-ext-large
│       │   ├── config.json
│       │   ├── pytorch_model.bin
│       │   └── tokenizer.json
│       ├── README.md
│       ├── s1bert25hz-2kh-longer-epoch=68e-step=50232.ckpt
│       ├── s2D488k.pth
│       ├── s2G488k.pth
│       └── speech_paraformer-large_asr_nat-zh-cn-16k-common-vocab8404-pytorch
├── MuseTalk
│   ├── models
│   │   ├── dwpose
│   │   │   └── dw-ll_ucoco_384.pth
│   │   ├── face-parse-bisent
│   │   │   ├── 79999_iter.pth
│   │   │   └── resnet18-5c106cde.pth
│   │   ├── musetalk
│   │   │   ├── musetalk.json
│   │   │   └── pytorch_model.bin
│   │   ├── README.md
│   │   ├── sd-vae-ft-mse
│   │   │   ├── config.json
│   │   │   └── diffusion_pytorch_model.bin
│   │   └── whisper
│   │       └── tiny.pt
├── Qwen
│   └── Qwen-1_8B-Chat
│       ├── assets
│       │   ├── logo.jpg
│       │   ├── qwen_tokenizer.png
│       │   ├── react_showcase_001.png
│       │   ├── react_showcase_002.png
│       │   └── wechat.png
│       ├── cache_autogptq_cuda_256.cpp
│       ├── cache_autogptq_cuda_kernel_256.cu
│       ├── config.json
│       ├── configuration_qwen.py
│       ├── cpp_kernels.py
│       ├── examples
│       │   └── react_prompt.md
│       ├── generation_config.json
│       ├── LICENSE
│       ├── model-00001-of-00002.safetensors
│       ├── model-00002-of-00002.safetensors
│       ├── modeling_qwen.py
│       ├── model.safetensors.index.json
│       ├── NOTICE
│       ├── qwen_generation_utils.py
│       ├── qwen.tiktoken
│       ├── README.md
│       ├── tokenization_qwen.py
│       └── tokenizer_config.json
├── Whisper
│   ├── base.pt
│   └── tiny.pt
├── FunASR
│   ├── punc_ct-transformer_zh-cn-common-vocab272727-pytorch
│   │   ├── configuration.json
│   │   ├── config.yaml
│   │   ├── example
│   │   │   └── punc_example.txt
│   │   ├── fig
│   │   │   └── struct.png
│   │   ├── model.pt
│   │   ├── README.md
│   │   └── tokens.json
│   ├── speech_fsmn_vad_zh-cn-16k-common-pytorch
│   │   ├── am.mvn
│   │   ├── configuration.json
│   │   ├── config.yaml
│   │   ├── example
│   │   │   └── vad_example.wav
│   │   ├── fig
│   │   │   └── struct.png
│   │   ├── model.pt
│   │   └── README.md
│   └── speech_seaco_paraformer_large_asr_nat-zh-cn-16k-common-vocab8404-pytorch
│       ├── am.mvn
│       ├── asr_example_hotword.wav
│       ├── configuration.json
│       ├── config.yaml
│       ├── example
│       │   ├── asr_example.wav
│       │   └── hotword.txt
│       ├── fig
│       │   ├── res.png
│       │   └── seaco.png
│       ├── model.pt
│       ├── README.md
│       ├── seg_dict
│       └── tokens.json
└── README.mdASR
TTS
LLM
- https://github.com/CVI-SZU/Linly
- https://github.com/QwenLM/Qwen
- https://deepmind.google/technologies/gemini/
- https://github.com/THUDM/ChatGLM3
- https://openai.com
THG
- https://github.com/OpenTalker/SadTalker
- https://github.com/Rudrabha/Wav2Lip
- https://github.com/Fictionarry/ER-NeRF
Voice Clone
[!CAUTION]
When using this tool, please comply with all applicable laws, including copyright, data protection, and privacy laws. Do not use, modify, distribute, or sublicense this tool without permission from the original authors and/or copyright holders.
Linly-Talker follows the MIT License. In addition to adhering to the MIT License, ensure that you comply with all license agreements for any referenced models and components. Unauthorized use may lead to legal consequences.
For Tasks:
Click tags to check more tools for each tasksFor Jobs:
Alternative AI tools for Linly-Talker
Similar Open Source Tools

Linly-Talker
Linly-Talker is an innovative digital human conversation system that integrates the latest artificial intelligence technologies, including Large Language Models (LLM) 🤖, Automatic Speech Recognition (ASR) 🎙️, Text-to-Speech (TTS) 🗣️, and voice cloning technology 🎤. This system offers an interactive web interface through the Gradio platform 🌐, allowing users to upload images 📷 and engage in personalized dialogues with AI 💬.
Vitron
Vitron is a unified pixel-level vision LLM designed for comprehensive understanding, generating, segmenting, and editing static images and dynamic videos. It addresses challenges in existing vision LLMs such as superficial instance-level understanding, lack of unified support for images and videos, and insufficient coverage across various vision tasks. The tool requires Python >= 3.8, Pytorch == 2.1.0, and CUDA Version >= 11.8 for installation. Users can deploy Gradio demo locally and fine-tune their models for specific tasks.
RooFlow
RooFlow is a VS Code extension that enhances AI-assisted development by providing persistent project context and optimized mode interactions. It reduces token consumption and streamlines workflow by integrating Architect, Code, Test, Debug, and Ask modes. The tool simplifies setup, offers real-time updates, and provides clearer instructions through YAML-based rule files. It includes components like Memory Bank, System Prompts, VS Code Integration, and Real-time Updates. Users can install RooFlow by downloading specific files, placing them in the project structure, and running an insert-variables script. They can then start a chat, select a mode, interact with Roo, and use the 'Update Memory Bank' command for synchronization. The Memory Bank structure includes files for active context, decision log, product context, progress tracking, and system patterns. RooFlow features persistent context, real-time updates, mode collaboration, and reduced token consumption.
DevoxxGenieIDEAPlugin
Devoxx Genie is a Java-based IntelliJ IDEA plugin that integrates with local and cloud-based LLM providers to aid in reviewing, testing, and explaining project code. It supports features like code highlighting, chat conversations, and adding files/code snippets to context. Users can modify REST endpoints and LLM parameters in settings, including support for cloud-based LLMs. The plugin requires IntelliJ version 2023.3.4 and JDK 17. Building and publishing the plugin is done using Gradle tasks. Users can select an LLM provider, choose code, and use commands like review, explain, or generate unit tests for code analysis.
KlicStudio
Klic Studio is a versatile audio and video localization and enhancement solution developed by Krillin AI. This minimalist yet powerful tool integrates video translation, dubbing, and voice cloning, supporting both landscape and portrait formats. With an end-to-end workflow, users can transform raw materials into beautifully ready-to-use cross-platform content with just a few clicks. The tool offers features like video acquisition, accurate speech recognition, intelligent segmentation, terminology replacement, professional translation, voice cloning, video composition, and cross-platform support. It also supports various speech recognition services, large language models, and TTS text-to-speech services. Users can easily deploy the tool using Docker and configure it for different tasks like subtitle translation, large model translation, and optional voice services.
KrillinAI
KrillinAI is a video subtitle translation and dubbing tool based on AI large models, featuring speech recognition, intelligent sentence segmentation, professional translation, and one-click deployment of the entire process. It provides a one-stop workflow from video downloading to the final product, empowering cross-language cultural communication with AI. The tool supports multiple languages for input and translation, integrates features like automatic dependency installation, video downloading from platforms like YouTube and Bilibili, high-speed subtitle recognition, intelligent subtitle segmentation and alignment, custom vocabulary replacement, professional-level translation engine, and diverse external service selection for speech and large model services.
LLM-Zero-to-Hundred
LLM-Zero-to-Hundred is a repository showcasing various applications of LLM chatbots and providing insights into training and fine-tuning Language Models. It includes projects like WebGPT, RAG-GPT, WebRAGQuery, LLM Full Finetuning, RAG-Master LLamaindex vs Langchain, open-source-RAG-GEMMA, and HUMAIN: Advanced Multimodal, Multitask Chatbot. The projects cover features like ChatGPT-like interaction, RAG capabilities, image generation and understanding, DuckDuckGo integration, summarization, text and voice interaction, and memory access. Tutorials include LLM Function Calling and Visualizing Text Vectorization. The projects have a general structure with folders for README, HELPER, .env, configs, data, src, images, and utils.
ComfyUI_VLM_nodes
ComfyUI_VLM_nodes is a repository containing various nodes for utilizing Vision Language Models (VLMs) and Language Models (LLMs). The repository provides nodes for tasks such as structured output generation, image to music conversion, LLM prompt generation, automatic prompt generation, and more. Users can integrate different models like InternLM-XComposer2-VL, UForm-Gen2, Kosmos-2, moondream1, moondream2, JoyTag, and Chat Musician. The nodes support features like extracting keywords, generating prompts, suggesting prompts, and obtaining structured outputs. The repository includes examples and instructions for using the nodes effectively.
VideoLingo
VideoLingo is an all-in-one video translation and localization dubbing tool designed to generate Netflix-level high-quality subtitles. It aims to eliminate stiff machine translation, multiple lines of subtitles, and can even add high-quality dubbing, allowing knowledge from around the world to be shared across language barriers. Through an intuitive Streamlit web interface, the entire process from video link to embedded high-quality bilingual subtitles and even dubbing can be completed with just two clicks, easily creating Netflix-quality localized videos. Key features and functions include using yt-dlp to download videos from Youtube links, using WhisperX for word-level timeline subtitle recognition, using NLP and GPT for subtitle segmentation based on sentence meaning, summarizing intelligent term knowledge base with GPT for context-aware translation, three-step direct translation, reflection, and free translation to eliminate strange machine translation, checking single-line subtitle length and translation quality according to Netflix standards, using GPT-SoVITS for high-quality aligned dubbing, and integrating package for one-click startup and one-click output in streamlit.
Easy-Translate
Easy-Translate is a script designed for translating large text files with a single command. It supports various models like M2M100, NLLB200, SeamlessM4T, LLaMA, and Bloom. The tool is beginner-friendly and offers seamless and customizable features for advanced users. It allows acceleration on CPU, multi-CPU, GPU, multi-GPU, and TPU, with support for different precisions and decoding strategies. Easy-Translate also provides an evaluation script for translations. Built on HuggingFace's Transformers and Accelerate library, it supports prompt usage and loading huge models efficiently.
bigcodebench
BigCodeBench is an easy-to-use benchmark for code generation with practical and challenging programming tasks. It aims to evaluate the true programming capabilities of large language models (LLMs) in a more realistic setting. The benchmark is designed for HumanEval-like function-level code generation tasks, but with much more complex instructions and diverse function calls. BigCodeBench focuses on the evaluation of LLM4Code with diverse function calls and complex instructions, providing precise evaluation & ranking and pre-generated samples to accelerate code intelligence research. It inherits the design of the EvalPlus framework but differs in terms of execution environment and test evaluation.
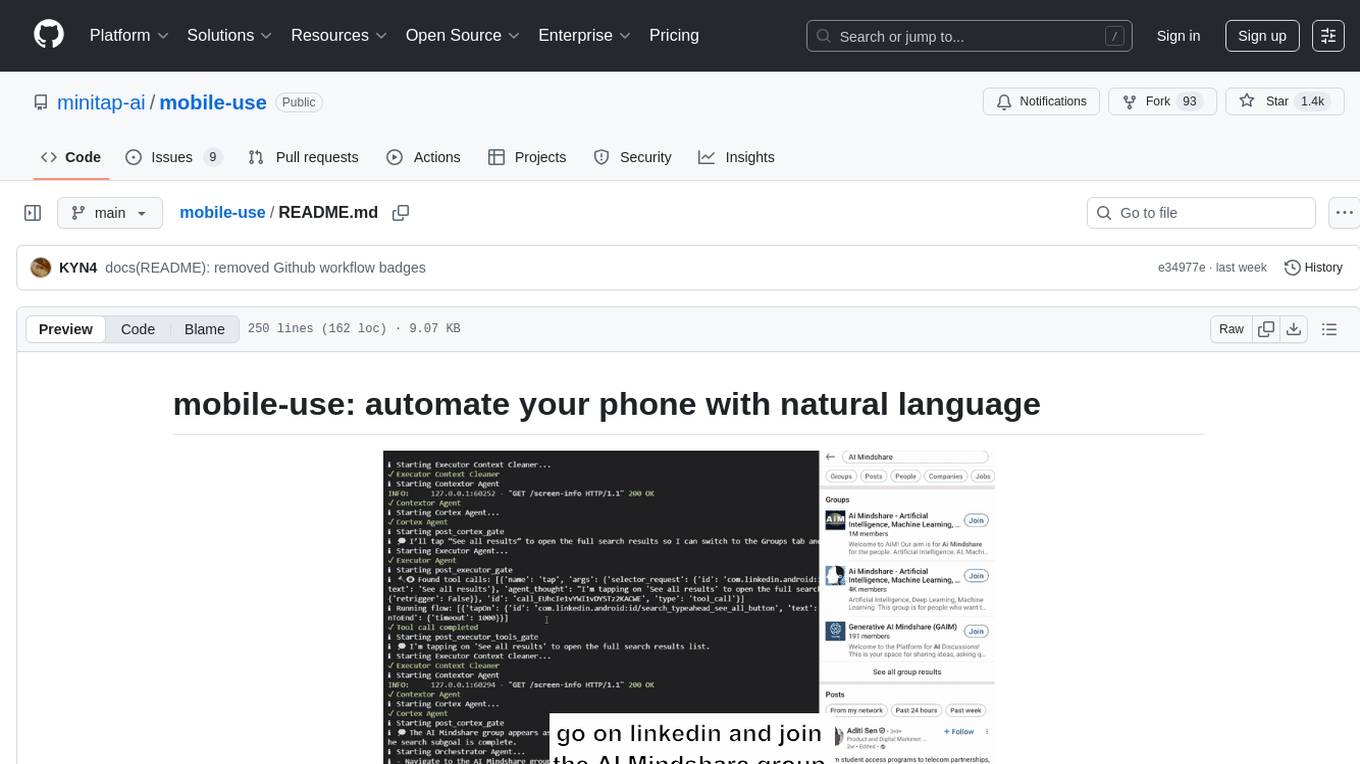
mobile-use
Mobile-use is an open-source AI agent that controls Android or IOS devices using natural language. It understands commands to perform tasks like sending messages and navigating apps. Features include natural language control, UI-aware automation, data scraping, and extensibility. Users can automate their mobile experience by setting up environment variables, customizing LLM configurations, and launching the tool via Docker or manually for development. The tool supports physical Android phones, Android simulators, and iOS simulators. Contributions are welcome, and the project is licensed under MIT.
gptme
Personal AI assistant/agent in your terminal, with tools for using the terminal, running code, editing files, browsing the web, using vision, and more. A great coding agent that is general-purpose to assist in all kinds of knowledge work, from a simple but powerful CLI. An unconstrained local alternative to ChatGPT with 'Code Interpreter', Cursor Agent, etc. Not limited by lack of software, internet access, timeouts, or privacy concerns if using local models.
AutoAgent
AutoAgent is a fully-automated and zero-code framework that enables users to create and deploy LLM agents through natural language alone. It is a top performer on the GAIA Benchmark, equipped with a native self-managing vector database, and allows for easy creation of tools, agents, and workflows without any coding. AutoAgent seamlessly integrates with a wide range of LLMs and supports both function-calling and ReAct interaction modes. It is designed to be dynamic, extensible, customized, and lightweight, serving as a personal AI assistant.
Easy-Voice-Toolkit
Easy Voice Toolkit is a toolkit based on open source voice projects, providing automated audio tools including speech model training. Users can seamlessly integrate functions like audio processing, voice recognition, voice transcription, dataset creation, model training, and voice conversion to transform raw audio files into ideal speech models. The toolkit supports multiple languages and is currently only compatible with Windows systems. It acknowledges the contributions of various projects and offers local deployment options for both users and developers. Additionally, cloud deployment on Google Colab is available. The toolkit has been tested on Windows OS devices and includes a FAQ section and terms of use for academic exchange purposes.
PySpur
PySpur is a graph-based editor designed for LLM workflows, offering modular building blocks for easy workflow creation and debugging at node level. It allows users to evaluate final performance and promises self-improvement features in the future. PySpur is easy-to-hack, supports JSON configs for workflow graphs, and is lightweight with minimal dependencies, making it a versatile tool for workflow management in the field of AI and machine learning.
For similar tasks
blog
这是一个程序员关于 ChatGPT 学习过程的记录,其中包括了 ChatGPT 的使用技巧、相关工具和资源的整理,以及一些个人见解和思考。 **使用技巧** * **充值 OpenAI API**:可以通过 https://beta.openai.com/account/api-keys 进行充值,支持信用卡和 PayPal。 * **使用专梯**:推荐使用稳定的专梯,可以有效提高 ChatGPT 的访问速度和稳定性。 * **使用魔法**:可以通过 https://my.x-air.app:666/#/register?aff=32853 访问 ChatGPT,无需魔法即可访问。 * **下载各种 apk**:可以通过 https://apkcombo.com 下载各种安卓应用的 apk 文件。 * **ChatGPT 官网**:ChatGPT 的官方网站是 https://ai.com。 * **Midjourney**:Midjourney 是一个生成式 AI 图像平台,可以通过 https://midjourney.com 访问。 * **文本转视频**:可以通过 https://www.d-id.com 将文本转换为视频。 * **国内大模型**:国内也有很多大模型,如阿里巴巴的通义千问、百度文心一言、讯飞星火、阿里巴巴通义听悟等。 * **查看 OpenAI 状态**:可以通过 https://status.openai.com/ 查看 OpenAI 的服务状态。 * **Canva 画图**:Canva 是一个在线平面设计平台,可以通过 https://www.canva.cn 进行画图。 **相关工具和资源** * **文字转语音**:可以通过 https://modelscope.cn/models?page=1&tasks=text-to-speech&type=audio 找到文字转语音的模型。 * **可好好玩玩的项目**: * https://github.com/sunner/ChatALL * https://github.com/labring/FastGPT * https://github.com/songquanpeng/one-api * **个人博客**: * https://baoyu.io/ * https://gorden-sun.notion.site/527689cd2b294e60912f040095e803c5?v=4f6cc12006c94f47aee4dc909511aeb5 * **srt 2 lrc 歌词**:可以通过 https://gotranscript.com/subtitle-converter 将 srt 格式的字幕转换为 lrc 格式的歌词。 * **5 种速率限制**:OpenAI API 有 5 种速率限制:RPM(每分钟请求数)、RPD(每天请求数)、TPM(每分钟 tokens 数量)、TPD(每天 tokens 数量)、IPM(每分钟图像数量)。 * **扣子平台**:coze.cn 是一个扣子平台,可以提供各种扣子。 * **通过云函数免费使用 GPT-3.5**:可以通过 https://juejin.cn/post/7353849549540589587 免费使用 GPT-3.5。 * **不蒜子 统计网页基数**:可以通过 https://busuanzi.ibruce.info/ 统计网页的基数。 * **视频总结和翻译网页**:可以通过 https://glarity.app/zh-CN 总结和翻译视频。 * **视频翻译和配音工具**:可以通过 https://github.com/jianchang512/pyvideotrans 翻译和配音视频。 * **文字生成音频**:可以通过 https://www.cnblogs.com/jijunjian/p/18118366 将文字生成音频。 * **memo ai**:memo.ac 是一个多模态 AI 平台,可以将视频链接、播客链接、本地音视频转换为文字,支持多语言转录后翻译,还可以将文字转换为新的音频。 * **视频总结工具**:可以通过 https://summarize.ing/ 总结视频。 * **可每天免费玩玩**:可以通过 https://www.perplexity.ai/ 每天免费玩玩。 * **Suno.ai**:Suno.ai 是一个 AI 语言模型,可以通过 https://bibigpt.co/ 访问。 * **CapCut**:CapCut 是一个视频编辑软件,可以通过 https://www.capcut.cn/ 下载。 * **Valla.ai**:Valla.ai 是一个多模态 AI 模型,可以通过 https://www.valla.ai/ 访问。 * **Viggle.ai**:Viggle.ai 是一个 AI 视频生成平台,可以通过 https://viggle.ai 访问。 * **使用免费的 GPU 部署文生图大模型**:可以通过 https://www.cnblogs.com/xuxiaona/p/18088404 部署文生图大模型。 * **语音转文字**:可以通过 https://speech.microsoft.com/portal 将语音转换为文字。 * **投资界的 ai**:可以通过 https://reportify.cc/ 了解投资界的 ai。 * **抓取小视频 app 的各种信息**:可以通过 https://github.com/NanmiCoder/MediaCrawler 抓取小视频 app 的各种信息。 * **马斯克 Grok1 开源**:马斯克的 Grok1 模型已经开源,可以通过 https://github.com/xai-org/grok-1 访问。 * **ChatALL**:ChatALL 是一个跨端支持的聊天机器人,可以通过 https://github.com/sunner/ChatALL 访问。 * **零一万物**:零一万物是一个 AI 平台,可以通过 https://www.01.ai/cn 访问。 * **智普**:智普是一个 AI 语言模型,可以通过 https://chatglm.cn/ 访问。 * **memo ai 下载**:可以通过 https://memo.ac/ 下载 memo ai。 * **ffmpeg 学习**:可以通过 https://www.ruanyifeng.com/blog/2020/01/ffmpeg.html 学习 ffmpeg。 * **自动生成文章小工具**:可以通过 https://www.cognition-labs.com/blog 生成文章。 * **简易商城**:可以通过 https://www.cnblogs.com/whuanle/p/18086537 搭建简易商城。 * **物联网**:可以通过 https://www.cnblogs.com/xuxiaona/p/18088404 学习物联网。 * **自定义表单、自定义列表、自定义上传和下载、自定义流程、自定义报表**:可以通过 https://www.cnblogs.com/whuanle/p/18086537 实现自定义表单、自定义列表、自定义上传和下载、自定义流程、自定义报表。 **个人见解和思考** * ChatGPT 是一个强大的工具,可以用来提高工作效率和创造力。 * ChatGPT 的使用门槛较低,即使是非技术人员也可以轻松上手。 * ChatGPT 的发展速度非常快,未来可能会对各个行业产生深远的影响。 * 我们应该理性看待 ChatGPT,既要看到它的优点,也要意识到它的局限性。 * 我们应该积极探索 ChatGPT 的应用场景,为社会创造价值。
chat-ui
A chat interface using open source models, eg OpenAssistant or Llama. It is a SvelteKit app and it powers the HuggingChat app on hf.co/chat.
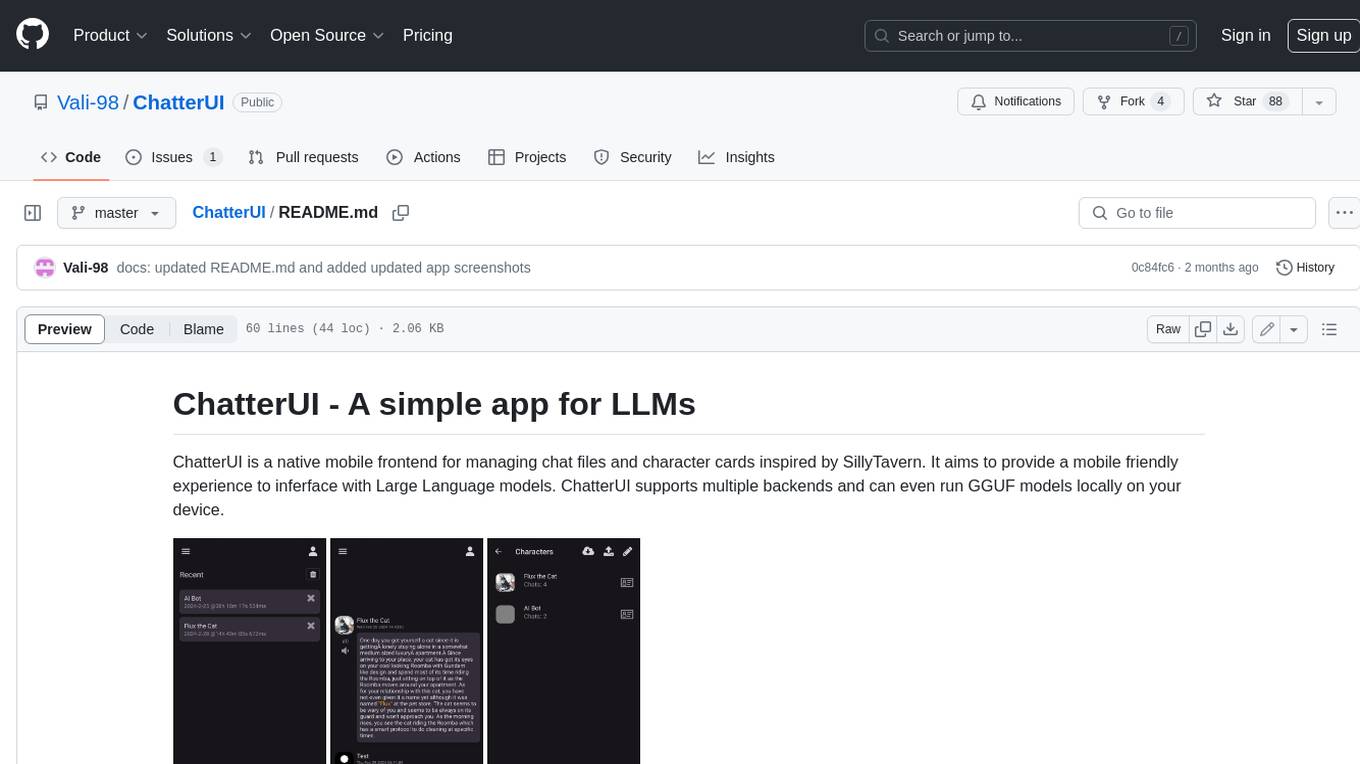
ChatterUI
ChatterUI is a mobile app that allows users to manage chat files and character cards, and to interact with Large Language Models (LLMs). It supports multiple backends, including local, koboldcpp, text-generation-webui, Generic Text Completions, AI Horde, Mancer, Open Router, and OpenAI. ChatterUI provides a mobile-friendly interface for interacting with LLMs, making it easy to use them for a variety of tasks, such as generating text, translating languages, writing code, and answering questions.
99AI
99AI is a commercializable AI web application based on NineAI 2.4.2 (no authorization, no backdoors, no piracy, integrated front-end and back-end integration packages, supports Docker rapid deployment). The uncompiled source code is temporarily closed. Compared with the stable version, the development version is faster.
chatnio
Chat Nio is a next-generation AI one-stop solution that provides a rich and user-friendly interface for interacting with various AI models. It offers features such as AI chat conversation, rich format compatibility, markdown support, message menu support, multi-platform adaptation, dialogue memory, full-model file parsing, full-model DuckDuckGo online search, full-screen large text editing, model marketplace, preset support, site announcements, preference settings, internationalization support, and a rich admin system. Chat Nio also boasts a powerful channel management system that utilizes a self-developed channel distribution algorithm, supports multi-channel management, is compatible with multiple formats, allows for custom models, supports channel retries, enables balanced load within the same channel, and provides channel model mapping and user grouping. Additionally, Chat Nio offers forwarding API services that are compatible with multiple formats in the OpenAI universal format and support multiple model compatible layers. It also provides a custom build and install option for highly customizable deployments. Chat Nio is an open-source project licensed under the Apache License 2.0 and welcomes contributions from the community.
Awesome-LLM-Reasoning
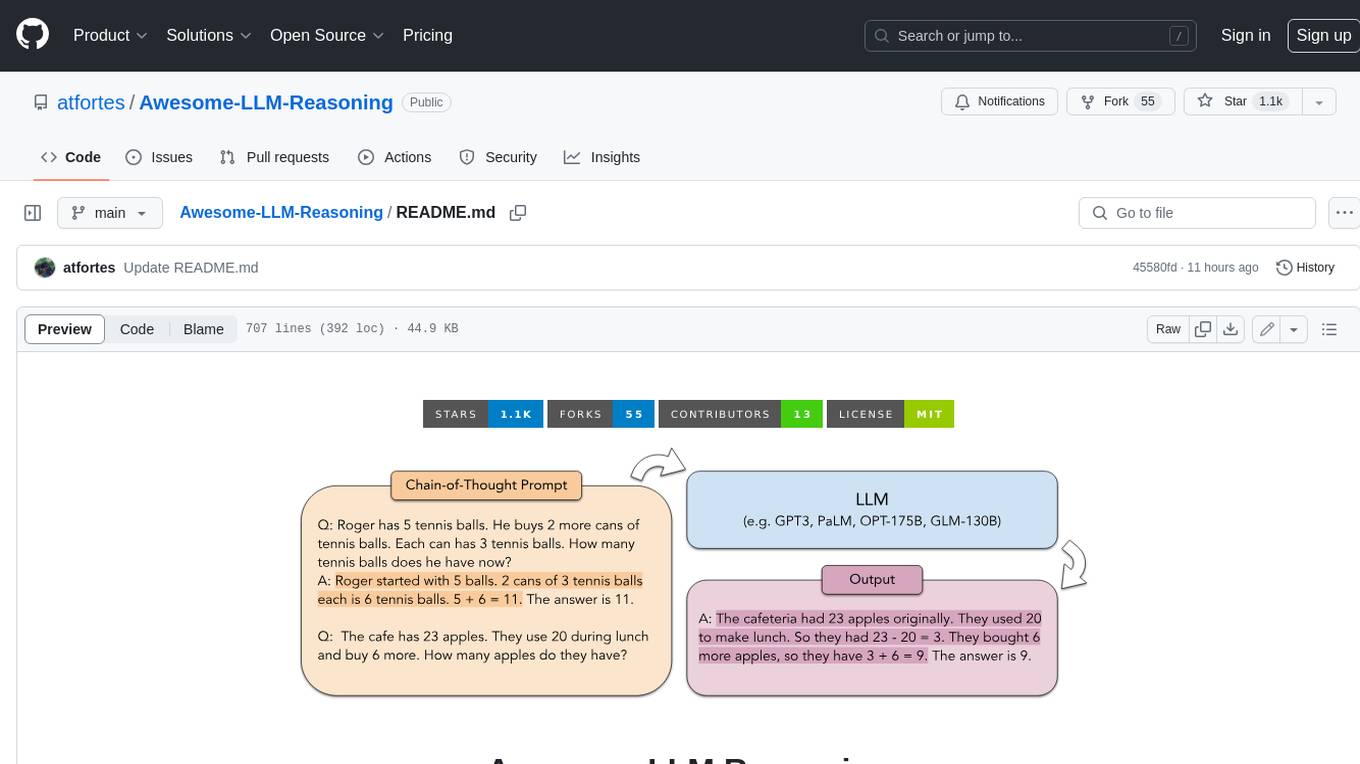
**Curated collection of papers and resources on how to unlock the reasoning ability of LLMs and MLLMs.** **Description in less than 400 words, no line breaks and quotation marks.** Large Language Models (LLMs) have revolutionized the NLP landscape, showing improved performance and sample efficiency over smaller models. However, increasing model size alone has not proved sufficient for high performance on challenging reasoning tasks, such as solving arithmetic or commonsense problems. This curated collection of papers and resources presents the latest advancements in unlocking the reasoning abilities of LLMs and Multimodal LLMs (MLLMs). It covers various techniques, benchmarks, and applications, providing a comprehensive overview of the field. **5 jobs suitable for this tool, in lowercase letters.** - content writer - researcher - data analyst - software engineer - product manager **Keywords of the tool, in lowercase letters.** - llm - reasoning - multimodal - chain-of-thought - prompt engineering **5 specific tasks user can use this tool to do, in less than 3 words, Verb + noun form, in daily spoken language.** - write a story - answer a question - translate a language - generate code - summarize a document

Chinese-LLaMA-Alpaca-2
Chinese-LLaMA-Alpaca-2 is a large Chinese language model developed by Meta AI. It is based on the Llama-2 model and has been further trained on a large dataset of Chinese text. Chinese-LLaMA-Alpaca-2 can be used for a variety of natural language processing tasks, including text generation, question answering, and machine translation. Here are some of the key features of Chinese-LLaMA-Alpaca-2: * It is the largest Chinese language model ever trained, with 13 billion parameters. * It is trained on a massive dataset of Chinese text, including books, news articles, and social media posts. * It can be used for a variety of natural language processing tasks, including text generation, question answering, and machine translation. * It is open-source and available for anyone to use. Chinese-LLaMA-Alpaca-2 is a powerful tool that can be used to improve the performance of a wide range of natural language processing tasks. It is a valuable resource for researchers and developers working in the field of artificial intelligence.

Linly-Talker
Linly-Talker is an innovative digital human conversation system that integrates the latest artificial intelligence technologies, including Large Language Models (LLM) 🤖, Automatic Speech Recognition (ASR) 🎙️, Text-to-Speech (TTS) 🗣️, and voice cloning technology 🎤. This system offers an interactive web interface through the Gradio platform 🌐, allowing users to upload images 📷 and engage in personalized dialogues with AI 💬.
For similar jobs
ChatFAQ
ChatFAQ is an open-source comprehensive platform for creating a wide variety of chatbots: generic ones, business-trained, or even capable of redirecting requests to human operators. It includes a specialized NLP/NLG engine based on a RAG architecture and customized chat widgets, ensuring a tailored experience for users and avoiding vendor lock-in.
anything-llm
AnythingLLM is a full-stack application that enables you to turn any document, resource, or piece of content into context that any LLM can use as references during chatting. This application allows you to pick and choose which LLM or Vector Database you want to use as well as supporting multi-user management and permissions.
ai-guide
This guide is dedicated to Large Language Models (LLMs) that you can run on your home computer. It assumes your PC is a lower-end, non-gaming setup.
classifai
Supercharge WordPress Content Workflows and Engagement with Artificial Intelligence. Tap into leading cloud-based services like OpenAI, Microsoft Azure AI, Google Gemini and IBM Watson to augment your WordPress-powered websites. Publish content faster while improving SEO performance and increasing audience engagement. ClassifAI integrates Artificial Intelligence and Machine Learning technologies to lighten your workload and eliminate tedious tasks, giving you more time to create original content that matters.
mikupad
mikupad is a lightweight and efficient language model front-end powered by ReactJS, all packed into a single HTML file. Inspired by the likes of NovelAI, it provides a simple yet powerful interface for generating text with the help of various backends.
glide
Glide is a cloud-native LLM gateway that provides a unified REST API for accessing various large language models (LLMs) from different providers. It handles LLMOps tasks such as model failover, caching, key management, and more, making it easy to integrate LLMs into applications. Glide supports popular LLM providers like OpenAI, Anthropic, Azure OpenAI, AWS Bedrock (Titan), Cohere, Google Gemini, OctoML, and Ollama. It offers high availability, performance, and observability, and provides SDKs for Python and NodeJS to simplify integration.
onnxruntime-genai
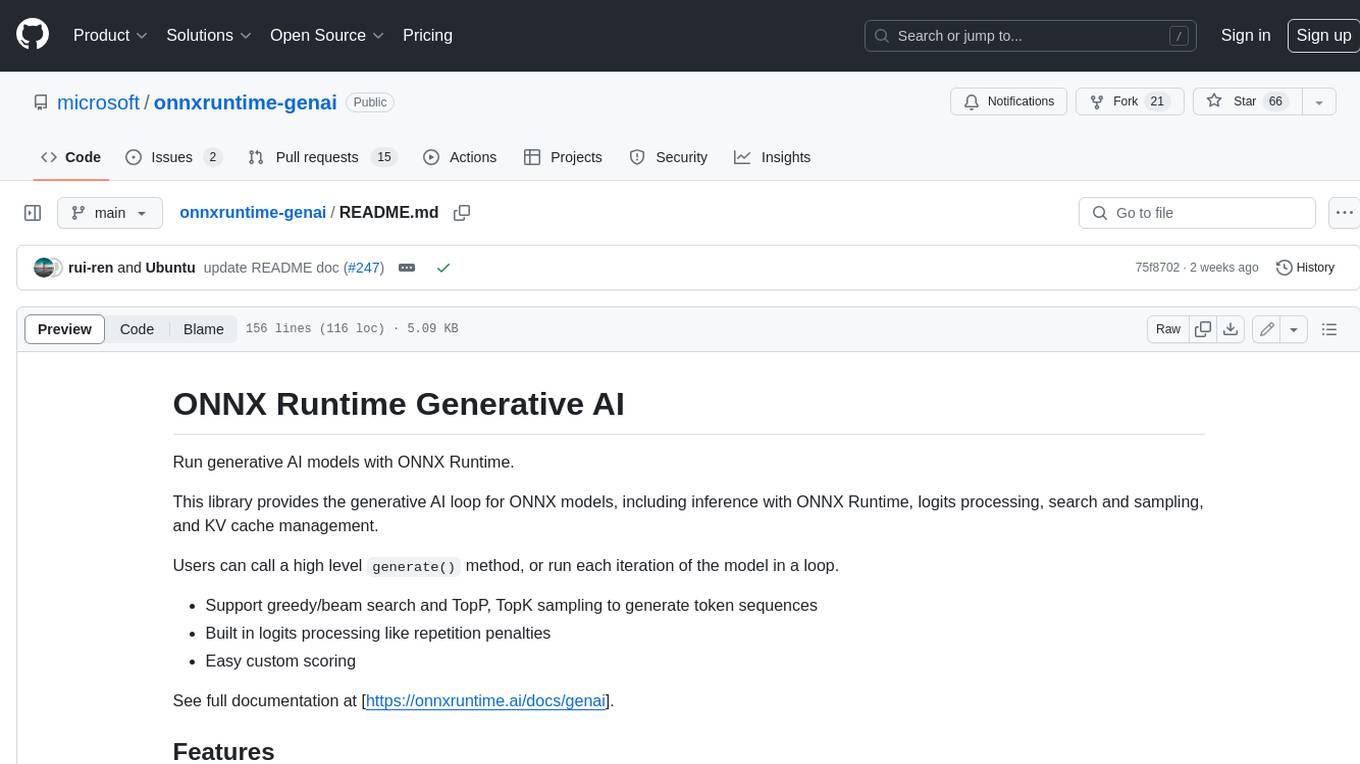
ONNX Runtime Generative AI is a library that provides the generative AI loop for ONNX models, including inference with ONNX Runtime, logits processing, search and sampling, and KV cache management. Users can call a high level `generate()` method, or run each iteration of the model in a loop. It supports greedy/beam search and TopP, TopK sampling to generate token sequences, has built in logits processing like repetition penalties, and allows for easy custom scoring.
firecrawl
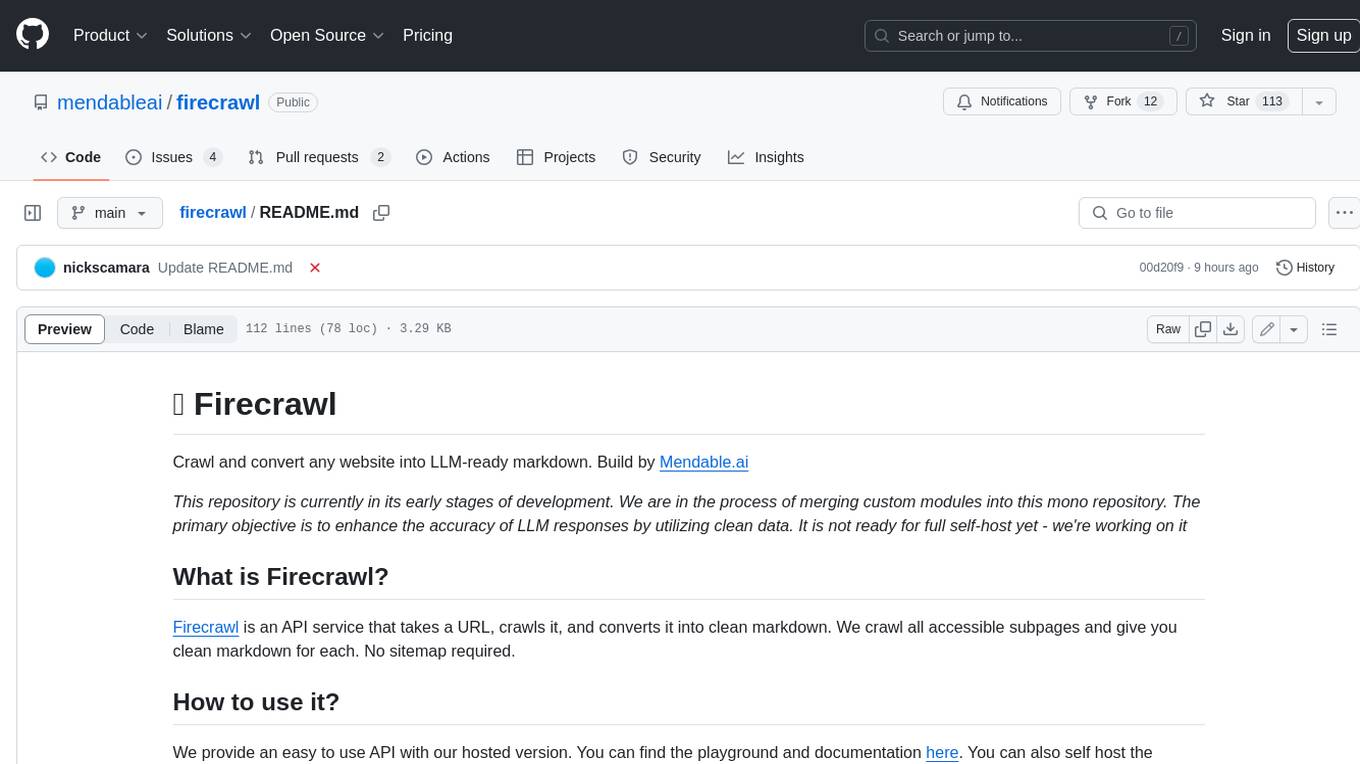
Firecrawl is an API service that takes a URL, crawls it, and converts it into clean markdown. It crawls all accessible subpages and provides clean markdown for each, without requiring a sitemap. The API is easy to use and can be self-hosted. It also integrates with Langchain and Llama Index. The Python SDK makes it easy to crawl and scrape websites in Python code.


