
UCAgent
UnityChip Verification AI-Agent
Stars: 94
UCAgent is an AI-powered automated UT verification agent for chip design. It automates chip verification workflow, supports functional and code coverage analysis, ensures consistency among documentation, code, and reports, and collaborates with mainstream Code Agents via MCP protocol. It offers three intelligent interaction modes and requires Python 3.11+, Linux/macOS OS, 4GB+ memory, and access to an AI model API. Users can clone the repository, install dependencies, configure qwen, and start verification. UCAgent supports various verification quality improvement options and basic operations through TUI shortcuts and stage color indicators. It also provides documentation build and preview using MkDocs, PDF manual build using Pandoc + XeLaTeX, and resources for further help and contribution.
README:
AI-powered automated UT verification agent based on large language models
中文介绍 | UCAgent Online Documentation
UCAgent is an automated hardware verification AI agent based on large language models, focusing on Unit Test verification for chip design. It automatically analyzes hardware designs, generates test cases, executes verification tasks, and produces test reports through AI technology, thereby improving verification efficiency.
Key Features:
- Automated chip verification workflow
- Support for functional coverage and code coverage analysis
- Consistency assurance among documentation, code, and reports
- Deep collaboration with mainstream Code Agents (OpenHands, Copilot, Claude Code, Gemini-CLI, Qwen-Code, etc.) via MCP protocol
- Three intelligent interaction modes (standard, enhanced, advanced)
For more details, please refer to UCAgent Online Documentation
- Python 3.11+
- Supported OS: Linux, macOS
- Memory: 4GB+ recommended
- Network: Access to AI model API (OpenAI compatible)
- picker: https://github.com/XS-MLVP/picker
git clone https://github.com/XS-MLVP/UCAgent.git
cd UCAgentpip3 install -r requirements.txtPlease refer to https://qwenlm.github.io/qwen-code-docs/en/ to install qwen-code-cli, then configure the MCP Server as shown below.
Example ~/.qwen/settings.json:
{
    "mcpServers": {
           "unitytest": {
            "httpUrl": "http://localhost:5000/mcp",
            "timeout": 300000
        }
    }
}
Since running test cases may take a long time, it is recommended to set a larger timeout value, for example 300 seconds.
For other Code Agents, please refer to their documentation, e.g., claude code, opencode, copilot-cli, kilo-cli, etc.
Taking Adder in examples as an illustration.
# Default backend is langchain,
#   requires configuration: OPENAI_API_BASE and other environment variables
make mcp_Adder ARGS="--loop --backend=qwen"
For supported backends, please refer to the backend section in ucagent/setting.yaml.
(1)Start MCP-Server
make mcp_Adder  # workspace is set to output directory
# Calls the following commands:
#   picker export Adder/Adder.v --rw 1 --sname Adder --tdir output/ -c -w output/Adder/Adder.fst
#   ucagent output/ Adder -s -hm --tui --mcp-server-no-file-tools --no-embed-tools
The default MCP Server address is: http://127.0.0.1:5000/mcp
(2)Start qwen to execute task
cd output
qwen
After starting qwen as above, input the task prompt:
Please use the tool
RoleInfoto get your role information and basic guidance, then complete the task. Use the toolReadTextFileto read files. You need to perform file operations in the current working directory and should not go beyond this directory.
Note:
- Start the Code Agent in the working directory (e.g., output in the example above), otherwise file path mismatch issues may occur.
- If the DUT is complex and has peripheral component dependencies, you need to open the default skipped stages via ucagent interaction commands.
Tips:
- Write verification prompts according to task requirements
- When Code Agent stops midway, you can input:
Continue, please use tool 'Complete' to determine if all tasks are finished
💡 More Usage Methods: Besides MCP collaboration mode, UCAgent also supports direct LLM integration, human-machine collaboration, and other modes. See Usage Documentation
By default, UCAgent only enables the internal Python Checker for stage checking, which is heuristic. If you need verification quality improvement, you can enable LLM stage checking. If you need to reach "delivery level" quality, you further need to enable Human stage checking.
Default stage checking order: Python Checker -> LLM -> Human
-
ctrl+up/down/left/right: Adjust layout (Console height / Mission panel width) -
ctrl+h/j/k/l: Vim-style layout adjustment (equivalent to ctrl+left/down/up/right) -
ctrl+c: Cancel running command; exit TUI if no command is running -
ctrl+t: Open theme picker -
f1: Show/hide keyboard shortcuts help panel -
shift+right: Clear console output -
shift+left: Clear input text -
tab: Command completion; press Tab repeatedly to cycle through candidates -
pageup/pagedown: Page through Console output -
esc: Exit scrolling/paging/help panel, or clear input
-
White: Pending execution -
Red: Currently executing -
Green: Execution passed -
*:- Blue indicates LLM Fail checking is enabled for this stage, providing modification suggestions when stage check fails more than 3 times
- Green indicates LLM Pass checking is enabled for this stage, verifying if stage task requirements are met upon completion
- Red indicates this stage requires mandatory human inspection, AI can continue after entering command
hmcheck_pass [msg]
-
Yellow: Stage skipped
-
q: Exit TUI (or exit UCAgent) -
tui: Enter TUI -
tab: Command completion -
tool_list: List all available tools -
help: View all command help -
loop [prompt]: Continue current task
📖 Detailed Operations: See TUI Usage Documentation
Q: How to configure different AI models?
A: Modify the openai.model_name field in config.yaml, which supports any OpenAI-compatible API. See Configuration Documentation.
Q: What to do when errors occur during verification?
A: Use Ctrl+C to enter interactive mode, check current status with status, and use help to get debugging commands.
Q: MCP server cannot connect?
A: Check if the port is occupied, verify firewall settings, and you can specify a different port with --mcp-server-port.
Q: Why is there information from the last execution?
A: UCAgent by default looks for the .ucagent/ucagent_info.json file in the working directory to load previous execution information and continue. If you don't need history, delete this file or use the --no-history parameter to ignore loading history.
Q: How to run long-duration verification?
A: Please refer to CodeAgent's custom backend mode examples/CustomBackend/README.md.
Q: Can verification stages be customized?
A: Yes, see Customization Documentation.
Q: How to add custom tools?
A: Create a new tool class in the ucagent/tools/ directory, inherit from the UCTool base class, and load it with the --ex-tools parameter. See Tool List Documentation.
🔍 More Questions: Check the complete FAQ Documentation
The Makefile provides documentation-related helper targets (MkDocs + Material):
| Target | Purpose | Use Case |
|---|---|---|
make docs-help |
Show documentation-related target help | View available commands |
make docs-install |
Install build dependencies from docs/requirements-docs.txt
|
First use or dependency updates |
make docs-serve |
Local preview (default 127.0.0.1:8030) | Develop and preview docs |
make docs-build |
Build static site to docs/site
|
Generate production version |
make docs-clean |
Delete docs/site directory |
Clean build artifacts |
First-time use (install dependencies):
make docs-install # Install mkdocs and material theme dependenciesDaily development (preview documentation):
make docs-serve      # Start local server, visit http://127.0.0.1:8030
# Browser will auto-refresh after modifying docs
Local generation and viewing (build production version):
make docs-build      # Generate static website to docs/site directory
# Open docs/site/index.html in local browser
make docs-clean # Clean build artifacts (optional)# 1. Initial setup: Install dependencies
make docs-install
# 2. Development phase: Preview docs (can be repeated)
make docs-serve # Visit http://127.0.0.1:8030 in browser
# ...edit documentation...
# Press Ctrl+C to stop service
# 3. Local generation: Build production version
make docs-build # Generate docs/site directory
# Open docs/site/index.html in local browser
# 4. Cleanup (optional)
make docs-clean # Delete docs/site directory- Port and address are currently hardcoded in
docs/Makefile, can be modified as needed. -
make docs-serveis suitable for development use, supports hot reload -
make docs-buildgenerates complete static website files, output to docs/site directory, can preview final effect locally (open docs/site/index.html)
For generating high-quality developer PDF manuals:
| Target | Purpose |
|---|---|
make pdf |
Generate ucagent-doc.pdf from ordered Markdown sources |
make pdf-one |
Equivalent to pdf (convenient for CI calls) |
make pdf-clean |
Clean generated PDF and LaTeX temporary files |
make pdf
make MONO="JetBrains Mono" pdf      # Override monospace font
make TWOSIDE=1 pdf                   # Two-sided layout (adds -twoside to filename)
make pdf-clean- pandoc
- XeLaTeX (TexLive)
- Chinese font "Noto Serif CJK SC"
- Monospace font (default DejaVu Sans Mono)
- Optional filter
pandoc-crossref
-
MONOChange monospace font -
TWOSIDEEnable two-sided mode when non-empty
-
Missing fonts: Install CJK font packages (e.g.,
fonts-noto-cjk). -
LaTeX errors: Ensure complete XeLaTeX suite is installed (use
texlive-fullif necessary). -
Missing cross-references: Confirm
pandoc-crossrefis in PATH.
Output: ucagent-doc.pdf can be distributed with version releases.
- 📚 UCAgent Online Documentation
- 🚀 Quick Start Guide
- 🔧 Custom Configuration
- 🛠️ Tool List
- 💬 GitHub Issues
Issues and Pull Requests are welcome!
For Tasks:
Click tags to check more tools for each tasksFor Jobs:
Alternative AI tools for UCAgent
Similar Open Source Tools
UCAgent
UCAgent is an AI-powered automated UT verification agent for chip design. It automates chip verification workflow, supports functional and code coverage analysis, ensures consistency among documentation, code, and reports, and collaborates with mainstream Code Agents via MCP protocol. It offers three intelligent interaction modes and requires Python 3.11+, Linux/macOS OS, 4GB+ memory, and access to an AI model API. Users can clone the repository, install dependencies, configure qwen, and start verification. UCAgent supports various verification quality improvement options and basic operations through TUI shortcuts and stage color indicators. It also provides documentation build and preview using MkDocs, PDF manual build using Pandoc + XeLaTeX, and resources for further help and contribution.
pentagi
PentAGI is an innovative tool for automated security testing that leverages cutting-edge artificial intelligence technologies. It is designed for information security professionals, researchers, and enthusiasts who need a powerful and flexible solution for conducting penetration tests. The tool provides secure and isolated operations in a sandboxed Docker environment, fully autonomous AI-powered agent for penetration testing steps, a suite of 20+ professional security tools, smart memory system for storing research results, web intelligence for gathering information, integration with external search systems, team delegation system, comprehensive monitoring and reporting, modern interface, API integration, persistent storage, scalable architecture, self-hosted solution, flexible authentication, and quick deployment through Docker Compose.
LEANN
LEANN is an innovative vector database that democratizes personal AI, transforming your laptop into a powerful RAG system that can index and search through millions of documents using 97% less storage than traditional solutions without accuracy loss. It achieves this through graph-based selective recomputation and high-degree preserving pruning, computing embeddings on-demand instead of storing them all. LEANN allows semantic search of file system, emails, browser history, chat history, codebase, or external knowledge bases on your laptop with zero cloud costs and complete privacy. It is a drop-in semantic search MCP service fully compatible with Claude Code, enabling intelligent retrieval without changing your workflow.
forge
Forge is a powerful open-source tool for building modern web applications. It provides a simple and intuitive interface for developers to quickly scaffold and deploy projects. With Forge, you can easily create custom components, manage dependencies, and streamline your development workflow. Whether you are a beginner or an experienced developer, Forge offers a flexible and efficient solution for your web development needs.
uLoopMCP
uLoopMCP is a Unity integration tool designed to let AI drive your Unity project forward with minimal human intervention. It provides a 'self-hosted development loop' where an AI can compile, run tests, inspect logs, and fix issues using tools like compile, run-tests, get-logs, and clear-console. It also allows AI to operate the Unity Editor itself—creating objects, calling menu items, inspecting scenes, and refining UI layouts from screenshots via tools like execute-dynamic-code, execute-menu-item, and capture-window. The tool enables AI-driven development loops to run autonomously inside existing Unity projects.
company-research-agent
Agentic Company Researcher is a multi-agent tool that generates comprehensive company research reports by utilizing a pipeline of AI agents to gather, curate, and synthesize information from various sources. It features multi-source research, AI-powered content filtering, real-time progress streaming, dual model architecture, modern React frontend, and modular architecture. The tool follows an agentic framework with specialized research and processing nodes, leverages separate models for content generation, uses a content curation system for relevance scoring and document processing, and implements a real-time communication system via WebSocket connections. Users can set up the tool quickly using the provided setup script or manually, and it can also be deployed using Docker and Docker Compose. The application can be used for local development and deployed to various cloud platforms like AWS Elastic Beanstalk, Docker, Heroku, and Google Cloud Run.
DesktopCommanderMCP
Desktop Commander MCP is a server that allows the Claude desktop app to execute long-running terminal commands on your computer and manage processes through Model Context Protocol (MCP). It is built on top of MCP Filesystem Server to provide additional search and replace file editing capabilities. The tool enables users to execute terminal commands with output streaming, manage processes, perform full filesystem operations, and edit code with surgical text replacements or full file rewrites. It also supports vscode-ripgrep based recursive code or text search in folders.
chunkr
Chunkr is an open-source document intelligence API that provides a production-ready service for document layout analysis, OCR, and semantic chunking. It allows users to convert PDFs, PPTs, Word docs, and images into RAG/LLM-ready chunks. The API offers features such as layout analysis, OCR with bounding boxes, structured HTML and markdown output, and VLM processing controls. Users can interact with Chunkr through a Python SDK, enabling them to upload documents, process them, and export results in various formats. The tool also supports self-hosted deployment options using Docker Compose or Kubernetes, with configurations for different AI models like OpenAI, Google AI Studio, and OpenRouter. Chunkr is dual-licensed under the GNU Affero General Public License v3.0 (AGPL-3.0) and a commercial license, providing flexibility for different usage scenarios.
CodeRAG
CodeRAG is an AI-powered code retrieval and assistance tool that combines Retrieval-Augmented Generation (RAG) with AI to provide intelligent coding assistance. It indexes your entire codebase for contextual suggestions based on your complete project, offering real-time indexing, semantic code search, and contextual AI responses. The tool monitors your code directory, generates embeddings for Python files, stores them in a FAISS vector database, matches user queries against the code database, and sends retrieved code context to GPT models for intelligent responses. CodeRAG also features a Streamlit web interface with a chat-like experience for easy usage.
Shellsage
Shell Sage is an intelligent terminal companion and AI-powered terminal assistant that enhances the terminal experience with features like local and cloud AI support, context-aware error diagnosis, natural language to command translation, and safe command execution workflows. It offers interactive workflows, supports various API providers, and allows for custom model selection. Users can configure the tool for local or API mode, select specific models, and switch between modes easily. Currently in alpha development, Shell Sage has known limitations like limited Windows support and occasional false positives in error detection. The roadmap includes improvements like better context awareness, Windows PowerShell integration, Tmux integration, and CI/CD error pattern database.
qwen-code
Qwen Code is an open-source AI agent optimized for Qwen3-Coder, designed to help users understand large codebases, automate tedious work, and expedite the shipping process. It offers an agentic workflow with rich built-in tools, a terminal-first approach with optional IDE integration, and supports both OpenAI-compatible API and Qwen OAuth authentication methods. Users can interact with Qwen Code in interactive mode, headless mode, IDE integration, and through a TypeScript SDK. The tool can be configured via settings.json, environment variables, and CLI flags, and offers benchmark results for performance evaluation. Qwen Code is part of an ecosystem that includes AionUi and Gemini CLI Desktop for graphical interfaces, and troubleshooting guides are available for issue resolution.
zcf
ZCF (Zero-Config Claude-Code Flow) is a tool that provides zero-configuration, one-click setup for Claude Code with bilingual support, intelligent agent system, and personalized AI assistant. It offers an interactive menu for easy operations and direct commands for quick execution. The tool supports bilingual operation with automatic language switching and customizable AI output styles. ZCF also includes features like BMad Workflow for enterprise-grade workflow system, Spec Workflow for structured feature development, CCR (Claude Code Router) support for proxy routing, and CCometixLine for real-time usage tracking. It provides smart installation, complete configuration management, and core features like professional agents, command system, and smart configuration. ZCF is cross-platform compatible, supports Windows and Termux environments, and includes security features like dangerous operation confirmation mechanism.
docs-mcp-server
The docs-mcp-server repository contains the server-side code for the documentation management system. It provides functionalities for managing, storing, and retrieving documentation files. Users can upload, update, and delete documents through the server. The server also supports user authentication and authorization to ensure secure access to the documentation system. Additionally, the server includes APIs for integrating with other systems and tools, making it a versatile solution for managing documentation in various projects and organizations.
Groqqle
Groqqle 2.1 is a revolutionary, free AI web search and API that instantly returns ORIGINAL content derived from source articles, websites, videos, and even foreign language sources, for ANY target market of ANY reading comprehension level! It combines the power of large language models with advanced web and news search capabilities, offering a user-friendly web interface, a robust API, and now a powerful Groqqle_web_tool for seamless integration into your projects. Developers can instantly incorporate Groqqle into their applications, providing a powerful tool for content generation, research, and analysis across various domains and languages.
text-extract-api
The text-extract-api is a powerful tool that allows users to convert images, PDFs, or Office documents to Markdown text or JSON structured documents with high accuracy. It is built using FastAPI and utilizes Celery for asynchronous task processing, with Redis for caching OCR results. The tool provides features such as PDF/Office to Markdown and JSON conversion, improving OCR results with LLama, removing Personally Identifiable Information from documents, distributed queue processing, caching using Redis, switchable storage strategies, and a CLI tool for task management. Users can run the tool locally or on cloud services, with support for GPU processing. The tool also offers an online demo for testing purposes.
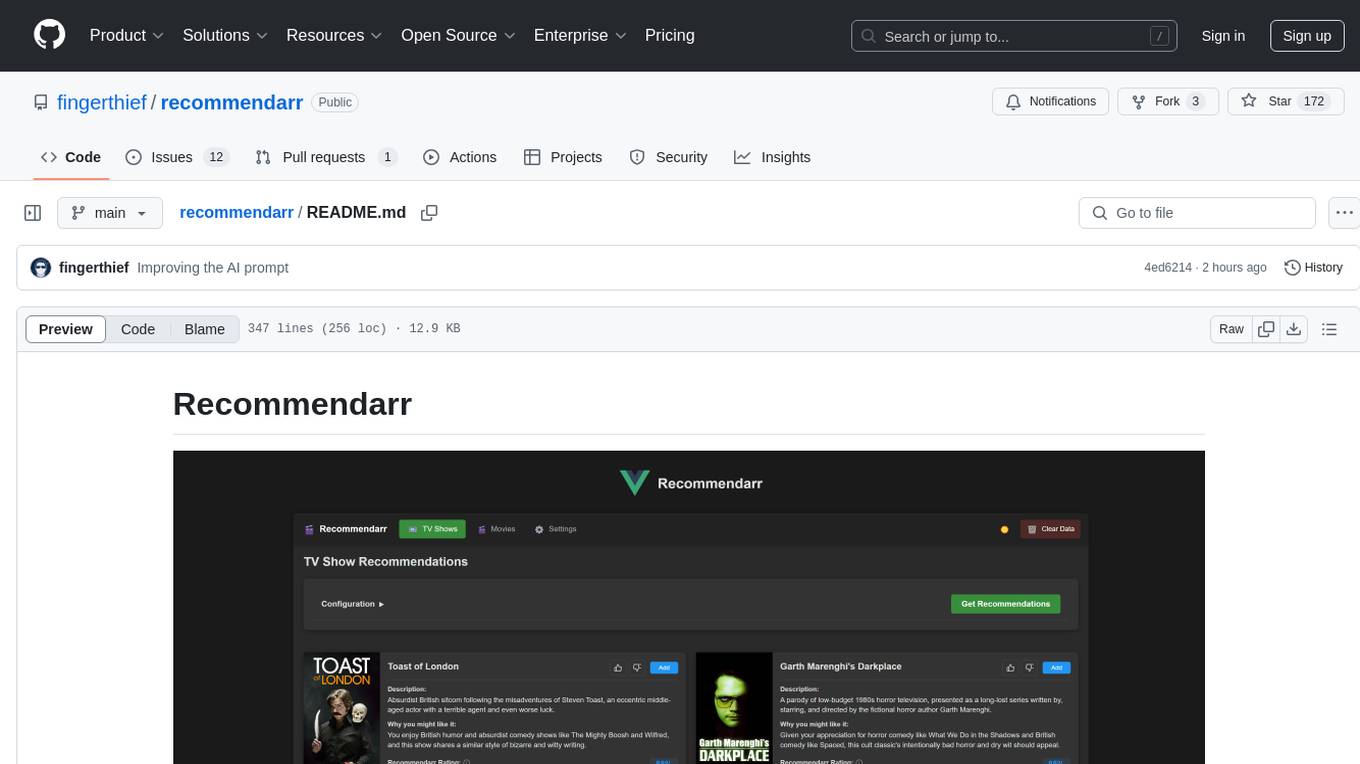
recommendarr
Recommendarr is a tool that generates personalized TV show and movie recommendations based on your Sonarr, Radarr, Plex, and Jellyfin libraries using AI. It offers AI-powered recommendations, media server integration, flexible AI support, watch history analysis, customization options, and dark/light mode toggle. Users can connect their media libraries and watch history services, configure AI service settings, and get personalized recommendations based on genre, language, and mood/vibe preferences. The tool works with any OpenAI-compatible API and offers various recommended models for different cost options and performance levels. It provides personalized suggestions, detailed information, filter options, watch history analysis, and one-click adding of recommended content to Sonarr/Radarr.
For similar tasks
weixin-dyh-ai
WeiXin-Dyh-AI is a backend management system that supports integrating WeChat subscription accounts with AI services. It currently supports integration with Ali AI, Moonshot, and Tencent Hyunyuan. Users can configure different AI models to simulate and interact with AI in multiple modes: text-based knowledge Q&A, text-to-image drawing, image description, text-to-voice conversion, enabling human-AI conversations on WeChat. The system allows hierarchical AI prompt settings at system, subscription account, and WeChat user levels. Users can configure AI model types, providers, and specific instances. The system also supports rules for allocating models and keys at different levels. It addresses limitations of WeChat's messaging system and offers features like text-based commands and voice support for interactions with AI.
opencommit
OpenCommit is a tool that auto-generates meaningful commits using AI, allowing users to quickly create commit messages for their staged changes. It provides a CLI interface for easy usage and supports customization of commit descriptions, emojis, and AI models. Users can configure local and global settings, switch between different AI providers, and set up Git hooks for integration with IDE Source Control. Additionally, OpenCommit can be used as a GitHub Action to automatically improve commit messages on push events, ensuring all commits are meaningful and not generic. Payments for OpenAI API requests are handled by the user, with the tool storing API keys locally.

gcop
GCOP (Git Copilot) is an AI-powered Git assistant that automates commit message generation, enhances Git workflow, and offers 20+ smart commands. It provides intelligent commit crafting, customizable commit templates, smart learning capabilities, and a seamless developer experience. Users can generate AI commit messages, add all changes with AI-generated messages, undo commits while keeping changes staged, and push changes to the current branch. GCOP offers configuration options for AI models and provides detailed documentation, contribution guidelines, and a changelog. The tool is designed to make version control easier and more efficient for developers.

HiveChat
HiveChat is an AI chat application designed for small and medium teams. It supports various models such as DeepSeek, Open AI, Claude, and Gemini. The tool allows easy configuration by one administrator for the entire team to use different AI models. It supports features like email or Feishu login, LaTeX and Markdown rendering, DeepSeek mind map display, image understanding, AI agents, cloud data storage, and integration with multiple large model service providers. Users can engage in conversations by logging in, while administrators can configure AI service providers, manage users, and control account registration. The technology stack includes Next.js, Tailwindcss, Auth.js, PostgreSQL, Drizzle ORM, and Ant Design.
UCAgent
UCAgent is an AI-powered automated UT verification agent for chip design. It automates chip verification workflow, supports functional and code coverage analysis, ensures consistency among documentation, code, and reports, and collaborates with mainstream Code Agents via MCP protocol. It offers three intelligent interaction modes and requires Python 3.11+, Linux/macOS OS, 4GB+ memory, and access to an AI model API. Users can clone the repository, install dependencies, configure qwen, and start verification. UCAgent supports various verification quality improvement options and basic operations through TUI shortcuts and stage color indicators. It also provides documentation build and preview using MkDocs, PDF manual build using Pandoc + XeLaTeX, and resources for further help and contribution.

EvoMaster
EvoMaster is an open-source AI-driven tool that automatically generates system-level test cases for web/enterprise applications. It uses Evolutionary Algorithm and Dynamic Program Analysis to evolve test cases, maximizing code coverage and fault detection. It supports REST, GraphQL, and RPC APIs, with whitebox testing for JVM-compiled APIs. The tool generates JUnit tests in Java or Kotlin, focusing on fault detection, self-contained tests, SQL handling, and authentication. Known limitations include manual driver creation for whitebox testing and longer execution times for better results. EvoMaster has been funded by ERC and RCN grants.
repopack
Repopack is a powerful tool that packs your entire repository into a single, AI-friendly file. It optimizes your codebase for AI comprehension, is simple to use with customizable options, and respects Gitignore files for security. The tool generates a packed file with clear separators and AI-oriented explanations, making it ideal for use with Generative AI tools like Claude or ChatGPT. Repopack offers command line options, configuration settings, and multiple methods for setting ignore patterns to exclude specific files or directories during the packing process. It includes features like comment removal for supported file types and a security check using Secretlint to detect sensitive information in files.
EvoMaster
EvoMaster is an open-source AI-driven tool that automatically generates system-level test cases for web/enterprise applications. It uses an Evolutionary Algorithm and Dynamic Program Analysis to evolve test cases, maximizing code coverage and fault detection. The tool supports REST, GraphQL, and RPC APIs, with whitebox testing for JVM-compiled languages. It generates JUnit tests, detects faults, handles SQL databases, and supports authentication. EvoMaster has been funded by the European Research Council and the Research Council of Norway.
For similar jobs
UCAgent
UCAgent is an AI-powered automated UT verification agent for chip design. It automates chip verification workflow, supports functional and code coverage analysis, ensures consistency among documentation, code, and reports, and collaborates with mainstream Code Agents via MCP protocol. It offers three intelligent interaction modes and requires Python 3.11+, Linux/macOS OS, 4GB+ memory, and access to an AI model API. Users can clone the repository, install dependencies, configure qwen, and start verification. UCAgent supports various verification quality improvement options and basic operations through TUI shortcuts and stage color indicators. It also provides documentation build and preview using MkDocs, PDF manual build using Pandoc + XeLaTeX, and resources for further help and contribution.