
xGitGuard
AI based Secrets Detection Python Framework
Stars: 53
xGitGuard is an AI-based system developed by Comcast Cybersecurity Research and Development team to detect secrets (e.g., API tokens, usernames, passwords) exposed on GitHub repositories. It uses advanced Natural Language Processing to detect secrets at scale and with appropriate velocity. The tool provides workflows for detecting credentials and keys/tokens in both enterprise and public GitHub accounts. Users can set up search patterns, configure API access, run detections with or without ML filters, and train ML models for improved detection accuracy. xGitGuard also supports custom keyword scans for targeted organizations or repositories. The tool is licensed under Apache 2.0.
README:
AI-Based Secrets Detection
Detect Secrets (API Tokens, Usernames, Passwords, etc.) Exposed on GitHub Repositories
Designed and Developed by Comcast Cybersecurity Research and Development Team
-
Detecting Publicly Exposed Secrets on GitHub at Scale
- xGitGuard is an AI-based system designed and developed by the Comcast Cybersecurity Research and Development team that detects secrets (e.g., API tokens, usernames, passwords, etc.) exposed on GitHub. xGitGuard uses advanced Natural Language Processing to detect secrets at scale and with appropriate velocity in GitHub repositories.
- What are Secrets?
-
Credentials
- Usernames & passwords, server credentials, account credentials, etc.
-
Keys/Tokens
- Service API tokens (AWS, Azure, etc), encryption keys, etc.
-
Credentials
-
Enterprise Credential Secrets Detection - Run Secret detection on the given
GitHub Enterpriseaccount -
Public Credential Secrets Detection - Run Secret detection on the
GitHub Publicaccount
-
Enterprise Keys and Tokens Secrets Detection - Run Secret detection on the given
GitHub Enterpriseaccount -
Public Keys and Tokens Secrets Detection - Run Secret detection on the
GitHub Publicaccount
-
Install Python >= v3.6
-
Clone/Download the repository from GitHub
-
Traverse into the cloned
xGitGuardfoldercd xGitGuard -
Install Python Dependency Packages
python -m pip install -r requirements.txt -
Check for Outdated Packages
pip list --outdated
-
There are two ways to define configurations in xGitGuard
- Config Files
- Command Line Inputs
-
For
EnterpriseGithub Detection(Secondary Keyword + Extension)under config directory- Secondary Keyword: secondary_keys.csv file or User Feed - list of Keys & Tokens
- Secondary Keyword: secondary_creds.csv file or User Feed - list of Credentials
- Extension: extensions.csv file or User Feed - List of file Extensions
-
For
PublicGithub Detection(Primary Keyword + Secondary Keyword + Extension)under config directory- Primary Keyword: primary_keywords.csv file or User Feed - list of primary Keys
- Secondary Keyword: secondary_keys.csv file or User Feed - list of Keys & Toekns
- Secondary Keyword: secondary_creds.csv file or User Feed - list of Credentials
- Extension: extensions.csv file or User Feed - List of file Extensions
- Setup the system Environment variable below for accessing GitHub
-
GITHUB_ENTERPRISE_TOKEN- Enterprise GitHub API Token with full scopes of repository and user.- Refer to the GitHub documentation How To Get GitHub API Token for help
-
- Update the following configs with
your Enterprise Namein config filexgg_configs.yamlin config Data folderxgitguard\config\*- enterprise_api_url:
https://github.<<Enterprise_Name>>.com/api/v3/search/code - enterprise_pre_url:
https://github.<<Enterprise_Name>>.com/api/v3/repos/ - url_validator:
https://github.<<Enterprise_Name>>.com/api/v3/search/code - enterprise_commits_url:
https://github.<<Enterprise_Name>>.com/api/v3/repos/{user_name}/{repo_name}/commits?path={file_path}
- enterprise_api_url:
-
Traverse into the
github-enterprisescript foldercd github-enterprise
By default, the Credential Secrets Detection script runs for given Secondary Keywords and extensions without ML Filter.
# Run with Default configs
python enterprise_cred_detections.py
xGitGuard also has an additional ML filter where users can collect their organization/targeted data and train their model. Having this ML filter helps to reduce the false positives from the detection.
User Needs to follow the below process to collect data and train the model to use ML filter.
- Follow ML Model Training
NOTE :
- To use ML Filter, ML training is mandatory. This includes data collection, feature engineering & model persisting.
- This process is going to be based on user requirements. It can be one time or if the user needs to improve the data, then needs to be done periodically.
# Run for given Secondary Keyword and extension with ML model,
python enterprise_cred_detections.py -m Yes
# Run for targeted org,
python enterprise_cred_detections.py -o org_name        #Ex: python enterprise_cred_detections.py -o test_org
# Run for targeted repo,
python enterprise_cred_detections.py -r org_name/repo_name     #Ex: python enterprise_cred_detections.py -r test_org/public_docker
Run usage:
enterprise_cred_detections.py [-h] [-s Secondary Keywords] [-e Extensions] [-m Ml prediction] [-u Unmask Secret] [-o org_name] [-r repo_name] [-l Logger Level] [-c Console Logging]

optional arguments:
  -h, --help            show this help message and exit
  -s Secondary Keywords, --secondary_keywords Secondary Keywords
                          Pass the Secondary Keywords list as a comma-separated string
  -e Extensions, --extensions Extensions
                          Pass the Extensions list as a comma-separated string
  -m ML Prediction, --ml_prediction ML Prediction
                          Pass the ML Filter as Yes or No. Default is No
  -u Set Unmask, --unmask_secret To write secret unmasked, then set Yes
                          Pass the flag as Yes or No. Default is No
  -o pass org name, --org Pass the targeted org list as a comma-separated string
  -r pass repo name, --repo Pass the targeted repo list as a comma-separated string
  -l Logger Level, --log_level Logger Level
                          Pass the Logging level as for CRITICAL - 50, ERROR - 40 WARNING - 30 INFO - 20 DEBUG - 10. Default is 20
  -c Console Logging, --console_logging Console Logging
                          Pass the Console Logging as Yes or No. Default is Yes
-
Inputs used for search and scan
Note: Command-line argument keywords have precedence over config files (Default). If no keywords are passed in cli, data from config files will be used for the search.
- secondary_creds.csv file has a default list of credential relevant patterns for search, which can be updated by users based on their requirement.
- extensions.csv file has a default list of file extensions to be searched, which can be updated by the users based on their requirement.
-
GitHub search pattern for above examples:
password +extension:py
By default, the Keys and Tokens Secrets Detection script runs for given Secondary Keywords and the extensions without ML Filter.
# Run with Default configs
python enterprise_key_detections.py
# Run for targeted org,
python enterprise_key_detections.py -o org_name        #Ex: python enterprise_key_detections.py -o test_org
# Run for targeted repo,
python enterprise_key_detections.py -r org_name/repo_name     #Ex: python enterprise_key_detections.py -r test_org/public_docker
xGitGuard also has an additional ML filter where users can collect their organization/targeted data and train their model. Having this ML filter helps in reducing the false positives from the detection.
The user needs to follow the below process to collect data and train the model to use ML filter.
- Follow ML Model Training
NOTE :
- To use ML filter, ML training is mandatory. It includes data collection, feature engineering & model persisting.
- This process is going to be based on user requirements. It can be one time or if the user needs to improve the data, then it needs to be done periodically.
# Run for given Secondary Keyword and extension with ML model
python enterprise_key_detections.py -m Yes
Run usage:
enterprise_key_detections.py [-h] [-s Secondary Keywords] [-e Extensions] [-m Ml prediction] [-u Unmask Secret] [-o org_name] [-r repo_name] [-l Logger Level] [-c Console Logging]

optional arguments:
  -h, --help            show this help message and exit
  -s Secondary Keywords, --secondary_keywords Secondary Keywords
                          Pass the Secondary Keywords list as a comma-separated string
  -e Extensions, --extensions Extensions
                          Pass the Extensions list as a comma-separated string
  -m ML Prediction, --ml_prediction ML Prediction
                          Pass the ML Filter as Yes or No. Default is No
  -u Set Unmask, --unmask_secret To write secret unmasked, then set Yes
                          Pass the flag as Yes or No. Default is No
  -o pass org name, --org Pass the targeted org list as a comma-separated string
  -r pass repo name, --repo Pass the targeted repo list as a comma-separated string
  -l Logger Level, --log_level Logger Level
                          Pass the Logging level as for CRITICAL - 50, ERROR - 40 WARNING - 30 INFO - 20 DEBUG - 10. Default is 20
  -c Console Logging, --console_logging Console Logging
                          Pass the Console Logging as Yes or No. Default is Yes
-
Inputs used for search and scan
Note: Command-line argument keywords have precedence over config files (Default). If no keywords are passed in cli, data from the config files will be used for search.
- secondary_keys.csv file will have a default list of key relevant patterns for search, which can be updated by the users based on their requirement.
- extensions.csv file has a default list of file extensions to be searched, which can be updated by the users based on their requirement.
-
GitHub search pattern for above examples:
api_key +extension:py
-
Credentials
1. Hashed Url Files: xgitguard\output\*_enterprise_hashed_url_creds.csv - List previously Processed Search urls. Urls stored will be skipped in next run to avoid re processing. 2. Secrets Detected: xgitguard\output\*_xgg_enterprise_creds_detected.csv 3. Log File: xgitguard\logs\enterprise_key_detections_*yyyymmdd_hhmmss*.log -
Keys & Tokens
  1. Hashed Url Files: xgitguard\output\*_enterprise_hashed_url_keys.csv
      - List previously Processed Search urls. Urls stored will be skipped in next run to avoid re processing.
  2. Secrets Detected: xgitguard\output\*_xgg_enterprise_keys_detected.csv
  3. Log File: xgitguard\logs\enterprise_key_detections_*yyyymmdd_hhmmss*.log
- Setup the Environment variable below for accessing GitHub
-
GITHUB_TOKEN- Public GitHub API Token with full scopes of the repository and user.- Refer to GitHub Docs How To Get GitHub API Token for help
-
- Config data folder
xgitguard\config\*
- Traverse into the
github-publicscript foldercd github-public
Note: User needs to remove the sample content from primary_keywords.csv and add primary keywords like targeted domain names to be searched in public GitHub.
By default, Credential Secrets Detection script runs for given Primary Keyword, Secondary Keyword, and extension without ML Filter.
# Run with Default configs
python public_cred_detections.py
# Run for targeted org,
python public_cred_detections.py -o org_name         #Ex: python public_cred_detections.py -o test_org
# Run for targeted repo,
python public_cred_detections.py -r org_name/repo_name        #Ex: python public_cred_detections.py -r test_org/public_docker
xGitGuard also has an additional ML filter, where users can collect their organization/targeted data and train their model. Having this ML filter helps in reducing the false positives from the detection.
The user needs to follow the below process to collect data and train the model to use ML filter.
- Follow ML Model Training
NOTE :
- To use ML Feature, ML training is mandatory. It includes data collection, feature engineering & model persisting.
# Run for given Primary Keyword, Secondary Keyword, and extension with ML model
python public_cred_detections.py -m Yes
Run usage:
usage: public_cred_detections.py [-h] [-p Primary Keywords] [-s Secondary Keywords] [-e Extensions] [-m Ml prediction] [-u Unmask Secret] [-o org_name] [-r repo_name] [-l Logger Level] [-c Console Logging]

optional arguments:
-h, --help show this help message and exit
-p Primary Keywords, --primary_keywords Primary Keywords
Pass the Primary Keywords list as a comma-separated string
-s Secondary Keywords, --secondary_keywords Secondary Keywords
Pass the Secondary Keywords list as a comma-separated string
-e Extensions, --extensions Extensions
Pass the Extensions list as a comma-separated string
-m ML Prediction, --ml_prediction ML Prediction
                          Pass the ML Filter as Yes or No. Default is No
-u Set Unmask, --unmask_secret To write secret unmasked, then set Yes
                          Pass the flag as Yes or No. Default is No
-o pass org name, --org Pass the targeted org list as a comma-separated string
-r pass repo name, --repo Pass the targeted repo list as a comma-separated string
-l Logger Level, --log_level Logger Level
Pass the Logging level as for CRITICAL - 50, ERROR - 40 WARNING - 30 INFO - 20 DEBUG - 10. Default is 20
-c Console Logging, --console_logging Console Logging
Pass the Console Logging as Yes or No. Default is Yes
-
Inputs used for search and scan
Note: Command line argument keywords have precedence over config files (Default). If no keywords are passed in cli, config files data will be used for search.
- primary_keywords.csv file will have a default list of primary keyword-relevant patterns for search
- secondary_creds.csv file will have a default list of credential relevant patterns for search, which can be updated by the users based on their requirement.
- extensions.csv file has a default list of file extensions to be searched, which can be updated by the users based on their requirement.
-
GitHub search pattern for above examples:
abc.xyz.com password +extension:py
By default, Keys and Tokens Secret Detection script runs for given Primary Keyword, Secondary Keyword and extension without ML Filter.
# Run with Default configs
python public_key_detections.py
# Run  for targeted org,
python public_key_detections.py -o org_name           #Ex: python public_key_detections.py -o test_org
# Run for targeted repo,
python public_key_detections.py -r org_name/repo_name      #Ex: python public_key_detections.py -r test_org/public_docker
xGitGuard also has an additional ML filter, where users can collect their organization/targeted data and train their model. Having this ML filter helps in reducing the false positives from the detection.
The user needs to follow the below process to collect data and train the model to use ML filter.
- Follow ML Model Training
NOTE : To use ML Feature, ML training is mandatory. It includes data collection,feature engineering & model persisting.
# Run for given  Primary Keyword, Secondary Keyword, and extension with ML model,
python public_key_detections.py -m Yes
usage:
public_key_detections.py [-h] [-s Secondary Keywords] [-e Extensions] [-m Ml prediction][-u Unmask Secret] [-o org_name] [-r repo_name] [-l Logger Level] [-c Console Logging]

optional arguments:
-h, --help show this help message and exit
-s Secondary Keywords, --secondary_keywords Secondary Keywords
Pass the Secondary Keywords list as a comma-separated string
-e Extensions, --extensions Extensions
Pass the Extensions list as a comma-separated string
-m ML Prediction, --ml_prediction ML Prediction
                          Pass the ML Filter as Yes or No. Default is No
-u Set Unmask, --unmask_secret To write secret unmasked, then set Yes
                          Pass the flag as Yes or No. Default is No
-o pass org name, --org Pass the targeted org list as a comma-separated string
-r pass repo name, --repo Pass the targeted repo list as a comma-separated string
-l Logger Level, --log_level Logger Level
Pass the Logging level as for CRITICAL - 50, ERROR - 40 WARNING - 30 INFO - 20 DEBUG - 10. Default is 20
-c Console Logging, --console_logging Console Logging
Pass the Console Logging as Yes or No. Default is Yes
-
Inputs used for search and scan
Note: Command line argument keywords have precedence over config files (Default). If no keywords are passed in cli, config files data will be used for search.
- primary_keywords.csv file will have a default list of primary keyword-relevant patterns for search, which can be updated by the users based on their requirement.
- secondary_keys.csv file will have a default list of tokens & keys relevant patterns for search, which can be updated by the users based on their requirement.
- extensions.csv file has a default list of file extensions to be searched, which can be updated by the users based on their requirement.
-
GitHub search pattern for above examples:
abc.xyz.com api_key +extension:py
-
Credentials
1. Hashed Url Files: xgitguard\output\*_public_hashed_url_creds.csv - List pf previously Processed Search urls. Urls stored will be skipped in next run to avoid re processing. 2. Secrets Detected: xgitguard\output\*_xgg_public_creds_detected.csv 3. Log File: xgitguard\logs\public_key_detections_*yyyymmdd_hhmmss*.log -
Keys & Tokens
  1. Hashed Url Files: xgitguard\output\*_public_hashed_url_keys.csv
      - List pf previously Processed Search urls. Urls stored will be skipped in next run to avoid re processing.
  2. Secrets Detected: xgitguard\output\*_xgg_public_keys_detected.csv
  3. Log File: xgitguard\logs\public_key_detections_*yyyymmdd_hhmmss*.log
Note: By Default, the detected secrets will be masked to hide sensitive data. If needed, user can skip the masking to write raw secret using command line argument
-u Yes or --unmask_secret Yes. Refer command line options for more details.
To use ML Feature, ML training is mandatory. It includes data collection, feature engineering & model persisting.
Note: Labelling the collected secret is an important process to improve the ML prediction.
-
Traverse into the "ml_training" folder
cd ml_training
Traverse into the "data collector" folder under ml_training
cd ml_data_collector\github-enterprise-ml-data-collector
-
Credentials
- Run for given Secondary Keywords and extensions
python enterprise_cred_data_collector.py - To run with other parameters, please use help.
python enterprise_cred_data_collector.py -h - Training data for Enterprise Creds collected will be placed in
xgitguard\output\cred_train_source.csvfolder
- Run for given Secondary Keywords and extensions
-
Keys & Tokens
- Run for given Secondary Keywords and extensions,
python enterprise_key_data_collector.py - To run with other parameters, please use help.
python enterprise_key_data_collector.py -h - Training data for Enterprise Keys and Tokens collected will be placed in
xgitguard\output\key_train_source.csvfolder
- Run for given Secondary Keywords and extensions,
- By default all the data collected will be labeled as 1 under column "Label" in collected training data indicating the collected secret as a valid one.
-
User needs to review each row in the collected data and update the label value.i.e: if the user thinks collected data is not a secret, then change the value to 0 for that particular row. - By doing this, ML will have quality data for the model to reduce false positives.
Traverse into the "ml_training" folder
-
Credentials
- Run with option cred for engineering collected cred data
python ml_feature_engineering.py cred - By default in Enterprise mode, input will be cred_train_source.csv
- Engineered data for Enterprise Creds output will be placed in
xgitguard\output\cred_train.csvfolder
- Run with option cred for engineering collected cred data
-
Keys & Tokens
- Run with option cred for engineering collected keys & tokens data
python ml_feature_engineering.py key - By default in Enterprise mode, input will be key_train_source.csv
- Engineered data for Enterprise Keys & Tokens output will be placed in
xgitguard\output\key_train.csvfolder
- Run with option cred for engineering collected keys & tokens data
Traverse into the "ml_training" folder
-
Run training with Cred Training Data and persist model
python model.py cred -
Run training with Key Training Data and persist model
python model.py key -
For help on command line arguments, run
python model.py -hNote: If persisted model xgitguard\output\xgg_*.pickle is not present in the output folder, then use engineered data to create a model and persist it.
To use ML Feature, ML training is mandatory. It includes data collection, feature engineering & model persisting.
Note: Labelling the collected secret is an important process to use the ML effectively.
-
Traverse into the "models" folder
cd ml_training
Traverse into the "data collector" folder
cd ml_training\ml_data_collector\github-public-ml-data-collector
Note: User needs to remove the sample content from primary_keywords.csv and add primary keywords like targeted domain names to be searched in public GitHub.
-
Credentials
- Run for given Primary Keywords, Secondary Keywords, and extensions
python public_cred_data_collector.py - To run with other parameters, please use help.
python public_cred_data_collector.py -h - Training data for Public Creds collected will be placed in
xgitguard\output\public_cred_train_source.csvfolder
- Run for given Primary Keywords, Secondary Keywords, and extensions
-
Keys & Tokens
- Run for given Primary Keywords, Secondary keywords, and extensions
python public_key_data_collector.py - To run with other parameters, please use help.
python public_key_data_collector.py -h - Training data for Public Keys and Tokens collected will be placed in
xgitguard\output\public_key_train_source.csvfolder
- Run for given Primary Keywords, Secondary keywords, and extensions
Note: The data collection for public GitHub is optional.
- If targeted data collected from Enterprise is enough to use, then we can skip the data collection & Label review process
- By default, all the data collected will be labeled as 1 under column "Label" in collected training data indicating the collected secret as a valid one.
-
User needs to review each row in the collected data and update the label value.i.e: if the user thinks collected data is not a secret, then change the value to 0 for that particular row. - By doing this, ML will have quality data for the model to reduce false positives.
Note: Labelling the collected secret is an important process to use the ML effectively.
Traverse into the "ml_training" folder
-
Credentials
- Run with option cred for engineering collected cred data with public source data.
python ml_feature_engineering.py cred -s public - In public mode, input will be public_cred_train_source.csv
- Engineered data for Public Creds output will be placed in
xgitguard\output\public_cred_train.csvfolder
- Run with option cred for engineering collected cred data with public source data.
-
Keys & Tokens
- Run with option cred for engineering collected keys & tokens data with public source data.
python ml_feature_engineering.py key -s public - In public mode, input will be public_key_train_source.csv
- Engineered data for Public Keys & Tokens output will be placed in
xgitguard\output\public_key_train.csvfolder
- Run with option cred for engineering collected keys & tokens data with public source data.
Note:
- Data collection & feature engineering for public GitHub scan is optional.
- When public training data not available, feature engineering will use enterprise source data.
Traverse into the "ml_training" folder
-
Run training with Cred Training Data and persist model with public source data
python model.py cred -s public -
Run training with Key Training Data and persist model with public source data
python model.py key -s public -
For help on command line arguments, run
python model.py -hNote:
- If persisted model xgitguard\output\public_*xgg*.pickle is not present in the output folder, then use feature engineered data to create a model and persist it.
- By default, when feature engineered data collected in Public mode not available, then model creation will be using enterprise-based engineered data.
-
Traverse into the
custom-keyword-searchscript foldercd custom-keyword-search
Please add the required keywords to be searched into config/enterprise_keywords.csv
# Run with given configs,
python enterprise_keyword_search.py
# Run Run for targeted org,
python enterprise_keyword_search.py -o org_name             #Ex: python enterprise_keyword_search.py -o test_ccs
# Run Run for targeted repo,
python enterprise_keyword_search.py -r org_name/repo_name         #Ex: python enterprise_keyword_search.py -r test_ccs/ccs_repo_1
Run usage:
enterprise_keyword_search.py [-h] [-e Enterprise Keywords]  [-o org_name] [-r repo_name] [-l Logger Level] [-c Console Logging]

optional arguments:
  -h, --help            show this help message and exit
  -e Enterprise Keywords, --enterprise_keywords Enterprise Keywords
                          Pass the Enterprise Keywords list as a comma-separated string.This is optional argument. Keywords can also be provided in the `enterprise_keywords.csv` file located in the `configs` directory.
  -o pass org name, --org Pass the targeted org list as a comma-separated string
  -r pass repo name, --repo Pass the targeted repo list as a comma-separated string
  -l Logger Level, --log_level Logger Level
                          Pass the Logging level as for CRITICAL - 50, ERROR - 40 WARNING - 30 INFO - 20 DEBUG - 10. Default is 20
  -c Console Logging, --console_logging Console Logging
                          Pass the Console Logging as Yes or No. Default is Yes
Please add the required keywords to be searched into config/public_keywords.csv
# Run with given configs,
python public_keyword_search.py
# Run Run for targeted org,
python public_keyword_search.py -o org_name                 #Ex: python public_keyword_search.py -o test_org
# Run Run for targeted repo,
python public_keyword_search.py -r org_name/repo_name         #Ex: python public_keyword_search.py -r test_org/public_docker
Run usage:
public_keyword_search.py [-h] [-p Public Keywords]  [-o org_name] [-r repo_name] [-l Logger Level] [-c Console Logging]

optional arguments:
  -h, --help            show this help message and exit
  -e Public Keywords, --public_keywords Public Keywords
                          Pass the Public Keywords list as a comma-separated string.This is optional argument. Keywords can also be provided in the `public_keywords.csv` file located in the `configs` directory.
  -o pass org name, --org Pass the targeted org list as a comma-separated string
  -r pass repo name, --repo Pass the targeted repo list as a comma-separated string
  -l Logger Level, --log_level Logger Level
                          Pass the Logging level as for CRITICAL - 50, ERROR - 40 WARNING - 30 INFO - 20 DEBUG - 10. Default is 20
  -c Console Logging, --console_logging Console Logging
                          Pass the Console Logging as Yes or No. Default is Yes
- Users can update confidence_values.csv based on secondary_keys, secondary_creds, extensions value and give scoring from level 0 (lowest) to 5 (highest) to denote associated keyword suspiciousness.
- If users need to add any custom/new secondary creds/keys or extensions to the config files, then the same has to be added in the confidence_values.csv file with respective score level.
- Stop Words provided in config files are very limited and generic.Users need to update stop_words.csv with keywords considered has false postives to filter it out from the detections.
- Users can add additional extensions to extensions.csv to search types of files other than the default list.
- Users can enhance secondary_creds.csv/secondary_keys.csv by adding new patterns to do searches other than the default list.
- Users need to add primary keywords for public search in primary_keywords.csv after removing the sample content.
- In case of GitHub API calls resulting in 403 due to API rate-limit, increase the throttle timeout (github.throttle_time: 10) in the config ("config/xgg_configs.yaml)".
Licensed under the Apache 2.0 license.
For Tasks:
Click tags to check more tools for each tasksFor Jobs:
Alternative AI tools for xGitGuard
Similar Open Source Tools

xGitGuard
xGitGuard is an AI-based system developed by Comcast Cybersecurity Research and Development team to detect secrets (e.g., API tokens, usernames, passwords) exposed on GitHub repositories. It uses advanced Natural Language Processing to detect secrets at scale and with appropriate velocity. The tool provides workflows for detecting credentials and keys/tokens in both enterprise and public GitHub accounts. Users can set up search patterns, configure API access, run detections with or without ML filters, and train ML models for improved detection accuracy. xGitGuard also supports custom keyword scans for targeted organizations or repositories. The tool is licensed under Apache 2.0.
action_mcp
Action MCP is a powerful tool for managing and automating your cloud infrastructure. It provides a user-friendly interface to easily create, update, and delete resources on popular cloud platforms. With Action MCP, you can streamline your deployment process, reduce manual errors, and improve overall efficiency. The tool supports various cloud providers and offers a wide range of features to meet your infrastructure management needs. Whether you are a developer, system administrator, or DevOps engineer, Action MCP can help you simplify and optimize your cloud operations.
pipecat-flows
Pipecat Flows is a framework designed for building structured conversations in AI applications. It allows users to create both predefined conversation paths and dynamically generated flows, handling state management and LLM interactions. The framework includes a Python module for building conversation flows and a visual editor for designing and exporting flow configurations. Pipecat Flows is suitable for scenarios such as customer service scripts, intake forms, personalized experiences, and complex decision trees.
fraim
Fraim is an AI-powered toolkit designed for security engineers to enhance their workflows by leveraging AI capabilities. It offers solutions to find, detect, fix, and flag vulnerabilities throughout the development lifecycle. The toolkit includes features like Risk Flagger for identifying risks in code changes, Code Security Analysis for context-aware vulnerability detection, and Infrastructure as Code Analysis for spotting misconfigurations in cloud environments. Fraim can be run as a CLI tool or integrated into Github Actions, making it a versatile solution for security teams and organizations looking to enhance their security practices with AI technology.
markpdfdown
MarkPDFDown is a powerful tool that leverages multimodal large language models to transcribe PDF files into Markdown format. It simplifies the process of converting PDF documents into clean, editable Markdown text by accurately extracting text, preserving formatting, and handling complex document structures including tables, formulas, and diagrams.
CodeRAG
CodeRAG is an AI-powered code retrieval and assistance tool that combines Retrieval-Augmented Generation (RAG) with AI to provide intelligent coding assistance. It indexes your entire codebase for contextual suggestions based on your complete project, offering real-time indexing, semantic code search, and contextual AI responses. The tool monitors your code directory, generates embeddings for Python files, stores them in a FAISS vector database, matches user queries against the code database, and sends retrieved code context to GPT models for intelligent responses. CodeRAG also features a Streamlit web interface with a chat-like experience for easy usage.
BuildCLI
BuildCLI is a command-line interface (CLI) tool designed for managing and automating common tasks in Java project development. It simplifies the development process by allowing users to create, compile, manage dependencies, run projects, generate documentation, manage configuration profiles, dockerize projects, integrate CI/CD tools, and generate structured changelogs. The tool aims to enhance productivity and streamline Java project management by providing a range of functionalities accessible directly from the terminal.
pastemax
PasteMax is a modern file viewer application designed for developers to easily navigate, search, and copy code from repositories. It provides features such as file tree navigation, token counting, search capabilities, selection management, sorting options, dark mode, binary file detection, and smart file exclusion. Built with Electron, React, and TypeScript, PasteMax is ideal for pasting code into ChatGPT or other language models. Users can download the application or build it from source, and customize file exclusions. Troubleshooting steps are provided for common issues, and contributions to the project are welcome under the MIT License.
markpdfdown
MarkPDFDown is a powerful tool that leverages multimodal large language models to transcribe PDF files into Markdown format. It simplifies the process of converting PDF documents into clean, editable Markdown text by accurately extracting text, preserving formatting, and handling complex document structures including tables, formulas, and diagrams.
pentagi
PentAGI is an innovative tool for automated security testing that leverages cutting-edge artificial intelligence technologies. It is designed for information security professionals, researchers, and enthusiasts who need a powerful and flexible solution for conducting penetration tests. The tool provides secure and isolated operations in a sandboxed Docker environment, fully autonomous AI-powered agent for penetration testing steps, a suite of 20+ professional security tools, smart memory system for storing research results, web intelligence for gathering information, integration with external search systems, team delegation system, comprehensive monitoring and reporting, modern interface, API integration, persistent storage, scalable architecture, self-hosted solution, flexible authentication, and quick deployment through Docker Compose.
AutoAgent
AutoAgent is a fully-automated and zero-code framework that enables users to create and deploy LLM agents through natural language alone. It is a top performer on the GAIA Benchmark, equipped with a native self-managing vector database, and allows for easy creation of tools, agents, and workflows without any coding. AutoAgent seamlessly integrates with a wide range of LLMs and supports both function-calling and ReAct interaction modes. It is designed to be dynamic, extensible, customized, and lightweight, serving as a personal AI assistant.
mcpm.sh
MCPM is an open source CLI tool for managing MCP servers, providing a simplified global configuration approach to install servers once, organize them with profiles, and integrate them into any MCP client. Features include server discovery, direct execution, sharing capabilities, and client integration tools. It eliminates the complexity of v1's target-based system in favor of a clean global workspace model. The tool is designed to be AI agent friendly with comprehensive automation support and a rich CLI interface.
manifold
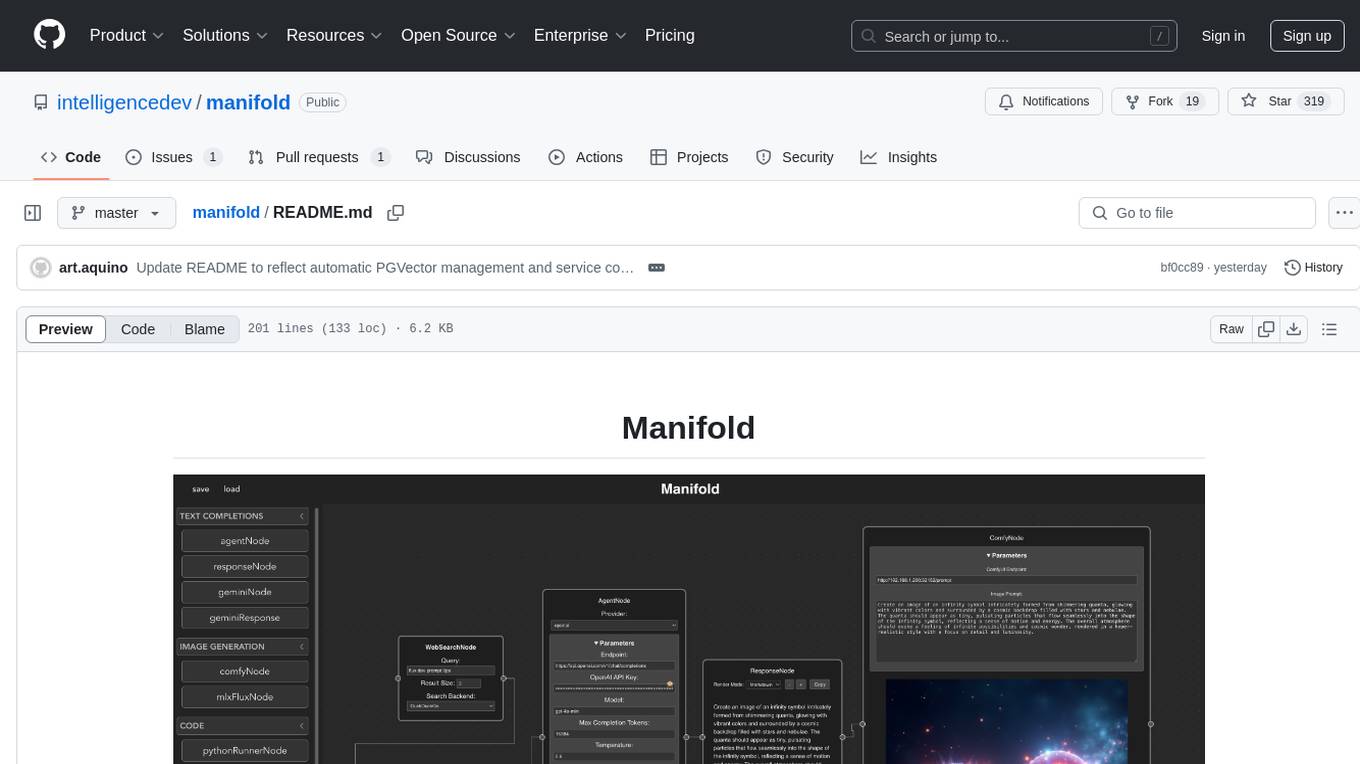
Manifold is a powerful platform for workflow automation using AI models. It supports text generation, image generation, and retrieval-augmented generation, integrating seamlessly with popular AI endpoints. Additionally, Manifold provides robust semantic search capabilities using PGVector combined with the SEFII engine. It is under active development and not production-ready.

director
Director is a context infrastructure tool for AI agents that simplifies managing MCP servers, prompts, and configurations by packaging them into portable workspaces accessible through a single endpoint. It allows users to define context workspaces once and share them across different AI clients, enabling seamless collaboration, instant context switching, and secure isolation of untrusted servers without cloud dependencies or API keys. Director offers features like workspaces, universal portability, local-first architecture, sandboxing, smart filtering, unified OAuth, observability, multiple interfaces, and compatibility with all MCP clients and servers.
alog
ALog is an open-source project designed to facilitate the deployment of server-side code to Cloudflare. It provides a step-by-step guide on creating a Cloudflare worker, configuring environment variables, and updating API base URL. The project aims to simplify the process of deploying server-side code and interacting with OpenAI API. ALog is distributed under the GNU General Public License v2.0, allowing users to modify and distribute the app while adhering to App Store Review Guidelines.
well-architected-iac-analyzer
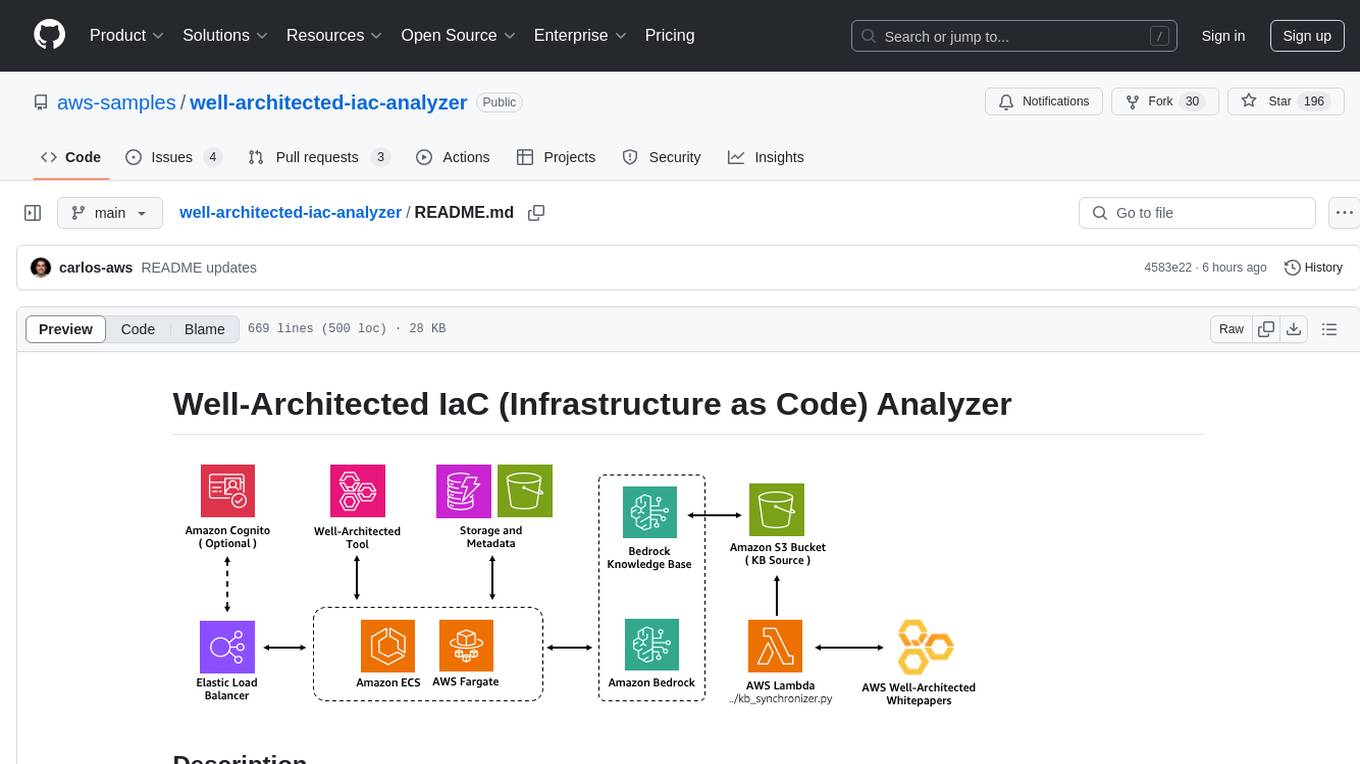
Well-Architected Infrastructure as Code (IaC) Analyzer is a project demonstrating how generative AI can evaluate infrastructure code for alignment with best practices. It features a modern web application allowing users to upload IaC documents, complete IaC projects, or architecture diagrams for assessment. The tool provides insights into infrastructure code alignment with AWS best practices, offers suggestions for improving cloud architecture designs, and can generate IaC templates from architecture diagrams. Users can analyze CloudFormation, Terraform, or AWS CDK templates, architecture diagrams in PNG or JPEG format, and complete IaC projects with supporting documents. Real-time analysis against Well-Architected best practices, integration with AWS Well-Architected Tool, and export of analysis results and recommendations are included.
For similar tasks

xGitGuard
xGitGuard is an AI-based system developed by Comcast Cybersecurity Research and Development team to detect secrets (e.g., API tokens, usernames, passwords) exposed on GitHub repositories. It uses advanced Natural Language Processing to detect secrets at scale and with appropriate velocity. The tool provides workflows for detecting credentials and keys/tokens in both enterprise and public GitHub accounts. Users can set up search patterns, configure API access, run detections with or without ML filters, and train ML models for improved detection accuracy. xGitGuard also supports custom keyword scans for targeted organizations or repositories. The tool is licensed under Apache 2.0.
gitleaks
Gitleaks is a tool for detecting secrets like passwords, API keys, and tokens in git repos, files, and whatever else you wanna throw at it via stdin. It can be installed using Homebrew, Docker, or Go, and is available in binary form for many popular platforms and OS types. Gitleaks can be implemented as a pre-commit hook directly in your repo or as a GitHub action. It offers scanning modes for git repositories, directories, and stdin, and allows creating baselines for ignoring old findings. Gitleaks also provides configuration options for custom secret detection rules and supports features like decoding encoded text and generating reports in various formats.
For similar jobs
promptflow
**Prompt flow** is a suite of development tools designed to streamline the end-to-end development cycle of LLM-based AI applications, from ideation, prototyping, testing, evaluation to production deployment and monitoring. It makes prompt engineering much easier and enables you to build LLM apps with production quality.
deepeval
DeepEval is a simple-to-use, open-source LLM evaluation framework specialized for unit testing LLM outputs. It incorporates various metrics such as G-Eval, hallucination, answer relevancy, RAGAS, etc., and runs locally on your machine for evaluation. It provides a wide range of ready-to-use evaluation metrics, allows for creating custom metrics, integrates with any CI/CD environment, and enables benchmarking LLMs on popular benchmarks. DeepEval is designed for evaluating RAG and fine-tuning applications, helping users optimize hyperparameters, prevent prompt drifting, and transition from OpenAI to hosting their own Llama2 with confidence.
MegaDetector
MegaDetector is an AI model that identifies animals, people, and vehicles in camera trap images (which also makes it useful for eliminating blank images). This model is trained on several million images from a variety of ecosystems. MegaDetector is just one of many tools that aims to make conservation biologists more efficient with AI. If you want to learn about other ways to use AI to accelerate camera trap workflows, check out our of the field, affectionately titled "Everything I know about machine learning and camera traps".
leapfrogai
LeapfrogAI is a self-hosted AI platform designed to be deployed in air-gapped resource-constrained environments. It brings sophisticated AI solutions to these environments by hosting all the necessary components of an AI stack, including vector databases, model backends, API, and UI. LeapfrogAI's API closely matches that of OpenAI, allowing tools built for OpenAI/ChatGPT to function seamlessly with a LeapfrogAI backend. It provides several backends for various use cases, including llama-cpp-python, whisper, text-embeddings, and vllm. LeapfrogAI leverages Chainguard's apko to harden base python images, ensuring the latest supported Python versions are used by the other components of the stack. The LeapfrogAI SDK provides a standard set of protobuffs and python utilities for implementing backends and gRPC. LeapfrogAI offers UI options for common use-cases like chat, summarization, and transcription. It can be deployed and run locally via UDS and Kubernetes, built out using Zarf packages. LeapfrogAI is supported by a community of users and contributors, including Defense Unicorns, Beast Code, Chainguard, Exovera, Hypergiant, Pulze, SOSi, United States Navy, United States Air Force, and United States Space Force.
llava-docker
This Docker image for LLaVA (Large Language and Vision Assistant) provides a convenient way to run LLaVA locally or on RunPod. LLaVA is a powerful AI tool that combines natural language processing and computer vision capabilities. With this Docker image, you can easily access LLaVA's functionalities for various tasks, including image captioning, visual question answering, text summarization, and more. The image comes pre-installed with LLaVA v1.2.0, Torch 2.1.2, xformers 0.0.23.post1, and other necessary dependencies. You can customize the model used by setting the MODEL environment variable. The image also includes a Jupyter Lab environment for interactive development and exploration. Overall, this Docker image offers a comprehensive and user-friendly platform for leveraging LLaVA's capabilities.

carrot
The 'carrot' repository on GitHub provides a list of free and user-friendly ChatGPT mirror sites for easy access. The repository includes sponsored sites offering various GPT models and services. Users can find and share sites, report errors, and access stable and recommended sites for ChatGPT usage. The repository also includes a detailed list of ChatGPT sites, their features, and accessibility options, making it a valuable resource for ChatGPT users seeking free and unlimited GPT services.
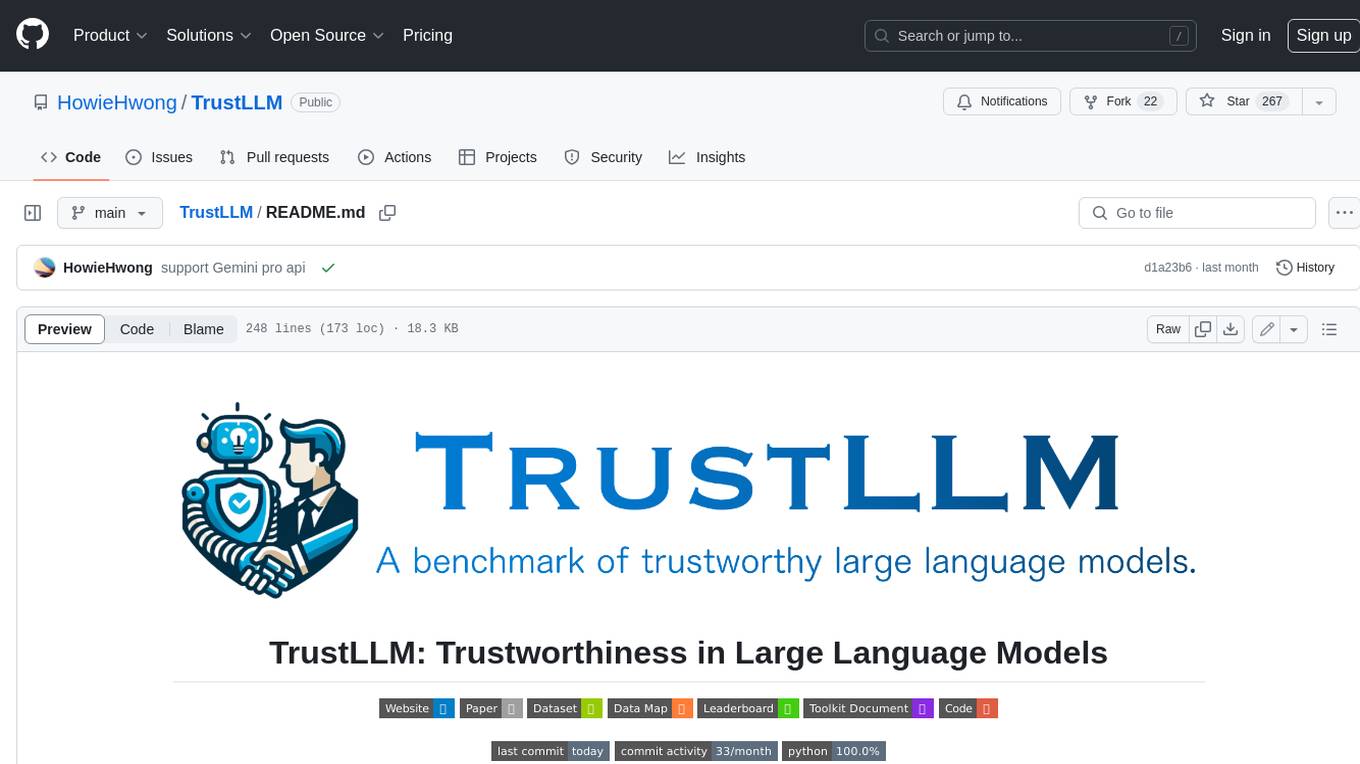
TrustLLM
TrustLLM is a comprehensive study of trustworthiness in LLMs, including principles for different dimensions of trustworthiness, established benchmark, evaluation, and analysis of trustworthiness for mainstream LLMs, and discussion of open challenges and future directions. Specifically, we first propose a set of principles for trustworthy LLMs that span eight different dimensions. Based on these principles, we further establish a benchmark across six dimensions including truthfulness, safety, fairness, robustness, privacy, and machine ethics. We then present a study evaluating 16 mainstream LLMs in TrustLLM, consisting of over 30 datasets. The document explains how to use the trustllm python package to help you assess the performance of your LLM in trustworthiness more quickly. For more details about TrustLLM, please refer to project website.
AI-YinMei
AI-YinMei is an AI virtual anchor Vtuber development tool (N card version). It supports fastgpt knowledge base chat dialogue, a complete set of solutions for LLM large language models: [fastgpt] + [one-api] + [Xinference], supports docking bilibili live broadcast barrage reply and entering live broadcast welcome speech, supports Microsoft edge-tts speech synthesis, supports Bert-VITS2 speech synthesis, supports GPT-SoVITS speech synthesis, supports expression control Vtuber Studio, supports painting stable-diffusion-webui output OBS live broadcast room, supports painting picture pornography public-NSFW-y-distinguish, supports search and image search service duckduckgo (requires magic Internet access), supports image search service Baidu image search (no magic Internet access), supports AI reply chat box [html plug-in], supports AI singing Auto-Convert-Music, supports playlist [html plug-in], supports dancing function, supports expression video playback, supports head touching action, supports gift smashing action, supports singing automatic start dancing function, chat and singing automatic cycle swing action, supports multi scene switching, background music switching, day and night automatic switching scene, supports open singing and painting, let AI automatically judge the content.


