
blinkid-ios
Everything you need to add AI-driven ID scanning into your native iOS app.
Stars: 392
BlinkID iOS is a mobile SDK that enables developers to easily integrate ID scanning and data extraction capabilities into their iOS applications. The SDK supports scanning and processing various types of identity documents, such as passports, driver's licenses, and ID cards. It provides accurate and fast data extraction, including personal information and document details. With BlinkID iOS, developers can enhance their apps with secure and reliable ID verification functionality, improving user experience and streamlining identity verification processes.
README:
The BlinkID SDK is a comprehensive solution for implementing secure document scanning on iOS. It offers powerful capabilities for capturing and analyzing a wide range of identification documents. The package consists of BlinkID, which serves as the core module, and an optional BlinkIDUX package that provides a complete, ready-to-use solution with a user-friendly interface.
- Requirements
- Quick Start
- BlinkID Components
- BlinkIDUX Components
- Creating custom UX component
- Localization
- SDK Integration Troubleshooting
- SDK size
- Additional info
SDK package contains BlinkID framework, BlinkIDUX package and one or more sample apps that demonstrate their integration. The BlinkID framework can be deployed on iOS 15.0 or later and BlinkIDUX package can be deployed on iOS 16.0 or later. The framework and package support Swift projects.
Both
BlinkIDandBlinkIDUXare dynamic packages
This project is designed with Swift 6, leveraging the latest concurrency features to ensure efficient, and modern application performance.
BlinkIDUXis built with full support for SwiftUI, enabling seamless integration of declarative user interfaces with modern, responsive design principles.
| SDK | Platform | Installation | Minimum Swift Version | Type |
|---|---|---|---|---|
| BlinkID | iOS 15.0+ | Swift Package Manager | 5.10 / Xcode 15.3 | Dynamic |
| BlinkIDUX | iOS 16.0+ | Swift Package Manager | 5.10 / Xcode 15.3 | Dynamic |
In this section, you will initialize the SDK, create a capture session, and submit the images for either server-side or client-side verification, resulting in a fraud verdict and a detailed analysis of the document images.
This Quick Start guide will get you up and performing document scanning as quickly as possible. All steps described in this guide are required for the integration.
This guide closely follows the BlinkID app in the Samples folder of this repository. We highly recommend you try to run the sample app. The sample app should compile and run on your device.
The source code of the sample app can be used as a reference during the integration.
To integrate the BlinkID SDK into your iOS project, you'll need to:
- Obtain a valid license key from the Microblink dashboard
- Add the SDK framework to your project
The Swift Package Manager is a tool for automating the distribution of Swift code and is integrated into the swift compiler.
Once you have your Swift package set up, adding BlinkID and BlinkIDUX as a dependency are as easy as adding it to the dependencies value of your Package.swift or the Package list in Xcode.
We provide a URL to the public package repository that you can add in Xcode:
https://github.com/BlinkID/blinkid-spdependencies: [
.package(url: "https://github.com/BlinkID/blinkid-ios.git", .upToNextMajor(from: "7.0.0"))
]Normally you'll want to depend on the BlinkIDUX target:
.product(name: "BlinkIDUX", package: "BlinkIDUX")
BlinkIDUXhas a binary target dependency onBlinkID, so use this package only if you are also using our UX.
You can see dependency in our Package.swift:
.binaryTarget(
    name: "BlinkID",
    path: "Frameworks/BlinkID.xcframework"
)If you prefer not to use Swift Package Manager, you can integrate BlinkID and BlinkIDUX into your project manually.
Download latest release (Download BlinkID.xcframework.zip file or clone this repository).
-
Copy
BlinkID.xcframeworkto your project folder. -
In your Xcode project, open the Project navigator. Drag the
BlinkID.xcframeworkfile to your project, ideally in the Frameworks group. -
Since
BlinkID.xcframeworkis a dynamic framework, you also need to add it to embedded binaries section in General settings of your target and choose optionEmbed & Sign.
- Open up Terminal, cd into your top-level project directory, and run the following command "if" your project is not initialized as a git repository:
$ git init- Add BlinkIDUX as a git submodule by running the following command:
$ git submodule add https://github.com/BlinkID/blinkid-ios.gitTo add a local Swift package as a dependency in Xcode: 1. Go to your Xcode project. 2. Select your project in the Project Navigator. 3. Go to the Package Dependencies tab under your project settings. 4. Click the ”+” button to add a new dependency. 5. In the dialog that appears, select the “Add Local…” option at the bottom left. 6. Navigate to the folder containing your local Swift package and select it.
This will add the local Swift package as a dependency to your Xcode project.
BlinkIDUXhas a binary target dependency onBlinkID, so use this package only if you are also using our UX.
In files in which you want to use the functionality of the SDK place the import directive.
import BlinkID- Initialize the SDK with your license key:
let settings = BlinkIDSdkSettings(
    licenseKey: "your-license-key",
    downloadResources: true
)

let sdk = try await BlinkIDSdk.createBlinkIDSdk(withSettings: settings)- Create a capture session:
let session = await sdk.createScanningSession()- Process images and handle results:
let result = await session.process(inputImage: capturedImage)
if result.processResult?.resultCompleteness.scanningStatus == .documentScanned {
    let finalResult = await session.getResult()
    Task { @ProcessingActor in
        let sessionResult = BlinkIDSession.getResult()
    }
}We provide the BlinkIDUX package, which encapsulates all the necessary logic for the document scanning process, streamlining integration into your app.
In files in which you want to use the functionality of the SDK place the import directive.
import BlinkIDUX- Initialize the BlinkIDAnalyzer:
- Begin by creating an instance of the BlinkIDAnalyzer after initializing the capture session:
let analyzer = await BlinkIDAnalyzer(
    sdk: sdk,
    eventStream: BlinkIDEventStream()
)- Create a BlinkIDUXModel:
- Next, use the BlinkIDAnalyzer to initialize the BlinkIDUXModel:
let viewModel = BlinkIDUXModel(analyzer: analyzer)- Display the BlinkIDUXView in SwiftUI:
- Add the BlinkIDUXView to your SwiftUI view hierarchy using the BlinkIDUXModel::
struct ContentView: View {
    var body: some View {
        BlinkIDUXView(viewModel: viewModel)
    }
}- Access the Capture Result:
- The BlinkIDUXModel exposes the scanning result through the result property, which is a @Published variable. You can observe it to handle the result of the document capture and verification process inside your ViewModel:
viewModel.$result
    .sink { [weak self] scanningResultState in
        if let scanningResultState {
                if let scanningResult = scanningResultState.scanningResult {
                    // Handle the scanning result
                    print("Scanning completed with result: \(scanningResult)")
                }
        }
    }
.store(in: &cancellables)- or you can also directly observe it within your SwiftUI views using SwiftUI’s @ObservedObject or @StateObject property wrappers. This allows you to automatically update your UI based on the capture result without manually handling Combine subscriptions.
struct ContentView: View {
    @StateObject var viewModel: BlinkIDUXModel

    var body: some View {
        VStack {
            BlinkIDUXView(viewModel: viewModel)

            if let result = viewModel.scanningResult {
                Text("Scanning Result: \(result.scanningResult.description)")
            } else {
                Text("Awaiting scanning...")
            }
        }
    }
}BlinkID is a powerful document scanning solution designed to enhance the security and accuracy of document scanning processes.
The BlinkIDSdk class serves as the main entry point for document scanning functionality. It manages SDK initialization, resource downloading, and session creation.
let settings = BlinkIDSdkSettings(
    licenseKey: "your-license-key",
    downloadResources: true
)

do {
    let sdk = try await BlinkIDSdk.createBlinkIDSdk(withSettings: settings)
    let session = await sdk.createScanningSession()
    // Use the session for document scanning
} catch {
    // Handle initialization errors
}
BlinkIDSession is a Swift class that manages document scanning operations, providing a robust interface for capturing, processing, and validating documents through image analysis and scanning.
The BlinkIDSession class serves as the primary controller for document scanning workflows, handling various aspects such as:
- Image processing and analysis
- Session lifecycle management
- Result generation and processing
let sdk = try await BlinkIDSdk.createBlinkIDSdk(withSettings: settings)
let BlinkIDSession = await sdk.createScanningSession()
Creates a new capture session with specified settings and resource path configurations.
public func cancelActiveProcessing()Immediately terminates any ongoing processing operations. This method can be called from any context and is useful for handling user cancellations or session aborts.
@ProcessingActor
public func process(inputImage: InputImage) -> FrameProcessResult
Processes an input image and provides detailed analysis results. This method:
- Analyzes the provided image according to session settings
- Returns a
FrameProcessResultcontaining analysis results and completion status - Must be executed within the ProcessingActor context
@ProcessingActor
public func getResult() -> BlinkIDScanningResult
Retrieves the final results of the capture session, including:
- All captured images
- Session metadata
- Must be called within the ProcessingActor context
/// Processes a camera frame for document analysis.
/// - Parameter image: The camera frame to analyze
public func analyze(image: CameraFrame) async {
    guard !paused else { return }
    let inputImage = InputImage(cameraFrame: image)

    let result = await BlinkIDSession.process(inputImage: inputImage)

    if result.processResult?.resultCompleteness.scanningStatus == .documentScanned {
        guard !scanningDone else { return }
        scanningDone = true
        Task { @ProcessingActor in
            let sessionResult = BlinkIDSession.getResult()
            // Finish scanning
        }
    }
}
Please refer to our BlinkIDAnalyzer in the BlinkIDUX module for implementation details and guidance on its usage.
- Actor Isolation: Many methods must be called within the
ProcessingActorcontext to ensure thread safety - Session Management: Each session maintains its own unique identifier and state
- Resource Management: Proper initialization with valid resource paths is crucial for operation
- Cancellation Support: Operations can be cancelled at any time using
cancelActiveProcessing()
The class implements the Sendable protocol and uses actor isolation (@ProcessingActor) to ensure thread-safe operations in concurrent environments.
- Ensure proper error handling for processing operations
- Consider implementing timeout mechanisms for long-running operations
- Maintain proper lifecycle management of the session
- Handle results appropriately according to your application's needs
ProcessResult is a Swift structure that encapsulates the complete results of a document scanning process, combining frame analysis with completion status information.
- Document detection status
- Completion status
Contains detailed analysis results for a single frame in the verification process.
An enumeration representing the status of document detection during scanning.
-
failed: Document recognition failed -
success: Document recognition completed successfully -
cameraTooFar: Document has been detected but the camera is too far from the document -
cameraTooClose: Document has been detected but the camera is too close to the document -
cameraAngleTooSteep: Document has been detected but the camera’s angle is too steep -
documentTooCloseToCameraEdge: Document has been detected but the document is too close to the camera edge -
documentPartiallyVisible: Only part of the document is visible
An enumeration that defines the possible statuses that can occur during the scanning operation, specifically for managing the progress of scanning sides and the entire document.
-
scanningSideInProgress: Document recognition failed -
scanningBarcodeInProgress: Document recognition completed successfully -
sideScanned: Document has been detected but the camera is too far from the document -
documentScanned: Document has been detected but the camera is too close to the document -
cancelled: Document has been detected but the camera’s angle is too steep
A structure tracking the progress of different verification phases.
-
scanningStatus:ScanningStatus- Indicates the status of the scanning process -
vizExtracted:Bool- Indicates if the VIZ fields have been extracted -
mrzExtracted:Bool- Indicates if the MRZ fields have been extracted -
barcodeExtracted:Bool- Indicates if the barcode fields have been extracted -
documentImageExtracted:Bool- Indicates if the document image has been extracted -
faceImageExtracted:Bool- Indicates if the face image has been extracted -
signatureImageExtracted:Bool- Indicates if the signature image has been extracted
Represents a 2D point in the coordinate system.
-
x:Int32- X-coordinate -
y:Int32- Y-coordinate
Represents a four-sided polygon defined by its corner points.
-
upperLeft:Point -
upperRight:Point -
lowerRight:Point -
lowerLeft:Point
Combines physical position and orientation information of a detected document.
-
location:Quadrilateral- Boundary coordinates of the detected document -
orientation:CardOrientation- Orientation of the detected document
if result.processResult?.resultCompleteness.scanningStatus == .documentScanned {
    guard !scanningDone else { return }
    scanningDone = true
    Task { @ProcessingActor in
        let sessionResult = session.getResult()
        // Finish scanning
    }
}-
Error Handling
- Monitor
documentDetectionStatusfor potential capture issues - Check
processingStatusfor overall processing success
- Monitor
-
Quality Control
- Use
blurandglaredetection to ensure optimal image quality
- Use
-
Progress Tracking
- Use
ResultCompletenessto track verification progress - Monitor
scanningStatusfor overall process state - Handle partial completions appropriately
- Use
All types conform to the Sendable protocol, ensuring thread-safe operations in concurrent environments.
- Always check
resultCompleteness.scanningStatus == .documentScannedbefore concluding the scanning process - Implement proper error handling for all possible
DetectionStatuscases - Monitor quality indicators (blur, glare, moire) for optimal capture conditions
- Implement appropriate user feedback based on
processingStatusanddocumentDetectionStatus
InputImage is a Swift class that wraps either a UIImage or camera frame for processing in the document scanning system.
// Create from UIImage
public init(uiImage: UIImage, regionOfInterest: RegionOfInterest = RegionOfInterest())

// Create from camera frame
public init(cameraFrame: CameraFrame)A structure that defines the area of interest within an image for processing.
-
x:Float- X-coordinate (normalized between 0 and 1) -
y:Float- Y-coordinate (normalized between 0 and 1) -
width:Float- Width (normalized between 0 and 1) -
height:Float- Height (normalized between 0 and 1)
An enumeration representing the device orientation during frame capture.
-
portrait: Device in normal upright position -
portraitUpsideDown: Device held upside down -
landscapeRight: Device rotated 90 degrees clockwise -
landscapeLeft: Device rotated 90 degrees counterclockwise
A structure representing a complete camera frame with its metadata.
-
buffer:MBSampleBufferWrapper- Raw camera buffer containing image data -
roi:RegionOfInterest- Region of interest within the frame -
orientation:CameraFrameVideoOrientation- Camera orientation -
width:Int- Frame width in pixels (computed property) -
height:Int- Frame height in pixels (computed property)
public init(
    buffer: MBSampleBufferWrapper,
    roi: RegionOfInterest = RegionOfInterest(),
    orientation: CameraFrameVideoOrientation = .portrait
)
func processCameraOutput(_ sampleBuffer: CMSampleBuffer) {
let frame = CameraFrame(
buffer: MBSampleBufferWrapper(buffer: sampleBuffer),
roi: RegionOfInterest(x: 0, y: 0, width: 1.0, height: 1.0),
orientation: .portrait
)
let inputImage = InputImage(cameraFrame: frame)
}// Creating from UIImage
let inputImage1 = InputImage(
uiImage: documentImage,
regionOfInterest: RegionOfInterest(x: 0, y: 0, width: 1.0, height: 1.0)
)
// Creating from camera frame
let inputImage2 = InputImage(cameraFrame: cameraFrame)-
Image Source Handling
- Choose appropriate initialization method based on image source (UIImage or camera frame)
- Consider memory management implications when working with camera frames
- Handle orientation conversions properly
-
Region of Interest
- Use normalized coordinates (0-1) for region of interest
- Validate region boundaries to prevent out-of-bounds issues
- Consider UI implications when setting custom regions
-
Performance Optimization
- Minimize frame buffer copies
- Consider frame rate and processing overhead
- Handle memory efficiently when processing multiple frames
-
InputImageand related types conform to theSendableprotocol -
CameraFrameis marked as@unchecked Sendabledue to buffer handling - Care should be taken when sharing frames across threads
-
Memory Management
- Release camera frames promptly after processing
- Avoid unnecessary copies of large image buffers
- Use appropriate autorelease pool when processing multiple frames
-
Error Handling
- Check frame dimensions before processing
- Handle invalid region of interest parameters
- Validate image orientation data
-
Performance
- Process frames in appropriate queue/thread
- Consider frame rate requirements
- Optimize region of interest for specific use cases
The SDK supports both downloaded and bundled resources:
- Automatic resource downloading and caching
- Bundle-based resource loading
- Resource validation and verification
The SDK supports downloading machine learning models from our CDN. Models are automatically retrieved from https://models.cdn.microblink.com/resources when enabled.
To enable model downloads, set the downloadResources property to true in your BlinkIDSdkSettings:
let settings = BlinkIDSdkSettings(
    licenseKey: yourLicenseKey,
    downloadResources: true  // Enable model downloads
)
By default, downloaded models are stored in the MLModels folder. You can specify a custom storage location using the resourceLocalFolder property in the settings.
Model downloads occur during SDK initialization in the createBlinkIDSdk method:
do {
    let instance = try await BlinkIDSdk.createBlinkIDSdk(withSettings: settings)
} catch let error as ResourceDownloaderError {
    // Handle specific download errors
    if case .noInternetConnection = error {
        // Handle no internet connection
    }
    // Handle other download errors as needed
}
The operation may throw a ResourceDownloaderError with the following possible cases:
| Error Case | Description |
|---|---|
invalidURL(String) |
The provided URL for model download is invalid |
downloadFailed(Int) |
Download failed with specific HTTP status code |
fileNotFound(URL) |
Resource file not found at specified location |
hashMismatch(String) |
File hash verification failed |
fileAccessError(Error) |
Error accessing file system |
cacheDirNotFound |
Cache directory not found |
fileCreationError(Error) |
Error creating file |
noInternetConnection |
No internet connection available |
invalidResponse |
Invalid or unexpected server response |
resourceUnavailable |
Requested resource is not available |
The SDK provides built-in components for handling network connectivity states.
NetworkMonitor is ready-to-use network connectivity monitor that uses NWPathMonitor:
@MainActor
public class NetworkMonitor: ObservableObject {
    @Published public var isConnected = true
    public var isOffline: Bool { !isConnected }

    public init() {
        setupMonitor()
    }
}
NoInternetView is a pre-built SwiftUI view for handling offline states:
public struct NoInternetView: View {
    public init(retryAction: @escaping () -> Void)
}To use bundled models with our SDK, ensure the required model files are included in your app package and set the downloadResources property of BlinkIDSdkSettings to false. Specify the location of the bundled models using the bundleURL property of BlinkIDSdkSettings. If you are using the main bundle, you can retrieve its URL as follows:
let bundle = Bundle.main.bundleURLThe BlinkIDUX package is source-available, allowing you to customize and adapt its functionality to suit the specific needs of your project. This flexibility ensures that you can tailor the user experience and scanning workflow to align with your app’s design and requirements.
In the next section, we will explain the main components of the BlinkIDUX package and how they work together to simplify document scanning integration.
The BlinkIDAnalyzer component provides a robust set of features to streamline and enhance the document scanning process. It includes real-time camera frame analysis for immediate feedback during scanning and asynchronous event streaming to ensure smooth, non-blocking operations. The component supports pause and resume functionality, allowing users to temporarily halt the process and continue seamlessly. With session result handling, developers can easily access and process the final scanning outcomes. Additionally, it offers cancellation support, enabling users to terminate the scanning process at any time. Designed with comprehensive UI event feedback, it delivers clear and actionable guidance to users throughout the scanning workflow.
An enumeration that represents different sides of a document during the scanning process:
public enum DocumentSide: Sendable {
    case front    // Front side of the document
    case back     // Back side of the document
    case barcode  // Barcode region of the document
}An actor that manages the stream of UI events during the document scanning process:
public actor BlinkIDEventStream: EventStream {
    public func send(_ events: [UIEvent])
    public var stream: AsyncStream<[UIEvent]>
}The main analyzer component that processes camera frames and manages the document scanning workflow:
public actor BlinkIDAnalyzer: CameraFrameAnalyzer {
    public init(
        sdk: BlinkIDSdk,
        blinkIDSessionSettings: BlinkIDSessionSettings = BlinkIDSessionSettings(inputImageSource: .video),
        eventStream: BlinkIDEventStream
    )
}// Create an event stream
let eventStream = BlinkIDEventStream()
// Initialize the analyzer
let analyzer = await BlinkIDAnalyzer(
sdk: blinkIDVerifySdk,
blinkIDSessionSettings: BlinkIDSessionSettings(inputImageSource: .video),
eventStream: eventStream
)// Analyze a camera frame
for await frame in await camera.sampleBuffer {
await analyzer.analyze(image: CameraFrame(buffer: MBSampleBufferWrapper(cmSampleBuffer: frame.buffer), roi: roi, orientation: camera.orientation.toCameraFrameVideoOrientation()))
}The component provides real-time feedback through an event stream. Events can be observed to update the UI or trigger specific actions based on the scanning progress.
eventHandlingTask = Task {
    for await events in await analyzer.events.stream {
        if events.contains(.requestDocumentSide(side: .back)) {
            firstSideScanned()
        } else if events.contains(.requestDocumentSide(side: .barcode)) {
            self.setReticleState(.barcode, force: true)
        } else if events.contains(.wrongSide) {
            self.setReticleState(.error("Flip the document"))
        } else if events.contains(.tooClose) {
            self.setReticleState(.error("Move farther"))
        } else if events.contains(.tooFar) {
            self.setReticleState(.error("Move closer"))
        } else if events.contains(.tooCloseToEdge) {
            self.setReticleState(.error("Move the document from the edge"))
        } else if events.contains(.tilt) {
            self.setReticleState(.error("Keep document parallel with the phone"))
        } else if events.contains(.blur) {
            self.setReticleState(.error("Keep document and phone still"))
        } else if events.contains(.glare) {
            self.setReticleState(.error("Tilt or move document to remove reflection"))
        } else if events.contains(.notFullyVisible) {
            self.setReticleState(.error("Keep document fully visible"))
        } else if events.contains(.occlusion) {
            self.setReticleState(.error("Keep document fully visible"))
        }
    }
}When integrating the BlinkIDAnalyzer component, it is essential to follow best practices to ensure a seamless and efficient document scanning experience. By adhering to these guidelines, you can enhance user satisfaction and maintain robust application performance:
- Always handle the event stream to provide real-time user feedback during the scanning process.
- Implement proper error handling to manage scan failures gracefully and guide users effectively.
- Consider implementing timeout handling for production environments to prevent indefinite scanning sessions. Check out our implementation for more details.
- Manage memory efficiently by calling cancel() when the scanner is no longer needed, freeing up resources.
- Handle the pause/resume cycle appropriately to align with app lifecycle events, ensuring a consistent user experience.
The BlinkIDUXModel is a comprehensive view model that manages the document scanning user experience in iOS applications. This component handles camera preview, document detection, user guidance, and scanning state transitions.
BlinkIDUXModel serves as the business logic layer for the document scanning interface. It is designed as a MainActor to ensure thread-safe UI updates and implements the ObservableObject protocol for SwiftUI integration. The model manages the entire scanning workflow, from camera initialization to document capture and verification.
The model offers comprehensive camera control functionality through seamless integration with AVFoundation. It includes a fully implemented camera session, ensuring thread-safe access and synchronization with the BlinkIDAnalyzer for reliable and efficient performance.
The camera system is designed to provide robust and user-friendly functionality, including:
- Automatic session management for effortless setup and teardown.
- Torch/flashlight control to adapt to various lighting conditions.
- Frame capture and analysis synchronization for real-time document processing.
- Orientation handling to ensure correct alignment regardless of device orientation.
public class ScanningViewModel<T>: ObservableObject, ScanningViewModelProtocol {
    let camera: Camera = Camera()
}The model provides comprehensive user feedback mechanisms. The feedback features are designed to enhance user experience and guide users effectively throughout the document scanning process. These include:
- Visual guidance through reticle state management, helping users align documents accurately.
- Error messaging and recovery suggestions, providing clear instructions to resolve issues.
- Success animations and transitions, offering a smooth and engaging user experience upon successful scans.
- Accessibility announcements, ensuring inclusivity by providing auditory feedback for users with disabilities.
- Progress indicators, keeping users informed about the scanning status in real time.
@Published var reticleState: ReticleState = .frontThe model features a sophisticated animation system designed to provide dynamic and engaging user feedback during the document scanning process. Key animations include:
- Document flip animations, guiding users to scan both sides of a document when required.
- Success indicators, visually confirming successful scans.
- Ripple effects, drawing attention to areas of interest during the scanning process.
- State transitions, ensuring smooth and intuitive changes between different scanning states.
When implementing the BlinkIDUXModel, it’s crucial to follow best practices to ensure smooth and efficient operation. Key considerations include:
- Implement proper error handling to manage all scanning states gracefully and provide a robust user experience.
- Monitor memory usage during extended scanning sessions to avoid potential performance bottlenecks or crashes.
- Clean up resources promptly when the scanning process is complete to maintain optimal app performance.
- Handle orientation changes appropriately to ensure consistent user experience across different device orientations.
BlinkIDUXView is the main scanning interface component that combines camera functionality with user interaction elements. The view is designed to provide real-time feedback during the document scanning process while maintaining a clean and intuitive user interface.
The view is built using SwiftUI and follows the MVVM (Model-View-ViewModel) pattern, where:
- The view (BlinkIDUXView) handles the UI layout and user interactions
- The view model (BlinkIDUXModel) manages the business logic and state
- The camera integration handles the document capture pipeline
The view incorporates a camera feed through the CameraView component and manages the entire capture pipeline, including:
- Automatic camera session management
- Support for torch/flashlight functionality
- Real-time frame processing
- Orientation handling
The interface consists of several key components:
-
Camera Feed
- Full-screen camera preview
- Real-time document boundary detection
- Automatic orientation adjustment
-
Reticle
- Visual guidance for document positioning
- Dynamic state feedback
- Accessibility support
- Animation capabilities
-
Control Buttons
- Cancel button for session termination
- Torch button for lighting control
- Help button for user guidance
-
Feedback Elements
- Success indicators
- Visual animations
- Accessibility announcements
The component provides comprehensive accessibility support:
- VoiceOver compatibility
- Dynamic text scaling
- Accessibility labels and hints
- Automatic announcements for state changes
- Always initialize the view with a properly configured view model
- Implement proper error handling and user feedback
- Monitor memory usage during extended scanning sessions
- Handle orientation changes appropriately
- Implement proper cleanup on view dismissal
You have the flexibility to create your own custom UX if needed. However, we strongly recommend following the implementations provided in this package as a foundation. Since the package is source-available, you can modify or extend the code directly within your project to tailor it to your specific requirements.
We also highly recommend using our built-in Camera and CameraView components, as they are fully optimized for performance and seamlessly integrated with the BlinkIDAnalyzer. However, if necessary, you can implement and use your own camera solution.
If implementing your own Camera component, be sure to wrap your CMSampleBufferRef to our own
MBSampleBufferWrapper.MBSampleBufferWrappersafely encapsulates a Core Media sample buffer, ensuring proper reference counting and memory management while maintaining binary compatibility across different Swift versions.
To integrate the document scanning workflow effectively, you will start by creating a ViewModel to manage the scanning logic and interface with the underlying components. The ViewModel acts as the bridge between the CameraFrameAnalyzer and your UI, handling data flow, state management, and event processing.
In this section, we will guide you through the process of setting up and configuring the ViewModel, integrating it with the camera and analyzer components, and linking it to your SwiftUI view. This approach ensures a modular and maintainable architecture while leveraging the optimized components provided by the SDK.
@MainActor
public final class ViewModel: ObservableObject {
    // Use our Camera controller
    let camera: Camera = Camera()
    let analyzer: CameraFrameAnalyzer
    // Instructions text for the View
    @Published var instructionText: String = "Scan the front side"
    // Published BlinkIDCaptureResult, use it in your ViewModel, or directly in your SwiftUI View
    @Published public var captureResult: BlinkIDCaptureResult?

    private var eventHandlingTask: Task<Void, Never>?

    public init(analyzer: CameraFrameAnalyzer) {
        self.analyzer = analyzer
        startEventHandling()
    }
The startEventHandling method initializes an event task, allowing you to receive and process UIEvents from the CameraFrameAnalyzer’s event stream.
private func startEventHandling() {
    eventHandlingTask = Task {
        for await events in await analyzer.events.stream {
            if events.contains(.requestDocumentSide(side: .back)) {
            } else if events.contains(.requestDocumentSide(side: .barcode)) {
            } else if events.contains(.wrongSide) {
                instructionText = "Flip the document"
            } else if events.contains(.tooClose) {
                instructionText = "Move farther"
            } else if events.contains(.tooFar) {
                instructionText = "Move closer"
            } else if events.contains(.tooCloseToEdge) {
                instructionText = "Move farther"
            } else if events.contains(.tilt) {
                instructionText = "Keep document parallel with the phone"
            } else if events.contains(.blur) {
                instructionText = "Keep document and phone still"
            } else if events.contains(.glare) {
                instructionText = "Tilt or move document to remove reflection"
            } else if events.contains(.notFullyVisible) {
                instructionText = "Keep document fully visible"
            }
        }
    }
}
Implement analyze and pauseScanning methods:
public func analyze() async {

    Task {
        let result = await analyzer.result()
        if let scanningResult = result as? ScanningResult<BlinkIDScanningResult, BlinkIDScanningAlertType> {
            switch scanningResult {
            case .completed(let scanningResult):
                finishScan()
                self.result = BlinkIDResultState(scanningResult: scanningResult)
            case .interrupted(let alertType):
                self.alertType = alertType
                showScanningAlert = true
            case .cancelled:
                showLicenseErrorAlert = true
            case .ended:
                self.result = BlinkIDResultState(scanningResult: nil)
            }
        }
    }

    for await frame in await camera.sampleBuffer {
        await analyzer.analyze(image: CameraFrame(buffer: MBSampleBufferWrapper(cmSampleBuffer: frame.buffer), roi: roi, orientation: camera.orientation.toCameraFrameVideoOrientation()))
    }
}
func pauseScanning() {
Task {
await analyzer.cancel()
}
}The CameraFrameAnalyzer protocol defines the core interface for components that analyze camera frames during document scanning operations. This protocol is designed to provide a standardized way of processing camera input while maintaining thread safety through Swift's concurrency system.
The protocol defines essential methods and properties for analyzing camera frames in real-time, managing the analysis lifecycle, and providing feedback through an event stream.
public protocol CameraFrameAnalyzer: Sendable {
    func analyze(image: CameraFrame) async
    func cancel() async
    func pause() async
    func resume() async
    func restart() async throws
    func end() async
    func result() async -> ScanningResult
    var events: EventStream { get }
}analyze(image: CameraFrame) asyncProcesses a single camera frame for analysis. This method operates asynchronously to prevent blocking the main thread during intensive image processing operations.
cancel() asyncTerminates the current analysis operation immediately. This method ensures proper cleanup of resources when analysis needs to be stopped before completion.
pause() asyncTemporarily suspends the analysis operation while maintaining the current state. This is useful for scenarios where analysis needs to be temporarily halted, such as when the app enters the background.
resume() asyncContinues a previously paused analysis operation. This method restores the analyzer to its active state and resumes processing frames.
restart() async throwsStarts a new analysis operation. This method resets the analyzer to its initial state and resumes processing frames.
end() asyncEnds the analysis operation. This is used when analysis needs to be stopped, such as when the cancel button is pressed.
result() async -> ScanningResultRetrieves the final result of the analysis operation. This method returns a ScanningResult object containing the analysis outcome.
events: EventStreamProvides access to a stream of UI events generated during the analysis process. This stream can be used to update the user interface based on analysis progress and findings.
We strongly recommend using our
BlinkIDAnalyzerfor seamless integration. However, you can create your own custom implementation as long as it conforms to theCameraFrameAnalyzerprotocol.
Once the ViewModel is set up and configured, the next step is to create a SwiftUI view that interacts with it. The ViewModel serves as the central point for managing the document scanning workflow, including handling events, processing results, and updating the UI state. By linking the ViewModel to your view, you can create a dynamic and responsive interface that provides real-time feedback to users. In this section, we will demonstrate how to build a SwiftUI view using the ViewModel, ensuring seamless integration with the underlying document scanning components.
Start by creating new SwiftUI View called CaptureView.
struct CaptureView: View {
    @ObservedObject private var viewModel: ViewModel

    init(viewModel: ViewModel) {
        self.viewModel = viewModel
    }
}
We need to add CameraView to our body:
var body: some View {
    GeometryReader { geometry in
    ZStack {
        CameraView(camera: viewModel.camera)
            .ignoresSafeArea()
            .statusBarHidden()
            .task {
                await viewModel.camera.start()
                await viewModel.analyze()
            }
            .onDisappear {
                viewModel.stopEventHandling()
                Task {
                    await viewModel.camera.stop()
                }
            }
        }
    }
}
The camera feed is displayed using CameraView, which is tightly integrated with the ViewModel’s camera property. The .task modifier ensures that the camera starts and begins analysis as soon as the view appears, and proper cleanup is handled in onDisappear to stop the camera and event handling gracefully.
We also need to add some instuction view to our ZStack that will connect our ViewModel's instructionText:
VStack {
    Spacer()

    // Text is in the middle of the screen
    Text(viewModel.instructionText)
        .font(.system(size: 20))
        .foregroundColor(Color.white)
        .padding()
        .background(Color.gray)
        .clipShape(.capsule)

    Spacer()
}In this section, we will demonstrate how to establish the connection between the ViewModel and the View to facilitate a seamless document scanning workflow:
let analyzer = await BlinkIDAnalyzer(
    sdk: localSdk,
    eventStream: BlinkIDEventStream()
)

let viewModel = ViewModel(analyzer: analyzer)
In your SwiftUI View, add CaptureView:
struct ContentView: View {
    var body: some View {
        CaptureView(viewModel: viewModel)
    }
}
And that's it! You have created a custom SwiftUI View and ViewModel!
Our app supports localization following Apple’s recommended approach. We provide a Localizable.xcstrings file that you can use or modify as needed. Localization is determined by the system settings, meaning you must define
supported languages in your app’s Info.plist under the Localizations key, ensuring all required keys are included. Once configured, users can change the app’s language via Settings > [App Name] > Language. Note that in-app
language switching is not supported, as we adhere to Apple’s intended localization flow.
In case of problems with using the SDK, you should do as follows:
If you are getting "invalid licence key" error or having other licence-related problems (e.g. some feature is not enabled that should be or there is a watermark on top of camera), first check the console. All licence-related problems are logged to error log so it is easy to determine what went wrong.
When you have determine what is the licence-relate problem or you simply do not understand the log, you should contact us help.microblink.com. When contacting us, please make sure you provide following information:
- exact Bundle ID of your app (from your
info.plistfile) - licence that is causing problems
- please stress out that you are reporting problem related to iOS version of BlinkID SDK
- if unsure about the problem, you should also provide excerpt from console containing licence error
If you are having problems with scanning certain items, undesired behaviour on specific device(s), crashes inside BlinkID SDK or anything unmentioned, please do as follows:
- Contact us at help.microblink.com describing your problem and provide following information:
- log file obtained in previous step
- high resolution scan/photo of the item that you are trying to scan
- information about device that you are using
- please stress out that you are reporting problem related to iOS version of BlinkID SDK
BlinkID is really lightweight SDK. Compressed size is just 2.1MB. SDK size calculation is done by creating an App Size Report with Xcode, one with and one without the SDK. Here is the SDK App Size Report for iPhone:
| Size | App + On Demand Resources size | App size |
|---|---|---|
| compressed | 2.4 MB | 2,4 MB |
| uncompressed | 5,5 MB | 5,5 MB |
The uncompressed size is equivalent to the size of the installed app on the device, and the compressed size is the download size of your app. You can find the App Size Report here.
Complete API references can be found:
For Tasks:
Click tags to check more tools for each tasksFor Jobs:
Alternative AI tools for blinkid-ios
Similar Open Source Tools

blinkid-ios
BlinkID iOS is a mobile SDK that enables developers to easily integrate ID scanning and data extraction capabilities into their iOS applications. The SDK supports scanning and processing various types of identity documents, such as passports, driver's licenses, and ID cards. It provides accurate and fast data extraction, including personal information and document details. With BlinkID iOS, developers can enhance their apps with secure and reliable ID verification functionality, improving user experience and streamlining identity verification processes.
blinkid-android
The BlinkID Android SDK is a comprehensive solution for implementing secure document scanning and extraction. It offers powerful capabilities for extracting data from a wide range of identification documents. The SDK provides features for integrating document scanning into Android apps, including camera requirements, SDK resource pre-bundling, customizing the UX, changing default strings and localization, troubleshooting integration difficulties, and using the SDK through various methods. It also offers options for completely custom UX with low-level API integration. The SDK size is optimized for different processor architectures, and API documentation is available for reference. For any questions or support, users can contact the Microblink team at help.microblink.com.
cortex
Cortex is a tool that simplifies and accelerates the process of creating applications utilizing modern AI models like chatGPT and GPT-4. It provides a structured interface (GraphQL or REST) to a prompt execution environment, enabling complex augmented prompting and abstracting away model connection complexities like input chunking, rate limiting, output formatting, caching, and error handling. Cortex offers a solution to challenges faced when using AI models, providing a simple package for interacting with NL AI models.
probsem
ProbSem is a repository that provides a framework to leverage large language models (LLMs) for assigning context-conditional probability distributions over queried strings. It supports OpenAI engines and HuggingFace CausalLM models, and is flexible for research applications in linguistics, cognitive science, program synthesis, and NLP. Users can define prompts, contexts, and queries to derive probability distributions over possible completions, enabling tasks like cloze completion, multiple-choice QA, semantic parsing, and code completion. The repository offers CLI and API interfaces for evaluation, with options to customize models, normalize scores, and adjust temperature for probability distributions.
ai2-scholarqa-lib
Ai2 Scholar QA is a system for answering scientific queries and literature review by gathering evidence from multiple documents across a corpus and synthesizing an organized report with evidence for each claim. It consists of a retrieval component and a three-step generator pipeline. The retrieval component fetches relevant evidence passages using the Semantic Scholar public API and reranks them. The generator pipeline includes quote extraction, planning and clustering, and summary generation. The system is powered by the ScholarQA class, which includes components like PaperFinder and MultiStepQAPipeline. It requires environment variables for Semantic Scholar API and LLMs, and can be run as local docker containers or embedded into another application as a Python package.
SpeziLLM
The Spezi LLM Swift Package includes modules that help integrate LLM-related functionality in applications. It provides tools for local LLM execution, usage of remote OpenAI-based LLMs, and LLMs running on Fog node resources within the local network. The package contains targets like SpeziLLM, SpeziLLMLocal, SpeziLLMLocalDownload, SpeziLLMOpenAI, and SpeziLLMFog for different LLM functionalities. Users can configure and interact with local LLMs, OpenAI LLMs, and Fog LLMs using the provided APIs and platforms within the Spezi ecosystem.
nextjs-openai-doc-search
This starter project is designed to process `.mdx` files in the `pages` directory to use as custom context within OpenAI Text Completion prompts. It involves building a custom ChatGPT style doc search powered by Next.js, OpenAI, and Supabase. The project includes steps for pre-processing knowledge base, storing embeddings in Postgres, performing vector similarity search, and injecting content into OpenAI GPT-3 text completion prompt.
LLM-Finetuning-Toolkit
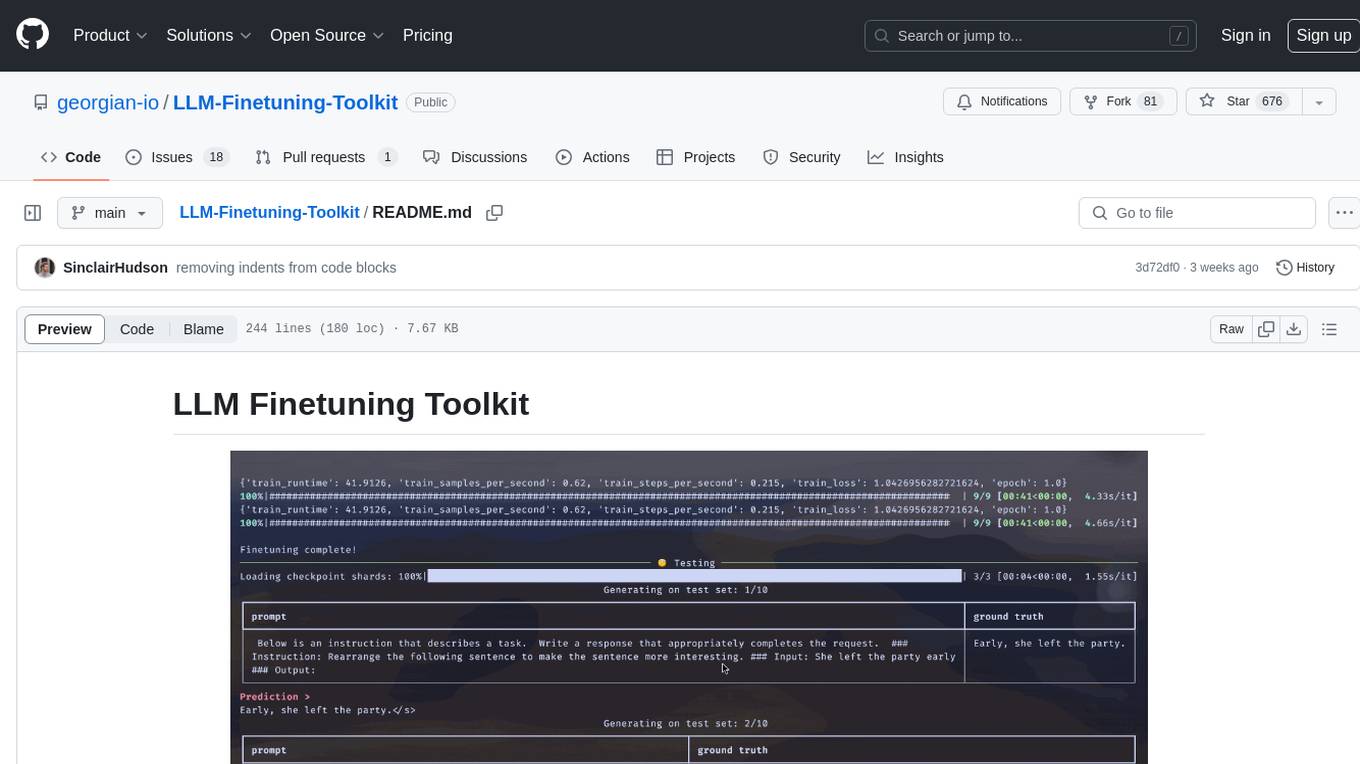
LLM Finetuning toolkit is a config-based CLI tool for launching a series of LLM fine-tuning experiments on your data and gathering their results. It allows users to control all elements of a typical experimentation pipeline - prompts, open-source LLMs, optimization strategy, and LLM testing - through a single YAML configuration file. The toolkit supports basic, intermediate, and advanced usage scenarios, enabling users to run custom experiments, conduct ablation studies, and automate fine-tuning workflows. It provides features for data ingestion, model definition, training, inference, quality assurance, and artifact outputs, making it a comprehensive tool for fine-tuning large language models.
resonance
Resonance is a framework designed to facilitate interoperability and messaging between services in your infrastructure and beyond. It provides AI capabilities and takes full advantage of asynchronous PHP, built on top of Swoole. With Resonance, you can: * Chat with Open-Source LLMs: Create prompt controllers to directly answer user's prompts. LLM takes care of determining user's intention, so you can focus on taking appropriate action. * Asynchronous Where it Matters: Respond asynchronously to incoming RPC or WebSocket messages (or both combined) with little overhead. You can set up all the asynchronous features using attributes. No elaborate configuration is needed. * Simple Things Remain Simple: Writing HTTP controllers is similar to how it's done in the synchronous code. Controllers have new exciting features that take advantage of the asynchronous environment. * Consistency is Key: You can keep the same approach to writing software no matter the size of your project. There are no growing central configuration files or service dependencies registries. Every relation between code modules is local to those modules. * Promises in PHP: Resonance provides a partial implementation of Promise/A+ spec to handle various asynchronous tasks. * GraphQL Out of the Box: You can build elaborate GraphQL schemas by using just the PHP attributes. Resonance takes care of reusing SQL queries and optimizing the resources' usage. All fields can be resolved asynchronously.
CogAgent
CogAgent is an advanced intelligent agent model designed for automating operations on graphical interfaces across various computing devices. It supports platforms like Windows, macOS, and Android, enabling users to issue commands, capture device screenshots, and perform automated operations. The model requires a minimum of 29GB of GPU memory for inference at BF16 precision and offers capabilities for executing tasks like sending Christmas greetings and sending emails. Users can interact with the model by providing task descriptions, platform specifications, and desired output formats.
bedrock-claude-chat
This repository is a sample chatbot using the Anthropic company's LLM Claude, one of the foundational models provided by Amazon Bedrock for generative AI. It allows users to have basic conversations with the chatbot, personalize it with their own instructions and external knowledge, and analyze usage for each user/bot on the administrator dashboard. The chatbot supports various languages, including English, Japanese, Korean, Chinese, French, German, and Spanish. Deployment is straightforward and can be done via the command line or by using AWS CDK. The architecture is built on AWS managed services, eliminating the need for infrastructure management and ensuring scalability, reliability, and security.
codellm-devkit
Codellm-devkit (CLDK) is a Python library that serves as a multilingual program analysis framework bridging traditional static analysis tools and Large Language Models (LLMs) specialized for code (CodeLLMs). It simplifies the process of analyzing codebases across multiple programming languages, enabling the extraction of meaningful insights and facilitating LLM-based code analysis. The library provides a unified interface for integrating outputs from various analysis tools and preparing them for effective use by CodeLLMs. Codellm-devkit aims to enable the development and experimentation of robust analysis pipelines that combine traditional program analysis tools and CodeLLMs, reducing friction in multi-language code analysis and ensuring compatibility across different tools and LLM platforms. It is designed to seamlessly integrate with popular analysis tools like WALA, Tree-sitter, LLVM, and CodeQL, acting as a crucial intermediary layer for efficient communication between these tools and CodeLLMs. The project is continuously evolving to include new tools and frameworks, maintaining its versatility for code analysis and LLM integration.
promptwright
Promptwright is a Python library designed for generating large synthetic datasets using local LLM and various LLM service providers. It offers flexible interfaces for generating prompt-led synthetic datasets. The library supports multiple providers, configurable instructions and prompts, YAML configuration, command line interface, push to Hugging Face Hub, and system message control. Users can define generation tasks using YAML configuration files or programmatically using Python code. Promptwright integrates with LiteLLM for LLM providers and supports automatic dataset upload to Hugging Face Hub. The library is not responsible for the content generated by models and advises users to review the data before using it in production environments.
promptwright
Promptwright is a Python library designed for generating large synthetic datasets using a local LLM and various LLM service providers. It offers flexible interfaces for generating prompt-led synthetic datasets. The library supports multiple providers, configurable instructions and prompts, YAML configuration for tasks, command line interface for running tasks, push to Hugging Face Hub for dataset upload, and system message control. Users can define generation tasks using YAML configuration or Python code. Promptwright integrates with LiteLLM to interface with LLM providers and supports automatic dataset upload to Hugging Face Hub.
Trace
Trace is a new AutoDiff-like tool for training AI systems end-to-end with general feedback. It generalizes the back-propagation algorithm by capturing and propagating an AI system's execution trace. Implemented as a PyTorch-like Python library, users can write Python code directly and use Trace primitives to optimize certain parts, similar to training neural networks.

ash_ai
Ash AI is a tool that provides a Model Context Protocol (MCP) server for exposing tool definitions to an MCP client. It allows for the installation of dev and production MCP servers, and supports features like OAuth2 flow with AshAuthentication, tool data access, tool execution callbacks, prompt-backed actions, and vectorization strategies. Users can also generate a chat feature for their Ash & Phoenix application using `ash_oban` and `ash_postgres`, and specify LLM API keys for OpenAI. The tool is designed to help developers experiment with tools and actions, monitor tool execution, and expose actions as tool calls.
For similar tasks
MiniAI-Face-Recognition-LivenessDetection-ServerSDK
The MiniAiLive Face Recognition LivenessDetection Server SDK provides system integrators with fast, flexible, and extremely precise facial recognition that can be deployed across various scenarios, including security, access control, public safety, fintech, smart retail, and home protection. The SDK is fully on-premise, meaning all processing happens on the hosting server, and no data leaves the server. The project structure includes bin, cpp, flask, model, python, test_image, and Dockerfile directories. To set up the project on Linux, download the repo, install system dependencies, and copy libraries into the system folder. For Windows, contact MiniAiLive via email. The C++ example involves replacing the license key in main.cpp, building the project, and running it. The Python example requires installing dependencies and running the project. The Python Flask example involves replacing the license key in app.py, installing dependencies, and running the project. The Docker Flask example includes building the docker image and running it. To request a license, contact MiniAiLive. Contributions to the project are welcome by following specific steps. An online demo is available at https://demo.miniai.live. Related products include MiniAI-Face-Recognition-LivenessDetection-AndroidSDK, MiniAI-Face-Recognition-LivenessDetection-iOS-SDK, MiniAI-Face-LivenessDetection-AndroidSDK, MiniAI-Face-LivenessDetection-iOS-SDK, MiniAI-Face-Matching-AndroidSDK, and MiniAI-Face-Matching-iOS-SDK. MiniAiLive is a leading AI solutions company specializing in computer vision and machine learning technologies.

MiniAI-Face-LivenessDetection-AndroidSDK
The MiniAiLive Face Liveness Detection Android SDK provides advanced computer vision techniques to enhance security and accuracy on Android platforms. It offers 3D Passive Face Liveness Detection capabilities, ensuring that users are physically present and not using spoofing methods to access applications or services. The SDK is fully on-premise, with all processing happening on the hosting server, ensuring data privacy and security.

blinkid-ios
BlinkID iOS is a mobile SDK that enables developers to easily integrate ID scanning and data extraction capabilities into their iOS applications. The SDK supports scanning and processing various types of identity documents, such as passports, driver's licenses, and ID cards. It provides accurate and fast data extraction, including personal information and document details. With BlinkID iOS, developers can enhance their apps with secure and reliable ID verification functionality, improving user experience and streamlining identity verification processes.
cheat-sheet-pdf
The Cheat-Sheet Collection for DevOps, Engineers, IT professionals, and more is a curated list of cheat sheets for various tools and technologies commonly used in the software development and IT industry. It includes cheat sheets for Nginx, Docker, Ansible, Python, Go (Golang), Git, Regular Expressions (Regex), PowerShell, VIM, Jenkins, CI/CD, Kubernetes, Linux, Redis, Slack, Puppet, Google Cloud Developer, AI, Neural Networks, Machine Learning, Deep Learning & Data Science, PostgreSQL, Ajax, AWS, Infrastructure as Code (IaC), System Design, and Cyber Security.
L1B3RT45
L1B3RT45 is a tool designed for jailbreaking all flagship AI models. It is part of the FREEAI project and is named LIBERTAS. Users can join the BASI Discord community for support. The tool was created with love by Pliny the Prompter.
card-scanner-flutter
Card Scanner Flutter is a fast, accurate, and secure plugin for Flutter that allows users to scan debit and credit cards offline. It can scan card details such as the card number, expiry date, card holder name, and card issuer. Powered by Google's Machine Learning models, the plugin offers great performance and accuracy. Users can control parameters for speed and accuracy balance and benefit from an intuitive API. Suitable for various jobs such as mobile app developer, fintech product manager, software engineer, data scientist, and UI/UX designer. AI keywords include card scanner, flutter plugin, debit card, credit card, machine learning. Users can use this tool to scan cards, verify card details, extract card information, validate card numbers, and enhance security.
AwesomeLLM4APR
Awesome LLM for APR is a repository dedicated to exploring the capabilities of Large Language Models (LLMs) in Automated Program Repair (APR). It provides a comprehensive collection of research papers, tools, and resources related to using LLMs for various scenarios such as repairing semantic bugs, security vulnerabilities, syntax errors, programming problems, static warnings, self-debugging, type errors, web UI tests, smart contracts, hardware bugs, performance bugs, API misuses, crash bugs, test case repairs, formal proofs, GitHub issues, code reviews, motion planners, human studies, and patch correctness assessments. The repository serves as a valuable reference for researchers and practitioners interested in leveraging LLMs for automated program repair.
ai_automation_suggester
An integration for Home Assistant that leverages AI models to understand your unique home environment and propose intelligent automations. By analyzing your entities, devices, areas, and existing automations, the AI Automation Suggester helps you discover new, context-aware use cases you might not have considered, ultimately streamlining your home management and improving efficiency, comfort, and convenience. The tool acts as a personal automation consultant, providing actionable YAML-based automations that can save energy, improve security, enhance comfort, and reduce manual intervention. It turns the complexity of a large Home Assistant environment into actionable insights and tangible benefits.
For similar jobs

carrot
The 'carrot' repository on GitHub provides a list of free and user-friendly ChatGPT mirror sites for easy access. The repository includes sponsored sites offering various GPT models and services. Users can find and share sites, report errors, and access stable and recommended sites for ChatGPT usage. The repository also includes a detailed list of ChatGPT sites, their features, and accessibility options, making it a valuable resource for ChatGPT users seeking free and unlimited GPT services.
superflows
Superflows is an open-source alternative to OpenAI's Assistant API. It allows developers to easily add an AI assistant to their software products, enabling users to ask questions in natural language and receive answers or have tasks completed by making API calls. Superflows can analyze data, create plots, answer questions based on static knowledge, and even write code. It features a developer dashboard for configuration and testing, stateful streaming API, UI components, and support for multiple LLMs. Superflows can be set up in the cloud or self-hosted, and it provides comprehensive documentation and support.
py-gpt
Py-GPT is a Python library that provides an easy-to-use interface for OpenAI's GPT-3 API. It allows users to interact with the powerful GPT-3 model for various natural language processing tasks. With Py-GPT, developers can quickly integrate GPT-3 capabilities into their applications, enabling them to generate text, answer questions, and more with just a few lines of code.
openssa
OpenSSA is an open-source framework for creating efficient, domain-specific AI agents. It enables the development of Small Specialist Agents (SSAs) that solve complex problems in specific domains. SSAs tackle multi-step problems that require planning and reasoning beyond traditional language models. They apply OODA for deliberative reasoning (OODAR) and iterative, hierarchical task planning (HTP). This "System-2 Intelligence" breaks down complex tasks into manageable steps. SSAs make informed decisions based on domain-specific knowledge. With OpenSSA, users can create agents that process, generate, and reason about information, making them more effective and efficient in solving real-world challenges.
tiledesk
Tiledesk is an Open Source Live Chat platform with integrated Chatbots written in NodeJs and Express. It provides a multi-channel platform for Web, Android, and iOS, offering out-of-the-box chatbots that work alongside humans. Users can automate conversations using native chatbot technology powered by AI, connect applications via APIs or Webhooks, deploy visual applications within conversations, and enable applications to interact with chatbots or end-users. Tiledesk is multichannel, allowing chatbot scripts with images and buttons to run on various channels like Whatsapp, Facebook Messenger, and Telegram. The project includes Tiledesk Server, Dashboard, Design Studio, Chat21 ionic, Web Widget, Server, Http Server, MongoDB, and a proxy. It offers Helm charts for Kubernetes deployment, but customization is recommended for production environments, such as integrating with external MongoDB or monitoring/logging tools. Enterprise customers can request private Docker images by contacting [email protected].
concierge
Concierge is a versatile automation tool designed to streamline repetitive tasks and workflows. It provides a user-friendly interface for creating custom automation scripts without the need for extensive coding knowledge. With Concierge, users can automate various tasks across different platforms and applications, increasing efficiency and productivity. The tool offers a wide range of pre-built automation templates and allows users to customize and schedule their automation processes. Concierge is suitable for individuals and businesses looking to automate routine tasks and improve overall workflow efficiency.

blinkid-ios
BlinkID iOS is a mobile SDK that enables developers to easily integrate ID scanning and data extraction capabilities into their iOS applications. The SDK supports scanning and processing various types of identity documents, such as passports, driver's licenses, and ID cards. It provides accurate and fast data extraction, including personal information and document details. With BlinkID iOS, developers can enhance their apps with secure and reliable ID verification functionality, improving user experience and streamlining identity verification processes.
chatbox
Chatbox is a desktop client for ChatGPT, Claude, and other LLMs, providing a user-friendly interface for AI copilot assistance on Windows, Mac, and Linux. It offers features like local data storage, multiple LLM provider support, image generation with Dall-E-3, enhanced prompting, keyboard shortcuts, and more. Users can collaborate, access the tool on various platforms, and enjoy multilingual support. Chatbox is constantly evolving with new features to enhance the user experience.

