
blinkid-android
Everything you need to add AI-driven ID scanning into your native Android app.
Stars: 453
The BlinkID Android SDK is a comprehensive solution for implementing secure document scanning and extraction. It offers powerful capabilities for extracting data from a wide range of identification documents. The SDK provides features for integrating document scanning into Android apps, including camera requirements, SDK resource pre-bundling, customizing the UX, changing default strings and localization, troubleshooting integration difficulties, and using the SDK through various methods. It also offers options for completely custom UX with low-level API integration. The SDK size is optimized for different processor architectures, and API documentation is available for reference. For any questions or support, users can contact the Microblink team at help.microblink.com.
README:
![]()
The BlinkID Android SDK is a comprehensive solution for implementing secure document scanning and extraction. It offers powerful capabilities for extracting data from a wide range of identification documents.
- Quick Start
- Device requirements
- Pre-bundling the SDK resources in your app
- Customizing the look and UX
- Changing default strings and localization
- Using SDK through
BlinkIdScanActivity - Completely custom UX (advanced)
- Troubleshooting
- Additional info
- Open Android Studio.
- In
Quick Startdialog choose Open project. - In
Filedialog select BlinkID folder. - Wait for the project to load. If Android Studio asks you to reload the project on startup, select
Yes.
- app demonstrates quick and straightforward integration of the BlinkID SDK using the provided UX in Jetpack Compose to scan a document and display the results.
The BlinkID library is available on Maven Central repository.
In your project root, add mavenCentral() repository to the repositories list, if not already present:
repositories {
    // ... other repositories
    mavenCentral()
}
Add BlinkID as a dependency in module level build.gradle(.kts):
dependencies {
    implementation("com.microblink:blinkid-ux:7.0.0")
}
-
A valid license key is required to initialize the document capture process. You can request a free trial license key, after you register, at Microblink Developer Hub.. License is bound to the application ID of your app, so please ensure you enter the correct application ID when asked.
-
You first need to initialize the SDK and obtain the
BlinkIdSdkinstance:
val maybeInstance = BlinkIdSdk.initializeSdk(
    BlinkIdSdkSettings(
        licenseKey = <your_license_key>,
    )
)
when {
    maybeInstance.isSuccess -> {
        val sdkInstance = maybeInstance.getOrNull()
        // use the SDK instance
    }

    maybeInstance.isFailure -> {
        val exception = maybeInstance.exceptionOrNull()
        Log.e(TAG, "Initialization failed", exception)
    }
}
BlinkIdSdk.initializeSdk is a suspend function which should be called from a coroutine.
- Use
BlinkIdCameraScanningScreencomposable to the scanning UX and obtain results:
BlinkIdCameraScanningScreen(
    sdkInstance,
    uiSettings = UiSettings(),
    sessionSettings = BlinkIdSessionSettings(),
    onScanningSuccess = { scanningResult ->
        // scanningResult is BlinkIdScanningResult
    },
    onScanningCanceled = {
        // user canceled the scanning
    }
)After the document scanning session is finished the SDK returns an object of type BlinkIdScanningResult. The object contains extraction process details, document class info, and extraction results. Results are separated into general results and section results. General results are a combined set from each entry with the individual data points taken from the most reliable data source (Barcode > MRZ > Visual).
Section results are separated by document side and by data source (Barcode, MRZ, Visual). Each of these individual data sources are available if present on the document (and allowed through scanning settings).
BlinkID SDK requires Android API level 24 or newer.
To perform successful scans, the camera preview resolution must be at least 1080p. Note that the camera preview resolution is not the same as the video recording resolution.
BlinkID SDK is distributed with ARMv7 and ARM64 native library binaries.
_BlinkID is a native library written in C++ and available for multiple platforms. Because of this, BlinkID cannot work on devices with obscure hardware architectures. We have compiled SDK's native code only for the most popular Android ABIs.
If you are combining BlinkID library with other libraries that contain native code in your application, make sure to match the architectures of all native libraries. For example, if the third-party library has only ARMv7 version, you must use exactly ARMv7 version of BlinkID with that library, but not ARM64. Using different architectures will crash your app at the initialization step because JVM will try to load all its native dependencies in the same preferred architecture and fail with UnsatisfiedLinkError.
To avoid this issue and ensure that only architectures supported by the BlinkID library are packaged in the final application, add the following statement to your android/defaultConfig block inside build.gradle.kts:
android {
    ...
    defaultConfig {
        ...
        ndk {
            // Tells Gradle to package the following ABIs into your application
            abiFilters += listOf("armeabi-v7a", "arm64-v8a")
        }
    }
}
If you want to reduce the SDK startup time and network traffic, you have option to pre-bundle the SDK resources as assets into your application. All required resources are located in libs/resources/assets/microblink/blinkid folder. You can bundle it to your application by including the mentioned folder to application's assets. Copy mentioned libs/resources/assets/microblink directory to src/main/assets folder of your application module (or appropriate folder for desired app flavor).
Use BlinkIdSdkSettings to set the following options when instantiating the SDK:
BlinkIdSdkSettings(
    context = context,
    licenseKey = <your_license_key>,
    // disable resource download
    downloadResources = false,
    // define path if you are not using a default one: "microblink/blinkid"
    // resourceLocalFolder = "path_within_app_assets"
)You can use basic customization options in our default BlinkIdCameraScanningScreen composable:
BlinkIdCameraScanningScreen(
    sdkInstance,
    // ui settings options
    uiSettings = UiSettings(
        typography = yourTypography,
        colorScheme = yourColorScheme,
        uiColors = youReticleColors,
        sdkStrings = yourSdkStrings,
        showOnboardingDialog = true, // or false
        showHelpButton = true // or false
    ),
    sessionSettings = BlinkIdSessionSettings(),
    onScanningSuccess = { scanningResult ->
        // result is BlinkIdScanningResult
    },
    onScanningCanceled = {
        // user canceled the scanning
    }
)
For a complete reference on available customization options, see UiSettings API docs.
It is possible to use completely custom UI elements by implementing your own Composable.
Create your implementation of scanning ViewModel (which must be a subclass of our CameraViewModel) to handle UX events that come from our SDK:
class YourBlinkIdScanningUxViewModel(
    blinkIdSdkInstance: BlinkIdSdk,
    sessionSettings: ScanningSessionSettings
) : CameraViewModel() {

    val imageAnalyzer = BlinkIdAnalyzer(
        blinkIdSdk = blinkIdSdkInstance,
        sessionSettings = sessionSettings,
        scanningDoneHandler = object : BlinkIdScanningDoneHandler {
            override fun onScanningFinished(result: BlinkIdScanningResult) {
                // TODO use scanning result
            }

            override fun onScanningCancelled() {
                // user cancelled the scanning
            }

            override fun onError(error: ErrorReason) {
                // handle scanning errors
            }
        },
        uxEventHandler = object : ScanningUxEventHandler {
            override fun onUxEvents(events: List<ScanningUxEvent>) {
                // handle scanning UX events to update UI state
                for (event in events) {
                    when (event) {
                        is ScanningUxEvent.ScanningDone -> {
                            // TODO
                        }

                        is ScanningUxEvent.DocumentNotFound -> {
                            // TODO
                        }

                        is ScanningUxEvent.DocumentNotFullyVisible -> {
                            // TODO
                        }

                        is ScanningUxEvent.DocumentTooClose -> {
                            // TODO
                        }

                        is BlinkIdDocumentLocatedLocation -> {
                            // TODO
                        }

                        is DocumentImageAnalysisResult -> {
                            // TODO
                        }

                        // TODO ... handle other events, when must be exhaustive, omitted for brevity

                    }
                }
            }
        }
    )

    override fun analyzeImage(image: ImageProxy) {
        // image has to be closed after processing
        image.use {
            imageAnalyzer?.analyze(it)
        }
    }

     override fun onCleared() {
        super.onCleared()
        // cancel and close image analyzer when view model is cleared
        imageAnalyzer.cancel()
        imageAnalyzer.close()
    }
}
Implement your camera scanning screen Composable by using our CameraScreen Composable which is responsible for camera management:
@Composable
fun YourCameraScanningScreen(
    viewModel: YourBlinkIdScanningUxViewModel
    //... other required parameters for your UI
) {
    // ...
    CameraScreen(
        cameraViewModel = viewModel,
    ) {
        // TODO your camera overlay Compose content
    }

}For larger control over the UX, you can use the open-source blinkid-ux and microblink-ux libraries and perform certain modifications. Only the source files that specifically allow for modification by the license header can be modified.
To do so, you can include the source code of our library directly in your application.
They are located in libs/sources/blinkid-ux and libs/sources/microblink-ux modules.
Please keep in mind that we will regularly make changes and update the source code with each release.
Strings used within built-in activities and UX can be localized to any language.
We have already prepared strings for several languages which you can use out of the box. You can also modify those strings, or you can add your own language. Languages natively supported by our SDK are the following: Arabic, Chinese simplified, Chinese traditional, Croatian, Czech, Dutch, Filipino, French, German, Hebrew, Hungarian, Indonesian, Italian, Malay, Portugese, Romanian, Serbian, Slovak, Slovenian, Spanish, Thai, and Vietnamese.
The language is automatically adapted to the user's OS language settings. Additionally, to force a specific language, you have to enable it from the code.
BlinkID can easily be translated to other languages. The res folder in microblink-ux has folder values which contains strings_core.xml - this file contains english strings. In order to make e.g. croatian translation, create a folder values-hr in your project and put the copy of strings_core.xml inside it. Then, open that file and translate the strings from English into Croatian.
To modify an existing string, the best approach would be to:
- Choose a language you want to modify. For example Croatian ('hr').
- Find
strings_core.xmlin folderres/values-hr - Choose a string key which you want to change. For example:
<string name="mb_close">Close</string> - In your project create a file
strings_core.xmlin the folderres/values-hr, if it doesn't already exist - Create an entry in the file with the value for the string which you want. For example:
<string name="mb_back">Zatvori</string> - Repeat for all the string you wish to change
You can modify strings and add another language. For more information on how localization works in Android, check out the official Android documentation.
You can define string resources that will be used instead of predefined ones by using the custom SdkStrings while creating the UiSettings.
The simplest way of using BlinkID SDK is through our integrated activity. This eliminates the need for Compose integration and allows for quick and easy access to results. By using this integration method customization is reduced, although many UI elements can still be customized.
Activity is accessed through rememberLauncherForActivityResult by using MbBlinkIdScan contract.
    val blinkIdLauncher = rememberLauncherForActivityResult(
        contract = MbBlinkIdScan(),
        onResult = { activityResult ->
            if (activityResult.status == BlinkIdScanActivityResultStatus.DocumentScanned) {
                // use activityResult.result (BlinkIdScanningResult)
            }
        }
    )
When launching the contract, BlinkIdScanActivitySettings need to be defined. These settings include basic SDK information such as license key and additional settings for customizing the scanning experience.
    blinkIdLauncher.launch(
        BlinkIdScanActivitySettings(
            BlinkIdSdkSettings(
                licenseKey = <your_license_key>
            ),
            BlinkIdSessionSettings(
                scanningSettings = ScanningSettings(
                    // define additional settings here
                )
            )
        )
    )
BlinkIdScanActivitySettings contain the following:
    data class BlinkIdScanActivitySettings(
        val blinkIdSdkSettings: BlinkIdSdkSettings,
        val scanningSessionSettings: BlinkIdSessionSettings = BlinkIdSessionSettings(),
        val uxSettings: BlinkIdUxSettings = BlinkIdUxSettings(),
        val scanActivityUiColors: BlinkIdActivityColors? = null,
        val scanActivityUiStrings: SdkStrings = SdkStrings.Default,
        val showOnboardingDialog: Boolean = DefaultShowOnboardingDialog,
        val showHelpButton: Boolean = DefaultShowHelpButton,
        val enableEdgeToEdge: Boolean = true,
        val deleteCachedAssetsAfterUse: Boolean = false
    )
Most customizations regarding the UI are handled in the same way as with the Composable component. The only difference is a limitation in customizing Typography and Colors.
Currently, Typography cannot be customized through an activity.
While Colors are fully customizable, the client needs to make sure that Dark and Light themes follow the current system state. In the Compose implementation, this is handled directly by the SDK.
When using the low-level API, you are responsible for preparing the input image stream (or static images) for analysis as well as building a completely custom UX from scratch based on the image-by-image feedback from the SDK.
Low-level API gives you more flexibility with the cost of a significantly larger integration effort. For example, if you need a camera, you will be responsible for camera management and displaying real-time user guidance.
For low-level API integration, only BlinkID SDK core library: blinkid-core is needed.
Both blinkid-ux and microblink-ux are not needed.
In your project root, add mavenCentral() repository to the repositories list, if not already present:
repositories {
    // ... other repositories
    mavenCentral()
}
Add blinkid-core library as a dependency in module level build.gradle(.kts):
dependencies {
    implementation("com.microblink:blinkid-core:7.0.0")
}
BlinkIdSdk is a singleton that is main entry point to the BlinkID SDK. It manages the global state of the SDK. This involves managing the main processing, unlocking the SDK, ensuring that licence check is up-to-date, downloading resources, and performing all necessary synchronization for the processing operations.
Once you obtain an instance of the BlinkIdSdk class after the SDK initialization is completed, you can use it to start a document capture session.
BlinkIdScanningSession is the main object that accepts images and camera frames, processes them and returns frame-by-frame results, and final result when it becomes available.
- First initialize the SDK to obtain
BlinkIdSdkinstance by callingBlinkIdSdk.initializeSdksuspend function from a Coroutine:
val maybeInstance = BlinkIdSdk.initializeSdk(
    BlinkIdSdkSettings(
        context = context,
        licenseKey = "your_license_key",
    )
)
when {
    maybeInstance.isSuccess -> {
        val sdkInstance = maybeInstance.getOrNull()
        // use the SDK instance
    }

    maybeInstance.isFailure -> {
        val exception = maybeInstance.exceptionOrNull()
        Log.e(TAG, "Initialization failed", exception)
    }
}- Create
BlinkIdScanningSessionby calling suspend functionBlinkIdSdk.createScanningSession(BlinkIdSessionSettings)
val scanningSession = blinkIdSdk.createScanningSession(BlinkIdSessionSettings(
    // use InputImageSource.Video to analyze stream of images, if you have few
    // images (e.g. from gallery) use InputImageSource.Photo
    inputImageSource = InputImageSource.Video,
    // update other options if required
))- To process each image (camera frame) that comes to the recognition, call the suspend function
BlinkIdScanningSession.process(InputImage): BlinkIdProcessResult
val processResult = scanningSesionSession.process(inputImage)There are helper methods for creating InputImage from android.media.Image, androidx.camera.core.ImageProxy and standard Android Bitmap.
Processing of the single frame returns ProcessResult which contains:
- Detailed analysis of the input image, including various detection statuses and potential issues that should be used for frame-by-frame UX updates.
- Completeness status of the overall process.
You should keep calling the process function until the result completeness indicates that the result is complete, but you could have custom logic for cancellation and timeouts.
If after analysis of some image completeness status of BlinkIdProcessResult indicates that document capture is complete, only then you should get the final result from the ScanningSession:
if (processResult.resultCompleteness.isComplete()) {
    val captureResult = session.getResult()
    // do something with the final result
}
You will get BlinkIdScanningResult with extraction results.
After scanning is completed, it is important to terminate the scanning session
To terminate the scanning session, ensure that BlinkIdScanningSession.close() is called.
If you are finished with the SDK processing, terminate the SDK to free up resources by invoking BlinkIdSdk.closeAndDeleteCachedAssets() on the SDK instance. If you just wish to close the SDK but may need to use it and the future, you can eliminate the need for re-downloading the resources by calling BlinkId.close().
In case of problems with SDK integration, make sure that you have followed integration instructions and device requirements. If you're still having problems, please contact us at help.microblink.com describing your problem and provide the following information:
- high-resolution scan/photo of the item that you are trying to read
- information about device that you are using - we need the exact model name of the device. You can obtain that information with any app like this one
- please stress that you are reporting a problem related to the Android version of BlinkID SDK
We recommend that you distribute your app using App Bundle. This will defer APK generation to Google Play, allowing it to generate minimal APK for each specific device that downloads your app, including only required processor architecture support.
Here is the SDK size, calculated for supported ABIs:
| ABI | Download size | Install size |
|---|---|---|
| armeabi-v7a | 2.72 MB | 3.89 MB |
| arm64-v8a | 2.78 MB | 4.58 MB |
SDK size is calculated as application size increases when BlinkID SDK is added, with all its dependencies included.
You can find the BlinkID SDK KDoc documentation here.
For any other questions, feel free to contact us at help.microblink.com.
For Tasks:
Click tags to check more tools for each tasksFor Jobs:
Alternative AI tools for blinkid-android
Similar Open Source Tools
blinkid-android
The BlinkID Android SDK is a comprehensive solution for implementing secure document scanning and extraction. It offers powerful capabilities for extracting data from a wide range of identification documents. The SDK provides features for integrating document scanning into Android apps, including camera requirements, SDK resource pre-bundling, customizing the UX, changing default strings and localization, troubleshooting integration difficulties, and using the SDK through various methods. It also offers options for completely custom UX with low-level API integration. The SDK size is optimized for different processor architectures, and API documentation is available for reference. For any questions or support, users can contact the Microblink team at help.microblink.com.
blinkid-ios
BlinkID iOS is a mobile SDK that enables developers to easily integrate ID scanning and data extraction capabilities into their iOS applications. The SDK supports scanning and processing various types of identity documents, such as passports, driver's licenses, and ID cards. It provides accurate and fast data extraction, including personal information and document details. With BlinkID iOS, developers can enhance their apps with secure and reliable ID verification functionality, improving user experience and streamlining identity verification processes.
safety-tooling
This repository, safety-tooling, is designed to be shared across various AI Safety projects. It provides an LLM API with a common interface for OpenAI, Anthropic, and Google models. The aim is to facilitate collaboration among AI Safety researchers, especially those with limited software engineering backgrounds, by offering a platform for contributing to a larger codebase. The repo can be used as a git submodule for easy collaboration and updates. It also supports pip installation for convenience. The repository includes features for installation, secrets management, linting, formatting, Redis configuration, testing, dependency management, inference, finetuning, API usage tracking, and various utilities for data processing and experimentation.
LLMUnity
LLM for Unity enables seamless integration of Large Language Models (LLMs) within the Unity engine, allowing users to create intelligent characters for immersive player interactions. The tool supports major LLM models, runs locally without internet access, offers fast inference on CPU and GPU, and is easy to set up with a single line of code. It is free for both personal and commercial use, tested on Unity 2021 LTS, 2022 LTS, and 2023. Users can build multiple AI characters efficiently, use remote servers for processing, and customize model settings for text generation.
debug-gym
debug-gym is a text-based interactive debugging framework designed for debugging Python programs. It provides an environment where agents can interact with code repositories, use various tools like pdb and grep to investigate and fix bugs, and propose code patches. The framework supports different LLM backends such as OpenAI, Azure OpenAI, and Anthropic. Users can customize tools, manage environment states, and run agents to debug code effectively. debug-gym is modular, extensible, and suitable for interactive debugging tasks in a text-based environment.
web-llm
WebLLM is a modular and customizable javascript package that directly brings language model chats directly onto web browsers with hardware acceleration. Everything runs inside the browser with no server support and is accelerated with WebGPU. WebLLM is fully compatible with OpenAI API. That is, you can use the same OpenAI API on any open source models locally, with functionalities including json-mode, function-calling, streaming, etc. We can bring a lot of fun opportunities to build AI assistants for everyone and enable privacy while enjoying GPU acceleration.

aire
Aire is a modern Laravel form builder with a focus on expressive and beautiful code. It allows easy configuration of form components using fluent method calls or Blade components. Aire supports customization through config files and custom views, data binding with Eloquent models or arrays, method spoofing, CSRF token injection, server-side and client-side validation, and translations. It is designed to run on Laravel 5.8.28 and higher, with support for PHP 7.1 and higher. Aire is actively maintained and under consideration for additional features like read-only plain text, cross-browser support for custom checkboxes and radio buttons, support for Choices.js or similar libraries, improved file input handling, and better support for content prepending or appending to inputs.
ai2-scholarqa-lib
Ai2 Scholar QA is a system for answering scientific queries and literature review by gathering evidence from multiple documents across a corpus and synthesizing an organized report with evidence for each claim. It consists of a retrieval component and a three-step generator pipeline. The retrieval component fetches relevant evidence passages using the Semantic Scholar public API and reranks them. The generator pipeline includes quote extraction, planning and clustering, and summary generation. The system is powered by the ScholarQA class, which includes components like PaperFinder and MultiStepQAPipeline. It requires environment variables for Semantic Scholar API and LLMs, and can be run as local docker containers or embedded into another application as a Python package.
probsem
ProbSem is a repository that provides a framework to leverage large language models (LLMs) for assigning context-conditional probability distributions over queried strings. It supports OpenAI engines and HuggingFace CausalLM models, and is flexible for research applications in linguistics, cognitive science, program synthesis, and NLP. Users can define prompts, contexts, and queries to derive probability distributions over possible completions, enabling tasks like cloze completion, multiple-choice QA, semantic parsing, and code completion. The repository offers CLI and API interfaces for evaluation, with options to customize models, normalize scores, and adjust temperature for probability distributions.
nextjs-openai-doc-search
This starter project is designed to process `.mdx` files in the `pages` directory to use as custom context within OpenAI Text Completion prompts. It involves building a custom ChatGPT style doc search powered by Next.js, OpenAI, and Supabase. The project includes steps for pre-processing knowledge base, storing embeddings in Postgres, performing vector similarity search, and injecting content into OpenAI GPT-3 text completion prompt.
paper-qa
PaperQA is a minimal package for question and answering from PDFs or text files, providing very good answers with in-text citations. It uses OpenAI Embeddings to embed and search documents, and includes a process of embedding docs, queries, searching for top passages, creating summaries, using an LLM to re-score and select relevant summaries, putting summaries into prompt, and generating answers. The tool can be used to answer specific questions related to scientific research by leveraging citations and relevant passages from documents.
ShortcutsBench
ShortcutsBench is a project focused on collecting and analyzing workflows created in the Shortcuts app, providing a dataset of shortcut metadata, source files, and API information. It aims to study the integration of large language models with Apple devices, particularly focusing on the role of shortcuts in enhancing user experience. The project offers insights for Shortcuts users, enthusiasts, and researchers to explore, customize workflows, and study automated workflows, low-code programming, and API-based agents.
Trace
Trace is a new AutoDiff-like tool for training AI systems end-to-end with general feedback. It generalizes the back-propagation algorithm by capturing and propagating an AI system's execution trace. Implemented as a PyTorch-like Python library, users can write Python code directly and use Trace primitives to optimize certain parts, similar to training neural networks.
cortex
Cortex is a tool that simplifies and accelerates the process of creating applications utilizing modern AI models like chatGPT and GPT-4. It provides a structured interface (GraphQL or REST) to a prompt execution environment, enabling complex augmented prompting and abstracting away model connection complexities like input chunking, rate limiting, output formatting, caching, and error handling. Cortex offers a solution to challenges faced when using AI models, providing a simple package for interacting with NL AI models.
hash
HASH is a self-building, open-source database which grows, structures and checks itself. With it, we're creating a platform for decision-making, which helps you integrate, understand and use data in a variety of different ways.
bedrock-claude-chat
This repository is a sample chatbot using the Anthropic company's LLM Claude, one of the foundational models provided by Amazon Bedrock for generative AI. It allows users to have basic conversations with the chatbot, personalize it with their own instructions and external knowledge, and analyze usage for each user/bot on the administrator dashboard. The chatbot supports various languages, including English, Japanese, Korean, Chinese, French, German, and Spanish. Deployment is straightforward and can be done via the command line or by using AWS CDK. The architecture is built on AWS managed services, eliminating the need for infrastructure management and ensuring scalability, reliability, and security.
For similar tasks
blinkid-android
The BlinkID Android SDK is a comprehensive solution for implementing secure document scanning and extraction. It offers powerful capabilities for extracting data from a wide range of identification documents. The SDK provides features for integrating document scanning into Android apps, including camera requirements, SDK resource pre-bundling, customizing the UX, changing default strings and localization, troubleshooting integration difficulties, and using the SDK through various methods. It also offers options for completely custom UX with low-level API integration. The SDK size is optimized for different processor architectures, and API documentation is available for reference. For any questions or support, users can contact the Microblink team at help.microblink.com.
skyvern
Skyvern automates browser-based workflows using LLMs and computer vision. It provides a simple API endpoint to fully automate manual workflows, replacing brittle or unreliable automation solutions. Traditional approaches to browser automations required writing custom scripts for websites, often relying on DOM parsing and XPath-based interactions which would break whenever the website layouts changed. Instead of only relying on code-defined XPath interactions, Skyvern adds computer vision and LLMs to the mix to parse items in the viewport in real-time, create a plan for interaction and interact with them. This approach gives us a few advantages: 1. Skyvern can operate on websites it’s never seen before, as it’s able to map visual elements to actions necessary to complete a workflow, without any customized code 2. Skyvern is resistant to website layout changes, as there are no pre-determined XPaths or other selectors our system is looking for while trying to navigate 3. Skyvern leverages LLMs to reason through interactions to ensure we can cover complex situations. Examples include: 1. If you wanted to get an auto insurance quote from Geico, the answer to a common question “Were you eligible to drive at 18?” could be inferred from the driver receiving their license at age 16 2. If you were doing competitor analysis, it’s understanding that an Arnold Palmer 22 oz can at 7/11 is almost definitely the same product as a 23 oz can at Gopuff (even though the sizes are slightly different, which could be a rounding error!) Want to see examples of Skyvern in action? Jump to #real-world-examples-of- skyvern

airbyte-connectors
This repository contains Airbyte connectors used in Faros and Faros Community Edition platforms as well as Airbyte Connector Development Kit (CDK) for JavaScript/TypeScript.
open-parse
Open Parse is a Python library for visually discerning document layouts and chunking them effectively. It is designed to fill the gap in open-source libraries for handling complex documents. Unlike text splitting, which converts a file to raw text and slices it up, Open Parse visually analyzes documents for superior LLM input. It also supports basic markdown for parsing headings, bold, and italics, and has high-precision table support, extracting tables into clean Markdown formats with accuracy that surpasses traditional tools. Open Parse is extensible, allowing users to easily implement their own post-processing steps. It is also intuitive, with great editor support and completion everywhere, making it easy to use and learn.
unstract
Unstract is a no-code platform that enables users to launch APIs and ETL pipelines to structure unstructured documents. With Unstract, users can go beyond co-pilots by enabling machine-to-machine automation. Unstract's Prompt Studio provides a simple, no-code approach to creating prompts for LLMs, vector databases, embedding models, and text extractors. Users can then configure Prompt Studio projects as API deployments or ETL pipelines to automate critical business processes that involve complex documents. Unstract supports a wide range of LLM providers, vector databases, embeddings, text extractors, ETL sources, and ETL destinations, providing users with the flexibility to choose the best tools for their needs.
Dot
Dot is a standalone, open-source application designed for seamless interaction with documents and files using local LLMs and Retrieval Augmented Generation (RAG). It is inspired by solutions like Nvidia's Chat with RTX, providing a user-friendly interface for those without a programming background. Pre-packaged with Mistral 7B, Dot ensures accessibility and simplicity right out of the box. Dot allows you to load multiple documents into an LLM and interact with them in a fully local environment. Supported document types include PDF, DOCX, PPTX, XLSX, and Markdown. Users can also engage with Big Dot for inquiries not directly related to their documents, similar to interacting with ChatGPT. Built with Electron JS, Dot encapsulates a comprehensive Python environment that includes all necessary libraries. The application leverages libraries such as FAISS for creating local vector stores, Langchain, llama.cpp & Huggingface for setting up conversation chains, and additional tools for document management and interaction.
instructor
Instructor is a Python library that makes it a breeze to work with structured outputs from large language models (LLMs). Built on top of Pydantic, it provides a simple, transparent, and user-friendly API to manage validation, retries, and streaming responses. Get ready to supercharge your LLM workflows!
sparrow
Sparrow is an innovative open-source solution for efficient data extraction and processing from various documents and images. It seamlessly handles forms, invoices, receipts, and other unstructured data sources. Sparrow stands out with its modular architecture, offering independent services and pipelines all optimized for robust performance. One of the critical functionalities of Sparrow - pluggable architecture. You can easily integrate and run data extraction pipelines using tools and frameworks like LlamaIndex, Haystack, or Unstructured. Sparrow enables local LLM data extraction pipelines through Ollama or Apple MLX. With Sparrow solution you get API, which helps to process and transform your data into structured output, ready to be integrated with custom workflows. Sparrow Agents - with Sparrow you can build independent LLM agents, and use API to invoke them from your system. **List of available agents:** * **llamaindex** - RAG pipeline with LlamaIndex for PDF processing * **vllamaindex** - RAG pipeline with LLamaIndex multimodal for image processing * **vprocessor** - RAG pipeline with OCR and LlamaIndex for image processing * **haystack** - RAG pipeline with Haystack for PDF processing * **fcall** - Function call pipeline * **unstructured-light** - RAG pipeline with Unstructured and LangChain, supports PDF and image processing * **unstructured** - RAG pipeline with Weaviate vector DB query, Unstructured and LangChain, supports PDF and image processing * **instructor** - RAG pipeline with Unstructured and Instructor libraries, supports PDF and image processing. Works great for JSON response generation
For similar jobs
react-native-vision-camera
VisionCamera is a powerful, high-performance Camera library for React Native. It features Photo and Video capture, QR/Barcode scanner, Customizable devices and multi-cameras ("fish-eye" zoom), Customizable resolutions and aspect-ratios (4k/8k images), Customizable FPS (30..240 FPS), Frame Processors (JS worklets to run facial recognition, AI object detection, realtime video chats, ...), Smooth zooming (Reanimated), Fast pause and resume, HDR & Night modes, Custom C++/GPU accelerated video pipeline (OpenGL).
iris_android
This repository contains an offline Android chat application based on llama.cpp example. Users can install, download models, and run the app completely offline and privately. To use the app, users need to go to the releases page, download and install the app. Building the app requires downloading Android Studio, cloning the repository, and importing it into Android Studio. The app can be run offline by following specific steps such as enabling developer options, wireless debugging, and downloading the stable LM model. The project is maintained by Nerve Sparks and contributions are welcome through creating feature branches and pull requests.
aiolauncher_scripts
AIO Launcher Scripts is a collection of Lua scripts that can be used with AIO Launcher to enhance its functionality. These scripts can be used to create widget scripts, search scripts, and side menu scripts. They provide various functions such as displaying text, buttons, progress bars, charts, and interacting with app widgets. The scripts can be used to customize the appearance and behavior of the launcher, add new features, and interact with external services.
gemini-android
Gemini Android is a repository showcasing Google's Generative AI on Android using Stream Chat SDK for Compose. It demonstrates the Gemini API for Android, implements UI elements with Jetpack Compose, utilizes Android architecture components like Hilt and AppStartup, performs background tasks with Kotlin Coroutines, and integrates chat systems with Stream Chat Compose SDK for real-time event handling. The project also provides technical content, instructions on building the project, tech stack details, architecture overview, modularization strategies, and a contribution guideline. It follows Google's official architecture guidance and offers a real-world example of app architecture implementation.
blinkid-android
The BlinkID Android SDK is a comprehensive solution for implementing secure document scanning and extraction. It offers powerful capabilities for extracting data from a wide range of identification documents. The SDK provides features for integrating document scanning into Android apps, including camera requirements, SDK resource pre-bundling, customizing the UX, changing default strings and localization, troubleshooting integration difficulties, and using the SDK through various methods. It also offers options for completely custom UX with low-level API integration. The SDK size is optimized for different processor architectures, and API documentation is available for reference. For any questions or support, users can contact the Microblink team at help.microblink.com.
react-native-airship
React Native Airship is a module designed to integrate Airship's iOS and Android SDKs into React Native applications. It provides developers with the necessary tools to incorporate Airship's push notification services seamlessly. The module offers a simple and efficient way to leverage Airship's features within React Native projects, enhancing user engagement and retention through targeted notifications.

gpt_mobile
GPT Mobile is a chat assistant for Android that allows users to chat with multiple models at once. It supports various platforms such as OpenAI GPT, Anthropic Claude, and Google Gemini. Users can customize temperature, top p (Nucleus sampling), and system prompt. The app features local chat history, Material You style UI, dark mode support, and per app language setting for Android 13+. It is built using 100% Kotlin, Jetpack Compose, and follows a modern app architecture for Android developers.
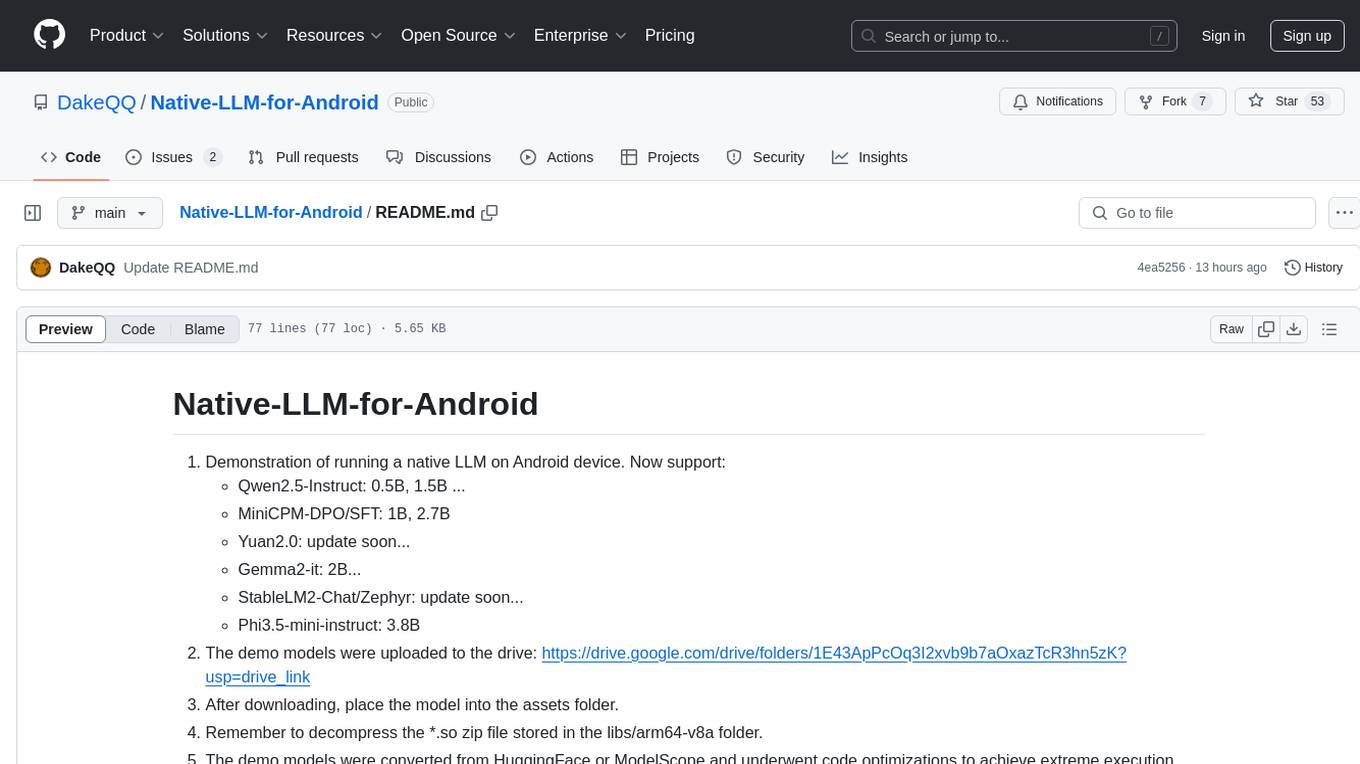
Native-LLM-for-Android
This repository provides a demonstration of running a native Large Language Model (LLM) on Android devices. It supports various models such as Qwen2.5-Instruct, MiniCPM-DPO/SFT, Yuan2.0, Gemma2-it, StableLM2-Chat/Zephyr, and Phi3.5-mini-instruct. The demo models are optimized for extreme execution speed after being converted from HuggingFace or ModelScope. Users can download the demo models from the provided drive link, place them in the assets folder, and follow specific instructions for decompression and model export. The repository also includes information on quantization methods and performance benchmarks for different models on various devices.