
HuggingFaceGuidedTourForMac
A guided tour on how to use HuggingFace large language models on Macs with Apple Silicon
Stars: 79
HuggingFaceGuidedTourForMac is a guided tour on how to install optimized pytorch and optionally Apple's new MLX, JAX, and TensorFlow on Apple Silicon Macs. The repository provides steps to install homebrew, pytorch with MPS support, MLX, JAX, TensorFlow, and Jupyter lab. It also includes instructions on running large language models using HuggingFace transformers. The repository aims to help users set up their Macs for deep learning experiments with optimized performance.
README:
A guided tour on how to install optimized pytorch and optionally Apple's new MLX and/or Google's tensorflow or JAX on Apple Silicon Macs and how to use HuggingFace large language models for your own experiments. Recent Mac show good performance for machine learning tasks.
We will perform the following steps:
- Install
homebrew - Install
pytorchwith MPS (metal performance shaders) support using Apple Silicon GPUs - Install Apple's new
mlxframework - Install
JAXwith Apple's metal drivers (experimental is this point in time(2024-04)) - Install
tensorflowwith and Apple's metal pluggable metal driver optimizations - Install
jupyter labto run notebooks - Install
huggingfaceand run some pre-trained language models usingtransformersand just a few lines of code within jupyter lab.
Then we provide additional HowTos for:
- Running large language models (LLMs) that rival commercial projects: Llama 2 or Llama 3 with llama.cpp (s.b.) using Mac Metal acceleration.
(skip to 1. Preparations if you know which framework you are going to use)
Tensorflow, JAX, Pytorch, and MLX are deep-learning frameworks that provide the required libraries to perform optimized tensor operations used in training and inference. On high level, the functionality of all four is equivalent. Huggingface builds on top of any of the those frameworks and provides a large library of pretrained models for many different use-cases, ready to use or to customize plus a number of convenience libraries and sample code for easy getting-started.
- Pytorch is the most general and currently most widely used deep learning framework. In case of doubt, use Pytorch. It supports many different hardware platforms (including Apple Silicon optimizations).
- JAX is a newer Google framework that is considered especially by researchers as the better alternative to Tensorflow. It support GPUs, TPUs, and Apple's Metal framework (still experimental) and is more 'low-level', especially when used without complementary neural network-layers such as flax. JAX on Apple Silicon is still 'exotic', hence for production projects, use Pytorch, and for research projects, both JAX and MLX are interesting: MLX has more dynamic development (at this point in time), JAX supports more hardware framework (GPUs and TPUs) besides Apple Silicon.
- MLX is Apple's new kid on the block, and thus overall support and documentation is (currently) much more limited than for the other main frameworks. It is beautiful and well designed (they took lessons learned for torch and tensorflow), yet it is closely tied to Apple Silicon. It's currently best for students that have Apple hardware and want to learn or experiment with deep learning. Things you learn with MLX easily transfer to Pytorch, yet be aware that conversion of models and porting of training and inference code is needed in order to deploy whatever you developed into the non-Apple universe.
- corenet is Apple's newly released training library that utilizes PyTorch and the HuggingFace infrastructure, and additionally contains examples how to migrate models to MLX. See the example: OpenElm (MLX).
- Tensorflow is the 'COBOL' of deep learning and it's practically silently EoL'ed by Google. Google themselves publishes new models for PyTorch and JAX/Flax, and not for Tensorflow. If you are not forced to use Tensorflow, because your organisation already uses it, ignore it. If your organziation uses TF, make a migration plan! Look at Pytorch for production and JAX for research.
HuggingFace publishes an Overview of model-support for each framework. Currently, Pytorch is the defacto standard, if you want to make use of existing models.
For the (probably too simplified) answer to the question "What's the fastest?" have a look at the Jupyter notebook 02-Benchmarks, and once you've completed the installation, you can test your own environment. The notebook allows to compare the speed of matrix multiplications for different frameworks. However, the difference between frameworks when performing 'standard' model training or inference tasks will most likely be less pronounced.
If you haven't done so, go to https://brew.sh/ and follow the instructions to install homebrew.
Once done, open a terminal and type brew --version to check that it is installed correctly.
Now use brew to install more recent versions of python and git. The recommendation is to use Homebrew's default Python 3.12, if you are not planning to use Tensorflow with Metal optimization (still requires 3.11 (at 2024-04)).
brew install [email protected] gitbrew install [email protected] git
brew install [email protected]or3.11):
Edit ~/.zshrc and insert:
# This is OPTIONAL and only required if you want to make homebrew's Python 3.12 as the global version:
export PATH="/opt/homebrew/opt/[email protected]/bin:$PATH"
export PATH=/opt/homebrew/opt/[email protected]/libexec/bin:$PATH
Change all references of 3.12 to 3.11 when wanting to make homebrew's Python 3.11 system-standard python.
(Restart your terminal to activate the path changes, or enter source ~/.zshrc in your current terminal session.)
venvby creating thevenvwith exactly that python. E.g./usr/bin/python3 -m venv my_venv_namecreates a virtual environment using Apple's macOS python (which at the time of this writing, 2024-02, is still stuck at 3.9.6). See below, Virtual environments, for more details.
Now clone this project as a test project:
git clone https://github.com/domschl/HuggingFaceGuidedTourForMacThis clones the test-project into a directory HuggingFaceGuidedTourForMac
Now create a Python 3.12 environment for this project and activate it:
(Again: replace with 3.11, if you need)
python3.12 -m venv HuggingFaceGuidedTourForMacCreating a venv adds the files required (python binaries, libraries, configs) for the virtual python environment to the project folder we just cloned, using again the same directory HuggingFaceGuidedTourForMac. Enter the directory and activate the virtual environment:
cd HuggingFaceGuidedTourForMac
source bin/activate
Now the directory HuggingFaceGuidedTourForMac contains the content of the github repository (e.g. 00-SystemCheck.ipynb) and the the files for the virtual env (e.g. bin, lib, etc, include, share, pyvenv.cfg):

Alternatives: If you have many different python versions installed, you can create an environment that uses a specific version by specifying the path of the python that is used to create the venv, e.g.:
/opt/homebrew/opt/[email protected]/bin/python3.12 -m venv my_new_312_envuses homebrew's python explicitly to create a new venv, whereas
/usr/bin/python3 -m venv my_old_system_venvwould use Apple's macOS python version for the new environment.
Do deactivate this virtual environment, simply use:
deactivateTo re-activate it, enter the directory that contains the venv, here: HuggingFaceGuidedTourForMac and use:
source bin/activate
A very unintuitive property of
venvis the fact: while you enter an environment by activating it in the subdirectory of your project (withsource bin/activate), thevenvstays active when you leave the project folder and start working on something completely different until you explicitly deactivate thevenvwithdeactivate.There are a number of tools that modify the terminal system prompt to display the currently active
venv, which is very helpful thing. Checkoutpowerline, orpowerlevel10k[recommended], or, if you like embellishmentOh My Zsh.
 Example with
 powerlevel10k installed. The left side of the system prompt shows the current directory, the right side would show the name of the venv. Currently, no venv is active.
After activating a venv in HuggingFaceGuidedTourForMac:
 Even is the working directoy is changed (here to
 home), since the venv is still active, it's name is displayed on the right side by powerlevel10k. Very handy.
Make sure that your virtual environment is active with pip -V (uppercase V), this should show a path for pip within your project:
<your-path>/HuggingFaceGuidedTourForMac/lib/python3.12/site-packages/pip (python 3.12)
Following https://pytorch.org, we will install Pytorch with pip. You need at least version 2.x (default since 2023) in order to get MPS (Metal Performance Shaders) support within pytorch, which offers significant performance advantage on Apple Silicon.
To install pytorch into the venv:
pip install -U torch numpy torchvision torchaudioNote: to experiment with Pytorch's compile() function with Python 3.12, you will need to install the 2.4 nightly (see https://pytorch.org/get-started/locally/) until torch 2.4 is released.
To test that pytorch is installed correctly, and MPS metal performance shaders are available, open a terminal, type python and within the python shell, enter:
import torch
# check if MPS is available:
torch.backends.mps.is_available()
This should return True.
pip install -U mlxAgain, start python and enter:
import mlx.core as mx
print(mx.__version__)
This should print a version, such as 0.11.1 (2024-04)
- Visit the Apple MLX project and especially mlx-examples!
- There is a vibrant MLX community on Huggingface that has ported many nets to MLX: Huggingface MLX-Community
- Apple's new corenet utilizes PyTorch and the HuggingFace infrastructure, and additionally contains examples how to migrate models to MLX. See the example: OpenElm (MLX).
JAX is an excellent choice, if low-level optimization of algorithms and research beyond the boundaries of established deep-learning algorithms is your focus. Modelled after numpy, it supports automatic differentiation of 'everything' (for optimization problems) and supports vectorization and parallelization of python algorithms beyond mere deep learning. To get functionality that is expected from other deep learning frameworks (layers, training-loop functions and similar 'high-level'), consider installing additional neural network library such as: flax.
To install JAX with pip into the active environment:
pip install -U jax jax-metalStart python (3.12 is supported) and enter:
import jax
print(jax.devices()[0])
This should display something like:
Platform 'METAL' is experimental and not all JAX functionality may be correctly supported!
2024-04-28 10:28:09.561877: W pjrt_plugin/src/mps_client.cc:563] WARNING: JAX Apple GPU support is experimental and not all JAX functionality is correctly supported!
Metal device set to: Apple M2 Max

systemMemory: 32.00 GB
maxCacheSize: 10.67 GB

METAL:0
Here METAL:0 is the device that JAX will use for calculations, and Apple Silicon is supported.
- HuggingFace example projects with JAX and Flax
- Apple's rather terse documentation is found at Apple's JAX documentation.
Tensorflow is losing support fast, and not even Google publishes new models for Tensorflow. A migration plan is recommended, if you plan to use this.
tensorflow-metalaccelerator is currently (2024-03) not supported that version, so use Python 3.11:
Make sure that your virtual environment is active with pip -V (uppercase V), this should show a path for pip within your project:
<your-path>/HuggingFaceGuidedTourForMac/lib/python3.11/site-packages/pip (python 3.11)
Following https://developer.apple.com/metal/tensorflow-plugin/, we will install tensorflow with pip within our venv:
pip install -U tensorflow tensorflow-metalTo test that tensorflow is installed correctly, open a terminal, type python and within the python shell, enter:
import tensorflow as tf
tf.config.list_physical_devices('GPU')
You should see something like:
[PhysicalDevice(name='/physical_device:GPU:0', device_type='GPU')]
At this point, your Apple Silicon Mac should be ready to run pytorch and optionally MLX and/or JAX or tensorflow with hardware acceleration support, using the Apple Metal framework.
To test this, you can use jupyter lab to run some notebooks. To install jupyter lab, first make sure the virtual environment you want to use is active (pip -V), and type:
pip install -U jupyterlab ipywidgets
venvis often not updated correctly, re-activate the environment to make sure that the correct local Jupyter version is used:
deactivate
source bin/activate
To start Jupyter lab, type:
jupyter labThis should open a browser window with jupyter lab running. You can then create a new python notebook and run some code to test that tensorflow and pytorch are working correctly:

import torch

print("Pytorch version:", torch.__version__)
If this completed successful, your Mac is now ready for Deep Learning experiments.
HuggingFace is a great resource for NLP and Deep Learning experiments. It provides a large number of pre-trained language models and a simple API to use them. It will allow us to quickly get started with Deep Learning experiments.
From the huggingface installation instructions, we use pip to install transformers:
pip install -U transformers
~/.cache/huggingface/hub. You can remove these models at any time by deleting this directory or parts of it's content.
Within the directory HuggingFaceGuidedTourForMac and active venv, start jupyter lab and load the 00-SystemCheck.ipynb notebook. The notebook will first check all the deep-learning frameworks and give information, if they are correctly installed. Afterward, Pytorch is used for a simple experiment.
Use <Shift>-Enter to run the notebook's cells.
After the various tests, your should finally see something like this:
![]()
If you've received a label classification of POSITIVE with a score of 0.99, then you are ready to start experimenting with HuggingFace!
HuggingFacelibraries are downloading all sorts of large binary blobs containing the trained model data. That data is stored in your home directory at:~/.cache/huggingface/hub. You can remove these models at any time by deleting this directory or parts of it's content.
- If self-tests fail ('xyz not found!'), make sure that tensorflow (optional), jax (optional), MLX (optional), pytorch, jupyter, and transformers by huggingface are all installed into the same, active Python virtual environment, otherwise the components won't 'see' each other!
You can open the notebook 01-ChatBot.ipynb to try out a very simple chatbot on your Mac.
The python code used is:
import torch
from transformers import AutoModelForCausalLM, AutoTokenizer
from transformers.utils import logging

# Disable warnings about padding_side that cannot be rectified with current software:
logging.set_verbosity_error()

model_names = ["microsoft/DialoGPT-small", "microsoft/DialoGPT-medium", "microsoft/DialoGPT-large"]
use_model_index = 1  # Change 0: small model, 1: medium, 2: large model (requires most resources!)
model_name = model_names[use_model_index]

tokenizer = AutoTokenizer.from_pretrained(model_name) # , padding_side='left')
model = AutoModelForCausalLM.from_pretrained(model_name)

# The chat function: received a user input and chat-history and returns the model's reply and chat-history:
def reply(input_text, history=None):
    # encode the new user input, add the eos_token and return a tensor in Pytorch
    new_user_input_ids = tokenizer.encode(input_text + tokenizer.eos_token, return_tensors='pt')

    # append the new user input tokens to the chat history
    bot_input_ids = torch.cat([history, new_user_input_ids], dim=-1) if history is not None else new_user_input_ids

    # generated a response while limiting the total chat history to 1000 tokens,
    chat_history_ids = model.generate(bot_input_ids, max_length=1000, pad_token_id=tokenizer.eos_token_id)

    # pretty print last ouput tokens from bot
    return tokenizer.decode(chat_history_ids[:, bot_input_ids.shape[-1]:][0], skip_special_tokens=True), chat_history_ids

history = None
while True:
    input_text = input("> ")
    if input_text in ["", "bye", "quit", "exit"]:
        break
    reply_text, history_new = reply(input_text, history)
    history=history_new
    if history.shape[1]>80:
        old_shape = history.shape
        history = history[:,-80:]
        print(f"History cut from {old_shape} to {history.shape}")
    # history_text = tokenizer.decode(history[0])
    # print(f"Current history: {history_text}")
    print(f"D_GPT: {reply_text}")
This shows a (quite limited and repetitive) chatbot using Microsoft's DialoGPT models.
Things to try:
- By changing
use_model_indexbetween0..2, you can select either a small, medium or large language model. - To see the history that the model maintains you can uncomment the two
history_textrelated lines above. - To get rid of the downloaded models, clean up
~/.cache/huggingface/hub. Missing stuff is automatically re-downloaded when needed.
- Your Mac can run large language models that rival the performance of commercial solutions. An excellent example is the
llama.cppproject that implements the inference code necessary to run LLMs in highly optimized C++ code, supporting the Mac's Metal acceleration.
A step-by-step guide to compile and run Llama 3 or Llama 2 first for benchmarking and then for chat can be found here:
Llama.cpp chat using the Llama 2 model, with first Llama 3 support. Additionally a first version for Llama 3 is provided.
- One of the (currently) best sources for information about new releases of models on Huggingface is LocalLLama reddit group.
- The fast-track to learning how neural network and specifically large languages models actually work, is Andrej Karpathy's course on Youtube: The spelled-out intro to neural networks and backpropagation: building micrograd. If you know some python and how to multiply a matrix with numpy, this is the course that takes you all the way to being able to build your own Large-language model from scratch.
brew uninstall miniconda
Additional modifications are (all of them are inactive, once miniconda is removed):
-
~/.condarc(list of channels), and~/.conda\. -
~/.zshrc(or.bashrc) for the setup of path and environment. - After using hugginface models, large model binary blobs may reside at:
~/.cache/huggingface/hub. Simply remove the directory.
- 2024-04-28: Added JAX installation with Metal support and quick-test.
- 2024-04-26: Apple's corenet
- 2024-04-22: Llama 3.
- 2024-02-24: (Guide version 3.0) Updates for Python 3.12 and Apple MLX framework, Tensorflow is legacy-option.
- 2023-12-14: Pin python version of homebrew to 3.11.
- 2023-10-30: Restested with macOS 14.1 Sonoma, Tensorflow 2.14, Pytorch 2.1. Next steps added for more advanced projects.
- 2023-09-25: (Guide version 2.0) Switched from
condatopipandvenvfor latest versions of tensorflow 2.13, Pytorch 2, macOS Sonoma, installation is now much simpler. - 2023-03-16: Since
pytorchv2.0 is now released, the channelpytorch-nightlycan now be replaced bypytorchin the installation instructions. Thepytorch-nightlychannel is no longer needed for MPS support.
For Tasks:
Click tags to check more tools for each tasksFor Jobs:
Alternative AI tools for HuggingFaceGuidedTourForMac
Similar Open Source Tools
HuggingFaceGuidedTourForMac
HuggingFaceGuidedTourForMac is a guided tour on how to install optimized pytorch and optionally Apple's new MLX, JAX, and TensorFlow on Apple Silicon Macs. The repository provides steps to install homebrew, pytorch with MPS support, MLX, JAX, TensorFlow, and Jupyter lab. It also includes instructions on running large language models using HuggingFace transformers. The repository aims to help users set up their Macs for deep learning experiments with optimized performance.
torchchat
torchchat is a codebase showcasing the ability to run large language models (LLMs) seamlessly. It allows running LLMs using Python in various environments such as desktop, server, iOS, and Android. The tool supports running models via PyTorch, chatting, generating text, running chat in the browser, and running models on desktop/server without Python. It also provides features like AOT Inductor for faster execution, running in C++ using the runner, and deploying and running on iOS and Android. The tool supports popular hardware and OS including Linux, Mac OS, Android, and iOS, with various data types and execution modes available.
fabric
Fabric is an open-source framework for augmenting humans using AI. It provides a structured approach to breaking down problems into individual components and applying AI to them one at a time. Fabric includes a collection of pre-defined Patterns (prompts) that can be used for a variety of tasks, such as extracting the most interesting parts of YouTube videos and podcasts, writing essays, summarizing academic papers, creating AI art prompts, and more. Users can also create their own custom Patterns. Fabric is designed to be easy to use, with a command-line interface and a variety of helper apps. It is also extensible, allowing users to integrate it with their own AI applications and infrastructure.
garak
Garak is a free tool that checks if a Large Language Model (LLM) can be made to fail in a way that is undesirable. It probes for hallucination, data leakage, prompt injection, misinformation, toxicity generation, jailbreaks, and many other weaknesses. Garak's a free tool. We love developing it and are always interested in adding functionality to support applications.

Upscaler
Holloway's Upscaler is a consolidation of various compiled open-source AI image/video upscaling products for a CLI-friendly image and video upscaling program. It provides low-cost AI upscaling software that can run locally on a laptop, programmable for albums and videos, reliable for large video files, and works without GUI overheads. The repository supports hardware testing on various systems and provides important notes on GPU compatibility, video types, and image decoding bugs. Dependencies include ffmpeg and ffprobe for video processing. The user manual covers installation, setup pathing, calling for help, upscaling images and videos, and contributing back to the project. Benchmarks are provided for performance evaluation on different hardware setups.
garak
Garak is a vulnerability scanner designed for LLMs (Large Language Models) that checks for various weaknesses such as hallucination, data leakage, prompt injection, misinformation, toxicity generation, and jailbreaks. It combines static, dynamic, and adaptive probes to explore vulnerabilities in LLMs. Garak is a free tool developed for red-teaming and assessment purposes, focusing on making LLMs or dialog systems fail. It supports various LLM models and can be used to assess their security and robustness.
termax
Termax is an LLM agent in your terminal that converts natural language to commands. It is featured by: - Personalized Experience: Optimize the command generation with RAG. - Various LLMs Support: OpenAI GPT, Anthropic Claude, Google Gemini, Mistral AI, and more. - Shell Extensions: Plugin with popular shells like `zsh`, `bash` and `fish`. - Cross Platform: Able to run on Windows, macOS, and Linux.
sage
Sage is a tool that allows users to chat with any codebase, providing a chat interface for code understanding and integration. It simplifies the process of learning how a codebase works by offering heavily documented answers sourced directly from the code. Users can set up Sage locally or on the cloud with minimal effort. The tool is designed to be easily customizable, allowing users to swap components of the pipeline and improve the algorithms powering code understanding and generation.
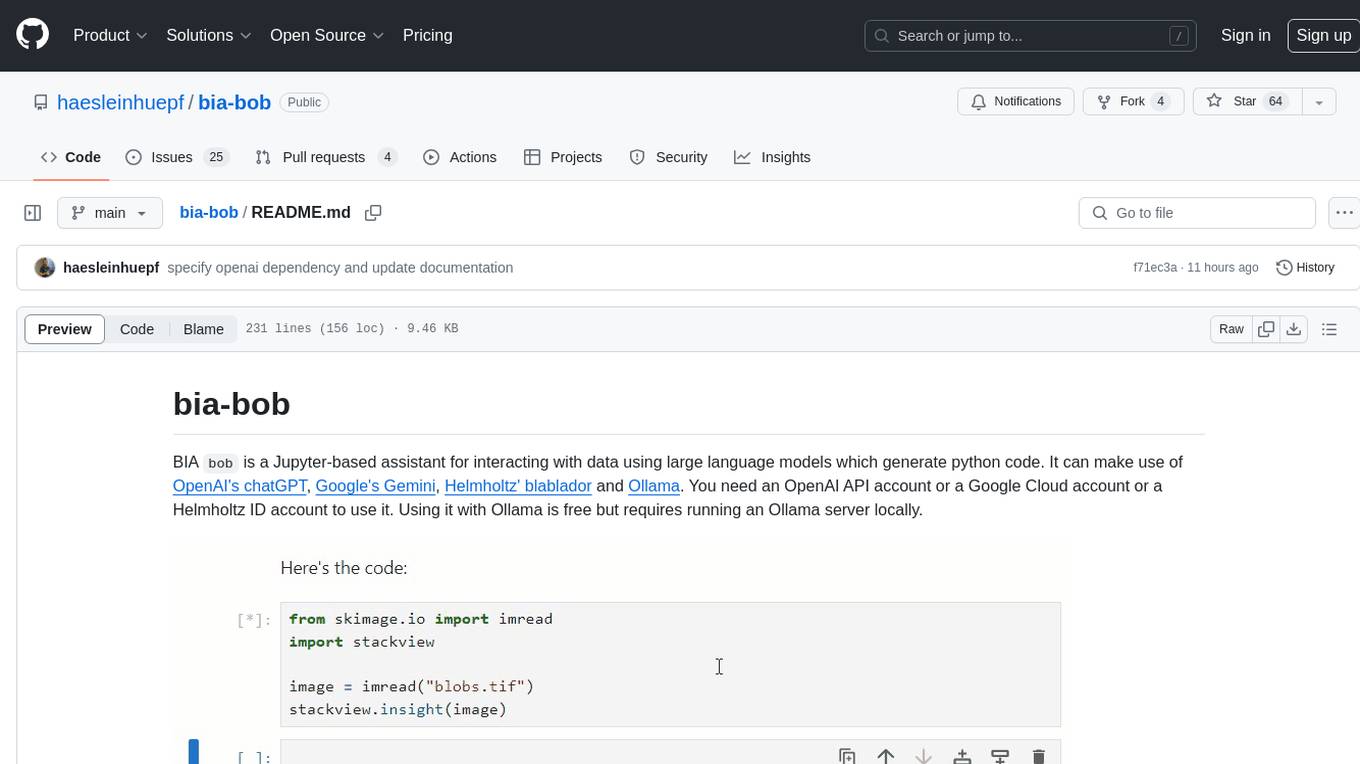
bia-bob
BIA `bob` is a Jupyter-based assistant for interacting with data using large language models to generate Python code. It can utilize OpenAI's chatGPT, Google's Gemini, Helmholtz' blablador, and Ollama. Users need respective accounts to access these services. Bob can assist in code generation, bug fixing, code documentation, GPU-acceleration, and offers a no-code custom Jupyter Kernel. It provides example notebooks for various tasks like bio-image analysis, model selection, and bug fixing. Installation is recommended via conda/mamba environment. Custom endpoints like blablador and ollama can be used. Google Cloud AI API integration is also supported. The tool is extensible for Python libraries to enhance Bob's functionality.
hordelib
horde-engine is a wrapper around ComfyUI designed to run inference pipelines visually designed in the ComfyUI GUI. It enables users to design inference pipelines in ComfyUI and then call them programmatically, maintaining compatibility with the existing horde implementation. The library provides features for processing Horde payloads, initializing the library, downloading and validating models, and generating images based on input data. It also includes custom nodes for preprocessing and tasks such as face restoration and QR code generation. The project depends on various open source projects and bundles some dependencies within the library itself. Users can design ComfyUI pipelines, convert them to the backend format, and run them using the run_image_pipeline() method in hordelib.comfy.Comfy(). The project is actively developed and tested using git, tox, and a specific model directory structure.

WindowsAgentArena
Windows Agent Arena (WAA) is a scalable Windows AI agent platform designed for testing and benchmarking multi-modal, desktop AI agents. It provides researchers and developers with a reproducible and realistic Windows OS environment for AI research, enabling testing of agentic AI workflows across various tasks. WAA supports deploying agents at scale using Azure ML cloud infrastructure, allowing parallel running of multiple agents and delivering quick benchmark results for hundreds of tasks in minutes.

Fabric
Fabric is an open-source framework designed to augment humans using AI by organizing prompts by real-world tasks. It addresses the integration problem of AI by creating and organizing prompts for various tasks. Users can create, collect, and organize AI solutions in a single place for use in their favorite tools. Fabric also serves as a command-line interface for those focused on the terminal. It offers a wide range of features and capabilities, including support for multiple AI providers, internationalization, speech-to-text, AI reasoning, model management, web search, text-to-speech, desktop notifications, and more. The project aims to help humans flourish by leveraging AI technology to solve human problems and enhance creativity.

llamafile
llamafile is a tool that enables users to distribute and run Large Language Models (LLMs) with a single file. It combines llama.cpp with Cosmopolitan Libc to create a framework that simplifies the complexity of LLMs into a single-file executable called a 'llamafile'. Users can run these executable files locally on most computers without the need for installation, making open LLMs more accessible to developers and end users. llamafile also provides example llamafiles for various LLM models, allowing users to try out different LLMs locally. The tool supports multiple CPU microarchitectures, CPU architectures, and operating systems, making it versatile and easy to use.
hash
HASH is a self-building, open-source database which grows, structures and checks itself. With it, we're creating a platform for decision-making, which helps you integrate, understand and use data in a variety of different ways.

abliteration
Abliteration is a tool that allows users to create abliterated models using transformers quickly and easily. It is not a tool for uncensorship, but rather for making models that will not explicitly refuse users. Users can clone the repository, install dependencies, and make abliterations using the provided commands. The tool supports adjusting parameters for stubborn models and offers various options for customization. Abliteration can be used for creating modified models for specific tasks or topics.
moly
Moly is an AI LLM client written in Rust, showcasing the capabilities of the Makepad UI toolkit and Project Robius, a framework for multi-platform application development in Rust. It is currently in beta, allowing users to build and run Moly on macOS, Linux, and Windows. The tool provides packaging support for different platforms, such as `.app`, `.dmg`, `.deb`, AppImage, pacman, and `.exe` (NSIS). Users can easily set up WasmEdge using `moly-runner` and leverage `cargo` commands to build and run Moly. Additionally, Moly offers pre-built releases for download and supports packaging for distribution on Linux, Windows, and macOS.
For similar tasks
HuggingFaceGuidedTourForMac
HuggingFaceGuidedTourForMac is a guided tour on how to install optimized pytorch and optionally Apple's new MLX, JAX, and TensorFlow on Apple Silicon Macs. The repository provides steps to install homebrew, pytorch with MPS support, MLX, JAX, TensorFlow, and Jupyter lab. It also includes instructions on running large language models using HuggingFace transformers. The repository aims to help users set up their Macs for deep learning experiments with optimized performance.
kdbai-samples
KDB.AI is a time-based vector database that allows developers to build scalable, reliable, and real-time applications by providing advanced search, recommendation, and personalization for Generative AI applications. It supports multiple index types, distance metrics, top-N and metadata filtered retrieval, as well as Python and REST interfaces. The repository contains samples demonstrating various use-cases such as temporal similarity search, document search, image search, recommendation systems, sentiment analysis, and more. KDB.AI integrates with platforms like ChatGPT, Langchain, and LlamaIndex. The setup steps require Unix terminal, Python 3.8+, and pip installed. Users can install necessary Python packages and run Jupyter notebooks to interact with the samples.
langkit
LangKit is an open-source text metrics toolkit for monitoring language models. It offers methods for extracting signals from input/output text, compatible with whylogs. Features include text quality, relevance, security, sentiment, toxicity analysis. Installation via PyPI. Modules contain UDFs for whylogs. Benchmarks show throughput on AWS instances. FAQs available.
web-ai-demos
Collection of client-side AI demos showcasing various AI applications using Chrome's built-in AI, Transformers.js, and Google's Gemma model through MediaPipe. Demos include weather description generation, summarization API, performance tips, utility functions, sentiment analysis, toxicity assessment, and streaming content using Server Sent Events.
leettools
LeetTools is an AI search assistant that can perform highly customizable search workflows and generate customized format results based on both web and local knowledge bases. It provides an automated document pipeline for data ingestion, indexing, and storage, allowing users to focus on implementing workflows without worrying about infrastructure. LeetTools can run with minimal resource requirements on the command line with configurable LLM settings and supports different databases for various functions. Users can configure different functions in the same workflow to use different LLM providers and models.
For similar jobs
sweep
Sweep is an AI junior developer that turns bugs and feature requests into code changes. It automatically handles developer experience improvements like adding type hints and improving test coverage.
teams-ai
The Teams AI Library is a software development kit (SDK) that helps developers create bots that can interact with Teams and Microsoft 365 applications. It is built on top of the Bot Framework SDK and simplifies the process of developing bots that interact with Teams' artificial intelligence capabilities. The SDK is available for JavaScript/TypeScript, .NET, and Python.
ai-guide
This guide is dedicated to Large Language Models (LLMs) that you can run on your home computer. It assumes your PC is a lower-end, non-gaming setup.

classifai
Supercharge WordPress Content Workflows and Engagement with Artificial Intelligence. Tap into leading cloud-based services like OpenAI, Microsoft Azure AI, Google Gemini and IBM Watson to augment your WordPress-powered websites. Publish content faster while improving SEO performance and increasing audience engagement. ClassifAI integrates Artificial Intelligence and Machine Learning technologies to lighten your workload and eliminate tedious tasks, giving you more time to create original content that matters.
chatbot-ui
Chatbot UI is an open-source AI chat app that allows users to create and deploy their own AI chatbots. It is easy to use and can be customized to fit any need. Chatbot UI is perfect for businesses, developers, and anyone who wants to create a chatbot.
BricksLLM
BricksLLM is a cloud native AI gateway written in Go. Currently, it provides native support for OpenAI, Anthropic, Azure OpenAI and vLLM. BricksLLM aims to provide enterprise level infrastructure that can power any LLM production use cases. Here are some use cases for BricksLLM: * Set LLM usage limits for users on different pricing tiers * Track LLM usage on a per user and per organization basis * Block or redact requests containing PIIs * Improve LLM reliability with failovers, retries and caching * Distribute API keys with rate limits and cost limits for internal development/production use cases * Distribute API keys with rate limits and cost limits for students
uAgents
uAgents is a Python library developed by Fetch.ai that allows for the creation of autonomous AI agents. These agents can perform various tasks on a schedule or take action on various events. uAgents are easy to create and manage, and they are connected to a fast-growing network of other uAgents. They are also secure, with cryptographically secured messages and wallets.
griptape
Griptape is a modular Python framework for building AI-powered applications that securely connect to your enterprise data and APIs. It offers developers the ability to maintain control and flexibility at every step. Griptape's core components include Structures (Agents, Pipelines, and Workflows), Tasks, Tools, Memory (Conversation Memory, Task Memory, and Meta Memory), Drivers (Prompt and Embedding Drivers, Vector Store Drivers, Image Generation Drivers, Image Query Drivers, SQL Drivers, Web Scraper Drivers, and Conversation Memory Drivers), Engines (Query Engines, Extraction Engines, Summary Engines, Image Generation Engines, and Image Query Engines), and additional components (Rulesets, Loaders, Artifacts, Chunkers, and Tokenizers). Griptape enables developers to create AI-powered applications with ease and efficiency.