
notebook-intelligence
AI coding assistant for JupyterLab
Stars: 101
Notebook Intelligence (NBI) is an AI coding assistant and extensible AI framework for JupyterLab. It greatly boosts the productivity of JupyterLab users with AI assistance by providing features such as code generation with inline chat, auto-complete, and chat interface. NBI supports various LLM Providers and AI Models, including local models from Ollama. Users can configure model provider and model options, remember GitHub Copilot login, and save configuration files. NBI seamlessly integrates with Model Context Protocol (MCP) servers, supporting both Standard Input/Output (stdio) and Server-Sent Events (SSE) transports. Users can easily add MCP servers to NBI, auto-approve tools, set environment variables, and group servers based on functionality. Additionally, NBI allows access to built-in tools from an MCP participant, enhancing the user experience and productivity.
README:
Notebook Intelligence (NBI) is an AI coding assistant and extensible AI framework for JupyterLab. It can use GitHub Copilot or AI models from any other LLM Provider, including local models from Ollama. NBI greatly boosts the productivity of JupyterLab users with AI assistance.
See blog posts for features and usage.
- Introducing Notebook Intelligence!
- Building AI Extensions for JupyterLab
- Building AI Agents for JupyterLab
- Notebook Intelligence now supports any LLM Provider and AI Model!


NBI requires JupyterLab >= 4.0.0. To install the extension, run the command below and restart JupyterLab.
pip install notebook-intelligenceYou can configure the model provider and model options using the Notebook Intelligence Settings dialog. You can access this dialog from JupyterLab Settings menu -> Notebook Intelligence Settings, using /settings command in NBI Chat or by using the command palette. For more details, see the blog post.

Notebook Intelligence extension for JupyterLab
This extension is composed of a Python package named notebook_intelligence
for the server extension and a NPM package named @notebook-intelligence/notebook-intelligence
for the frontend extension.
Notebook Intelligence uses system keyring to store the GitHub access tokens. If your stored access token fails to login (due to expiration or other reasons), you will be prompted to relogin on the UI. If you run into issues with this feature, check the Jupyter server logs and the keyring package documentation.
To let Notebook Intelligence remember your GitHub access token after you logged in:
jupyter lab --NotebookIntelligence.github_access_token=rememberOnce you set it to remember, it will continue to remember even if you skip --NotebookIntelligence.github_access_token at following launches. In order to forget the GitHub access token stored:
jupyter lab --NotebookIntelligence.github_access_token=forgetNBI saves configuration at ~/.jupyter/nbi-config.json. It also supports environment wide base configuration at <env-prefix>/share/jupyter/nbi-config.json. Organizations can ship default configuration at this environment wide config path. User's changes will be stored as overrides at ~/.jupyter/nbi-config.json.
These config files are used for saving LLM provider, model and MCP configuration. Note that API keys you enter for your custom LLM providers will also be stored in these config files.
[!IMPORTANT] Note that updating nbi-config.json manually requires restarting JupyterLab to take effect.
Model Context Protocol (MCP) Support
NBI seamlessly integrates with MCP servers. It supports servers with both Standard Input/Output (stdio) and Server-Sent Events (SSE) transports. The MCP support is limited to server tools at the moment.
You can easily add MCP servers to NBI by editing the configuration file nbi-config.json. Simply add a key "mcp" and "mcpServers" under it as shown below.
[!NOTE] Using MCP servers requires an LLM model with tool calling capabilities. All of the GitHub Copilot models provided in NBI support this feature. If you are using other providers make sure you choose a tool calling capable model.
[!CAUTION] Note that most MCP servers are run on the same computer as your JupyterLab installation and they can make irreversible changes to your computer and/or access private data. Make sure that you only install MCP servers from trusted sources.
{
    "chat_model": {
        ...
    },
    ...<other configuration>,

    "mcp": {
        "mcpServers": {
            "filesystem": {
                "command": "npx",
                "args": [
                    "-y",
                    "@modelcontextprotocol/server-filesystem",
                    "/Users/mbektas/mcp-test"
                ]
            },
        }
    }
}
This will automatically create a new chat participant in NBI and you can access it by starting your prompts with @mcp. Use @mcp /info prompt to get information on the tools provided by the MCP servers you configured. This chat participant will have access all the tools provided by the servers you configure.

By default, each tool call to MCP servers will require approval. If you would like to auto approve tools, you can do so by using the "alwaysAllow": [] configuration key in the nbi-config.json. Simply list the names of tools.
"mcpServers": {
    "filesystem": {
        "command": "npx",
        "args": [
            "-y",
            "@modelcontextprotocol/server-filesystem",
            "/Users/mbektas/mcp-test"
        ],
        "alwaysAllow": ["list_allowed_directories", "list_directory"]
    },
}
For servers with stdio transport, you can also set additional environment variables by using the env key. Environment variables are specified as key value pairs.
"mcpServers": {
    "servername": {
        "command": "",
        "args": [],
        "env": {
            "ENV_VAR_NAME": "ENV_VAR_VALUE"
        }
    },
}
Below is an example of a server configuration with SSE transport. For SSE transport servers, you can also specify headers to be sent as part of the requests.
"mcpServers": {
    "remoterservername": {
        "url": "http://127.0.0.1:8080/sse",
        "headers": {
            "Authorization": "Bearer mysecrettoken"
        }
    },
}
If you have multiple servers configured but you would like to disable some for a while, you can do so by using the disabled key. servername2 will be diabled and not available in @mcp chat participant.
"mcpServers": {
    "servername1": {
        "command": "",
        "args": [],
    },
    "servername2": {
        "command": "",
        "args": [],
        "disabled": true
    },
}When you integrate multiple MCP servers to NBI, all of their tools will be available under the same chat participant @mcp. However, this may not be ideal in many situations. You may want to group certain servers and their tools based on their functionality. NBI lets you do that easily by configuring MCP chat participants. You can list the servers for each custom participant. If there are any unassigned MCP servers, then they will be used the default @mcp chat participant.
Below is an example of creating a custom MCP participant. This configuration results in two chat participants @mcp-fs with filesytem MC server tools and @mcp with servername1 and servername1 MCP server tools.
{
    "chat_model": {
        ...
    },
    ...<other configuration>,

    "mcp": {
        "mcpServers": {
            "filesystem": {
                "command": "npx",
                "args": [
                    "-y",
                    "@modelcontextprotocol/server-filesystem",
                    "/Users/mbektas/mcp-test"
                ]
            },
            "servername1": {
                "command": "",
                "args": [],
            },
            "servername2": {
                "command": "",
                "args": [],
                "disabled": true
            }
        },
        "participants": {
            "fs": {
                "name": "MCP - File system",
                "servers": ["filesystem"]
            }
        }
    }
}NBI allows you to access built-in tools from an MCP participant. You can do that by adding the list of built in NBI tools to your MCP participant configuration. The built-in tools available to MCP are create_new_notebook, add_markdown_cell_to_notebook, add_code_cell_to_notebook. Below is an example that integrates all these tools to MCP participant @mcp-fs.
"participants": {
    "fs": {
        "name": "MCP - File system",
        "servers": ["filesystem"],
        "nbiTools": [
            "create_new_notebook",
            "add_markdown_cell_to_notebook",
            "add_code_cell_to_notebook"
        ]
    }
}
This chat participant will allow you to run example prompts like below.
@mcp-fs list the directories I have access to.
@mcp-fs add a code cell which demonstrates ipywidgets Button to this notebook.
For building locally and contributing see the developer documentatation.
For Tasks:
Click tags to check more tools for each tasksFor Jobs:
Alternative AI tools for notebook-intelligence
Similar Open Source Tools
notebook-intelligence
Notebook Intelligence (NBI) is an AI coding assistant and extensible AI framework for JupyterLab. It greatly boosts the productivity of JupyterLab users with AI assistance by providing features such as code generation with inline chat, auto-complete, and chat interface. NBI supports various LLM Providers and AI Models, including local models from Ollama. Users can configure model provider and model options, remember GitHub Copilot login, and save configuration files. NBI seamlessly integrates with Model Context Protocol (MCP) servers, supporting both Standard Input/Output (stdio) and Server-Sent Events (SSE) transports. Users can easily add MCP servers to NBI, auto-approve tools, set environment variables, and group servers based on functionality. Additionally, NBI allows access to built-in tools from an MCP participant, enhancing the user experience and productivity.

chat-mcp
A Cross-Platform Interface for Large Language Models (LLMs) utilizing the Model Context Protocol (MCP) to connect and interact with various LLMs. The desktop app, built on Electron, ensures compatibility across Linux, macOS, and Windows. It simplifies understanding MCP principles, facilitates testing of multiple servers and LLMs, and supports dynamic LLM configuration and multi-client management. The UI can be extracted for web use, ensuring consistency across web and desktop versions.

motorhead
Motorhead is a memory and information retrieval server for LLMs. It provides three simple APIs to assist with memory handling in chat applications using LLMs. The first API, GET /sessions/:id/memory, returns messages up to a maximum window size. The second API, POST /sessions/:id/memory, allows you to send an array of messages to Motorhead for storage. The third API, DELETE /sessions/:id/memory, deletes the session's message list. Motorhead also features incremental summarization, where it processes half of the maximum window size of messages and summarizes them when the maximum is reached. Additionally, it supports searching by text query using vector search. Motorhead is configurable through environment variables, including the maximum window size, whether to enable long-term memory, the model used for incremental summarization, the server port, your OpenAI API key, and the Redis URL.
CoPilot
TigerGraph CoPilot is an AI assistant that combines graph databases and generative AI to enhance productivity across various business functions. It includes three core component services: InquiryAI for natural language assistance, SupportAI for knowledge Q&A, and QueryAI for GSQL code generation. Users can interact with CoPilot through a chat interface on TigerGraph Cloud and APIs. CoPilot requires LLM services for beta but will support TigerGraph's LLM in future releases. It aims to improve contextual relevance and accuracy of answers to natural-language questions by building knowledge graphs and using RAG. CoPilot is extensible and can be configured with different LLM providers, graph schemas, and LangChain tools.
langchain-extract
LangChain Extract is a simple web server that allows you to extract information from text and files using LLMs. It is built using FastAPI, LangChain, and Postgresql. The backend closely follows the extraction use-case documentation and provides a reference implementation of an app that helps to do extraction over data using LLMs. This repository is meant to be a starting point for building your own extraction application which may have slightly different requirements or use cases.

LLamaWorker
LLamaWorker is a HTTP API server developed to provide an OpenAI-compatible API for integrating Large Language Models (LLM) into applications. It supports multi-model configuration, streaming responses, text embedding, chat templates, automatic model release, function calls, API key authentication, and test UI. Users can switch models, complete chats and prompts, manage chat history, and generate tokens through the test UI. Additionally, LLamaWorker offers a Vulkan compiled version for download and provides function call templates for testing. The tool supports various backends and provides API endpoints for chat completion, prompt completion, embeddings, model information, model configuration, and model switching. A Gradio UI demo is also available for testing.
npcsh
`npcsh` is a python-based command-line tool designed to integrate Large Language Models (LLMs) and Agents into one's daily workflow by making them available and easily configurable through the command line shell. It leverages the power of LLMs to understand natural language commands and questions, execute tasks, answer queries, and provide relevant information from local files and the web. Users can also build their own tools and call them like macros from the shell. `npcsh` allows users to take advantage of agents (i.e. NPCs) through a managed system, tailoring NPCs to specific tasks and workflows. The tool is extensible with Python, providing useful functions for interacting with LLMs, including explicit coverage for popular providers like ollama, anthropic, openai, gemini, deepseek, and openai-like providers. Users can set up a flask server to expose their NPC team for use as a backend service, run SQL models defined in their project, execute assembly lines, and verify the integrity of their NPC team's interrelations. Users can execute bash commands directly, use favorite command-line tools like VIM, Emacs, ipython, sqlite3, git, pipe the output of these commands to LLMs, or pass LLM results to bash commands.
bot-on-anything
The 'bot-on-anything' repository allows developers to integrate various AI models into messaging applications, enabling the creation of intelligent chatbots. By configuring the connections between models and applications, developers can easily switch between multiple channels within a project. The architecture is highly scalable, allowing the reuse of algorithmic capabilities for each new application and model integration. Supported models include ChatGPT, GPT-3.0, New Bing, and Google Bard, while supported applications range from terminals and web platforms to messaging apps like WeChat, Telegram, QQ, and more. The repository provides detailed instructions for setting up the environment, configuring the models and channels, and running the chatbot for various tasks across different messaging platforms.
otto-m8
otto-m8 is a flowchart based automation platform designed to run deep learning workloads with minimal to no code. It provides a user-friendly interface to spin up a wide range of AI models, including traditional deep learning models and large language models. The tool deploys Docker containers of workflows as APIs for integration with existing workflows, building AI chatbots, or standalone applications. Otto-m8 operates on an Input, Process, Output paradigm, simplifying the process of running AI models into a flowchart-like UI.
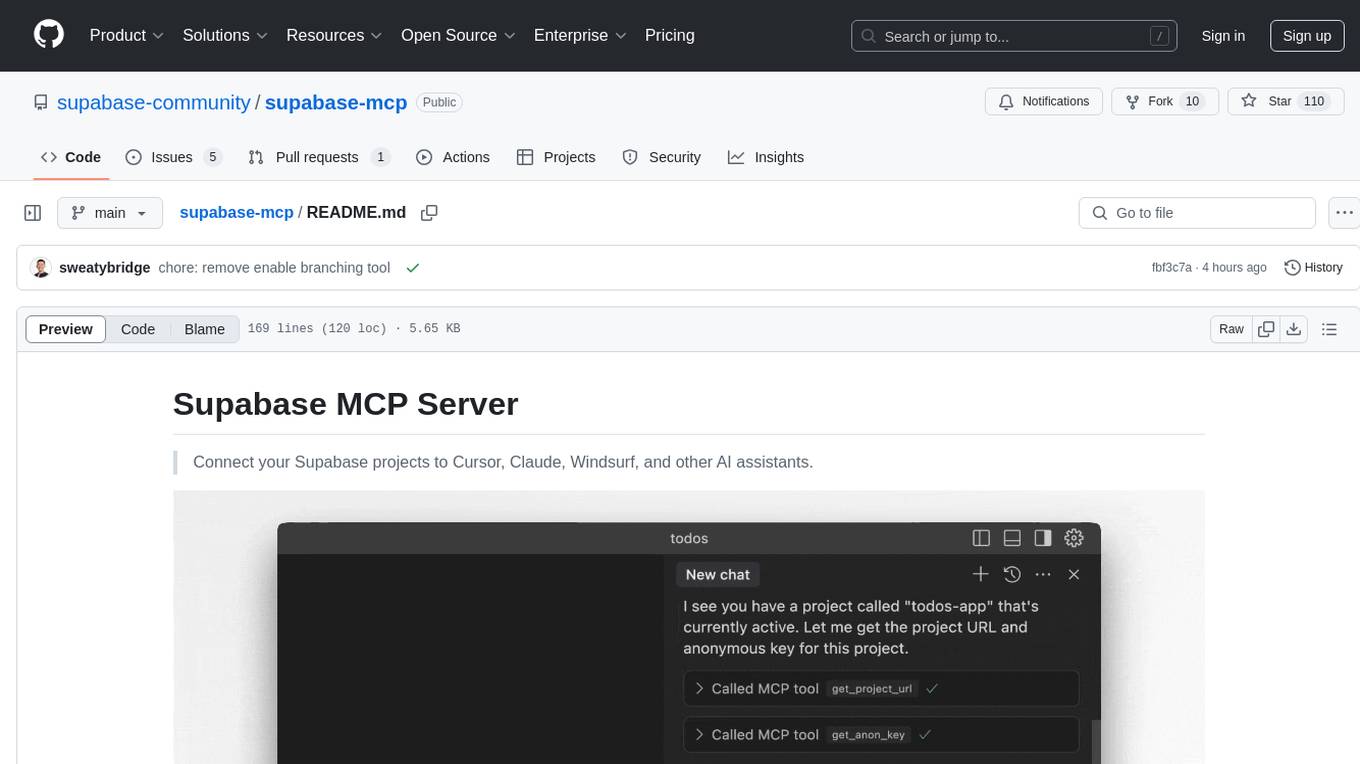
supabase-mcp
Supabase MCP Server standardizes how Large Language Models (LLMs) interact with Supabase, enabling AI assistants to manage tables, fetch config, and query data. It provides tools for project management, database operations, project configuration, branching (experimental), and development tools. The server is pre-1.0, so expect some breaking changes between versions.
ai-dev-2024-ml-workshop
The 'ai-dev-2024-ml-workshop' repository contains materials for the Deploy and Monitor ML Pipelines workshop at the AI_dev 2024 conference in Paris, focusing on deployment designs of machine learning pipelines using open-source applications and free-tier tools. It demonstrates automating data refresh and forecasting using GitHub Actions and Docker, monitoring with MLflow and YData Profiling, and setting up a monitoring dashboard with Quarto doc on GitHub Pages.
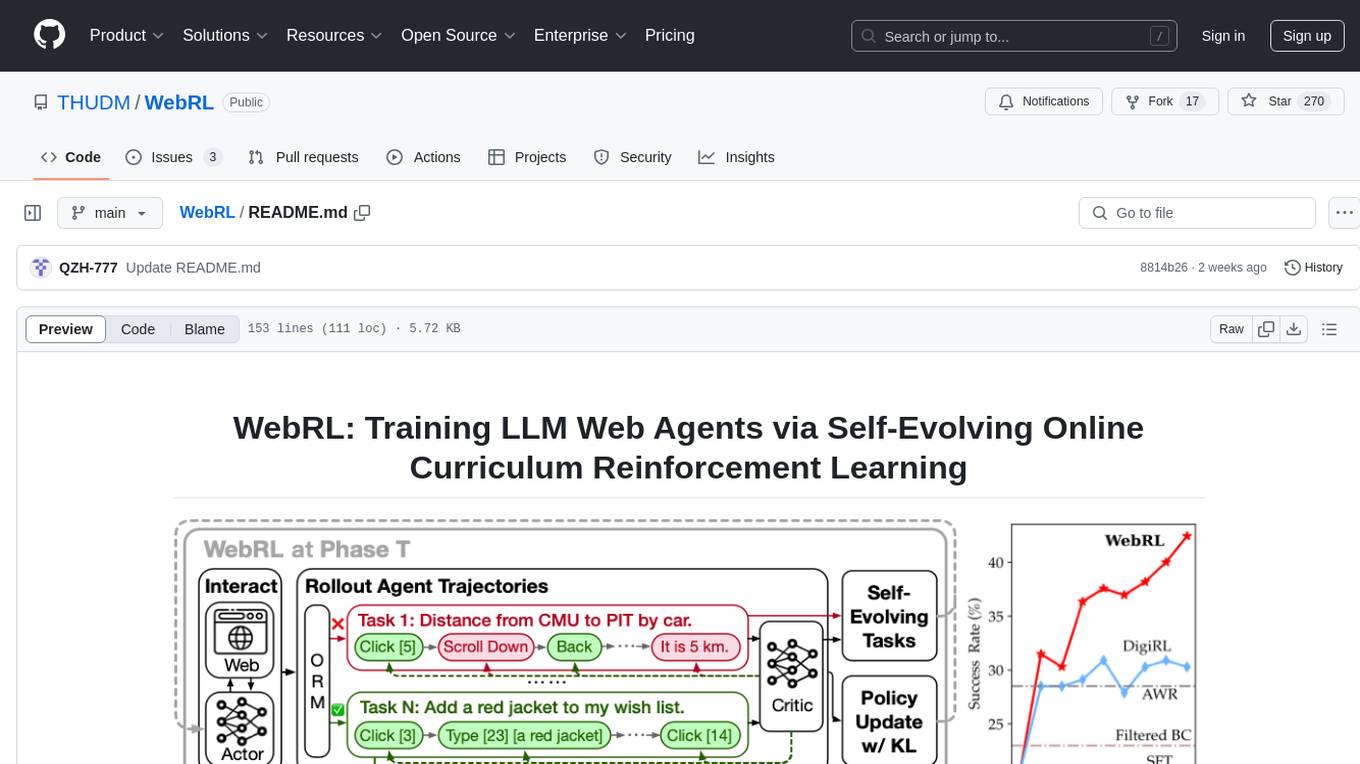
WebRL
WebRL is a self-evolving online curriculum learning framework designed for training web agents in the WebArena environment. It provides model checkpoints, training instructions, and evaluation processes for training the actor and critic models. The tool enables users to generate new instructions and interact with WebArena to configure tasks for training and evaluation.
agent-mimir
Agent Mimir is a command line and Discord chat client 'agent' manager for LLM's like Chat-GPT that provides the models with access to tooling and a framework with which accomplish multi-step tasks. It is easy to configure your own agent with a custom personality or profession as well as enabling access to all tools that are compatible with LangchainJS. Agent Mimir is based on LangchainJS, every tool or LLM that works on Langchain should also work with Mimir. The tasking system is based on Auto-GPT and BabyAGI where the agent needs to come up with a plan, iterate over its steps and review as it completes the task.
awadb
AwaDB is an AI native database designed for embedding vectors. It simplifies database usage by eliminating the need for schema definition and manual indexing. The system ensures real-time search capabilities with millisecond-level latency. Built on 5 years of production experience with Vearch, AwaDB incorporates best practices from the community to offer stability and efficiency. Users can easily add and search for embedded sentences using the provided client libraries or RESTful API.
chatmemory
ChatMemory is a simple yet powerful long-term memory manager that facilitates communication between AI and users. It organizes conversation data into history, summary, and knowledge entities, enabling quick retrieval of context and generation of clear, concise answers. The tool leverages vector search on summaries/knowledge and detailed history to provide accurate responses. It balances speed and accuracy by using lightweight retrieval and fallback detailed search mechanisms, ensuring efficient memory management and response generation beyond mere data retrieval.
Toolio
Toolio is an OpenAI-like HTTP server API implementation that supports structured LLM response generation, making it conform to a JSON schema. It is useful for reliable tool calling and agentic workflows based on schema-driven output. Toolio is based on the MLX framework for Apple Silicon, specifically M1/M2/M3/M4 Macs. It allows users to host MLX-format LLMs for structured output queries and provides a command line client for easier usage of tools. The tool also supports multiple tool calls and the creation of custom tools for specific tasks.
For similar tasks
notebook-intelligence
Notebook Intelligence (NBI) is an AI coding assistant and extensible AI framework for JupyterLab. It greatly boosts the productivity of JupyterLab users with AI assistance by providing features such as code generation with inline chat, auto-complete, and chat interface. NBI supports various LLM Providers and AI Models, including local models from Ollama. Users can configure model provider and model options, remember GitHub Copilot login, and save configuration files. NBI seamlessly integrates with Model Context Protocol (MCP) servers, supporting both Standard Input/Output (stdio) and Server-Sent Events (SSE) transports. Users can easily add MCP servers to NBI, auto-approve tools, set environment variables, and group servers based on functionality. Additionally, NBI allows access to built-in tools from an MCP participant, enhancing the user experience and productivity.
samples
Strands Agents Samples is a repository showcasing easy-to-use examples for building AI agents using a model-driven approach. The examples provided are for demonstration and educational purposes only, not intended for direct production use. Users can explore various samples to understand concepts and techniques, ensuring proper security and testing procedures before implementation.
ai-guide
This guide is dedicated to Large Language Models (LLMs) that you can run on your home computer. It assumes your PC is a lower-end, non-gaming setup.
onnxruntime-genai
ONNX Runtime Generative AI is a library that provides the generative AI loop for ONNX models, including inference with ONNX Runtime, logits processing, search and sampling, and KV cache management. Users can call a high level `generate()` method, or run each iteration of the model in a loop. It supports greedy/beam search and TopP, TopK sampling to generate token sequences, has built in logits processing like repetition penalties, and allows for easy custom scoring.
mistral.rs
Mistral.rs is a fast LLM inference platform written in Rust. We support inference on a variety of devices, quantization, and easy-to-use application with an Open-AI API compatible HTTP server and Python bindings.
generative-ai-python
The Google AI Python SDK is the easiest way for Python developers to build with the Gemini API. The Gemini API gives you access to Gemini models created by Google DeepMind. Gemini models are built from the ground up to be multimodal, so you can reason seamlessly across text, images, and code.
jetson-generative-ai-playground
This repo hosts tutorial documentation for running generative AI models on NVIDIA Jetson devices. The documentation is auto-generated and hosted on GitHub Pages using their CI/CD feature to automatically generate/update the HTML documentation site upon new commits.

chat-ui
A chat interface using open source models, eg OpenAssistant or Llama. It is a SvelteKit app and it powers the HuggingChat app on hf.co/chat.
For similar jobs
sweep
Sweep is an AI junior developer that turns bugs and feature requests into code changes. It automatically handles developer experience improvements like adding type hints and improving test coverage.
teams-ai
The Teams AI Library is a software development kit (SDK) that helps developers create bots that can interact with Teams and Microsoft 365 applications. It is built on top of the Bot Framework SDK and simplifies the process of developing bots that interact with Teams' artificial intelligence capabilities. The SDK is available for JavaScript/TypeScript, .NET, and Python.
ai-guide
This guide is dedicated to Large Language Models (LLMs) that you can run on your home computer. It assumes your PC is a lower-end, non-gaming setup.

classifai
Supercharge WordPress Content Workflows and Engagement with Artificial Intelligence. Tap into leading cloud-based services like OpenAI, Microsoft Azure AI, Google Gemini and IBM Watson to augment your WordPress-powered websites. Publish content faster while improving SEO performance and increasing audience engagement. ClassifAI integrates Artificial Intelligence and Machine Learning technologies to lighten your workload and eliminate tedious tasks, giving you more time to create original content that matters.
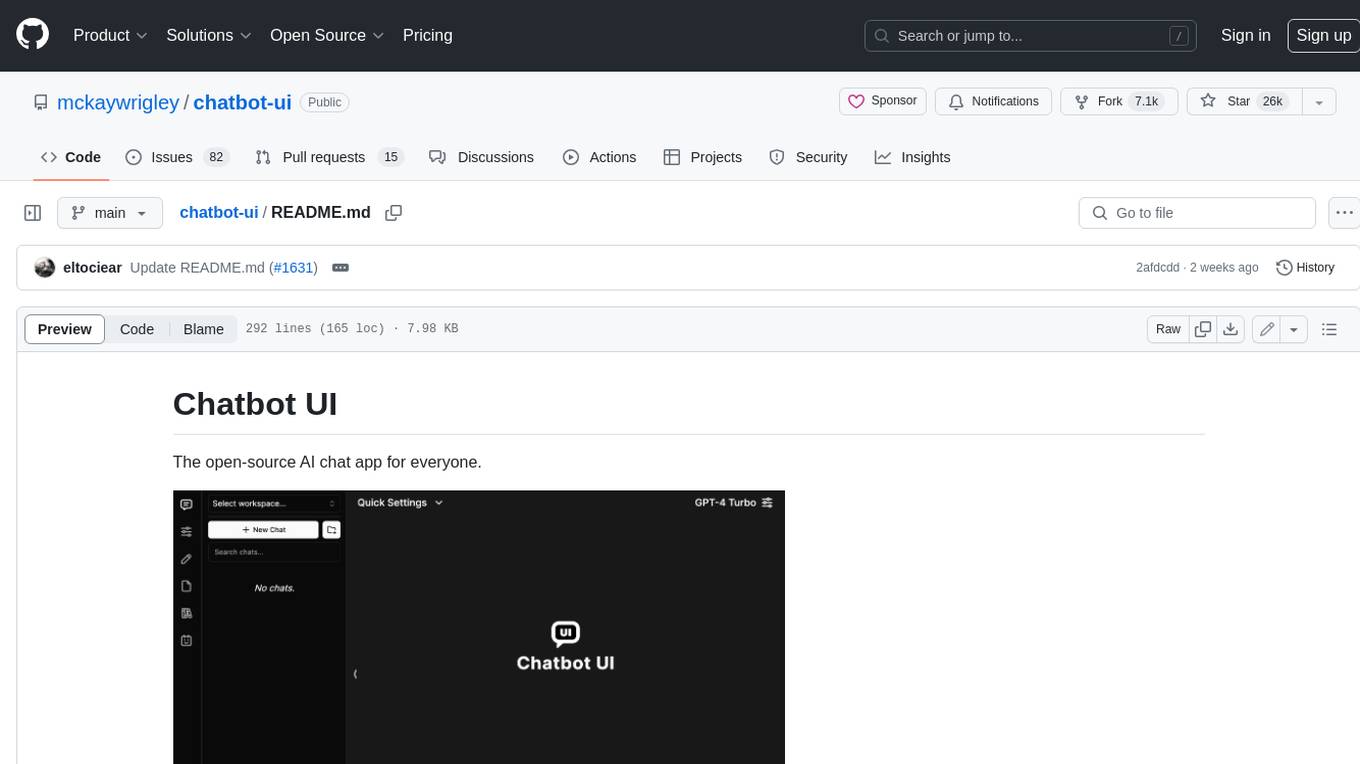
chatbot-ui
Chatbot UI is an open-source AI chat app that allows users to create and deploy their own AI chatbots. It is easy to use and can be customized to fit any need. Chatbot UI is perfect for businesses, developers, and anyone who wants to create a chatbot.
BricksLLM
BricksLLM is a cloud native AI gateway written in Go. Currently, it provides native support for OpenAI, Anthropic, Azure OpenAI and vLLM. BricksLLM aims to provide enterprise level infrastructure that can power any LLM production use cases. Here are some use cases for BricksLLM: * Set LLM usage limits for users on different pricing tiers * Track LLM usage on a per user and per organization basis * Block or redact requests containing PIIs * Improve LLM reliability with failovers, retries and caching * Distribute API keys with rate limits and cost limits for internal development/production use cases * Distribute API keys with rate limits and cost limits for students
uAgents
uAgents is a Python library developed by Fetch.ai that allows for the creation of autonomous AI agents. These agents can perform various tasks on a schedule or take action on various events. uAgents are easy to create and manage, and they are connected to a fast-growing network of other uAgents. They are also secure, with cryptographically secured messages and wallets.
griptape
Griptape is a modular Python framework for building AI-powered applications that securely connect to your enterprise data and APIs. It offers developers the ability to maintain control and flexibility at every step. Griptape's core components include Structures (Agents, Pipelines, and Workflows), Tasks, Tools, Memory (Conversation Memory, Task Memory, and Meta Memory), Drivers (Prompt and Embedding Drivers, Vector Store Drivers, Image Generation Drivers, Image Query Drivers, SQL Drivers, Web Scraper Drivers, and Conversation Memory Drivers), Engines (Query Engines, Extraction Engines, Summary Engines, Image Generation Engines, and Image Query Engines), and additional components (Rulesets, Loaders, Artifacts, Chunkers, and Tokenizers). Griptape enables developers to create AI-powered applications with ease and efficiency.