
cameratrapai
AI models trained by Google to classify species in images from motion-triggered widlife cameras.
Stars: 125
SpeciesNet is an ensemble of AI models designed for classifying wildlife in camera trap images. It consists of an object detector that finds objects of interest in wildlife camera images and an image classifier that classifies those objects to the species level. The ensemble combines these two models using heuristics and geographic information to assign each image to a single category. The models have been trained on a large dataset of camera trap images and are used for species recognition in the Wildlife Insights platform.
README:
An ensemble of AI models for classifying wildlife in camera trap images.
- Overview
- Running SpeciesNet
- Downloading SpeciesNet model weights directly
- Contacting us
- Citing SpeciesNet
- Supported models
- Input format
- Output format
- Ensemble decision-making
- Alternative installation variants
- Contributing code
- Animal picture
- Build status
Effective wildlife monitoring relies heavily on motion-triggered wildlife cameras, or “camera traps”, which generate vast quantities of image data. Manual processing of these images is a significant bottleneck. AI can accelerate that processing, helping conservation practitioners spend more time on conservation, and less time reviewing images.
This repository hosts code for running an ensemble of two AI models: (1) an object detector that finds objects of interest in wildlife camera images, and (2) an image classifier that classifies those objects to the species level. This ensemble is used for species recognition in the Wildlife Insights platform.
The object detector used in this ensemble is MegaDetector, which finds animals, humans, and vehicles in camera trap images, but does not classify animals to species level.
The species classifier (SpeciesNet) was trained at Google using a large dataset of camera trap images and an EfficientNet V2 M architecture. It is designed to classify images into one of more than 2000 labels, covering diverse animal species, higher-level taxa (like "mammalia" or "felidae"), and non-animal classes ("blank", "vehicle"). SpeciesNet has been trained on a geographically diverse dataset of over 65M images, including curated images from the Wildlife Insights user community, as well as images from publicly-available repositories.
The SpeciesNet ensemble combines these two models using a set of heuristics and, optionally, geographic information to assign each image to a single category. See the "ensemble decision-making" section for more information about how the ensemble combines information for each image to make a single prediction.
The full details of the models and the ensemble process are discussed in this research paper:
Gadot T, Istrate Ș, Kim H, Morris D, Beery S, Birch T, Ahumada J. To crop or not to crop: Comparing whole-image and cropped classification on a large dataset of camera trap images. IET Computer Vision. 2024 Dec;18(8):1193-208.
The instructions on this page will assume that you have a Python virtual environment set up. If you have not installed Python, or you are not familiar with Python virtual environments, start with our installing Python page. If you see a prompt that looks something like the following, you're all set to proceed to the next step:

You can install the SpeciesNet Python package via:
pip install speciesnet
To confirm that the package has been installed, you can run:
python -m speciesnet.scripts.run_model --help
You should see help text related to the main script you'll use to run SpeciesNet.
The easiest way to run the ensemble is via the "run_model" script, like this:
python -m speciesnet.scripts.run_model.py --folders "c:\your\image\folder" --predictions_json "c:\your\output\file.json"
Change c:\your\image\folder to the root folder where your images live, and change c:\your\output\file.json to the location where you want to put the output file containing the SpeciesNet results.
This will automatically download and run the detector and the classifier. This command periodically logs output to the output file, and if this command doesn't finish (e.g. you have to cancel or reboot), you can just run the same command, and it will pick up where it left off.
These commands produce an output file in .json format; for details about this format, and information about converting it to other formats, see the "output format" section below.
You can also run the three steps (detector, classifier, ensemble) separately; see the "running each component separately" section for more information.
In the above example, we didn't tell the ensemble what part of the world your images came from, so it may, for example, predict a kangaroo for an image from England. If you want to let our ensemble filter predictions geographically, add, for example:
--country GBR
You can use any ISO 3166-1 alpha-3 three-letter country code.
If your images are from the USA, you can also specify a state name using the two-letter state abbreviation, by adding, for example:
--admin1_region CA
If you don't have an NVIDIA GPU, you can ignore this section.
If you have an NVIDIA GPU, you should be able to use it for both the detection and classification steps. However, because our detector runs in PyTorch and our classifier runs in TensorFlow, this comes with two caveats...
Recent versions of TensorFlow do not support GPUs on "native Windows". Everything will work fine on Windows, but our code won't use your GPU to run the classifier. However, TensorFlow does support GPUs in WSL (the Windows Subsystem for Linux), which has been available as part of Windows since Windows 10, and is installed by default in Windows 11. WSL is like a Linux prompt that runs inside your Windows OS. If you're using Windows, and it's working great, but you want to use your GPU, try WSL, and feel free to email us if you get stuck setting things up in WSL.
Most of the time, after installing the speciesnet Python package, the GPU will be available to either TensorFlow or PyTorch, but not both. You can test which framework(s) can see your GPU by running:
python -m speciesnet.scripts.gpu_test
You might see "No GPUs reported by PyTorch" and/or "No GPUs reported by Tensorflow". If both frameworks show that a GPU is available, congratulations, you've won the Python IT lottery. More commonly, TensorFlow will not see the GPU. If this is what you observe, don't worry, everything will still work, you'll just need to run each step in a separate Python environment. We recommend creating an extra environment in this case called "speciesnet-tf", like this:
conda create -n speciesnet-tf python=3.11 pip -y
conda activate speciesnet-tf
pip install "numpy<2.0"
pip install torch torchvision torchaudio --index-url https://download.pytorch.org/whl/cpu --force-reinstall
pip install "tensorflow[and-cuda]==2.15.1" --force-reinstall
This is forcing a CPU-only installation of PyTorch in that environment (which is OK, we won't be using PyTorch in this environment), then forcing a GPU installation of TensorFlow. After this, you should be able to run each component separately, just be sure to activate the "speciesnet" environment before running the detector, and the "speciesnet-tf" environment before running the classifier.
If this approach isn't working as advertised, let us know.
Rather than running everything at once, you may want to run the detection, classification, and ensemble steps separately. You can do that like this:
-
Run the detector:
python -m speciesnet.scripts.run_model.py --detector_only --folders "c:\your\image\folder" --predictions_json "c:\your_detector_output_file.json" -
Run the classifier, passing the file that you just created, which contains detection results:
python -m speciesnet.scripts.run_model.py --classifier_only --folders "c:\your\image\folder" --predictions_json "c:\your_clasifier_output_file.json" --detections_json "c:\your_detector_output_file.json" -
Run the ensemble step, passing both the files that you just created, which contain the detection and classification results:
python -m speciesnet.scripts.run_model.py --ensemble_only --folders "c:\your\image\folder" --predictions_json "c:\your_ensemble_output_file.json" --detections_json "c:\your_detector_output_file.json" --classifications_json "c:\your_clasifier_output_file.json"
The run_model.py script recommended above will download model weights automatically. If you want to use the SpeciesNet model weights outside of our script, or if you plan to be offline when you first run the script, you can download model weights directly from Kaggle. Running our ensemble also requires MegaDetector, so in this list of links, we also include a direct link to the MegaDetector model weights.
- SpeciesNet page on Kaggle
- Direct link to version 4.0.0a weights (the crop classifier)
- Direct link to version 4.0.0b weights (the whole-image classifier)
- Direct link to MegaDetector weights
If you have issues or questions, either file an issue or email us at [email protected].
If you use this model, please cite:
@article{gadot2024crop,
  title={To crop or not to crop: Comparing whole-image and cropped classification on a large dataset of camera trap images},
  author={Gadot, Tomer and Istrate, Ștefan and Kim, Hyungwon and Morris, Dan and Beery, Sara and Birch, Tanya and Ahumada, Jorge},
  journal={IET Computer Vision},
  year={2024},
  publisher={Wiley Online Library}
}
Depending on how you plan to run SpeciesNet, you may want to install additional dependencies:
-
Minimal requirements:
pip install speciesnet -
Minimal + notebook requirements:
pip install speciesnet[notebooks] -
Minimal + server requirements:
pip install speciesnet[server] -
Minimal + cloud requirements (
az/gs/s3), e.g.:pip install speciesnet[gs] -
Any combination of the above requirements, e.g.:
pip install speciesnet[notebooks,server]
There are two variants of the SpeciesNet classifier, which lend themselves to different ensemble strategies:
- v4.0.0a (default): Always-crop model, i.e. we run the detector first and crop the image to the top detection bounding box before feeding it to the species classifier.
- v4.0.0b: Full-image model, i.e. we run both the detector and the species classifier on the full image, independently.
run_model.py defaults to v4.0.0a, but you can specify one model or the other using the --model option, for example:
--model kaggle:google/speciesnet/keras/v4.0.0a--model kaggle:google/speciesnet/keras/v4.0.0b
If you are a DIY type and you plan to run the models outside of our ensemble, a couple of notes:
- The crop classifier (v4.0.0a) expects images to be cropped tightly to animals, then resized to 480x480px.
- The whole-image classifier (v4.0.0b) expects images to have been cropped vertically to remove some pixels from the top and bottom, then resized to 480x480px.
See classifier.py to see how preprocessing is implemented for both classifiers.
In the above examples, we demonstrate calling run_model.py using the --folders option to point to your images, and optionally using the --country options to tell the ensemble what country your images came from. run_model.py can also load a list of images from a .json file in the following format; this is particularly useful if you want to specify different countries/states for different subsets of your images.
When you call the model, you can either prepare your requests to match this format or, in some cases, other supported formats will be converted to this automatically.
{
    "instances": [
        {
            "filepath": str  => Image filepath
            "country": str (optional)  => 3-letter country code (ISO 3166-1 Alpha-3) for the location where the image was taken
            "admin1_region": str (optional)  => First-level administrative division (in ISO 3166-2 format) within the country above
            "latitude": float (optional)  => Latitude where the image was taken
            "longitude": float (optional)  => Longitude where the image was taken
        },
        ...  => A request can contain multiple instances in the format above.
    ]
}
admin1_region is currently only supported in the US, where valid values for admin1_region are two-letter state codes.
Latitude and longitude are only used to determine admin1_region, so if you are specifying a state code, you don't need to specify latitude and longitude.
run_model.py produces output in .json format, containing an array called "predictions", with one element per image. We provide a script to convert this format to the format used by MegaDetector, which can be imported into Timelapse, see speciesnet_to_md.py.
Each element always contains field called "filepath"; the exact content of those elements will vary depending on which elements of the ensemble you ran.
{
    "predictions": [
        {
            "filepath": str  => Image filepath.
            "failures": list[str] (optional)  => List of internal components that failed during prediction (e.g. "CLASSIFIER", "DETECTOR", "GEOLOCATION"). If absent, the prediction was successful.
            "country": str (optional)  => 3-letter country code (ISO 3166-1 Alpha-3) for the location where the image was taken. It can be overwritten if the country from the request doesn't match the country of (latitude, longitude).
            "admin1_region": str (optional)  => First-level administrative division (in ISO 3166-2 format) within the country above. If not provided in the request, it can be computed from (latitude, longitude) when those coordinates are specified. Included in the response only for some countries that are used in geofencing (e.g. "USA").
            "latitude": float (optional)  => Latitude where the image was taken, included only if (latitude, longitude) were present in the request.
            "longitude": float (optional)  => Longitude where the image was taken, included only if (latitude, longitude) were present in the request.
            "classifications": {  => dict (optional)  => Top-5 classifications. Included only if "CLASSIFIER" if not part of the "failures" field.
                "classes": list[str]  => List of top-5 classes predicted by the classifier, matching the decreasing order of their scores below.
                "scores": list[float]  => List of scores corresponding to top-5 classes predicted by the classifier, in decreasing order.
                "target_classes": list[str] (optional)  => List of target classes, only present if target classes are passed as arguments.
                "target_logits": list[float] (optional)  => Raw confidence scores (logits) of the target classes, only present if target classes are passed as arguments.
            },
            "detections": [  => list (optional)  => List of detections with confidence scores > 0.01, in decreasing order of their scores. Included only if "DETECTOR" if not part of the "failures" field.
                {
                    "category": str  => Detection class "1" (= animal), "2" (= human) or "3" (= vehicle) from MegaDetector's raw output.
                    "label": str  => Detection class "animal", "human" or "vehicle", matching the "category" field above. Added for readability purposes.
                    "conf": float  => Confidence score of the current detection.
                    "bbox": list[float]  => Bounding box coordinates, in (xmin, ymin, width, height) format, of the current detection. Coordinates are normalized to the [0.0, 1.0] range, relative to the image dimensions.
                },
                ...  => A prediction can contain zero or multiple detections.
            ],
            "prediction": str (optional)  => Final prediction of the SpeciesNet ensemble. Included only if "CLASSIFIER" and "DETECTOR" are not part of the "failures" field.
            "prediction_score": float (optional)  => Final prediction score of the SpeciesNet ensemble. Included only if the "prediction" field above is included.
            "prediction_source": str (optional)  => Internal component that produced the final prediction. Used to collect information about which parts of the SpeciesNet ensemble fired. Included only if the "prediction" field above is included.
            "model_version": str  => A string representing the version of the model that produced the current prediction.
        },
        ...  => A response will contain one prediction for each instance in the request.
    ]
}
{
    "predictions": [
        {
            "filepath": str  => Image filepath.
            "failures": list[str] (optional)  => List of internal components that failed during prediction (in this case, only "CLASSIFIER" can be in that list). If absent, the prediction was successful.
            "classifications": {  => dict (optional)  => Top-5 classifications. Included only if "CLASSIFIER" if not part of the "failures" field.
                "classes": list[str]  => List of top-5 classes predicted by the classifier, matching the decreasing order of their scores below.
                "scores": list[float]  => List of scores corresponding to top-5 classes predicted by the classifier, in decreasing order.
                "target_classes": list[str] (optional)  => List of target classes, only present if target classes are passed as arguments.
                "target_logits": list[float] (optional)  => Raw confidence scores (logits) of the target classes, only present if target classes are passed as arguments.
            }
        },
        ...  => A response will contain one prediction for each instance in the request.
    ]
}
{
    "predictions": [
        {
            "filepath": str  => Image filepath.
            "failures": list[str] (optional)  => List of internal components that failed during prediction (in this case, only "DETECTOR" can be in that list). If absent, the prediction was successful.
            "detections": [  => list (optional)  => List of detections with confidence scores > 0.01, in decreasing order of their scores. Included only if "DETECTOR" if not part of the "failures" field.
                {
                    "category": str  => Detection class "1" (= animal), "2" (= human) or "3" (= vehicle) from MegaDetector's raw output.
                    "label": str  => Detection class "animal", "human" or "vehicle", matching the "category" field above. Added for readability purposes.
                    "conf": float  => Confidence score of the current detection.
                    "bbox": list[float]  => Bounding box coordinates, in (xmin, ymin, width, height) format, of the current detection. Coordinates are normalized to the [0.0, 1.0] range, relative to the image dimensions.
                },
                ...  => A prediction can contain zero or multiple detections.
            ]
        },
        ...  => A response will contain one prediction for each instance in the request.
    ]
}
The SpeciesNet ensemble uses multiple steps to predict a single category for each image, combining the strengths of the detector and the classifier.
The ensembling strategy was primarily optimized for minimizing the human effort required to review collections of images. To do that, the guiding principles are:
- Help users to quickly filter out unwanted images (e.g., blanks): identify as many blank images as possible while minimizing missed animals, which can be more costly than misclassifying a non-blank image as one of the possible animal classes.
- Provide high-confidence predictions for frequent classes (e.g., deer).
- Make predictions on the lowest taxonomic level possible, while balancing precision: if the ensemble is not confident enough all the way to the species level, we would rather return a prediction we are confident about in a higher taxonomic level (e.g., family, or sometimes even "animal"), instead of risking an incorrect prediction on the species level.
Here is a breakdown of the different steps:
-
Input processing: Raw images are preprocessed and passed to both the object detector (MegaDetector) and the image classifier. The type of preprocessing will depend on the selected model. For "always crop" models, images are first processed by the object detector and then cropped based on the detection bounding box before being fed to the classifier. For "full image" models, images are preprocessed independently for both models.
-
Object detection: The detector identifies potential objects (animals, humans, or vehicles) in the image, providing their bounding box coordinates and confidence scores.
-
Species classification: The species classifier analyzes the (potentially cropped) image to identify the most likely species present. It provides a list of top-5 species classifications, each with a confidence score. The species classifier is a fully supervised model that classifies images into a fixed set of animal species, higher taxa, and non-animal labels.
-
Detection-based human/vehicle decisions: If the detector is highly confident about the presence of a human or vehicle, that label will be returned as the final prediction regardless of what the classifier predicts. If the detection is less confident and the classifier also returns human or vehicle as a top-5 prediction, with a reasonable score, that top prediction will be returned. This step prevents high-confidence detector predictions from being overridden by lower-confidence classifier predictions.
-
Blank decisions: If the classifier predicts "blank" with a high confidence score, and the detector has very low confidence about the presence of an animal (or is absent), that "blank" label is returned as a final prediction. Similarly, if a classification is "blank" with extra-high confidence (above 0.99), that label is returned as a final prediction regardless of the detector's output. This enables the model to filter out images with high confidence in being blank.
-
Geofencing: If the most likely species is an animal and a location (country and optional admin1 region) is provided for the image, a geofencing rule is applied. If that species is explicitly disallowed for that region based on the available geofencing rules, the prediction will be rolled up (as explained below) to a higher taxa level on that allow list.
-
Label rollup: If all of the previous steps do not yield a final prediction, a "rollup" is applied when there is a good classification score for an animal. "Rollup" is the process of propagating the classification predictions to the first matching ancestor in the taxonomy, provided there is a good score at that level. This means the model may assign classifications at the genus, family, order, class, or kingdom level, if those scores are higher than the score at the species level. This is a common strategy to handle long-tail distributions, common in wildlife datasets.
-
Detection-based animal decisions: If the detector has a reasonable confidence
animalprediction,animalwill be returned along with the detector confidence. -
Unknown: If no other rule applies, the
unknownclass is returned as the final prediction, to avoid making low-confidence predictions. -
Prediction source: At each step of the prediction workflow, a
prediction_sourceis stored. This will be included in the final results to help diagnose which parts of the overall SpeciesNet ensemble were actually used.
If you're interested in contributing to our repo, rather than installing via pip, we recommend cloning the repo, then creating the Python virtual environment for development using the following commands:
python -m venv .env
source .env/bin/activate
pip install -e .[dev]
We use the following tools for testing and validating code:
-
pytestfor running tests:pytest -vv
-
blackfor formatting code:black . -
isortfor sorting Python imports consistently:isort . -
pylintfor linting Python code and flag various issues:pylint . --recursive=yes -
pyrightfor static type checking:pyright
-
pymarkdownfor linting Markdown files:pymarkdown scan **/*.md
If you submit a PR to contribute your code back to this repo, you will be asked to sign a contributor license agreement; see CONTRIBUTING.md for more information.
It would be unfortunate if this whole README about camera trap images didn't show you a single camera trap image, so...

Image credit University of Minnesota, from the Orinoquía Camera Traps dataset.
![]()
![]()
![]()
For Tasks:
Click tags to check more tools for each tasksFor Jobs:
Alternative AI tools for cameratrapai
Similar Open Source Tools
cameratrapai
SpeciesNet is an ensemble of AI models designed for classifying wildlife in camera trap images. It consists of an object detector that finds objects of interest in wildlife camera images and an image classifier that classifies those objects to the species level. The ensemble combines these two models using heuristics and geographic information to assign each image to a single category. The models have been trained on a large dataset of camera trap images and are used for species recognition in the Wildlife Insights platform.

rag-experiment-accelerator
The RAG Experiment Accelerator is a versatile tool that helps you conduct experiments and evaluations using Azure AI Search and RAG pattern. It offers a rich set of features, including experiment setup, integration with Azure AI Search, Azure Machine Learning, MLFlow, and Azure OpenAI, multiple document chunking strategies, query generation, multiple search types, sub-querying, re-ranking, metrics and evaluation, report generation, and multi-lingual support. The tool is designed to make it easier and faster to run experiments and evaluations of search queries and quality of response from OpenAI, and is useful for researchers, data scientists, and developers who want to test the performance of different search and OpenAI related hyperparameters, compare the effectiveness of various search strategies, fine-tune and optimize parameters, find the best combination of hyperparameters, and generate detailed reports and visualizations from experiment results.

Tools4AI
Tools4AI is a Java-based Agentic Framework for building AI agents to integrate with enterprise Java applications. It enables the conversion of natural language prompts into actionable behaviors, streamlining user interactions with complex systems. By leveraging AI capabilities, it enhances productivity and innovation across diverse applications. The framework allows for seamless integration of AI with various systems, such as customer service applications, to interpret user requests, trigger actions, and streamline workflows. Prompt prediction anticipates user actions based on input prompts, enhancing user experience by proactively suggesting relevant actions or services based on context.
llms
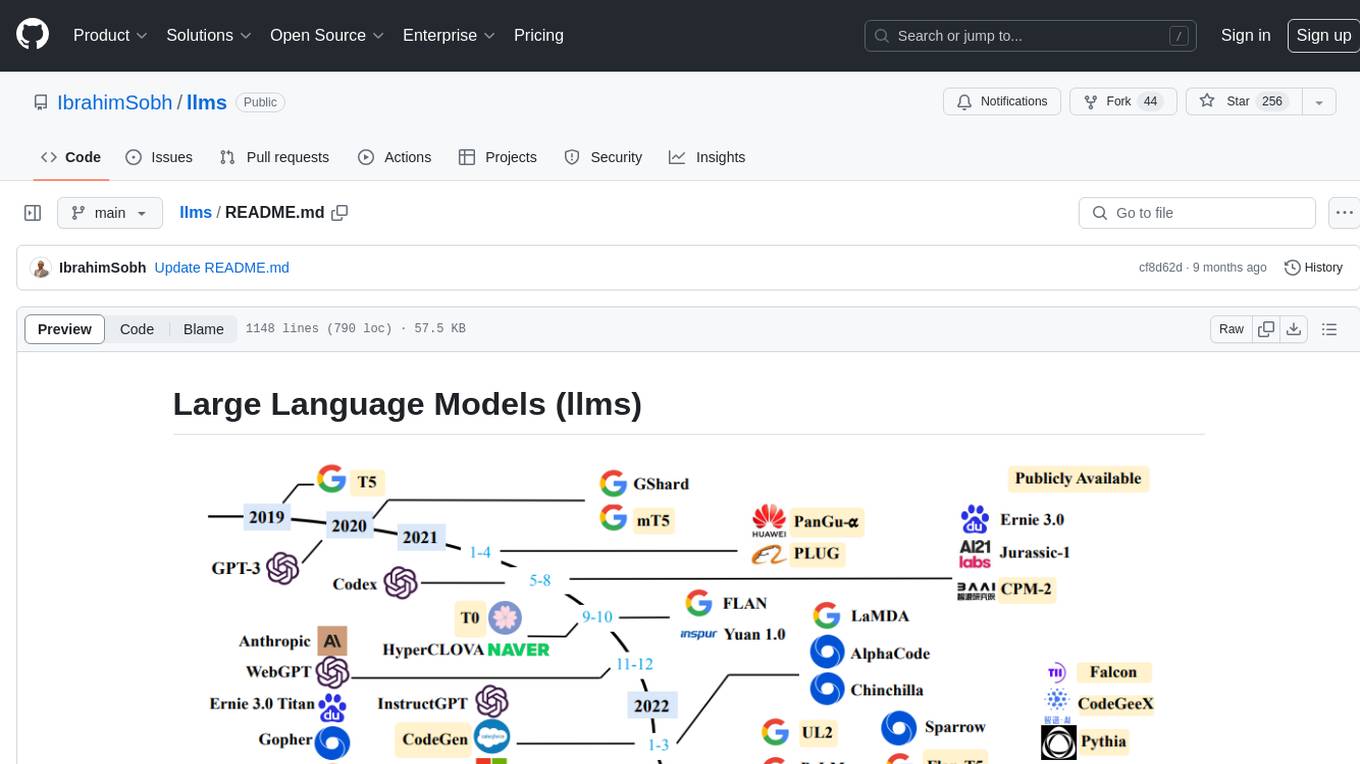
The 'llms' repository is a comprehensive guide on Large Language Models (LLMs), covering topics such as language modeling, applications of LLMs, statistical language modeling, neural language models, conditional language models, evaluation methods, transformer-based language models, practical LLMs like GPT and BERT, prompt engineering, fine-tuning LLMs, retrieval augmented generation, AI agents, and LLMs for computer vision. The repository provides detailed explanations, examples, and tools for working with LLMs.
abliterator
abliterator.py is a simple Python library/structure designed to ablate features in large language models (LLMs) supported by TransformerLens. It provides capabilities to enter temporary contexts, cache activations with N samples, calculate refusal directions, and includes tokenizer utilities. The library aims to streamline the process of experimenting with ablation direction turns by encapsulating useful logic and minimizing code complexity. While currently basic and lacking comprehensive documentation, the library serves well for personal workflows and aims to expand beyond feature ablation to augmentation and additional features over time with community support.
kafka-ml
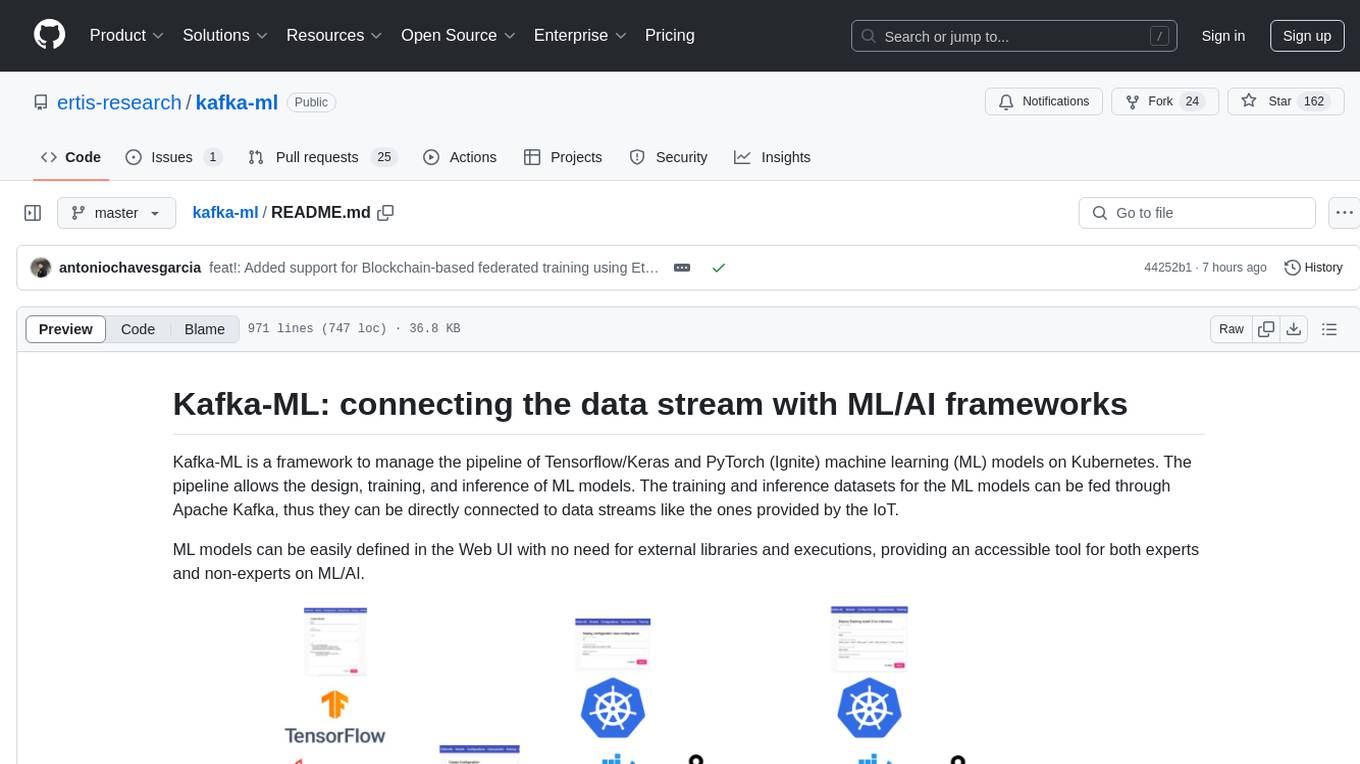
Kafka-ML is a framework designed to manage the pipeline of Tensorflow/Keras and PyTorch machine learning models on Kubernetes. It enables the design, training, and inference of ML models with datasets fed through Apache Kafka, connecting them directly to data streams like those from IoT devices. The Web UI allows easy definition of ML models without external libraries, catering to both experts and non-experts in ML/AI.
llama-on-lambda
This project provides a proof of concept for deploying a scalable, serverless LLM Generative AI inference engine on AWS Lambda. It leverages the llama.cpp project to enable the usage of more accessible CPU and RAM configurations instead of limited and expensive GPU capabilities. By deploying a container with the llama.cpp converted models onto AWS Lambda, this project offers the advantages of scale, minimizing cost, and maximizing compute availability. The project includes AWS CDK code to create and deploy a Lambda function leveraging your model of choice, with a FastAPI frontend accessible from a Lambda URL. It is important to note that you will need ggml quantized versions of your model and model sizes under 6GB, as your inference RAM requirements cannot exceed 9GB or your Lambda function will fail.
feedgen
FeedGen is an open-source tool that uses Google Cloud's state-of-the-art Large Language Models (LLMs) to improve product titles, generate more comprehensive descriptions, and fill missing attributes in product feeds. It helps merchants and advertisers surface and fix quality issues in their feeds using Generative AI in a simple and configurable way. The tool relies on GCP's Vertex AI API to provide both zero-shot and few-shot inference capabilities on GCP's foundational LLMs. With few-shot prompting, users can customize the model's responses towards their own data, achieving higher quality and more consistent output. FeedGen is an Apps Script based application that runs as an HTML sidebar in Google Sheets, allowing users to optimize their feeds with ease.
ai-rag-chat-evaluator
This repository contains scripts and tools for evaluating a chat app that uses the RAG architecture. It provides parameters to assess the quality and style of answers generated by the chat app, including system prompt, search parameters, and GPT model parameters. The tools facilitate running evaluations, with examples of evaluations on a sample chat app. The repo also offers guidance on cost estimation, setting up the project, deploying a GPT-4 model, generating ground truth data, running evaluations, and measuring the app's ability to say 'I don't know'. Users can customize evaluations, view results, and compare runs using provided tools.
airflow-ai-sdk
This repository contains an SDK for working with LLMs from Apache Airflow, based on Pydantic AI. It allows users to call LLMs and orchestrate agent calls directly within their Airflow pipelines using decorator-based tasks. The SDK leverages the familiar Airflow `@task` syntax with extensions like `@task.llm`, `@task.llm_branch`, and `@task.agent`. Users can define tasks that call language models, orchestrate multi-step AI reasoning, change the control flow of a DAG based on LLM output, and support various models in the Pydantic AI library. The SDK is designed to integrate LLM workflows into Airflow pipelines, from simple LLM calls to complex agentic workflows.
Tiny-Predictive-Text
Tiny-Predictive-Text is a demonstration of predictive text without an LLM, using permy.link. It provides a detailed description of the tool, including its features, benefits, and how to use it. The tool is suitable for a variety of jobs, including content writers, editors, and researchers. It can be used to perform a variety of tasks, such as generating text, completing sentences, and correcting errors.
parsee-core
Parsee AI is a high-level open source data extraction and structuring framework specialized for the extraction of data from a financial domain, but can be used for other use-cases as well. It aims to make the structuring of data from unstructured sources like PDFs, HTML files, and images as easy as possible. Parsee can be used locally in Python environments or through a hosted version for cloud-based jobs. It supports the extraction of tables, numbers, and other data elements, with the ability to create custom extraction templates and run jobs using different models.
nagato-ai
Nagato-AI is an intuitive AI Agent library that supports multiple LLMs including OpenAI's GPT, Anthropic's Claude, Google's Gemini, and Groq LLMs. Users can create agents from these models and combine them to build an effective AI Agent system. The library is named after the powerful ninja Nagato from the anime Naruto, who can control multiple bodies with different abilities. Nagato-AI acts as a linchpin to summon and coordinate AI Agents for specific missions. It provides flexibility in programming and supports tools like Coordinator, Researcher, Critic agents, and HumanConfirmInputTool.
minbpe
This repository contains a minimal, clean code implementation of the Byte Pair Encoding (BPE) algorithm, commonly used in LLM tokenization. The BPE algorithm is "byte-level" because it runs on UTF-8 encoded strings. This algorithm was popularized for LLMs by the GPT-2 paper and the associated GPT-2 code release from OpenAI. Sennrich et al. 2015 is cited as the original reference for the use of BPE in NLP applications. Today, all modern LLMs (e.g. GPT, Llama, Mistral) use this algorithm to train their tokenizers. There are two Tokenizers in this repository, both of which can perform the 3 primary functions of a Tokenizer: 1) train the tokenizer vocabulary and merges on a given text, 2) encode from text to tokens, 3) decode from tokens to text. The files of the repo are as follows: 1. minbpe/base.py: Implements the `Tokenizer` class, which is the base class. It contains the `train`, `encode`, and `decode` stubs, save/load functionality, and there are also a few common utility functions. This class is not meant to be used directly, but rather to be inherited from. 2. minbpe/basic.py: Implements the `BasicTokenizer`, the simplest implementation of the BPE algorithm that runs directly on text. 3. minbpe/regex.py: Implements the `RegexTokenizer` that further splits the input text by a regex pattern, which is a preprocessing stage that splits up the input text by categories (think: letters, numbers, punctuation) before tokenization. This ensures that no merges will happen across category boundaries. This was introduced in the GPT-2 paper and continues to be in use as of GPT-4. This class also handles special tokens, if any. 4. minbpe/gpt4.py: Implements the `GPT4Tokenizer`. This class is a light wrapper around the `RegexTokenizer` (2, above) that exactly reproduces the tokenization of GPT-4 in the tiktoken library. The wrapping handles some details around recovering the exact merges in the tokenizer, and the handling of some unfortunate (and likely historical?) 1-byte token permutations. Finally, the script train.py trains the two major tokenizers on the input text tests/taylorswift.txt (this is the Wikipedia entry for her kek) and saves the vocab to disk for visualization. This script runs in about 25 seconds on my (M1) MacBook. All of the files above are very short and thoroughly commented, and also contain a usage example on the bottom of the file.

MegatronApp
MegatronApp is a toolchain built around the Megatron-LM training framework, offering performance tuning, slow-node detection, and training-process visualization. It includes modules like MegaScan for anomaly detection, MegaFBD for forward-backward decoupling, MegaDPP for dynamic pipeline planning, and MegaScope for visualization. The tool aims to enhance large-scale distributed training by providing valuable capabilities and insights.
LLM-LieDetector
This repository contains code for reproducing experiments on lie detection in black-box LLMs by asking unrelated questions. It includes Q/A datasets, prompts, and fine-tuning datasets for generating lies with language models. The lie detectors rely on asking binary 'elicitation questions' to diagnose whether the model has lied. The code covers generating lies from language models, training and testing lie detectors, and generalization experiments. It requires access to GPUs and OpenAI API calls for running experiments with open-source models. Results are stored in the repository for reproducibility.
For similar tasks
bia-bob
BIA `bob` is a Jupyter-based assistant for interacting with data using large language models to generate Python code. It can utilize OpenAI's chatGPT, Google's Gemini, Helmholtz' blablador, and Ollama. Users need respective accounts to access these services. Bob can assist in code generation, bug fixing, code documentation, GPU-acceleration, and offers a no-code custom Jupyter Kernel. It provides example notebooks for various tasks like bio-image analysis, model selection, and bug fixing. Installation is recommended via conda/mamba environment. Custom endpoints like blablador and ollama can be used. Google Cloud AI API integration is also supported. The tool is extensible for Python libraries to enhance Bob's functionality.
cameratrapai
SpeciesNet is an ensemble of AI models designed for classifying wildlife in camera trap images. It consists of an object detector that finds objects of interest in wildlife camera images and an image classifier that classifies those objects to the species level. The ensemble combines these two models using heuristics and geographic information to assign each image to a single category. The models have been trained on a large dataset of camera trap images and are used for species recognition in the Wildlife Insights platform.
MegaDetector
MegaDetector is an AI model that identifies animals, people, and vehicles in camera trap images (which also makes it useful for eliminating blank images). This model is trained on several million images from a variety of ecosystems. MegaDetector is just one of many tools that aims to make conservation biologists more efficient with AI. If you want to learn about other ways to use AI to accelerate camera trap workflows, check out our of the field, affectionately titled "Everything I know about machine learning and camera traps".
For similar jobs
cameratrapai
SpeciesNet is an ensemble of AI models designed for classifying wildlife in camera trap images. It consists of an object detector that finds objects of interest in wildlife camera images and an image classifier that classifies those objects to the species level. The ensemble combines these two models using heuristics and geographic information to assign each image to a single category. The models have been trained on a large dataset of camera trap images and are used for species recognition in the Wildlife Insights platform.
weave
Weave is a toolkit for developing Generative AI applications, built by Weights & Biases. With Weave, you can log and debug language model inputs, outputs, and traces; build rigorous, apples-to-apples evaluations for language model use cases; and organize all the information generated across the LLM workflow, from experimentation to evaluations to production. Weave aims to bring rigor, best-practices, and composability to the inherently experimental process of developing Generative AI software, without introducing cognitive overhead.

agentcloud
AgentCloud is an open-source platform that enables companies to build and deploy private LLM chat apps, empowering teams to securely interact with their data. It comprises three main components: Agent Backend, Webapp, and Vector Proxy. To run this project locally, clone the repository, install Docker, and start the services. The project is licensed under the GNU Affero General Public License, version 3 only. Contributions and feedback are welcome from the community.
oss-fuzz-gen
This framework generates fuzz targets for real-world `C`/`C++` projects with various Large Language Models (LLM) and benchmarks them via the `OSS-Fuzz` platform. It manages to successfully leverage LLMs to generate valid fuzz targets (which generate non-zero coverage increase) for 160 C/C++ projects. The maximum line coverage increase is 29% from the existing human-written targets.
LLMStack
LLMStack is a no-code platform for building generative AI agents, workflows, and chatbots. It allows users to connect their own data, internal tools, and GPT-powered models without any coding experience. LLMStack can be deployed to the cloud or on-premise and can be accessed via HTTP API or triggered from Slack or Discord.
VisionCraft
The VisionCraft API is a free API for using over 100 different AI models. From images to sound.
kaito
Kaito is an operator that automates the AI/ML inference model deployment in a Kubernetes cluster. It manages large model files using container images, avoids tuning deployment parameters to fit GPU hardware by providing preset configurations, auto-provisions GPU nodes based on model requirements, and hosts large model images in the public Microsoft Container Registry (MCR) if the license allows. Using Kaito, the workflow of onboarding large AI inference models in Kubernetes is largely simplified.
PyRIT
PyRIT is an open access automation framework designed to empower security professionals and ML engineers to red team foundation models and their applications. It automates AI Red Teaming tasks to allow operators to focus on more complicated and time-consuming tasks and can also identify security harms such as misuse (e.g., malware generation, jailbreaking), and privacy harms (e.g., identity theft). The goal is to allow researchers to have a baseline of how well their model and entire inference pipeline is doing against different harm categories and to be able to compare that baseline to future iterations of their model. This allows them to have empirical data on how well their model is doing today, and detect any degradation of performance based on future improvements.