
DreamLayer
The Most intuitive Stable Diffusion WebUI for AI artists, developers & researchers
Stars: 367
DreamLayer AI is an open-source Stable Diffusion WebUI designed for AI researchers, labs, and developers. It automates prompts, seeds, and metrics for benchmarking models, datasets, and samplers, enabling reproducible evaluations across multiple seeds and configurations. The tool integrates custom metrics and evaluation pipelines, providing a streamlined workflow for AI research. With features like automated benchmarking, reproducibility, built-in metrics, multi-modal readiness, and researcher-friendly interface, DreamLayer AI aims to simplify and accelerate the model evaluation process.
README:
The Fastest Way to Benchmark Diffusion Models.
Built for AI researchers, labs, and developers. Automates prompts, seeds, and metrics so benchmarks that take weeks now run reproducibly in hours.
⭐ Star to Get Early-Supporter Perks ⭐
Product Vision: AI Research
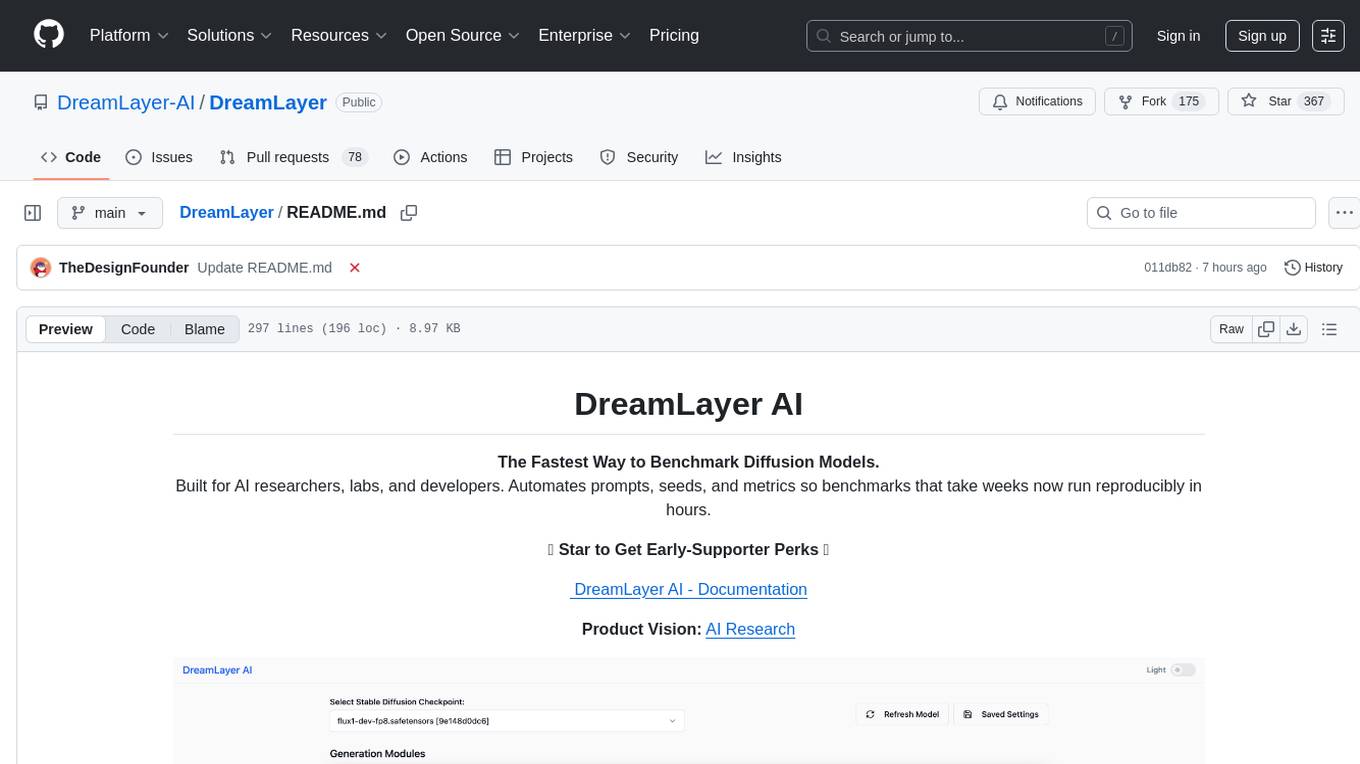
DreamLayer AI is an open-source Stable Diffusion WebUI that keeps the familiar Automatic1111 ⁄ Forge layout you know, replaces the clutter with a modern design system, and runs every generation step on ComfyUI in the background. No custom scripts, no manual logging, no wasted compute. A streamlined workflow for:
- AI researchers benchmarking models, datasets, and samplers
- Labs and teams running reproducible evaluations across multiple seeds and configs
- Developers integrating custom metrics and evaluation pipelines
Status: ✨ Now live: Beta V1
⭐ Star the repo for updates & to get early-supporter perks
Easiest way to run DreamLayer 😃 Best for non-technical users
- Download this repo
- Open the folder in Cursor (an AI-native code editor)
- Type
run itor press the "Run" button — then follow the guided steps
Cursor will:
- Walk you through each setup step
- Install Python and Node dependencies
- Create a virtual environment
- Start the backend and frontend
- Output a localhost:8080 link you can open in your browser
⏱️ Takes about 5-10 minutes. No terminal needed. Just click, run, and you’re in. 🚀
On macOS, PyTorch setup may take a few retries. Just keep pressing Run when prompted. Cursor will guide you through it.
linux:
./install_linux_dependencies.shmacOS:
./install_mac_dependencies.shWindows:
install_windows_dependencies.ps1linux:
./start_dream_layer.shmacOS:
./start_dream_layer.shWindows:
start_dream_layer.batinstall_dependencies_linux DLVENV_PATH // preferred path to python virtual env. default is /tmp/dlvenv
start_dream_layer DREAMLAYER_COMFYUI_CPU_MODE // if no nvidia drivers available run using CPU only. default is false
- Frontend: http://localhost:8080
- ComfyUI: http://localhost:8188
DreamLayer ships without weights to keep the download small. You have two ways to add models:
DreamLayer can also call external APIs (OpenAI DALL·E, Flux, Ideogram).
To enable them:
Edit your .env file at dream_layer/.env:
OPENAI_API_KEY=sk-...
BFL_API_KEY=flux-...
IDEOGRAM_API_KEY=id-...
STABILITY_API_KEY=sk-...
Once a key is present, the model becomes visible in the dropdown. No key = feature stays hidden.
Step 1: Download .safetensors or .ckpt files from:
- Hugging Face
- Civitai
- Your own training runs
Step 2: Place the models in the appropriate folders (auto-created on first run):
- Checkpoints/ → # full checkpoints (.safetensors)
- Lora/ → # LoRA & LoCon files
- ControlNet/ → # ControlNet models
- VAE/ → # optional VAEs
Step 3: Click Settings ▸ Refresh Model List in the UI — the models appear in dropdowns.
Tip: Use symbolic links if your checkpoints live on another drive.
The installation scripts will automatically install all dependencies and set up the environment.
| 🔍 Feature | 🚀 How it’s better |
|---|---|
| Automated Benchmarking | Turn a 1–2 week manual benchmarking task into 3–5 hours per model |
| Reproducibility | Every run is logged with prompts, seeds, configs, and metrics for exact replay |
| Metrics Built In | CLIP Score, FID, Precision, Recall, F1 with support for custom metrics |
| Multi Modal Ready | Benchmark image, video, and audio models with one pipeline |
| Researcher Friendly | Runs locally or on your GPUs with CSV exports, reports, and leaderboard ready outputs |
- Python 3.8+
- Node.js 16+
- 8GB+ RAM recommended
Starring helps us trend on GitHub which brings more contributors and faster features.
Early stargazers get perks:
- GitHub Hall of Fame: Your handle listed forever in the README under Founding Supporter
- Early Builds: Download private binaries before everyone else
- Community first hiring: We prioritize contributors and stargazers for all freelance, full-time, and AI artist or engineering roles.
- Closed Beta Invites: Give feedback that shapes 1.0
- Discord badge: Exclusive Founding Supporter role
⭐ Hit the star button right now and join us at the ground floor
☺️
- Star this repository.
- Watch releases for the July code drop.
- Join the Discord (link coming soon) and say hi.
- Open issues for ideas or feedback & Submit PRs once the code is live
-
Share the screenshot on X ⁄ Twitter with
#DreamLayerAIto spread the word.
All contributions code, docs, art, tutorials—are welcome!
- Create a PR and follow the evidence requirements in the template.
- See CHANGELOG Guidelines for detailed contribution process.
Full docs will ship with the first code release.
DreamLayer AI will ship under the GPL-3.0 license when the code is released.
All trademarks and closed-source models referenced belong to their respective owners.
### Made with ❤️ by builders, for builders • See you in July 2025!
DreamLayer AI includes a comprehensive test suite covering all functionality including ClipScore integration, database operations, and API endpoints.
# Install test dependencies
pip install -r tests/requirements.txt

# Run all tests
python tests/run_all_tests.py

# Run specific test categories
python tests/run_all_tests.py unit          # Unit tests only
python tests/run_all_tests.py integration  # Integration tests only
python tests/run_all_tests.py api          # API endpoint tests
python tests/run_all_tests.py clipscore    # ClipScore functionality tests

# Run with verbose output
python tests/run_all_tests.py all -v| Test File | Coverage | Description |
|---|---|---|
test_txt2img_server.py |
Text-to-Image API | Tests txt2img generation and database integration |
test_img2img_server.py |
Image-to-Image API | Tests img2img generation and database integration |
test_run_registry.py |
Run Registry API | Tests database-first API with ClipScore retrieval |
test_report_bundle.py |
Report Generation | Tests Mac-compatible report bundle creation |
test_clip_score.py |
ClipScore Integration | Tests CLIP model calculation and database storage |
test_database_integration.py |
Database Operations | Tests 3-table schema and database operations |
- ✅ Unit Tests - Individual component testing
- ✅ Integration Tests - End-to-end workflow testing
- ✅ API Tests - HTTP endpoint testing with Flask test client
- ✅ Database Tests - SQLite operations with temporary test databases
- ✅ Mock Testing - External dependency mocking (ComfyUI, CLIP model)
- ✅ Error Handling - Edge cases and error condition testing
- ✅ Mac Compatibility - ZIP file generation testing
# Run specific test file
python -m pytest tests/test_clip_score.py -v

# Run specific test method
python -m pytest tests/test_clip_score.py::TestClipScore::test_clip_score_calculation_with_mock -v

# Run with coverage report
python -m pytest tests/ --cov=dream_layer_backend --cov-report=htmlThe test suite requires these additional dependencies:
-
pytest- Test framework -
pytest-cov- Coverage reporting -
pytest-mock- Mocking utilities -
requests-mock- HTTP request mocking
Install with: pip install -r tests/requirements.txt
For Tasks:
Click tags to check more tools for each tasksFor Jobs:
Alternative AI tools for DreamLayer
Similar Open Source Tools
DreamLayer
DreamLayer AI is an open-source Stable Diffusion WebUI designed for AI researchers, labs, and developers. It automates prompts, seeds, and metrics for benchmarking models, datasets, and samplers, enabling reproducible evaluations across multiple seeds and configurations. The tool integrates custom metrics and evaluation pipelines, providing a streamlined workflow for AI research. With features like automated benchmarking, reproducibility, built-in metrics, multi-modal readiness, and researcher-friendly interface, DreamLayer AI aims to simplify and accelerate the model evaluation process.
HacxGPT-CLI
HacxGPT-CLI is an open-source command-line interface designed to provide powerful, unrestricted, and seamless AI-driven conversations. It allows users to interact with multiple AI providers through a custom-built local API engine, offering features like powerful AI conversations, extensive model support, unrestricted framework, easy-to-use CLI, cross-platform compatibility, multi-provider support, configuration management, and local storage of API keys.
agentneo
AgentNeo is a Python package that provides functionalities for project, trace, dataset, experiment management. It allows users to authenticate, create projects, trace agents and LangGraph graphs, manage datasets, and run experiments with metrics. The tool aims to streamline AI project management and analysis by offering a comprehensive set of features.
figma-console-mcp
Figma Console MCP is a Model Context Protocol server that bridges design and development, giving AI assistants complete access to Figma for extraction, creation, and debugging. It connects AI assistants like Claude to Figma, enabling plugin debugging, visual debugging, design system extraction, design creation, variable management, real-time monitoring, and three installation methods. The server offers 53+ tools for NPX and Local Git setups, while Remote SSE provides read-only access with 16 tools. Users can create and modify designs with AI, contribute to projects, or explore design data. The server supports authentication via personal access tokens and OAuth, and offers tools for navigation, console debugging, visual debugging, design system extraction, design creation, design-code parity, variable management, and AI-assisted design creation.
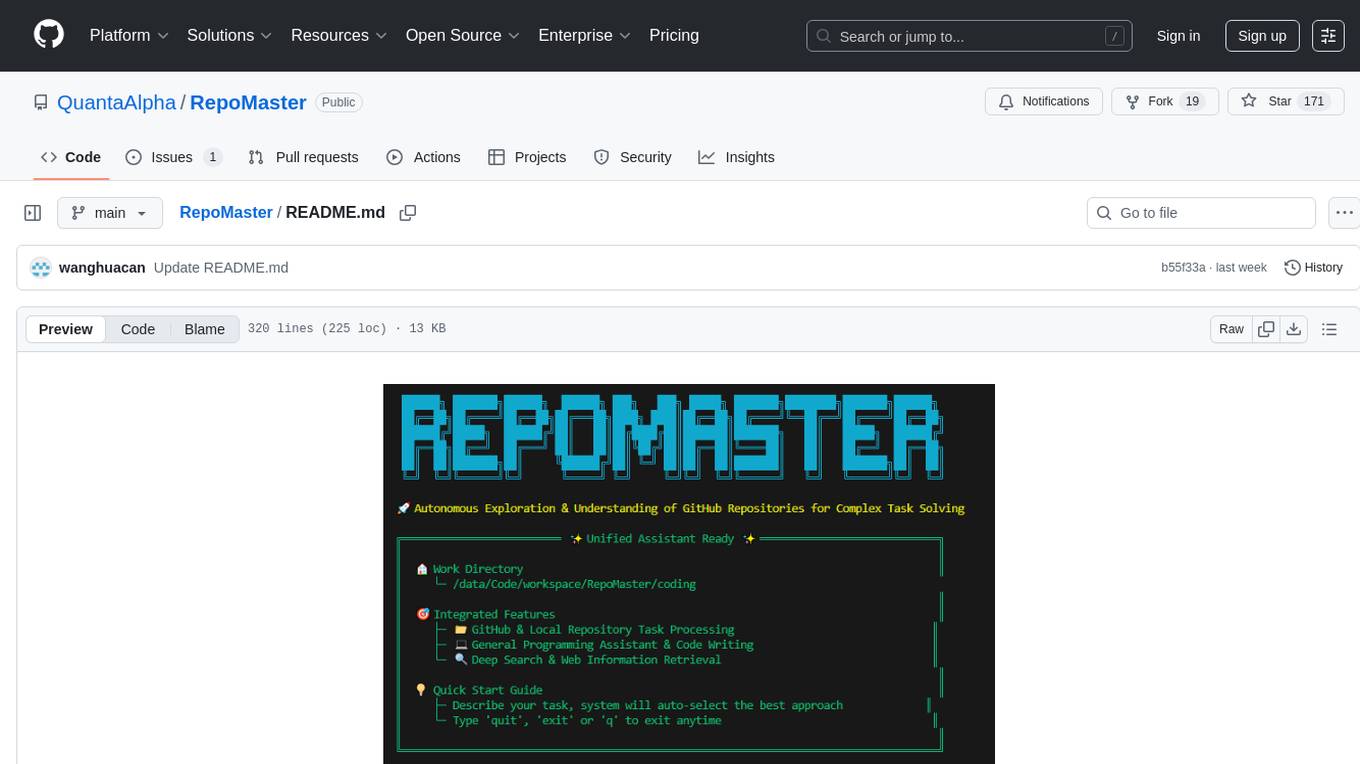
RepoMaster
RepoMaster is an AI agent that leverages GitHub repositories to solve complex real-world tasks. It transforms how coding tasks are solved by automatically finding the right GitHub tools and making them work together seamlessly. Users can describe their tasks, and RepoMaster's AI analysis leads to auto discovery and smart execution, resulting in perfect outcomes. The tool provides a web interface for beginners and a command-line interface for advanced users, along with specialized agents for deep search, general assistance, and repository tasks.
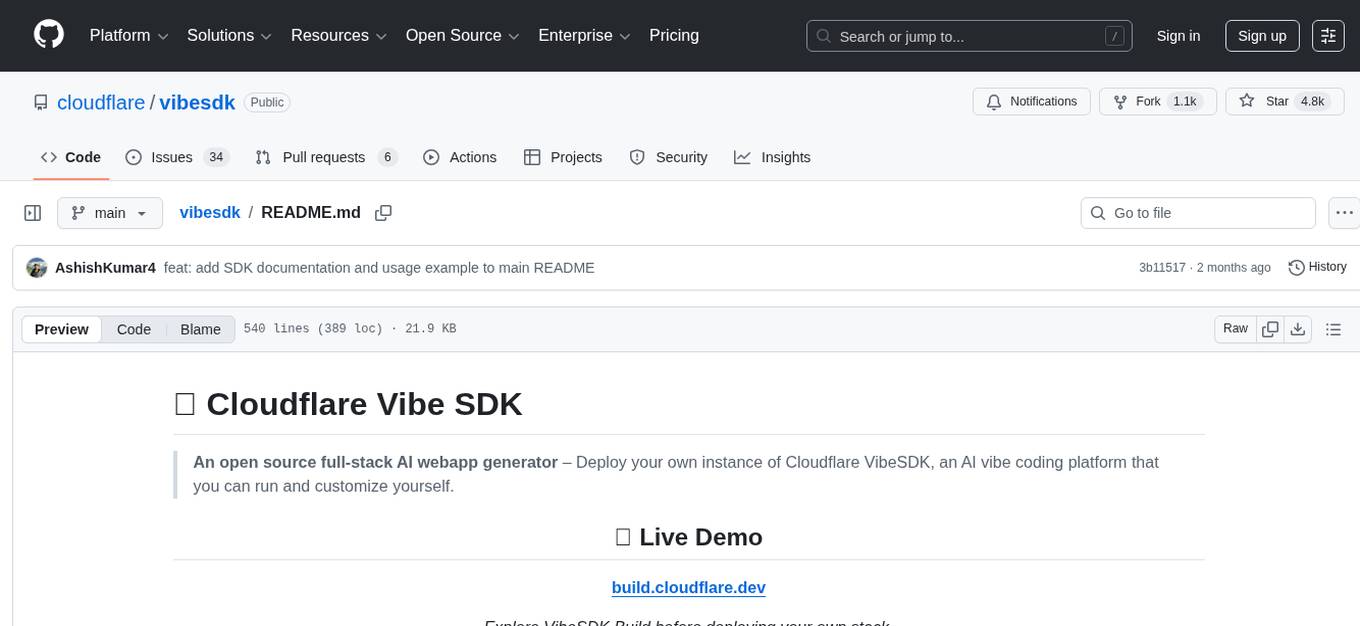
vibesdk
Cloudflare VibeSDK is an open source full-stack AI webapp generator built on Cloudflare's developer platform. It allows companies to build AI-powered platforms, enables internal development for non-technical teams, and supports SaaS platforms to extend product functionality. The platform features AI code generation, live previews, interactive chat, modern stack generation, one-click deploy, and GitHub integration. It is built on Cloudflare's platform with frontend in React + Vite, backend in Workers with Durable Objects, database in D1 (SQLite) with Drizzle ORM, AI integration via multiple LLM providers, sandboxed app previews and execution in containers, and deployment to Workers for Platforms with dispatch namespaces. The platform also offers an SDK for programmatic access to build apps programmatically using TypeScript SDK.
stenoai
StenoAI is an AI-powered meeting intelligence tool that allows users to record, transcribe, summarize, and query meetings using local AI models. It prioritizes privacy by processing data entirely on the user's device. The tool offers multiple AI models optimized for different use cases, making it ideal for healthcare, legal, and finance professionals with confidential data needs. StenoAI also features a macOS desktop app with a user-friendly interface, making it convenient for users to access its functionalities. The project is open-source and not affiliated with any specific company, emphasizing its focus on meeting-notes productivity and community collaboration.
agentsys
AgentSys is a modular runtime and orchestration system for AI agents, with 14 plugins, 43 agents, and 30 skills that compose into structured pipelines for software development. Each agent has a single responsibility, a specific model assignment, and defined inputs/outputs. The system runs on Claude Code, OpenCode, and Codex CLI, and plugins are fetched automatically from their repos. AgentSys orchestrates agents to handle tasks like task selection, branch management, code review, artifact cleanup, CI, PR comments, and deployment.
layra
LAYRA is the world's first visual-native AI automation engine that sees documents like a human, preserves layout and graphical elements, and executes arbitrarily complex workflows with full Python control. It empowers users to build next-generation intelligent systems with no limits or compromises. Built for Enterprise-Grade deployment, LAYRA features a modern frontend, high-performance backend, decoupled service architecture, visual-native multimodal document understanding, and a powerful workflow engine.

VibeSurf
VibeSurf is an open-source AI agentic browser that combines workflow automation with intelligent AI agents, offering faster, cheaper, and smarter browser automation. It allows users to create revolutionary browser workflows, run multiple AI agents in parallel, perform intelligent AI automation tasks, maintain privacy with local LLM support, and seamlessly integrate as a Chrome extension. Users can save on token costs, achieve efficiency gains, and enjoy deterministic workflows for consistent and accurate results. VibeSurf also provides a Docker image for easy deployment and offers pre-built workflow templates for common tasks.
SAM
SAM is a native macOS AI assistant built with Swift and SwiftUI, designed for non-developers who want powerful tools in their everyday life. It provides real assistance, smart memory, voice control, image generation, and custom AI model training. SAM keeps your data on your Mac, supports multiple AI providers, and offers features for documents, creativity, writing, organization, learning, and more. It is privacy-focused, user-friendly, and accessible from various devices. SAM stands out with its privacy-first approach, intelligent memory, task execution capabilities, powerful tools, image generation features, custom AI model training, and flexible AI provider support.
transformerlab-app
Transformer Lab is an app that allows users to experiment with Large Language Models by providing features such as one-click download of popular models, finetuning across different hardware, RLHF and Preference Optimization, working with LLMs across different operating systems, chatting with models, using different inference engines, evaluating models, building datasets for training, calculating embeddings, providing a full REST API, running in the cloud, converting models across platforms, supporting plugins, embedded Monaco code editor, prompt editing, inference logs, all through a simple cross-platform GUI.
AgC
AgC is an open-core platform designed for deploying, running, and orchestrating AI agents at scale. It treats agents as first-class compute units, providing a modular, observable, cloud-neutral, and production-ready environment. Open Agentic Compute empowers developers and organizations to run agents like cloud-native workloads without lock-in.
sandboxed.sh
sandboxed.sh is a self-hosted cloud orchestrator for AI coding agents that provides isolated Linux workspaces with Claude Code, OpenCode & Amp runtimes. It allows users to hand off entire development cycles, run multi-day operations unattended, and keep sensitive data local by analyzing data against scientific literature. The tool features dual runtime support, mission control for remote agent management, isolated workspaces, a git-backed library, MCP registry, and multi-platform support with a web dashboard and iOS app.
gemini-cli
Gemini CLI is an open-source AI agent that provides lightweight access to Gemini, offering powerful capabilities like code understanding, generation, automation, integration, and advanced features. It is designed for developers who prefer working in the command line and offers extensibility through MCP support. The tool integrates directly into GitHub workflows and offers various authentication options for individual developers, enterprise teams, and production workloads. With features like code querying, editing, app generation, debugging, and GitHub integration, Gemini CLI aims to streamline development workflows and enhance productivity.
MassGen
MassGen is a cutting-edge multi-agent system that leverages the power of collaborative AI to solve complex tasks. It assigns a task to multiple AI agents who work in parallel, observe each other's progress, and refine their approaches to converge on the best solution to deliver a comprehensive and high-quality result. The system operates through an architecture designed for seamless multi-agent collaboration, with key features including cross-model/agent synergy, parallel processing, intelligence sharing, consensus building, and live visualization. Users can install the system, configure API settings, and run MassGen for various tasks such as question answering, creative writing, research, development & coding tasks, and web automation & browser tasks. The roadmap includes plans for advanced agent collaboration, expanded model, tool & agent integration, improved performance & scalability, enhanced developer experience, and a web interface.
For similar tasks
byteir
The ByteIR Project is a ByteDance model compilation solution. ByteIR includes compiler, runtime, and frontends, and provides an end-to-end model compilation solution. Although all ByteIR components (compiler/runtime/frontends) are together to provide an end-to-end solution, and all under the same umbrella of this repository, each component technically can perform independently. The name, ByteIR, comes from a legacy purpose internally. The ByteIR project is NOT an IR spec definition project. Instead, in most scenarios, ByteIR directly uses several upstream MLIR dialects and Google Mhlo. Most of ByteIR compiler passes are compatible with the selected upstream MLIR dialects and Google Mhlo.
ScandEval
ScandEval is a framework for evaluating pretrained language models on mono- or multilingual language tasks. It provides a unified interface for benchmarking models on a variety of tasks, including sentiment analysis, question answering, and machine translation. ScandEval is designed to be easy to use and extensible, making it a valuable tool for researchers and practitioners alike.
opencompass
OpenCompass is a one-stop platform for large model evaluation, aiming to provide a fair, open, and reproducible benchmark for large model evaluation. Its main features include: * Comprehensive support for models and datasets: Pre-support for 20+ HuggingFace and API models, a model evaluation scheme of 70+ datasets with about 400,000 questions, comprehensively evaluating the capabilities of the models in five dimensions. * Efficient distributed evaluation: One line command to implement task division and distributed evaluation, completing the full evaluation of billion-scale models in just a few hours. * Diversified evaluation paradigms: Support for zero-shot, few-shot, and chain-of-thought evaluations, combined with standard or dialogue-type prompt templates, to easily stimulate the maximum performance of various models. * Modular design with high extensibility: Want to add new models or datasets, customize an advanced task division strategy, or even support a new cluster management system? Everything about OpenCompass can be easily expanded! * Experiment management and reporting mechanism: Use config files to fully record each experiment, and support real-time reporting of results.
openvino.genai
The GenAI repository contains pipelines that implement image and text generation tasks. The implementation uses OpenVINO capabilities to optimize the pipelines. Each sample covers a family of models and suggests certain modifications to adapt the code to specific needs. It includes the following pipelines: 1. Benchmarking script for large language models 2. Text generation C++ samples that support most popular models like LLaMA 2 3. Stable Diffuison (with LoRA) C++ image generation pipeline 4. Latent Consistency Model (with LoRA) C++ image generation pipeline
GPT4Point
GPT4Point is a unified framework for point-language understanding and generation. It aligns 3D point clouds with language, providing a comprehensive solution for tasks such as 3D captioning and controlled 3D generation. The project includes an automated point-language dataset annotation engine, a novel object-level point cloud benchmark, and a 3D multi-modality model. Users can train and evaluate models using the provided code and datasets, with a focus on improving models' understanding capabilities and facilitating the generation of 3D objects.
octopus-v4
The Octopus-v4 project aims to build the world's largest graph of language models, integrating specialized models and training Octopus models to connect nodes efficiently. The project focuses on identifying, training, and connecting specialized models. The repository includes scripts for running the Octopus v4 model, methods for managing the graph, training code for specialized models, and inference code. Environment setup instructions are provided for Linux with NVIDIA GPU. The Octopus v4 model helps users find suitable models for tasks and reformats queries for effective processing. The project leverages Language Large Models for various domains and provides benchmark results. Users are encouraged to train and add specialized models following recommended procedures.
Awesome-LLM-RAG
This repository, Awesome-LLM-RAG, aims to record advanced papers on Retrieval Augmented Generation (RAG) in Large Language Models (LLMs). It serves as a resource hub for researchers interested in promoting their work related to LLM RAG by updating paper information through pull requests. The repository covers various topics such as workshops, tutorials, papers, surveys, benchmarks, retrieval-enhanced LLMs, RAG instruction tuning, RAG in-context learning, RAG embeddings, RAG simulators, RAG search, RAG long-text and memory, RAG evaluation, RAG optimization, and RAG applications.
stm32ai-modelzoo
The STM32 AI model zoo is a collection of reference machine learning models optimized to run on STM32 microcontrollers. It provides a large collection of application-oriented models ready for re-training, scripts for easy retraining from user datasets, pre-trained models on reference datasets, and application code examples generated from user AI models. The project offers training scripts for transfer learning or training custom models from scratch. It includes performances on reference STM32 MCU and MPU for float and quantized models. The project is organized by application, providing step-by-step guides for training and deploying models.
For similar jobs
weave
Weave is a toolkit for developing Generative AI applications, built by Weights & Biases. With Weave, you can log and debug language model inputs, outputs, and traces; build rigorous, apples-to-apples evaluations for language model use cases; and organize all the information generated across the LLM workflow, from experimentation to evaluations to production. Weave aims to bring rigor, best-practices, and composability to the inherently experimental process of developing Generative AI software, without introducing cognitive overhead.
LLMStack
LLMStack is a no-code platform for building generative AI agents, workflows, and chatbots. It allows users to connect their own data, internal tools, and GPT-powered models without any coding experience. LLMStack can be deployed to the cloud or on-premise and can be accessed via HTTP API or triggered from Slack or Discord.
VisionCraft
The VisionCraft API is a free API for using over 100 different AI models. From images to sound.
kaito
Kaito is an operator that automates the AI/ML inference model deployment in a Kubernetes cluster. It manages large model files using container images, avoids tuning deployment parameters to fit GPU hardware by providing preset configurations, auto-provisions GPU nodes based on model requirements, and hosts large model images in the public Microsoft Container Registry (MCR) if the license allows. Using Kaito, the workflow of onboarding large AI inference models in Kubernetes is largely simplified.
PyRIT
PyRIT is an open access automation framework designed to empower security professionals and ML engineers to red team foundation models and their applications. It automates AI Red Teaming tasks to allow operators to focus on more complicated and time-consuming tasks and can also identify security harms such as misuse (e.g., malware generation, jailbreaking), and privacy harms (e.g., identity theft). The goal is to allow researchers to have a baseline of how well their model and entire inference pipeline is doing against different harm categories and to be able to compare that baseline to future iterations of their model. This allows them to have empirical data on how well their model is doing today, and detect any degradation of performance based on future improvements.
tabby
Tabby is a self-hosted AI coding assistant, offering an open-source and on-premises alternative to GitHub Copilot. It boasts several key features: * Self-contained, with no need for a DBMS or cloud service. * OpenAPI interface, easy to integrate with existing infrastructure (e.g Cloud IDE). * Supports consumer-grade GPUs.
spear
SPEAR (Simulator for Photorealistic Embodied AI Research) is a powerful tool for training embodied agents. It features 300 unique virtual indoor environments with 2,566 unique rooms and 17,234 unique objects that can be manipulated individually. Each environment is designed by a professional artist and features detailed geometry, photorealistic materials, and a unique floor plan and object layout. SPEAR is implemented as Unreal Engine assets and provides an OpenAI Gym interface for interacting with the environments via Python.
Magick
Magick is a groundbreaking visual AIDE (Artificial Intelligence Development Environment) for no-code data pipelines and multimodal agents. Magick can connect to other services and comes with nodes and templates well-suited for intelligent agents, chatbots, complex reasoning systems and realistic characters.