aiid
The AI Incident Database seeks to identify, define, and catalog artificial intelligence incidents.
Stars: 168
The Artificial Intelligence Incident Database (AIID) is a collection of incidents involving the development and use of artificial intelligence (AI). The database is designed to help researchers, policymakers, and the public understand the potential risks and benefits of AI, and to inform the development of policies and practices to mitigate the risks and promote the benefits of AI. The AIID is a collaborative project involving researchers from the University of California, Berkeley, the University of Washington, and the University of Toronto.
README:
Information about the goals and organization of the AI Incident Database can be found on the production website. This page concentrates on onboarding for the following types of contributions to the database,
- Contribute changes to the current AI Incident Database.
- Contribute a new summary to the AI Incident Database. A "summary" is a programmatically generated summary of the database contents. Examples are available here.
- Contribute a new taxonomy to the AI Incident Database. Details on taxonomies are available in the arXiv paper.
- Contribute a new application facilitating a new use case for the database.
In most cases unless you are contributing quick fixes, we recommend opening an issue before contributing to the project. You can also Contact us for an invitation to the project's Slack installation. Lurking is encouraged. Finally, for major announcements you can join the announcements-only mailing list.
Anyone can contribute code to the project. The system is being built as a "do-ocracy", meaning those who "do" have influence over the development of the code.
The steps for contributing changes are the following,
- Create a fork of the repository.
- Clone the fork to your local environment.
- Open a feature branch from whichever branch you would like to change. This is typically the
staging
branch, so you can dogit checkout staging
thengit checkout -b feature-cool-new-thing
. - Make your changes, commit them, then push them remote.
- Open a pull request to the
staging
branch. - Update the pull request based on the review.
- See the pull request get pulled. :)
Please make sure your code is well organized and commented before opening the pull request.
The AI Incident Database is an open source project inviting contributions from the global community. Anyone with code changes that advance the change thesis of making the world better in the future by remembering the negative outcomes of the past are welcome to submit pull requests. To ensure that submitted changes are likely to be accepted, we recommend becoming familiar with the manner in which we organize our work items and open an issue on GitHub.
The process of completing work through GitHub issues at the highest level is:
Create Issue
-> Assign Issue
-> Review and Publish
Labels help streamline the process and ensure issues do not get lost or neglected. Label descriptions are on GitHub. The following describes when/how to use a label.
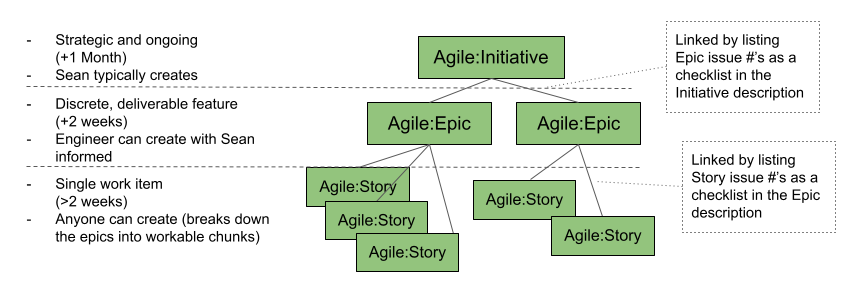
- Consider if the issue is an Initiative, Epic, or Story. All engineering issues aside from Bugs should fall in one of these categories and be assigned a label. Other types of issues (ex: Data Editor-related) may not have this label.
- Apply a descriptor label (when applicable):
Add the label Current Backlog
to trigger assigning a contributor. Either the assigner or the contributor adds the issue’s priority and effort labels.
Once the issue has a deliverable output(s), use the Pull Request process to have the contribution reviewed and accepted.
The person opening the PR should create it in a draft status until the work is finished, then they should click on "Ready for review" button and assign it to someone as a reviewer as soon the PR is ready to be reviewed.
In general, PR reviews can be assigned to any member of the @responsible-ai-collaboraite/aiid-dev team, or to the team alias itself. Don't be shy! Above all, contributors and reviewers should assume good intentions. As such, reviewers are also encouraged to re-assign PR reviews based on familiarity and time constraints.
When something is mergeable, then someone else with maintainer permissions (not the implementer or reviewer) can merge it to staging. They can optionally do a final review.
After merging to staging, the code quality is everyone’s responsibility.
For more information on how to create built-in draft pull requests, please refer to the GitHub blog.
Site architecture diagram. This is the link to view and edit the diagram on Diagrams.net |
The site has three components that are considered "serverless," meaning there is no dynamic backend templating the application or responding to API requests. The components include:
- Web host. This is the web server hosting the Gatsby-based web application. The site is hosted in production on Netlify.
- Index. The Algolia search index.
- Database. The Atlas MongoDB service exposed via MongoDB Realm. Atlas provides the storage, and Realm supports the web API with user account provisioning. This database does not currently automatically populate the search index, but periodic dumps will be made from this database to Algolia. The full database can support documents and details that are either unsupported by Algolia, or would be too expensive to host there.
More details are available in the Production System
information below. We recommend most people forego setting up a development environment with their own Index and Database. You should instead concentrate on setting up a Gatsby development site.
Style guide:
-
ESLint
andPrettier
have been configured to help enforcing code styles. Configuration details can be found in.eslintrc.json
and.prettierrc
. -
Husky and lint-staged are installed and
pre-commit
hook added to check lint/prettier issues on staged files and fix them automatically before making commit. -
format
andlint
scripts can be used manually to fix style issues.
The site is hosted by Netlify and is integrated into GitHub to generate previews of all code states. This allows for seamless previewing of the application. However, the preview domains do not match the whitelisted domains known by the MongoDB service, so not all functionality is expected to work in the build previews without whitelisting the domain preview.
Builds: Builds are presently run at least every 12 hours automatically by a GitHub action. They are also run on merge requests from forks. The site deploys from the main branch automatically if the build succeeds.
See mongo.md
Algolia is the instant search provider interfaced in the Discover application. It is presently updated manually when new incident reports are ingested into the database.
Cloudinary is what we use to host and manage report images.
This project is currently undergoing a significant restructuring as we transition away from the recently deprecated Atlas GraphQL endpoint. Please note that some parts of the documentation may be outdated. For the most up-to-date information and guidance, please follow this link to the latest documentation.
Depending on what feature you are working on, there will be different systems you'll need to set up after you've forked and cloned this repository:
Get a Gatsby environment working. Most of the time, you'll only need to run:
npm install --global gatsby-cli
Create a .env
file under site/gatsby-site
with the following contents:
GATSBY_REALM_APP_ID=aiidstitch2-sasvc
MONGODB_CONNECTION_STRING=mongodb+srv://readonly:[email protected]
MONGODB_TRANSLATIONS_CONNECTION_STRING=mongodb+srv://readonly:[email protected]
MONGODB_REPLICA_SET=aiiddev-shard-00-02.seam4.mongodb.net,aiiddev-shard-00-01.seam4.mongodb.net,aiiddev-shard-00-00.seam4.mongodb.net
GATSBY_ALGOLIA_APP_ID=JD5JCVZEVS
GATSBY_ALGOLIA_SEARCH_KEY=c5e99d93261645721a1765fe4414389c
GATSBY_AVAILABLE_LANGUAGES=en,es,fr
SKIP_PAGE_CREATOR=createTsneVisualizationPage
GATSBY_PRISMIC_REPO_NAME=
PRISMIC_ACCESS_TOKEN=
IS_EMPTY_ENVIRONMENT=
For GATSBY_PRISMIC_REPO_NAME
and PRISMIC_ACCESS_TOKEN
variables, please follow prismic setup below
For complete empty environment (no database data, no Algolia index, no Prismic content), set IS_EMPTY_ENVIRONMENT=true
. This will disable all tests that require data.
This will give you access to our staging
environment, so please be sure you are on the staging
branch.
In the same folder, install dependencies using npm
(do not use yarn
, it will ignore the package-lock.json
file):
npm install
You are ready to start a local copy of the project:
gatsby develop
You should have a local copy of the project running on https://localhost:8000.
The values you placed into the env file are all associated with a staging environment that is periodically rebuilt from the production environment. While this helps you get setup more quickly, if you will be making changes to the backend you will need your own development backend that you can control, modify, and potentially break.
When building the site, some steps can take a while to run. This can be inconvenient when you are working on a feature unrelated to the steps taking the most time in the build process. To avoid this problem, you can set the environment variable SKIP_PAGE_CREATOR
to a comma-separated list of page-creator functions found in gatsby-node
that should be skipped. These include: createMdxPages
, createCitationPages
, createWordCountsPages
, createBackupsPage
, createTaxonomyPages
, createDownloadIndexPage
, createDuplicatePages
, createTsneVisualizationPage
, and createEntitiesPages
. For instance, to run a development build skipping the creation of the TSNE (spatial) visualization and citation pages, you would run:
SKIP_PAGE_CREATOR=createTsneVisualizationPage,createCitiationPages gatsby develop
In general, skipping the TSNE visualization has the most significant reduction in build time.
If the feature you are working on includes structural changes to the MongoDB database or Realm functions, you'll need to create your own project by going to https://cloud.mongodb.com and following these steps:
- Create a new MongoDB project (the free tier will be enough)
- Create a new Atlas cluster with the name:
AIIDDev
- Choose "Username and Password" as authentication method.
- Choose "My Local Environment" as network access and add your current IP address.
- If your IP is dynamic, add
0.0.0.0
to the list of IP addresses.
- Create a new Realm App. The name should be
AIIDStitch2
. Realm will give it an id likeaiidstitch2-<REALM_APP_ID>
- Once created, go to
App Settings
and update app region toGlobal
- Create a new database user with admin access and another user with read-only permissions
Download the latest database backup from https://incidentdatabase.ai/research/snapshots.
Extract the archive, then from the mongodump
directory, run mongorestore
(included in MongoDB tools) using the admin user created in the step above to upload the database backup:
mongorestore mongodb+srv://<USER>:<PASSWORD>@aiiddev.<CLUSTER>.mongodb.net/aiidprod aiidprod
mongorestore mongodb+srv://<USER>:<PASSWORD>@aiiddev.<CLUSTER>.mongodb.net/translations translations
You can find the value for <CLUSTER>
by going to your Atlas cluster's overview on cloud.mongodb.com, then selecting the "primary" shard labeled aiiddev-shard-00-<XX>.<CLUSTER>.mongodb.net
.
Install the realm-cli
and follow the login process: https://docs.mongodb.com/realm/cli/realm-cli-login
npm install --global mongodb-realm-cli
Once authenticated, you can deploy the realm app by going to site/realm
of this repo and running:
realm-cli push --remote=aiidstitch2-<REALM_APP_ID>
Finally, update the previously created .env
:
GATSBY_REALM_APP_ID=aiidstitch2-<REALM_APP_ID>
MONGODB_CONNECTION_STRING=mongodb+srv://<username>:<password>@aiiddev.<CLUSTER>.mongodb.net
MONGODB_REPLICA_SET=aiiddev-shard-00-00.<CLUSTER>.mongodb.net,aiiddev-shard-00-01.<CLUSTER>.mongodb.net,aiiddev-shard-00-02.<CLUSTER>.mongodb.net
Restart Gatsby, and your local app should fetch data from your MongoDB environment!
Suppose the feature you are developing involves mutating the Algolia index (used in the Discover app). In that case, you'll have to create your own by signing up for Algolia here: https://www.algolia.com and following these steps:
- Create a new App (free tier will be enough)
- Create a new index called
instant_search
- Go to https://incidentdatabase.ai/downloadIndex and save the
new_index.json
file - Upload this file to your newly created index, by selecting
Use File
Algolia's UI - Now go to your Algolia App settings, and click API Keys, using the values from there to update your
.env
file accordingly.
GATSBY_ALGOLIA_APP_ID=<YOUR APP ID>
GATSBY_ALGOLIA_SEARCH_KEY=<YOUR SEARCH KEY>
ALGOLIA_ADMIN_KEY=<YOUR ADMIN KEY>
Algolia index settings are uploaded on build time, so they will take effect after running:
gatsby build
Alternatively, you can update the settings without rebuilding if from site/gatsby-site
you run:
node src/scripts/algolia-update.js
Restart Gatsby, and you should have a complete working environment!
The translation process runs on Gatsby's postBuild
event and consists of 3 steps:
- Get the list of languages, which is pulled from the /src/components/i18n/languages.js using the
GATSBY_AVAILABLE_LANGUAGES
environment variable as a filter:
GATSBY_AVAILABLE_LANGUAGES=en,es,fr
- Translate each incident report to each language, and save the translated reports to a
translations
database under a collection for each language:
translations
|-- incident_reports_en
| |-- { title, text, report_number }
| |-- { title, text, report_number }
|
|--incident_report_es
| |-- { title, text, report_number }
|-- { title, text, report_number }
|
|--incident_report_fr
| |-- { title, text, report_number }
|-- { title, text, report_number }
To access this database, a user with read/write permissions needs to be provided through the following environment variable:
MONGODB_TRANSLATIONS_CONNECTION_STRING=mongodb+srv://<user>:<password>@aiiddev.<host>.mongodb.net
You can use the same value defined on the MongoDB Setup environment variable MONGODB_CONNECTION_STRING
- Generate an Algolia index from each translated collection and upload them to Algolia. Each index has the following naming format:
instant_search-{language code}
After the first run, the following applies for subsequent runs:
Translations of report fields load from the existing translations/incident_reports_{language}/{doc}
document, and if not found, then the Translate API is hit.
Algolia indexes are replaced every time the process runs.
Https://react.i18next.com handles UI translations. To find missing keys enable debugging by setting the following environment variable:
GATSBY_I18N_DEBUG=true
The translate API charges ~20USD per million characters and can translate to 111 languages.
At the time of writing, there are 1336 Incident Reports, each report consisting of ~4000 characters, with a total sum of ~5 million characters.
Considering the pricing above, translating all ingested reports to one language will cost (5 million / 1 million) * $20 = ~$100
, and translating all incident reports to all languages $100 * 111= ~$11k
.
The translation process defaults to a dry run mode that prepends a string to every translated text instead of hitting Google's API.
Therefore, Translated texts in this mode will look like: translated-{language}-YouTube to crack down on inappropriate content masked as kids’ cartoons
The dry run is disabled through an environment variable as follows:
TRANSLATE_DRY_RUN=false
In addition to the Dry Run mode, you can also limit the number of reports to translate by setting the following environment variable. This variable sets the date from which the reports will be translated (using the date_submitted
report field):
TRANSLATE_SUBMISSION_DATE_START=2024-01-01
If the feature you are working on depends on Google's Geocoding API, please add the following environment variable with the appropriate value to your .env file.
GOOGLE_MAPS_API_KEY=XXXXXXXXXXXX
This project uses Prismic to fetch page content. You can still run the project without setting a Prismic account.
- Sign up for a new Prismic account or log in to your account if you already have one
- In
Create a new repository
section chooseSomething else
- Give your repository a name and choose
gatsby
in the technology dropdown - Choose your plan (if you only need one user, the free plan is enough)
- Click
Create repository
- Create a new token in Settings > API & Security > Content API tab > Change Repository security to
Private API – Require an access token for any request
> Create new app > Permanent access tokens > Save value for later
You can find the list of all custom types in the folder custom_types
- From the prismic left menu click
Custom Types
- Click
Create new custom type
- Give it a name (name of the json in custom_types folder)
- Click
JSON editor
- Paste the JSON content from the predefined custom types inside the json
- Click
Save
- On the Prismic dashboard left menu click
Documents
- Click
Create new
- Fill in all the mandatory fields
- Click
Save
- Keep in mind that the new content won't be available on your page until you Publish it.
- In order to publish it, click
Publish
In order for your recently published Prismic content to be available on your page, a Netlify build needs to be triggered. In order to do this, you need to create a Netlify Build Hook.
Add the following environment variable on Netlify:
GATSBY_PRISMIC_REPO_NAME=[name_of_your_repository]
(step 3 from Prismic Setup section)
PRISMIC_ACCESS_TOKEN=[you_prismic_access_token]
(step 6 from Prismic Setup section)
- Login to your Netlify
- Go to
Deploys
- Go to
Deploy settings
- Scroll to
Build Hooks
- Click
Add build hook
- Give it a name and assign a branch
- Click save
- Copy the generated URL
- Go to your Prismic repository
- Go to
Settings
>Webhooks
- Create a new webhook and paste the URL in the URL field
- In
Triggers
selectA document is published
andA document is unpublished
- Click
Add this webhook
All site users have one or more roles assigned to them. The role determines what actions the user can take on the site.
As soon as a user is signed in, the system assigns a subscriber
role by default. Role assignment is handled manually by the site administrators.
The roles are:
User Role | Permissions |
---|---|
subscriber |
This is the default role assigned to all users. It allows the user to subscribe to new incidents, specific incidents, entities, and anything else that is subscribeable. |
submitter |
This role allows the user to submit new incidents under their user account. |
incident_editor |
This role allows the user to: - Edit and clone incidents - See the live incident data. The live data is the data that is currently stored in the database. Keep in mind that incident pages are generated on each build, so if a user edits an incident, the change will be only visible if the live data options is activated until the next build finishes. - Add, edit, approve and delete incident variants - View and submit incident candidates - Restore previous versions of incidents and reports. - Approve and reject new submissions. Which involves converting a submission into an incident or report (create incident or report and linked notifications), or deleting the submission |
taxonomy_editor |
This role allows the user to edit all taxonomies. |
taxonomy_editor_{taxonomy_name} |
This role allows the user to edit a specific taxonomy. ie: taxonomy_editor_csetv1 role allows the user to edit the CSETv1 taxonomy. |
admin |
This role has full access to the site, including the ability to edit users' roles. |
This project uses Tailwind CSS framework with its class syntax. More specifically, we base our components on Flowbite React and Flowbite which is built on top of TailwindCSS.
In order to keep styling consistency on the site, we follow a set of steps when developing. This is also to make the development process more agile and simple.
- Develop your component using Flowbite React components
- If your components is not fully contemplated by Flowbite react, check Flowbite components and use the provided HTMLs.
- If you need to improve styling, use only Tailwind CSS classes.
Examples If you want to place a new Flowbite React button:
import { Button } from 'flowbite-react';
const YourComponent = () => {
return <Button color='success'>New button</Button>
}
If you want to customize a Flowbite button:
const YourComponent = () => {
return <button type="button" className="text-white bg-blue-700 hover:bg-blue-800 focus:ring-4 focus:ring-blue-300 font-medium rounded-lg text-sm px-5 py-2.5 mr-2 mb-2 dark:bg-blue-600 dark:hover:bg-blue-700 focus:outline-none dark:focus:ring-blue-800">Default</button>
}
Deployment of the site consists of two parts: deployment of the backend related features that runs as a GitHub Action and deployment of the frontend related features that runs on Netlify:
The Netlify build process runs every time a push is made to an open PR or main
or develop
.
To correctly set up this process, the following environment variables need to be created using Netlify's build settings UI:
ALGOLIA_ADMIN_KEY=
AWS_LAMBDA_JS_RUNTIME=nodejs18.x # required to run the Gatsby v5
GATSBY_ALGOLIA_APP_ID=
GATSBY_ALGOLIA_SEARCH_KEY=
GATSBY_REALM_APP_ID=
MONGODB_CONNECTION_STRING=
MONGODB_REPLICA_SET=
GATSBY_EXCLUDE_DATASTORE_FROM_BUNDLE=1 # specific to Netlify, for large sites
GATSBY_CPU_COUNT=2 # limits the number of Gatsby threads, helping with deployment stability
NODE_VERSION=18 # this is required by Gatsby v5
NODE_OPTIONS=--max-old-space-size=4096 # increase default heap size to prevent crashes during build
# The following "CLOUDFLARE_R2" variables are required to create the /research/snapshots/ page
CLOUDFLARE_R2_ACCOUNT_ID=[The Cloudflare R2 account ID (e.g.: 8f4144a9d995a9921d0200db59f6a00e)]
CLOUDFLARE_R2_ACCESS_KEY_ID=[The Cloudflare R2 access key ID (e.g.: 7aa73208bc89cee3195879e578b291ee)]
CLOUDFLARE_R2_SECRET_ACCESS_KEY=[The Cloudflare R2 secret access key]
CLOUDFLARE_R2_BUCKET_NAME=[The Cloudflare R2 bucket name (e.g.: 'aiid-public')]
GATSBY_CLOUDFLARE_R2_PUBLIC_BUCKET_URL=[The Cloudflare R2 public bucket URL (e.g.: https://pub-daddb16dc28841779b83690f75eb5c58.r2.dev)]
This guide walks you through the steps to set up a Netlify site for your project by importing an existing project from GitHub.
- Ensure you have a GitHub account and your project is already pushed to a repository.
- Make sure you have a Netlify account. If not, sign up at Netlify.
- Go to your Netlify dashboard.
- Click on Add New Site.
- Choose Import Existing Project.
- Select Deploy with GitHub to connect your GitHub account.
- Choose the repository where your project is located.
- Under Branch to Deploy, select
main
. This setting doesn't matter for now. - Leave all other settings as default.
- Click on Deploy Site.
- Navigate to Site Configuration > Build & Deploy.
- Under Build Settings > Build Status, find Stopped Builds.
- Click Save.
- Go to Site Configuration > Site Details.
- Copy the
NETLIFY_SITE_ID
. This will be useful when setting up the GitHub environment.
Two workflows take care of deploying the Realm app to both production
and staging
environments, defined in realm-production.yml
and realm-staging.yml
. Each workflow looks for environment variables defined in a GitHub Environment named production
and staging
.
These environments must contain the following variables:
GATSBY_REALM_APP_ID=
REALM_API_PRIVATE_KEY=
REALM_API_PUBLIC_KEY=
To get your Public and Private API Key, follow these instructions.
We have integrated our testing and deployment processes with GitHub Actions. There are three primary workflows for deployment: Deploy Previews, Staging, and Production. The goal of these workflows is to continuously test and integrate changes in pull requests across environments.
- File: /.github/workflows/preview.yml
-
Trigger: This workflow is activated for pushes to pull requests that target the
staging
branch. - Process: Executes both the integration tests and deploys the application to Netlify.
- Post-Deployment: Upon a successful deployment, the workflow automatically posts a comment on the pull request. This comment includes a link to the Netlify preview of the changes and a link to the Netlify deploy log.
-
Environment: This workflow uses the
staging
GitHub environment.
-
Trigger: Runs only on pushes to the
staging
branch. - Process: Executes both the integration tests and deploys to Netlify.
- Deployment Criteria: If the tests fail, no deployment will be carried out.
-
Environment: This workflow uses the
staging
GitHub environment.
-
Trigger: Runs only on pushes to the
main
branch. - Process: Executes both the integration tests and deploys to Netlify.
- Deployment Criteria: If the tests fail, no deployment will be carried out.
-
Environment: This workflow uses the
production
GitHub environment.
All three workflows share a common set of environment variables, which need to be defined for each environment. (Currently, we have only two environments: staging
and production
.) These variables are categorized into secrets and standard variables, and are accessed via GitHub actions as such.
ALGOLIA_ADMIN_KEY
CLOUDFLARE_R2_ACCESS_KEY_ID
CLOUDFLARE_R2_ACCOUNT_ID
CLOUDFLARE_R2_BUCKET_NAME
CLOUDFLARE_R2_SECRET_ACCESS_KEY
CYPRESS_RECORD_KEY
E2E_ADMIN_PASSWORD
E2E_ADMIN_USERNAME
GOOGLE_TRANSLATE_API_KEY
MONGODB_CONNECTION_STRING
MONGODB_MIGRATIONS_CONNECTION_STRING
MONGODB_REPLICA_SET
MONGODB_TRANSLATIONS_CONNECTION_STRING
NETLIFY_AUTH_TOKEN
PRISMIC_ACCESS_TOKEN
REALM_API_PRIVATE_KEY
REALM_GRAPHQL_API_KEY
REALM_API_PUBLIC_KEY
GATSBY_ROLLBAR_TOKEN
CYPRESS_PROJECT_ID
GATSBY_ALGOLIA_APP_ID
GATSBY_ALGOLIA_SEARCH_KEY
GATSBY_AVAILABLE_LANGUAGES
GATSBY_CLOUDFLARE_R2_PUBLIC_BUCKET_URL
GATSBY_PRISMIC_REPO_NAME
GATSBY_REALM_APP_ID
NETLIFY_SITE_ID
REALM_API_APP_ID
REALM_API_GROUP_ID
For integration testing, we use Cypress. You can run the desktop app continuously as part of your development environment or run it on demand in headless mode.
First, add two new environment variables:
E2E_ADMIN_USERNAME=
E2E_ADMIN_PASSWORD=
As their names imply, they should be an existing user's credentials with the admin
role.
To use the desktop version, run:
npm run test:e2e
And to run it in continuous integration (headless) mode:
npm run test:e2e:ci
Let's say you want to add the CTECH
Taxonomy.
-
Create a new MongoDB collection using the lowercased Taxonomy name: ctech.
-
Define the appropriate rules, relationships, and schema for this new collection. Specifically, a schema that specifies the fields of the taxonomy. An example for the fictional
ctech
schema is below. You can optionally populate the schema and use the MongoDB Realm API to generate the schema programmatically.
/site/realm/data_sources/mongodb-atlas/aiidprod/ctech/schema.json
{
"properties": {
"_id": {
"bsonType": "objectId"
},
"classifications": {
"bsonType": "object",
"properties": {
"taxonomy field 1": {
"bsonType": "bool"
},
"taxonomy field 2": {
"bsonType": "string"
},
"Publish": {
"bsonType": "bool"
}
}
},
"incident_id": {
"bsonType": "int"
},
"namespace": {
"bsonType": "string"
},
"notes": {
"bsonType": "string"
}
},
"title": "ctech"
}
- Add the new document to the
taxa
collection, that lists the taxonomy fields. This annotates the classifications found in the new collection and determines properties of their display in the user interface.
{
"_id": {
"$oid": "61f158f4c19c105af2f3d6af"
},
"namespace": "ctech",
"weight": {
"$numberInt": "50"
},
"description": "# What are these resources?\n\nThe following resources have been associated with incidents in the database to provide tools and processes to persons and companies looking for best practices in the prevention or mitigation of similar incidents in the future.",
"field_list": [
{
"short_name": "taxonomy field 1",
"long_name": "taxonomy field 1",
"short_description": "Lorem ipsum...",
"long_description": "__Lorem ipsum__",
"display_type": "bool",
"mongo_type": "bool",
"default": null,
"placeholder": null,
"permitted_values": null,
"weight": {
"$numberInt": "70"
},
"instant_facet": true,
"required": false
},
{
"short_name": "Publish",
"display_type": "bool",
"mongo_type": "bool"
}
]
}
-
Update
createCitiationPages.js
to have it pull the new taxonomy definitions. The relevant lines are:- /site/gatsby-site/page-creators/createCitiationPages.js#L125
- /site/gatsby-site/page-creators/createCitiationPages.js#L180
-
Restart Gatsby
Restarting Gatsby should make the new taxonomy available on the citation pages, so you can visit /cite/1 to see a form for editing the taxonomy. Please note that you will need to be logged in to a user account on the application to see the form.
Migration files are stored in the /site/gatsby-size/migrations
folder and their executions are logged in the migrations
collection.
Please add a connection string with read/write permissions to the mongo database:
MONGODB_MIGRATIONS_CONNECTION_STRING=
Migrations run automatically as part of Gatsby's onPreBootstrap
event, but it is also possible to run them from the command line for debugging or testing purposes:
To run all pending migrations:
node migrator up
To run a specific migration:
node migrator up --name 2022.02.18T16.29.14.increment-report-number.js
To add a new migration, execute the following command and define the up
and down
processes as pertinent.
node migrator create --name increment-report-number.js --folder migrations
Execution is taken care of by the umzug package. Please refer to its documentation for more information.
The site exposes a read-only GraphQL endpoint at /api/graphql
, which is a reflection of the Realm's auto-generated endpoint.
You can check the endpoint here
The endpoint can be queried using any GraphQL client, but for example, if using Apollo:
import { ApolloClient, HttpLink, InMemoryCache, gql } from '@apollo/client';
const client = new ApolloClient({
link: new HttpLink({
uri: `https://incidentdatabase.ai/api/graphql`,
}),
cache: new InMemoryCache()
});
client.query({query: gql`{
reports {
title
report_number
}
}`}).then(result => console.log(result));
The endpoint is implemented as a Gatsby function. In the context where this function runs (Netlify or your local Node), an environment variable to an Realm API Key with query introspection permission needs to be set:
REALM_GRAPHQL_API_KEY=xxxxxxxxxx
You can generate a new key following these steps:
- Go to your Realm App
- Go to
Authentication
- Go to
Authentication Providers
- Go to
API keys
- Click on
Create API key
and copy the key value
About Realm API Keys: https://www.mongodb.com/docs/realm/authentication/api-key/
In addition to that, you have to add your Netlify site URL to the allowed origins in your Realm App.
- Go to your Realm app
- Go to
App Settings
- Click on
+ Add Allowed Request Origin
- Add your Netlify public site URL (ie:
https://xxxx-xxxxx.netlify.app
) - Click
Save Draft
- Deploy draft
To enable social network login, you will need to add the following configuration to your Atlas App Service.
Add this secret value to your Atlas App Service following the instructions in the Atlas App Services documentation.
facebookAppSecret = [Facebook App Secret, see comment below for more information]
- To get the Facebook App Secret you should go to the Facebook Developer Portal, and click on your app > Settings > Basic.
On Facebook Authentication settings, set the "Client ID" with the Facebook App Id. To get the Facebook App ID you should go to the Facebook Developer Portal, and check your app.
"Redirect URIs" is the URL that the user will be redirected to after successfully authenticating with Facebook or Google. It should point to /logincallback
page. For Production the URI is https://incidentdatabase.ai/logincallback
, for Staging the URI is https://staging-aiid.netlify.app/logincallback
About Facebook Authentication instructions: https://www.mongodb.com/docs/realm/web/authenticate/#facebook-authentication
-
All: This subscription type is not defined yet.
{ "userId": "63320ce63ec803072c9f529c" "type": "all", }
-
Incident: Users with this subscription type will be notified when the incident associated is updated. This subscription type needs an incident_id value associated.
{ "userId": "63320ce63ec803072c9f529c" "type": "incident", "incident_id": 10, }
-
New Incident: Users with this subscription type will be notified when a new Incident is created. The notification will be sent after finish the next site build when the Incident page is actually created.
{ "userId": "63320ce63ec803072c9f529c" "type": "new-incidents", }
-
Entities: Users can subscribe to a specific Entity. The user with this subscription type will be notified when a new Incident associated with an specific Entity is created or when an existing Incident is updated to be associated with that Entity.
{ "userId": "63320ce63ec803072c9f529c", "type": "entity" "entityId": "openai", }
-
Submission Promoted: Users that submit a new Incident Report are automatically subscribed to its promotion. Once the submission has been approved by an editor, the user will recieve an email informing that the submission is now an incident/issue/report.
{ "userId": "63320ce63ec803072c9f529c", "type": "submission-promoted" }
These subscription types are also documented in subscriptions.js file.
Sendgrid is used to send email notifications.
To allow email notifications add these secret values to your Atlas App Service following the instructions in the Atlas App Services documentation.
To disable all email noticications, fill the following SendGridApiKey
secret value with an empty string. If this secret value is an empty string, the emails will be ignored.
SendGridApiKey = [SendGrid API key from https://app.sendgrid.com/settings/api_keys]
publicApiKey = [Public API key from the Atlas Organization. See comment below for more information]
privateApiKey = [Private API key from the Atlas Organization. See comment below for more information]
groupId = [Atlas Service App group ID, eg: "62cc90978bc4600cafdcf16e"]
appId = [Atlas Service App ID, eg: "62cc98647e6a26c53d5b4b53"]
To get your Public and Private API Key, follow these instructions.
To get the group ID and the app ID, the easiest way is to navigate to your Atlas Service App dashboard and copy from the URL. The URL format is https://services.cloud.mongodb.com/groups/[groupId]/apps/[appId]/dashboard
Email notifications to New Incidents (subscription type New Incident), Incident updates (subscription type Incident) and Submission Promoted (subscription type Submission Promoted) are sent when the next build finishes. This is because we have to wait until the new Incident page is generated and accessible.
When a new Incident is created or updates, a pending notification item is saved into the notifications
DB collection with processed=false
field.
And finally, as part of the site build process, we processed all pending notifications (processed=false
), send the emails to all recipients, and update the items with processed=true
and sentDate=[now]
.
-
Incident Updated
{ "type": "incident-updated", "incident_id": 374, "processed": false }
-
New Incident Report
{ "type": "new-report-incident", "incident_id": 374, "report_number": 2172, "processed": false }
-
New Incident
{ "type": 'new-incidents', "incident_id": incidentId, "processed": false, }
-
Entities
{ "type": "entity", "incident_id": 374, "entity_id": "openai", "isUpdate": true, "processed": false }
-
Submission Promoted
{ "type": "submission-promoted", "incident_id": 374, "processed": false }
This project uses Rollbar for error logging for the whole site, including background processes.
To log the errors a Realm secret value should be set:
rollbarAccessToken: [The access token value from your Rollbar account > Projects > Your project > Project Access Tokens > post_server_item]
In addition to that, this env variable should be set as well:
GATSBY_ROLLBAR_TOKEN: [The access token value from your Rollbar account > Projects > Your project > Project Access Tokens > post_server_item]
There is a GitHub Workflow "Restore Prod DB into Staging" that can be triggered manually to dump and restore Production database into Staging database (both aiidprod
and translations
databases)
Go to Actions > Restore Prod DB into Staging
> Run Workflow
dropdown > Run Workflow
To enable this workflow these GitHub secrets should be added:
DB_PRODUCTION_CONNECTION_STRING=[Production connection string with readonly user credentials. ie: mongodb+srv://[DB readonly user]:[DB user password]@aiiddev-xxxxxx.gcp.mongodb.net]
DB_STAGING_CONNECTION_STRING=[Staging connection string with admin user credentials. ie: mongodb+srv://[DB admin user]:[DB user password]@aiiddev-xxxxxx.gcp.mongodb.net]
NETLIFY_BUILD_STAGING_URL=[Netlify Staging build hook. This value is on https://app.netlify.com/sites/staging-aiid/settings/deploys#continuous-deployment]
For inquiries, you are encouraged to open an issue on this repository or visit the contact page.
For Tasks:
Click tags to check more tools for each tasksFor Jobs:
Alternative AI tools for aiid
Similar Open Source Tools
aiid
The Artificial Intelligence Incident Database (AIID) is a collection of incidents involving the development and use of artificial intelligence (AI). The database is designed to help researchers, policymakers, and the public understand the potential risks and benefits of AI, and to inform the development of policies and practices to mitigate the risks and promote the benefits of AI. The AIID is a collaborative project involving researchers from the University of California, Berkeley, the University of Washington, and the University of Toronto.
vectara-answer
Vectara Answer is a sample app for Vectara-powered Summarized Semantic Search (or question-answering) with advanced configuration options. For examples of what you can build with Vectara Answer, check out Ask News, LegalAid, or any of the other demo applications.
slack-bot
The Slack Bot is a tool designed to enhance the workflow of development teams by integrating with Jenkins, GitHub, GitLab, and Jira. It allows for custom commands, macros, crons, and project-specific commands to be implemented easily. Users can interact with the bot through Slack messages, execute commands, and monitor job progress. The bot supports features like starting and monitoring Jenkins jobs, tracking pull requests, querying Jira information, creating buttons for interactions, generating images with DALL-E, playing quiz games, checking weather, defining custom commands, and more. Configuration is managed via YAML files, allowing users to set up credentials for external services, define custom commands, schedule cron jobs, and configure VCS systems like Bitbucket for automated branch lookup in Jenkins triggers.
OpenAI-sublime-text
The OpenAI Completion plugin for Sublime Text provides first-class code assistant support within the editor. It utilizes LLM models to manipulate code, engage in chat mode, and perform various tasks. The plugin supports OpenAI, llama.cpp, and ollama models, allowing users to customize their AI assistant experience. It offers separated chat histories and assistant settings for different projects, enabling context-specific interactions. Additionally, the plugin supports Markdown syntax with code language syntax highlighting, server-side streaming for faster response times, and proxy support for secure connections. Users can configure the plugin's settings to set their OpenAI API key, adjust assistant modes, and manage chat history. Overall, the OpenAI Completion plugin enhances the Sublime Text editor with powerful AI capabilities, streamlining coding workflows and fostering collaboration with AI assistants.
tonic_validate
Tonic Validate is a framework for the evaluation of LLM outputs, such as Retrieval Augmented Generation (RAG) pipelines. Validate makes it easy to evaluate, track, and monitor your LLM and RAG applications. Validate allows you to evaluate your LLM outputs through the use of our provided metrics which measure everything from answer correctness to LLM hallucination. Additionally, Validate has an optional UI to visualize your evaluation results for easy tracking and monitoring.
WindowsAgentArena
Windows Agent Arena (WAA) is a scalable Windows AI agent platform designed for testing and benchmarking multi-modal, desktop AI agents. It provides researchers and developers with a reproducible and realistic Windows OS environment for AI research, enabling testing of agentic AI workflows across various tasks. WAA supports deploying agents at scale using Azure ML cloud infrastructure, allowing parallel running of multiple agents and delivering quick benchmark results for hundreds of tasks in minutes.
CJA_Comprehensive_Jailbreak_Assessment
This public repository contains the paper 'Comprehensive Assessment of Jailbreak Attacks Against LLMs'. It provides a labeling method to label results using Python and offers the opportunity to submit evaluation results to the leaderboard. Full codes will be released after the paper is accepted.
LongRAG
This repository contains the code for LongRAG, a framework that enhances retrieval-augmented generation with long-context LLMs. LongRAG introduces a 'long retriever' and a 'long reader' to improve performance by using a 4K-token retrieval unit, offering insights into combining RAG with long-context LLMs. The repo provides instructions for installation, quick start, corpus preparation, long retriever, and long reader.
blinkid-ios
BlinkID iOS is a mobile SDK that enables developers to easily integrate ID scanning and data extraction capabilities into their iOS applications. The SDK supports scanning and processing various types of identity documents, such as passports, driver's licenses, and ID cards. It provides accurate and fast data extraction, including personal information and document details. With BlinkID iOS, developers can enhance their apps with secure and reliable ID verification functionality, improving user experience and streamlining identity verification processes.
code2prompt
code2prompt is a command-line tool that converts your codebase into a single LLM prompt with a source tree, prompt templating, and token counting. It automates generating LLM prompts from codebases of any size, customizing prompt generation with Handlebars templates, respecting .gitignore, filtering and excluding files using glob patterns, displaying token count, including Git diff output, copying prompt to clipboard, saving prompt to an output file, excluding files and folders, adding line numbers to source code blocks, and more. It helps streamline the process of creating LLM prompts for code analysis, generation, and other tasks.
oterm
Oterm is a text-based terminal client for Ollama, a large language model. It provides an intuitive and simple terminal UI, allowing users to interact with Ollama without running servers or frontends. Oterm supports multiple persistent chat sessions, which are stored along with context embeddings and system prompt customizations in a SQLite database. Users can easily customize the model's system prompt and parameters, and select from any of the models they have pulled in Ollama or their own custom models. Oterm also supports keyboard shortcuts for creating new chat sessions, editing existing sessions, renaming sessions, exporting sessions as markdown, deleting sessions, toggling between dark and light themes, quitting the application, switching to multiline input mode, selecting images to include with messages, and navigating through the history of previous prompts. Oterm is licensed under the MIT License.
telemetry-airflow
This repository codifies the Airflow cluster that is deployed at workflow.telemetry.mozilla.org (behind SSO) and commonly referred to as "WTMO" or simply "Airflow". Some links relevant to users and developers of WTMO: * The `dags` directory in this repository contains some custom DAG definitions * Many of the DAGs registered with WTMO don't live in this repository, but are instead generated from ETL task definitions in bigquery-etl * The Data SRE team maintains a WTMO Developer Guide (behind SSO)
OlympicArena
OlympicArena is a comprehensive benchmark designed to evaluate advanced AI capabilities across various disciplines. It aims to push AI towards superintelligence by tackling complex challenges in science and beyond. The repository provides detailed data for different disciplines, allows users to run inference and evaluation locally, and offers a submission platform for testing models on the test set. Additionally, it includes an annotation interface and encourages users to cite their paper if they find the code or dataset helpful.
Bard-API
The Bard API is a Python package that returns responses from Google Bard through the value of a cookie. It is an unofficial API that operates through reverse-engineering, utilizing cookie values to interact with Google Bard for users struggling with frequent authentication problems or unable to authenticate via Google Authentication. The Bard API is not a free service, but rather a tool provided to assist developers with testing certain functionalities due to the delayed development and release of Google Bard's API. It has been designed with a lightweight structure that can easily adapt to the emergence of an official API. Therefore, using it for any other purposes is strongly discouraged. If you have access to a reliable official PaLM-2 API or Google Generative AI API, replace the provided response with the corresponding official code. Check out https://github.com/dsdanielpark/Bard-API/issues/262.
dravid
Dravid (DRD) is an advanced, AI-powered CLI coding framework designed to follow user instructions until the job is completed, including fixing errors. It can generate code, fix errors, handle image queries, manage file operations, integrate with external APIs, and provide a development server with error handling. Dravid is extensible and requires Python 3.7+ and CLAUDE_API_KEY. Users can interact with Dravid through CLI commands for various tasks like creating projects, asking questions, generating content, handling metadata, and file-specific queries. It supports use cases like Next.js project development, working with existing projects, exploring new languages, Ruby on Rails project development, and Python project development. Dravid's project structure includes directories for source code, CLI modules, API interaction, utility functions, AI prompt templates, metadata management, and tests. Contributions are welcome, and development setup involves cloning the repository, installing dependencies with Poetry, setting up environment variables, and using Dravid for project enhancements.
py-vectara-agentic
The `vectara-agentic` Python library is designed for developing powerful AI assistants using Vectara and Agentic-RAG. It supports various agent types, includes pre-built tools for domains like finance and legal, and enables easy creation of custom AI assistants and agents. The library provides tools for summarizing text, rephrasing text, legal tasks like summarizing legal text and critiquing as a judge, financial tasks like analyzing balance sheets and income statements, and database tools for inspecting and querying databases. It also supports observability via LlamaIndex and Arize Phoenix integration.
For similar tasks
aiid
The Artificial Intelligence Incident Database (AIID) is a collection of incidents involving the development and use of artificial intelligence (AI). The database is designed to help researchers, policymakers, and the public understand the potential risks and benefits of AI, and to inform the development of policies and practices to mitigate the risks and promote the benefits of AI. The AIID is a collaborative project involving researchers from the University of California, Berkeley, the University of Washington, and the University of Toronto.
For similar jobs
AirCasting
AirCasting is a platform for gathering, visualizing, and sharing environmental data. It aims to provide a central hub for environmental data, making it easier for people to access and use this information to make informed decisions about their environment.
aiid
The Artificial Intelligence Incident Database (AIID) is a collection of incidents involving the development and use of artificial intelligence (AI). The database is designed to help researchers, policymakers, and the public understand the potential risks and benefits of AI, and to inform the development of policies and practices to mitigate the risks and promote the benefits of AI. The AIID is a collaborative project involving researchers from the University of California, Berkeley, the University of Washington, and the University of Toronto.
open-webui
Open WebUI is an extensible, feature-rich, and user-friendly self-hosted WebUI designed to operate entirely offline. It supports various LLM runners, including Ollama and OpenAI-compatible APIs. For more information, be sure to check out our Open WebUI Documentation.
glide
Glide is a cloud-native LLM gateway that provides a unified REST API for accessing various large language models (LLMs) from different providers. It handles LLMOps tasks such as model failover, caching, key management, and more, making it easy to integrate LLMs into applications. Glide supports popular LLM providers like OpenAI, Anthropic, Azure OpenAI, AWS Bedrock (Titan), Cohere, Google Gemini, OctoML, and Ollama. It offers high availability, performance, and observability, and provides SDKs for Python and NodeJS to simplify integration.
litgpt
LitGPT is a command-line tool designed to easily finetune, pretrain, evaluate, and deploy 20+ LLMs **on your own data**. It features highly-optimized training recipes for the world's most powerful open-source large-language-models (LLMs).
khoj
Khoj is an open-source, personal AI assistant that extends your capabilities by creating always-available AI agents. You can share your notes and documents to extend your digital brain, and your AI agents have access to the internet, allowing you to incorporate real-time information. Khoj is accessible on Desktop, Emacs, Obsidian, Web, and Whatsapp, and you can share PDF, markdown, org-mode, notion files, and GitHub repositories. You'll get fast, accurate semantic search on top of your docs, and your agents can create deeply personal images and understand your speech. Khoj is self-hostable and always will be.
firecrawl
Firecrawl is an API service that takes a URL, crawls it, and converts it into clean markdown. It crawls all accessible subpages and provides clean markdown for each, without requiring a sitemap. The API is easy to use and can be self-hosted. It also integrates with Langchain and Llama Index. The Python SDK makes it easy to crawl and scrape websites in Python code.
NeMo
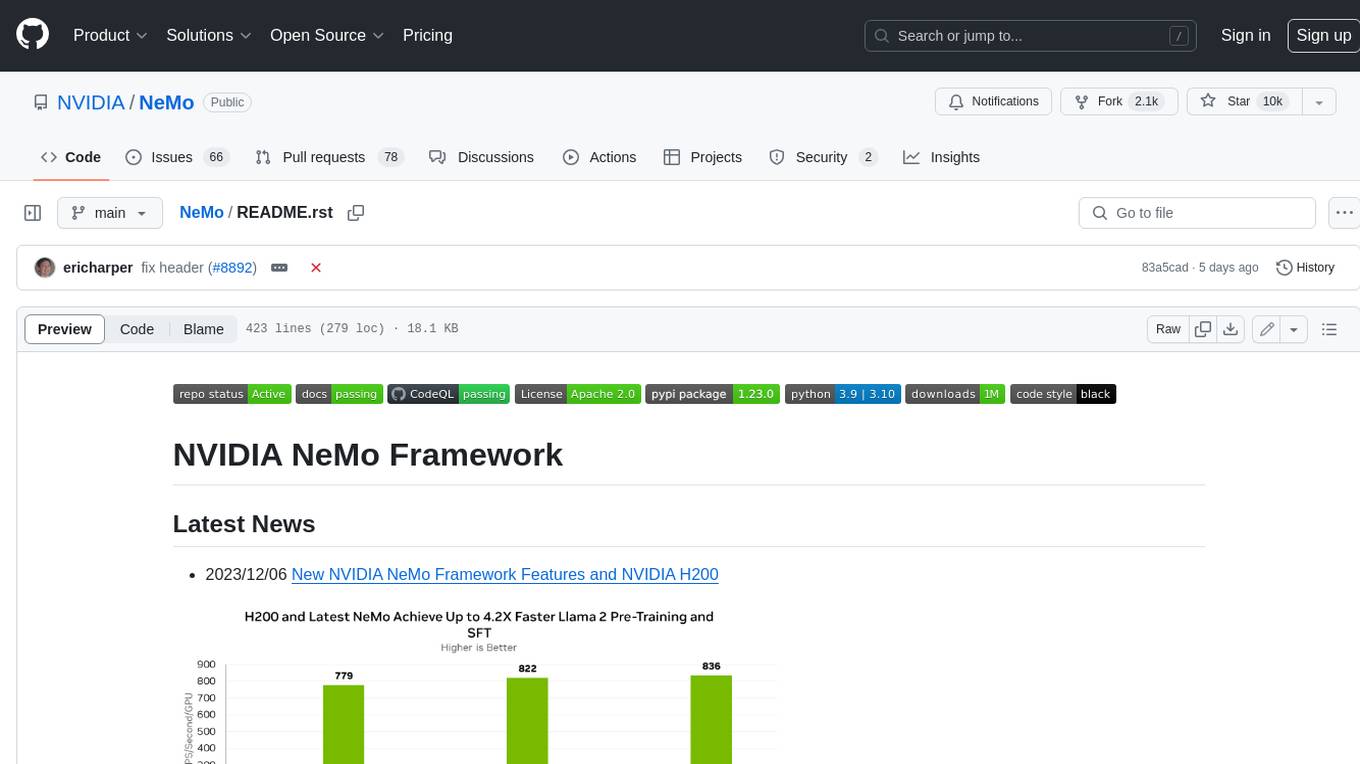
NeMo Framework is a generative AI framework built for researchers and pytorch developers working on large language models (LLMs), multimodal models (MM), automatic speech recognition (ASR), and text-to-speech synthesis (TTS). The primary objective of NeMo is to provide a scalable framework for researchers and developers from industry and academia to more easily implement and design new generative AI models by being able to leverage existing code and pretrained models.