
yarepl.nvim
Versatile REPL and TUI app manager. Multiple sending modes with parallel sessions, buffer attachments, and cross-language support. AI CLI integration for Aider and OpenAI Codex. Picker support, project-level configs, code cell text objects, and native dot-repeat.
Stars: 227
Yet Another REPL is a flexible REPL / TUI App management tool that supports multiple paradigms for interacting with TUI Apps. This plugin allows users to effortlessly interact with multiple TUI Apps through various paradigms, such as sending text from multiple buffers to a single TUI App, sending text from a single buffer to multiple TUI Apps, and attaching a buffer to a dedicated TUI App. It features integration with aider.chat and OpenAI Codex CLI, as well as provides code cell text object definitions. Users can choose their preferred fuzzy finder among telescope, fzf-lua, or Snacks.picker to preview active REPLs. The plugin also supports project-level REPLs and creating persistent REPLs in tmux.
README:
- yarepl.nvim
- Showcase
- Why yarepl.nvim?
- Installation
- Configuration
- Window configuration
- Customizing REPLs
- Customizing the Source Syntax
- Example keybinding setup
- Extensions
- Set up project-level REPLs
- Create persistent REPLs in tmux
- FAQ
- Limitations
- Acknowledgements
Yet Another REPL is a flexible REPL / TUI App management tool that supports multiple paradigms for interacting with tui-apps*. This plugin also works with project-level config and tmux, and includes native dot-repeat without requiring vim-repeat.
Flexibility and parallelism are core priorities. With yarepl.nvim, you can effortlessly interact with multiple TUI Apps through various paradigms:
- Send text from multiple buffers (same or different file types) to a single TUI App.
- Send text from a single buffer to multiple TUI Apps (same program or different)
- Attach a buffer to a dedicated TUI Apps
*: TUI APPs refers to both REPLs and other TUI Apps collectively.
The plugin features integration with aider.chat and OpenAI Codex CLI, and
provides convenient code cell text object definitions. Choose your preferred
fuzzy finder among telescope, fzf-lua, or Snacks.picker to preview active
REPLs. These features are available as extensions.
This image highlights an AI-driven coding assistant and REPL,
aider.chat, managed by yarepl.
yarepl enables integration with aider.chat. For more details,
refer to the Extensions section.
yarepl enables integration with the Codex CLI. For more details,
refer to the Extensions section.
With multiple projects at hand, I require the ability to send text from different files to REPLs with the same type (such as multiple ipython REPLs).
In instances where I'm performing time-consuming tasks, but need to conduct further experimentation on the current file, I also require the capability to send text from the same buffer to multiple REPLs.
Furthermore, when conducting mixed-language programming in a literate
programming style in text format such as rmarkdown, quarto, or plain
markdown, I need to send text in the buffer to different REPLs such as R and
Python .
Additionally, yarepl.nvim features a source_syntax capability that allows
sourcing large code chunks from temporary files instead of sending them
directly to the REPL. This prevents cluttering your interaction history and
provides better handling of substantial code content, especially useful on
Windows where large stdin processing can be problematic. The plugin writes
selected code regions/content to temporary files and provides convenient syntax
definitions for how each REPL should source files.
As a CLI fnatic, to communicate with chatgpt, I prefer through a REPL aichat.
Additionally, I require a set of global hotkeys and an isolated REPL
environment to facilitate communication with aichat separately without any
interference with other REPLs.
Unfortunately, currently available REPL plugins do not afford me such great
flexibility in managing REPL in multiple ways. This is why yarepl.nvim was
created.
nvim 0.9 is required. Although nvim 0.8 may also work, there are no plans
to ensure backward compatibility with nvim 0.8 if there are any compatibility
issues.
lazy.nvim:
{ 'milanglacier/yarepl.nvim', config = true }rocks.nvim:
Yarepl is available on luarocks.org. Simply run Rocks install yarepl.nvim
to install it like any other luarocks package.
yarepl.nvim does not require any dependencies but functions better with the following plugins:
-
telescope.nvimorfzf-lua.yarepl.nvimprovides extensions for REPL previewer. -
A UI frontend that provides an alternative frontend for
vim.ui.select. Some options aredressing.nvimortelescope-ui-select.nvim(only one of them needs to be installed).
-- below is the default configuration, there's no need to copy paste them if
-- you are satisfied with the default configuration, just calling
-- `require('yarepl').setup {}` is sufficient.
local yarepl = require 'yarepl'

yarepl.setup {
    -- see `:h buflisted`, whether the REPL buffer should be buflisted.
    buflisted = true,
    -- whether the REPL buffer should be a scratch buffer.
    scratch = true,
    -- the filetype of the REPL buffer created by `yarepl`
    ft = 'REPL',
    -- How yarepl open the REPL window, can be a string or a lua function.
    -- See below example for how to configure this option
    wincmd = 'belowright 15 split',
    -- The available REPL palattes that `yarepl` can create REPL based on.
    -- To disable a built-in meta, set its key to `false`, e.g., `metas = { R = false }`
    metas = {
        aichat = { cmd = 'aichat', formatter = 'bracketed_pasting', source_syntax = 'aichat' },
        radian = { cmd = 'radian', formatter = 'bracketed_pasting_no_final_new_line', source_syntax = 'R' },
        ipython = { cmd = 'ipython', formatter = 'bracketed_pasting', source_syntax = 'ipython' },
        python = { cmd = 'python', formatter = 'trim_empty_lines', source_syntax = 'python' },
        R = { cmd = 'R', formatter = 'trim_empty_lines', source_syntax = 'R' },
        bash = {
            cmd = 'bash',
            formatter = vim.fn.has 'linux' == 1 and 'bracketed_pasting' or 'trim_empty_lines',
            source_syntax = 'bash',
        },
        zsh = { cmd = 'zsh', formatter = 'bracketed_pasting', source_syntax = 'bash' },
    },
    -- when a REPL process exits, should the window associated with those REPLs closed?
    close_on_exit = true,
    -- whether automatically scroll to the bottom of the REPL window after sending
    -- text? This feature would be helpful if you want to ensure that your view
    -- stays updated with the latest REPL output.
    scroll_to_bottom_after_sending = true,
    -- Format REPL buffer names as #repl_name#n (e.g., #ipython#1) instead of using terminal defaults
    format_repl_buffers_names = true,
    os = {
        -- Some hacks for Windows. macOS and Linux users can simply ignore
        -- them. The default options are recommended for Windows user.
        windows = {
            -- Send a final `\r` to the REPL with delay,
            send_delayed_final_cr = true,
        },
    },
    -- Display the first line as virtual text to indicate the actual
    -- command sent to the REPL.
    source_command_hint = {
        enabled = false,
        hl_group = 'Comment',
    },
}yarepl doesn't set any default keybindings. Instead, it offers a variety of
commands that you can use to create your own keybindings. We'll also provide an
example configuration for keybindings based on these commands. Additionally,
yarepl provides a collection of <Plug> keymaps, which you can bind them to
your favorite mappings.
Here is a list of available commands:
Creates a REPL with id i from the list of available REPLs.
You can create a REPL with a specific id by providing a count, such as
3REPLStart for a REPL with id 3. If no count is provided, a new REPL with
increamental ID will be created. You can also provide a name as an argument. If
no argument is given, you'll be prompted to select a REPL from the list of
available ones. If the id is already in use, it will focus on the REPL with
that id. If you append a ! to the command, the current buffer will attach to
the newly created REPL, for instance, REPLStart! or 3REPLStart!. Note that
attachment only happens when a new REPL is created.
Attaches the current buffer to REPL i, for instance,
3REPLAttachBufferToREPL will attach the current buffer to REPL 3. If no count
is provided, you'll be prompted to select the REPL you want to attach the
current buffer to. If you add a trailing !, it will attempt to detach the
current buffer from any REPL.
Detach current buffer from any REPL.
Cleans up any invalid REPLs and rearranges the sequence of REPL ids. Usually, there's no need to use this command manually since invalid REPLs are cleaned up automatically at the appropriate time.
Focuses on REPL i or the REPL that the current buffer is attached to.
You can provide an optional argument, and the function will attempt to focus on
the closest REPL with the specified name. If no count is supplied, it will try
to focus on the REPL that the current buffer is attached to. If the current
buffer isn't attached to any REPL, it will use REPL 1. If you add a count i,
it will focus on the REPL i.
Here are some examples of how to use this command:
-
REPLFocuswill try to focus on the REPL that the current buffer is attached to. If the current buffer isn't attached to any REPL, it will use REPL 1. -
REPLFocus ipythonwill try to focus on the closest REPL with the nameipythonstarting from id1. -
3REPLFocuswill focus on REPL 3. -
3REPLFocus ipythonwill try to focus on the closest REPL with the nameipythonstarting from id3.
Hides REPL i or the REPL that the current buffer is attached to.
If you provide an optional argument, the function will attempt to hide the
closest REPL with the specified name. When no count is supplied, it will try to
hide the REPL that the current buffer is attached to. If the current buffer
isn't attached to any REPL, it will use REPL 1. If you add a count i, it will
hide REPL i.
Here are examples of how to use this command:
-
REPLHidewill try to hide the REPL that the current buffer is attached to. If the current buffer isn't attached to any REPL, it will use REPL 1. -
REPLHide ipythonwill try to hide the closest REPL with the nameipythonstarting from id1. -
3REPLHidewill hide REPL 3. -
3REPLHide ipythonwill try to hide the closest REPL with the nameipythonstarting from id3.
Hides or focuses on REPL i or the REPL that the current buffer is attached
to.
If you provide an optional argument, the function will attempt to hide or focus
on the closest REPL with the specified name. When no count is supplied, it will
try to hide or focus on the REPL that the current buffer is attached to. If the
current buffer isn't attached to any REPL, it will use REPL 1. If you add a
count i, it will hide REPL i.
Here are examples of how to use this command:
-
REPLHideOrFocuswill try to hide or focus on the REPL that the current buffer is attached to. If the current buffer isn't attached to any REPL, it will use REPL 1. -
REPLHideOrFocus ipythonwill try to hide or focus on the closest REPL with the nameipythonstarting from id1. -
3REPLHideOrFocuswill hide or focus on REPL 3. -
3REPLHideOrFocus ipythonwill try to hide or focus on the closest REPL with the nameipythonstarting from id3.
Closes REPL i or the REPL that the current buffer is attached to.
If you provide an optional argument, the function will attempt to close the
closest REPL with the specified name. If no count is supplied, it will try to
close the REPL that the current buffer is attached to. If the current buffer
isn't attached to any REPL, it will use REPL 1. If you add a count i, it will
close REPL i.
Here are examples of how to use this command:
-
REPLClosewill try to close the REPL that the current buffer is attached to. If the current buffer isn't attached to any REPL, it will use REPL 1. -
REPLClose ipythonwill try to close the closest REPL with the nameipythonand starting from id1. -
3REPLClosewill close REPL 3. -
3REPLClose ipythonwill try to close the closest REPL with the nameipythonstarting from id3.
Swaps two REPLs. If no REPL ID is provided, you'll be prompted to select both REPLs. If you provide one REPL ID, you'll be prompted to select the second REPL.
Sends the visual range to REPL i or the REPL that the current buffer
is attached to.
If you provide an optional argument, the function will attempt to send to the
closest REPL with the specified name. If no count is supplied, it will try to
send to the REPL that the current buffer is attached to. If the current buffer
isn't attached to any REPL, it will use REPL 1. If you add a count i, it will
send to REPL i.
Here are examples of how to use this command:
-
REPLSendVisualsends the visual range to the REPL that the current buffer is attached to. If the buffer is not attached to any REPL, it uses REPL 1. -
3REPLSendVisualsends the visual range to REPL 3. -
REPLSendVisual ipythonsends the visual range to the closest ipython REPL relative to id1. -
3REPLSendVisual ipythonsends the visual range to the closest ipython REPL relative to id3.
Note that due to a limitation of vim, when using REPLSendVisual via cmdline
rather than in a keymap, you must press Control+u before using the command.
For example, V3j:<Control+u>3REPLSendVisual sends the selected three lines to
REPL 3. However, you do not need to specify Control+u in your keymap as the
function will do this for you.
Similar to REPLSendVisual, the key distinction with REPLSourceVisual is
that it first writes the visually selected code to a temporary file. It then
sends a one-liner command to the REPL to source this file, instead of sending
the content directly.
The primary advantage of REPLSourceVisual lies in handling large code
content. Instead of sending huge code chunks directly to the REPL, it prevents
cluttering your interaction history, maintaining a cleaner session.
Additionally, on Windows, sourcing from a file mitigates potential issues with
stdin processing when the REPL must read substantial input, as the file-based
approach significantly reduces the data read from the stdin.
However, one notable drawback involves the security implications of temporary file creation. Since the REPL executes code from this file, any vulnerability in temporary file handling—such as exposure to malicious attack—could pose security risks. Thus, while beneficial in certain scenarios, this method requires careful consideration of its potential drawbacks.
Note that the REPL configuration requires a corresponding source_syntax
implementation. For more information, refer to the section Customizing the
Source Syntax. Built-in source
implementations are available for Python, R, and Bash.
Consider enabling config.source_command_hint.enabled = true. When enabled,
the first non-empty line of the code chunk displays as virtual text alongside
the source command sent to the REPL, providing a useful hint about the actual
command being executed.
Sends current line to REPL i or the REPL that current buffer is attached to.
If you provide an optional argument, the function will attempt to send to the
closest REPL with the specified name. If no count is supplied, it will try to
send to the REPL that the current buffer is attached to. If the current buffer
isn't attached to any REPL, it will use REPL 1. If you add a count i, it will
send to REPL i.
Here are examples of how to use this command:
-
REPLSendLinesends the current line to the REPL that the current buffer is attached to. If the buffer is not attached to any REPL, it uses REPL 1. -
3REPLSendLinesends the current line to REPL 3. -
REPLSendLine ipythonsends the current line to the closest ipython REPL relative to id1. -
3REPLSendLine ipythonsends the current line to the closest ipython REPL relative to id3.
The operator to send the text to REPL i or the REPL that the current buffer
is attached to.
If you provide an optional argument, the function will attempt to send to the
closest REPL with the specified name. If no count is supplied, it will try to
send to the REPL that the current buffer is attached to. If the current buffer
isn't attached to any REPL, it will use REPL 1. If you add a count i, it will
send to REPL i.
Here are examples of how to use this command:
-
REPLSendOperatoracts as the operator to send the text to the REPL that the current buffer is attached to. If the buffer is not attached to any REPL, it uses REPL 1. -
3REPLSendOperatorsends the motion to REPL 3. -
REPLSendOperator ipythonsends the motion to the closest ipython REPL relative to id1. -
3REPLSendOperator ipythonsends the motion to the closest ipython REPL relative to id3.
REPLSendOperator is dot-repeatable, you do not need to install
vim-repeat to make it work.
The REPLSourceOperator is analogous to the REPLSendOperator. To understand
the distinction between these two operators, refer to the section on
REPLSourceVisual, which contrasts REPLSendVisual with REPLSourceVisual.
This comparison provides a clear analogy that highlights the differences
between REPLSendOperator and REPLSourceOperator.
Sends the command typed in the cmdline to REPL i or the REPL that the current
buffer is attached to.
If the first argument of this command is $NAME, the function will attempt to
send to the closest REPL with the specified NAME. If no count is supplied, it
will try to send to the REPL that the current buffer is attached to. If the
current buffer isn't attached to any REPL, it will use REPL 1. If you add a
count i, it will send to REPL i.
Here are examples of how to use this command:
-
REPLExec %run a_file.pywill send the command%run a_file.pyto the REPL 1. -
3REPLExec print("hello world")will send the commandprint("hello world")to the REPL 3. -
REPLExec $ipython %whoswill send the command%whosto the closest ipython REPL relative to id 1. -
REPLExec $ipython %whoswill send the command%whosto the closest ipython REPL relative to id 3. -
REPLExec print("hello world")^Mprint("hello world again")will send the following two lines to the REPL current buffer is attached to or REPL 1.
print("hello world")
print("hello world again")
Note:
-
To type a literal
<Enter>(^M) incmdline, you must press<Ctrl-v> <Enter>rather than directly typeEnter. -
Some neovim command will interpolate
%to the file name of current buffer. ButREPLExecwill not do this for you. The interpolation only happens for the first$to get the desiredREPLname.
yarepl provides the following keymaps:
<Plug>(REPLStart)<Plug>(REPLFocus)<Plug>(REPLHide)<Plug>(REPLHideOrFocus)<Plug>(REPLSendLine)<Plug>(REPLSendOperator)<Plug>(REPLSendVisual)<Plug>(REPLSourceOperator)<Plug>(REPLSourceVisual)<Plug>(REPLClose)<Plug>(REPLExec)
The keymap variant behaves exactly the same as its command variant. For
example, you map <Leader>s to <Plug>(REPLStart), then type <Leader>s is
equivalent to :REPLStart. Type 3<Leader>s is equivalent to :3REPLStart.
And for each meta you registered (say you have a meta named ipython), the following keymaps will be registered:
<Plug>(REPLStart-ipython)<Plug>(REPLFocus-ipython)<Plug>(REPLHide-ipython)<Plug>(REPLHideOrFocus-ipython)<Plug>(REPLSendLine-ipython)<Plug>(REPLSendOperator-ipython)<Plug>(REPLSendVisual-ipython)<Plug>(REPLSourceOperator-ipython)<Plug>(REPLSourceVisual-ipython)<Plug>(REPLClose-ipython)<Plug>(REPLExec-ipython)
For keymaps with a meta, as you would expected, say you bind <LocalLeader>s
to <Plug>(REPLStart-ipython), then type <LocalLeader>s is equivalent to
:REPLStart ipython. Type 3<LocalLeader>s is equivalent to :3REPLStart ipython.
Note that any letters that are not alphanumeric or -/_ will be replaced
with -. Say you have a meta named python a, the corresponding keymap to
access them will be <Plug>(REPLStart-python-a).
When you are binding those plug keymaps to your own keybindings, make sure this is
a recursive map. e.g. vim.keymap.set('n', '<Plug>(REPLStart-ipython)', { noremap = false }).
if wincmd is a string, yarepl will execute it as a vimscript command.
wincmd = 'belowright 15 split'
-- will create a horizontal split below the current using window and takes up 15 lines for the new window
wincmd = 'vertical 30 split'
-- will create a vertical split right to the current using window and takes up 30 columns for the new window
In addition to passing a string to wincmd, you can also pass a Lua function.
This function accepts two parameters: the buffer number of the REPL buffer, and
the name of the REPL (the keys of metas).
wincmd = function(bufnr, name)
    vim.api.nvim_open_win(bufnr, true, {
        relative = 'editor',
        row = math.floor(vim.o.lines * 0.25),
        col = math.floor(vim.o.columns * 0.25),
        width = math.floor(vim.o.columns * 0.5),
        height = math.floor(vim.o.lines * 0.5),
        style = 'minimal',
        title = name,
        border = 'rounded',
        title_pos = 'center',
    })
end
This function creates a floating window at the center of the Vim screen with specific size and styling.
You can further customize the behavior by applying the wincmd configuration
to specific meta entries. When a meta includes its own wincmd setting, it
overrides the global wincmd.
float_wincmd = function(bufnr, name)
    vim.api.nvim_open_win(bufnr, true, {
        relative = 'editor',
        row = math.floor(vim.o.lines * 0.25),
        col = math.floor(vim.o.columns * 0.25),
        width = math.floor(vim.o.columns * 0.5),
        height = math.floor(vim.o.lines * 0.5),
        style = 'minimal',
        title = name,
        border = 'rounded',
        title_pos = 'center',
    })
end

yarepl.setup {
    metas = {
        -- REPL local settings
        ipython = { wincmd = 'topleft 25 split' },
        radian = { wincmd = float_wincmd },
    }
    -- global settings
    wincmd = 'belowright 15 split',
}
Similar to wincmd (which allows you to configure a global default with
meta-local overrides), you can also set meta-local overrides for
source_command_hint. The configuration option name for meta-local overrides
is identical to the global setting.
You can disable a built-in REPL meta by set the key to false:
metas = {
    R = false
}
To modify a built-in meta's settings, simply override the specific option. There's no need to copy the default values for other options:
metas = {
    ipython = { cmd = { 'ipython', '--simple-prompt' } }
}
You can add your own REPL meta by following this example:
function send_line_verbatim(lines)
    -- each line is a string
    return lines
end

function ipython_or_python()
    if vim.fn.executable 'ipython' == 1 then
        return { 'ipython', '--simple-prompt' }
    else
        return 'python'
    end
end

function ipython_or_python_formatter(lines)
    if vim.fn.executable 'ipython' == 1 then
        return yarepl.formatter.bracketed_pasting(lines)
    else
        return yarepl.formatter.trim_empty_lines(lines)
    end
end

metas = {
    ipython_new = { cmd = { 'ipython', '--simple-prompt' }, formatter = send_line_verbatim },
    ipython_or_python = { cmd = ipython_or_python, formatter = ipython_or_python_formatter },
}
cmd can be three types: a string, a list of strings, or a function that
returns either a string or list of strings.
formatter can be either:
- A string that matches a builtin formatter name:
-
bracketed_pasting: wrap the content within bracketed paste sequences -
bracketed_pasting_no_final_new_line: similar tobracketed_pasting, but does not add a new line at the end -
bracketed_pasting_delayed_cr: similar tobracketed_pasting, but use withsend_delayed_final_cr = true -
trim_empty_lines: remove empty lines from the input
-
- A function that takes a list of strings as input and returns a list of strings to send to the REPL
Here is a more complex example for ghci, a haskell repl.
yarepl offers a convenient helper function that simplifies the process of
creating a custom formatter without starting from scratch. For usage examples
and general guidelines on setting your own REPL formatter, expand the
Details section below.
Some REPLs can distinguish between pasted text and text from the user manual input by using prefix and suffix sequences, such as bracketed paste.
For modern REPLs with bracketed pasting support (which is usually the case), it
is recommended to use "bracketed_pasting"
Here are some tips for writing your own formatter function:
-
You may want to add a new entry
"\r"at the end of the list to indicate the end of input. -
If your REPL cannot distinguish between copy-pasted text and text from user manual input, you may want to replace
\twith 4 or 8 spaces since sending a raw\tmay be interpreted as invoking completion. -
Do not include
\nin any line as thechansendfunction will automatically replace it with\0. -
You may want to remove any empty lines from the input (a list of strings) since
chansendfunction translates an empty string""into"\n". For some REPLs without bracketed pasting support (such as Python), a plain"\n"may be treated as the end of input, blocking the rest of the code in the same function. -
If your REPL cannot distinguish between copy-pasted text and text from user manual input and your REPL will do auto-indent for you, you may want to remove any leading spaces from each line to prevent double indentation.
-
The returned list of strings will be sent to the
chansendfunction for reference.
-- Calling this function will return a function that takes a list of strings as
-- input and returns a list of strings. This can be used as the formatter function
-- of meta.

-- these are the default config
yarepl.formatter.factory {
    -- Specifies whether to return tabs in the string as spaces.
    replace_tab_by_space = false,
    -- Specifies the number of spaces to replace the tab (if enabled).
    number_of_spaces_to_replace_tab = 8,
    -- For a list of strings containing more than one string:
    when_multi_lines = {
        -- The prefixing code sent to the repl firstly.
        open_code = '',
        -- The suffixing code sent to the repl finally.
        end_code = '\r',
        -- Whether to remove empty lines from the list of strings.
        trim_empty_lines = false,
        -- Whether to remove leading spaces at the beginning of each line.
        remove_leading_spaces = false,
        -- If gsub_pattern and gsub_repl are not empty, `string.gsub` will
        -- be called with `gsub_pattern` and `gsub_repl` on each line. Note
        -- that you should use Lua pattern instead of Vim regex pattern.
        -- The gsub calls happen after `trim_empty_lines`,
        -- `remove_leading_spaces`, and `replace_tab_by_space`, and before
        -- prepending and appending `open_code` and `end_code`.
        gsub_pattern = '',
        gsub_repl = '',
    },
    -- For a list containing only one string:
    when_single_line = {
        -- The prefixing code sent to the repl firstly.
        open_code = '',
        -- The suffixing code sent to the repl finally.
        end_code = '\r',
        -- the same as the specs of `when_multi_lines`
        gsub_pattern = '',
        gsub_repl = '',
    },
    os = {
        -- Some hacks for Windows. macOS and Linux users can simply ignore
        -- them. The default options are recommended for Windows user.
        windows = {
            -- Join the lines with `\r` before sending to REPL.
            join_lines_with_cr = true,
        },
    },
}

-- `yarepl` provides four builtin formatters that can be referenced by name:
-- 1. 'bracketed_pasting' - Uses bracketed paste mode for modern REPLs
-- 2. 'bracketed_pasting_no_final_new_line' - Same as above but without final newline
-- 3. 'bracketed_pasting_delayed_cr': similar to `bracketed_pasting`, but use with `send_delayed_final_cr = true`
-- 4. 'trim_empty_lines' - Trims empty lines from input

-- You can also create custom formatters by calling `yarepl.formatter.factory`:

yarepl.formatter.trim_empty_lines = yarepl.formatter.factory {
    when_multi_lines = {
        trim_empty_lines = true,
        remove_leading_spaces = false,
    },
}

yarepl.formatter.bracketed_pasting = yarepl.formatter.factory {
    when_multi_lines = {
        open_code = '\27[200~',
        end_code = '\27[201~\r',
        trim_empty_lines = false,
        remove_leading_spaces = false,
    },
}send_delayed_final_cr (optional, defaults to false): Some REPLs do not
recognize the final CR (return)'s purpose is to tell the REPL that we want to
"finalize" (or evaluate) that command when it is input with a large chunk of
text when bracketed pasting is enabled. To mitigate this, we have to send the
final CR with a delay (to let the REPL realize that we want to evaluate that
command). In general we should ignore this option (keep it as the default
false). When you do enable this option, prefer using the
bracketed_pasting_delayed_cr formatter so that the final CR is not included
in the initial stream (it will be sent by the delayed event). The two observed
exceptions are Claude Code and OpenAI Codex which should use true. PRs are
welcome if you find other REPLs that require setting this option to true.
Example usage:
metas = {
    claude_code = {
        cmd = 'claude',
        formatter = 'bracketed_pasting_delayed_cr',
        source_syntax = '@{{file}}',
        send_delayed_final_cr = true
    },
    ipython = {
        cmd = 'ipython',
        formatter = 'bracketed_pasting',
        send_delayed_final_cr = false  -- this is the default, can be omitted
    },
    -- yarepl provides builtin extension to use with codex.
    codex = require('yarepl.extensions.codex').create_codex_meta(),
}To utilize REPLSourceOperator and REPLSourceVisual, your REPL meta
configuration must include either source_syntax.
Here's an example setup using yarepl with a source syntax:
local yarepl = require 'yarepl'

yarepl.setup {
    metas = {
        radian = {
            cmd = 'radian',
            formatter = 'bracketed_pasting_no_final_new_line',
            source_syntax = 'eval(parse(text = "{{file}}"))',
        },
    }
}
When source_syntax is specified, the selected code content is initially
written to a temporary file. Here, {{file}} serves as a placeholder, which is
replaced by the temporary file path. The interpolated string is subsequently
sent to the REPL.
Several built-in source_syntax options can be accessed as strings: R,
aichat, bash, ipython and python.
For a more flexible "sourcing" behavior, you can also define source_syntax as
a function, instead of using a string with {{file}}. This function must take
a string and return a string. The input is the selected code, and the output is
what gets sent to the REPL.
A common approach involves writing the input string to a temporary file, then returning a string that sources this file. The exact "sourcing" syntax depends on the target programming language.
Here's an example setup using yarepl with a source function:
local yarepl = require 'yarepl'
local python_source_func = function(str)
    local file = make_tmp_file(str)
    if not file then
        return
    end

    local cmd = string.format('exec(open("%s", "r").read())', file)
    return cmd
end


yarepl.setup {
    metas = {
        ipython = {
            cmd = 'ipython',
            formatter = 'bracketed_pasting',
            source_syntax = python_source_func,
        },
    }
}If you don't want to use those <Plug> keymaps provided by the plugin but
instead want to build the keymaps by your own, please check the
wiki.
Here is the keybindings setup from the maintainer:
local keymap = vim.api.nvim_set_keymap
local bufmap = vim.api.nvim_buf_set_keymap

keymap('n', '<Leader>cs', '<Plug>(REPLStart-aichat)', {
    desc = 'Start an Aichat REPL',
})
keymap('n', '<Leader>cf', '<Plug>(REPLFocus-aichat)', {
    desc = 'Focus on Aichat REPL',
})
keymap('n', '<Leader>ch', '<Plug>(REPLHide-aichat)', {
    desc = 'Hide Aichat REPL',
})
keymap('v', '<Leader>cr', '<Plug>(REPLSendVisual-aichat)', {
    desc = 'Send visual region to Aichat',
})
keymap('v', '<Leader>cR', '<Plug>(REPLSourceVisual-aichat)', {
    desc = 'Source visual region to Aichat',
})
keymap('n', '<Leader>crr', '<Plug>(REPLSendLine-aichat)', {
    desc = 'Send lines to Aichat',
})
keymap('n', '<Leader>cr', '<Plug>(REPLSendOperator-aichat)', {
    desc = 'Send Operator to Aichat',
})
keymap('n', '<Leader>cr', '<Plug>(REPLSourceOperator-aichat)', {
    desc = 'Source Operator to Aichat',
})
keymap('n', '<Leader>ce', '<Plug>(REPLExec-aichat)', {
    desc = 'Execute command in aichat',
})
keymap('n', '<Leader>cq', '<Plug>(REPLClose-aichat)', {
    desc = 'Quit Aichat',
})


local ft_to_repl = {
    r = 'radian',
    R = 'radian',
    rmd = 'radian',
    quarto = 'radian',
    markdown = 'radian',
    python = 'ipython',
    sh = 'bash',
}

autocmd('FileType', {
    pattern = { 'quarto', 'markdown', 'markdown.pandoc', 'rmd', 'python', 'sh', 'REPL', 'r' },
    group = my_augroup,
    desc = 'set up REPL keymap',
    callback = function()
        local repl = ft_to_repl[vim.bo.filetype]
        repl = repl and ('-' .. repl) or ''

        bufmap(0, 'n', '<LocalLeader>rs', string.format('<Plug>(REPLStart%s)', repl), {
            desc = 'Start an REPL',
        })
        bufmap(0, 'n', '<LocalLeader>rf', '<Plug>(REPLFocus)', {
            desc = 'Focus on REPL',
        })
        bufmap(0, 'n', '<LocalLeader>rv', '<CMD>Telescope REPLShow<CR>', {
            desc = 'View REPLs in telescope',
        })
        bufmap(0, 'n', '<LocalLeader>rh', '<Plug>(REPLHide)', {
            desc = 'Hide REPL',
        })
        bufmap(0, 'v', '<LocalLeader>s', '<Plug>(REPLSendVisual)', {
            desc = 'Send visual region to REPL',
        })
        bufmap(0, 'v', '<LocalLeader>S', '<Plug>(REPLSourceVisual)', {
            desc = 'Source visual region to REPL',
        })
        bufmap(0, 'n', '<LocalLeader>ss', '<Plug>(REPLSendLine)', {
            desc = 'Send line to REPL',
        })
        bufmap(0, 'n', '<LocalLeader>s', '<Plug>(REPLSendOperator)', {
            desc = 'Send operator to REPL',
        })
        bufmap(0, 'n', '<LocalLeader>S', '<Plug>(REPLSourceOperator)', {
            desc = 'Source operator to REPL',
        })
        bufmap(0, 'n', '<LocalLeader>re', '<Plug>(REPLExec)', {
            desc = 'Execute command in REPL',
            expr = true,
        })
        bufmap(0, 'n', '<LocalLeader>rq', '<Plug>(REPLClose)', {
            desc = 'Quit REPL',
        })
        bufmap(0, 'n', '<LocalLeader>rc', '<CMD>REPLCleanup<CR>', {
            desc = 'Clear REPLs.',
        })
        bufmap(0, 'n', '<LocalLeader>rS', '<CMD>REPLSwap<CR>', {
            desc = 'Swap REPLs.',
        })
        bufmap(0, 'n', '<LocalLeader>r?', '<Plug>(REPLStart)', {
            desc = 'Start an REPL from available REPL metas',
        })
        bufmap(0, 'n', '<LocalLeader>ra', '<CMD>REPLAttachBufferToREPL<CR>', {
            desc = 'Attach current buffer to a REPL',
        })
        bufmap(0, 'n', '<LocalLeader>rd', '<CMD>REPLDetachBufferToREPL<CR>', {
            desc = 'Detach current buffer to any REPL',
        })
    end,
})
With the keybinding setup, prefixing keybindings with c ensures that the text is always sent to the aichat REPL, a REPL for chatgpt.
For maximum flexibility with other programming languages, the maintainer desires the ability to easily switch between two modes:
-
Sending text from multiple files to a REPL via
2<LocalLeader>s, regardless of which buffer the maintainer is visiting. This guarantees that the text is always sent toRPEL 2. -
Sending text to a dedicated REPL for each buffer. To avoid the hassle of remembering the exact ID associated with the desired REPL, the maintainer can use
<LocalLeader>rato attach the current buffer to a REPL. Subsequently, the<LocalLeader>skey can be directly used to send the text to the desired REPL.
The Extensions module contains extended functionalities built upon the core
of yarepl.nvim. While not considered as core part of yarepl, it offers valuable
additional features. For comprehensive information about the features, please
refer to extensions/README.md.
Currently, the module includes:
This module enhances AI-assisted coding capabilities through aider.chat integration.
This module enhances AI-assisted coding capabilities through OpenAI's Codex CLI integration.
This module simplifies the creation of code cell text objects, allowing you to
utilize them with REPLSendOperator or other operators such as paste, delete,
and formatting.
This module provides a fuzzy finder interface to preview active REPLs with fzf-lua.
This module provides a fuzzy finder interface to preview active REPLs with telescope.
This module provides a fuzzy finder interface to preview active REPLs with Snacks.picker.
You may want to have the ability to control the REPL metas at the project
level. For example, you may want to open ipython installed in a conda
environment for one project and a different ipython installed in another
conda environment for another project.
One way to achieve this is to:
- Enable the built-in
exrc, which requiresnvim 0.9for security reasons.
To enable exrc, add the following line to your Neovim config:
vim.o.exrc = trueThen, configure yarepl like so:
vim.g.yarepl_ipython_paths = vim.g.yarepl_ipython_paths or {}
local yarepl = require 'yarepl'

require('yarepl').setup {
    metas = {
        ipython = {
            cmd = function()
                local cwd = vim.fn.getcwd()
                if vim.g.yarepl_ipython_paths and vim.g.yarepl_ipython_paths[cwd] then
                    return vim.g.yarepl_ipython_paths[cwd]
                else
                    return 'ipython'
                end
            end,
        },
    },
}
Now, in the project root directory ~/projects/project1, create a file
called .nvim.lua with the following lines:
local cwd = vim.fn.getcwd()

if vim.g.yarepl_ipython_paths then
    vim.g.yarepl_ipython_paths[cwd] = '~/mambaforge/envs/a-conda-env/bin/ipython'
else
    vim.g.yarepl_ipython_paths = {
        [cwd] = '~/mambaforge/envs/a-conda-env/bin/ipython',
    }
end
The first time you open project1, Neovim will prompt you to decide whether
you want to load the .nvim.lua file. Please allow it.
Note: The .nvim.lua file will be automatically loaded only once when
Neovim starts. Thus, if you switch working directories during the time Neovim
is running, the .nvim.lua file won't be loaded at the new working directory.
To manually load the .nvim.lua file after switching to a new working
directory, try :luafile .nvim.lua.
If you would like to maintain a persistent REPL process even after exiting
neovim, you can utilize tmux. To achieve this, the following configuration
creates a REPL meta named ipy_tmux that attaches to a tmux session named
ipython. If the session does not exist, a new tmux session named ipython is
created, and an ipython REPL is started.
metas = {
    ipy_tmux = {
        cmd = 'tmux attach -t ipython || tmux new -s ipython ipython',
        formatter = yarepl.formatter.bracketed_pasting,
    },
}We recommend using event = 'VeryLazy' to do the lazy loading. If you want to
use keys to lazy load this plugin, make sure you are using recursive mapping:
-- Recommended
return {
    'milanglacier/yarepl.nvim',
    event = 'VeryLazy',
    config = function()
        -- add your configs here
    end,
}

-- Also works, but use with caution!
return {
    'milanglacier/yarepl.nvim',
    keys = {
        { '<Leader>s', '<Plug>(REPLStart)', noremap = false, mode = 'n' },
        { '<LocalLeader>o', '<Plug>(REPLStart-ipython)', noremap = false, ft = 'python', mode = 'n' },
    },
    config = function()
        -- your config here
    end,
}If you are using a bufferline plugin and do not want the REPL buffers to
clutter your bufferline, pass buflisted = false in the setup function.
In case you have unlisted the REPLs and need to view the running ones, use
Telescope REPLShow.
Refer to REPLSendVisual
When using which-key.nvim and binding <Plug>(REPLSendVisual) or its variants
(like <Plug>(REPLSendVisual-ipython)) to keybindings that start with leader
or local leader keys, visual selections will always be sent to the first REPL,
regardless of any numeric prefix entered.
This behavior occurs due to a conflict with which-key.nvim, as it consumes the
count input before it reaches <Plug>(REPLSendVisual), resulting in a count
value of 0.
To resolve this issue, you have several options:
- Disable which-key.nvim in visual mode
- Bind
<Plug>(REPLSendVisual)to key sequences that don't trigger which-key (e.g.,<A-s>) - Use alternative methods such as
REPLAttachBufferToREPLto connect the current buffer to a REPL other than the first one
- Currently,
yareplonly supports sending entire lines to REPL. This means that no matter what the motion or visual range is, it will always send the whole line to the REPL.
For Tasks:
Click tags to check more tools for each tasksFor Jobs:
Alternative AI tools for yarepl.nvim
Similar Open Source Tools

yarepl.nvim
Yet Another REPL is a flexible REPL / TUI App management tool that supports multiple paradigms for interacting with TUI Apps. This plugin allows users to effortlessly interact with multiple TUI Apps through various paradigms, such as sending text from multiple buffers to a single TUI App, sending text from a single buffer to multiple TUI Apps, and attaching a buffer to a dedicated TUI App. It features integration with aider.chat and OpenAI Codex CLI, as well as provides code cell text object definitions. Users can choose their preferred fuzzy finder among telescope, fzf-lua, or Snacks.picker to preview active REPLs. The plugin also supports project-level REPLs and creating persistent REPLs in tmux.
aider.nvim
Aider.nvim is a Neovim plugin that integrates the Aider AI coding assistant, allowing users to open a terminal window within Neovim to run Aider. It provides functions like AiderOpen to open the terminal window, AiderAddModifiedFiles to add git-modified files to the Aider chat, and customizable keybindings. Users can configure the plugin using the setup function to manage context, keybindings, debug logging, and ignore specific buffer names.

appworld
AppWorld is a high-fidelity execution environment of 9 day-to-day apps, operable via 457 APIs, populated with digital activities of ~100 people living in a simulated world. It provides a benchmark of natural, diverse, and challenging autonomous agent tasks requiring rich and interactive coding. The repository includes implementations of AppWorld apps and APIs, along with tests. It also introduces safety features for code execution and provides guides for building agents and extending the benchmark.
codespin
CodeSpin.AI is a set of open-source code generation tools that leverage large language models (LLMs) to automate coding tasks. With CodeSpin, you can generate code in various programming languages, including Python, JavaScript, Java, and C++, by providing natural language prompts. CodeSpin offers a range of features to enhance code generation, such as custom templates, inline prompting, and the ability to use ChatGPT as an alternative to API keys. Additionally, CodeSpin provides options for regenerating code, executing code in prompt files, and piping data into the LLM for processing. By utilizing CodeSpin, developers can save time and effort in coding tasks, improve code quality, and explore new possibilities in code generation.
chat-ai
A Seamless Slurm-Native Solution for HPC-Based Services. This repository contains the stand-alone web interface of Chat AI, which can be set up independently to act as a wrapper for an OpenAI-compatible API endpoint. It consists of two Docker containers, 'front' and 'back', providing a ReactJS app served by ViteJS and a wrapper for message requests to prevent CORS errors. Configuration files allow setting port numbers, backend paths, models, user data, default conversation settings, and more. The 'back' service interacts with an OpenAI-compatible API endpoint using configurable attributes in 'back.json'. Customization options include creating a path for available models and setting the 'modelsPath' in 'front.json'. Acknowledgements to contributors and the Chat AI community are included.
pg_vectorize
pg_vectorize is a Postgres extension that automates text to embeddings transformation, enabling vector search and LLM applications with minimal function calls. It integrates with popular LLMs, provides workflows for vector search and RAG, and automates Postgres triggers for updating embeddings. The tool is part of the VectorDB Stack on Tembo Cloud, offering high-level APIs for easy initialization and search.
paper-qa
PaperQA is a minimal package for question and answering from PDFs or text files, providing very good answers with in-text citations. It uses OpenAI Embeddings to embed and search documents, and includes a process of embedding docs, queries, searching for top passages, creating summaries, using an LLM to re-score and select relevant summaries, putting summaries into prompt, and generating answers. The tool can be used to answer specific questions related to scientific research by leveraging citations and relevant passages from documents.
fish-ai
fish-ai is a tool that adds AI functionality to Fish shell. It can be integrated with various AI providers like OpenAI, Azure OpenAI, Google, Hugging Face, Mistral, or a self-hosted LLM. Users can transform comments into commands, autocomplete commands, and suggest fixes. The tool allows customization through configuration files and supports switching between contexts. Data privacy is maintained by redacting sensitive information before submission to the AI models. Development features include debug logging, testing, and creating releases.
py-vectara-agentic
The `vectara-agentic` Python library is designed for developing powerful AI assistants using Vectara and Agentic-RAG. It supports various agent types, includes pre-built tools for domains like finance and legal, and enables easy creation of custom AI assistants and agents. The library provides tools for summarizing text, rephrasing text, legal tasks like summarizing legal text and critiquing as a judge, financial tasks like analyzing balance sheets and income statements, and database tools for inspecting and querying databases. It also supports observability via LlamaIndex and Arize Phoenix integration.
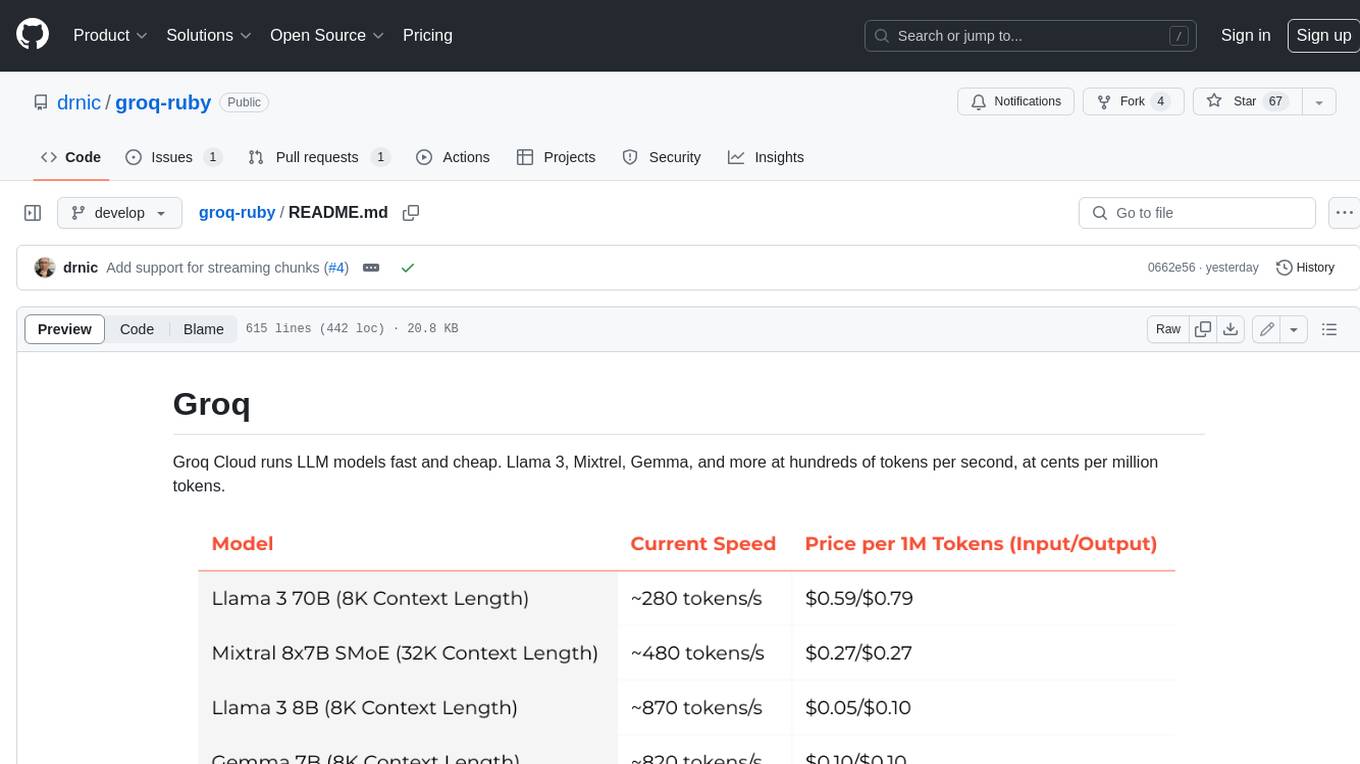
groq-ruby
Groq Cloud runs LLM models fast and cheap. Llama 3, Mixtrel, Gemma, and more at hundreds of tokens per second, at cents per million tokens.
mlx-lm
MLX LM is a Python package designed for generating text and fine-tuning large language models on Apple silicon using MLX. It offers integration with the Hugging Face Hub for easy access to thousands of LLMs, support for quantizing and uploading models to the Hub, low-rank and full model fine-tuning capabilities, and distributed inference and fine-tuning with `mx.distributed`. Users can interact with the package through command line options or the Python API, enabling tasks such as text generation, chatting with language models, model conversion, streaming generation, and sampling. MLX LM supports various Hugging Face models and provides tools for efficient scaling to long prompts and generations, including a rotating key-value cache and prompt caching. It requires macOS 15.0 or higher for optimal performance.
AirspeedVelocity.jl
AirspeedVelocity.jl is a tool designed to simplify benchmarking of Julia packages over their lifetime. It provides a CLI to generate benchmarks, compare commits/tags/branches, plot benchmarks, and run benchmark comparisons for every submitted PR as a GitHub action. The tool freezes the benchmark script at a specific revision to prevent old history from affecting benchmarks. Users can configure options using CLI flags and visualize benchmark results. AirspeedVelocity.jl can be used to benchmark any Julia package and offers features like generating tables and plots of benchmark results. It also supports custom benchmarks and can be integrated into GitHub actions for automated benchmarking of PRs.
garak
Garak is a vulnerability scanner designed for LLMs (Large Language Models) that checks for various weaknesses such as hallucination, data leakage, prompt injection, misinformation, toxicity generation, and jailbreaks. It combines static, dynamic, and adaptive probes to explore vulnerabilities in LLMs. Garak is a free tool developed for red-teaming and assessment purposes, focusing on making LLMs or dialog systems fail. It supports various LLM models and can be used to assess their security and robustness.
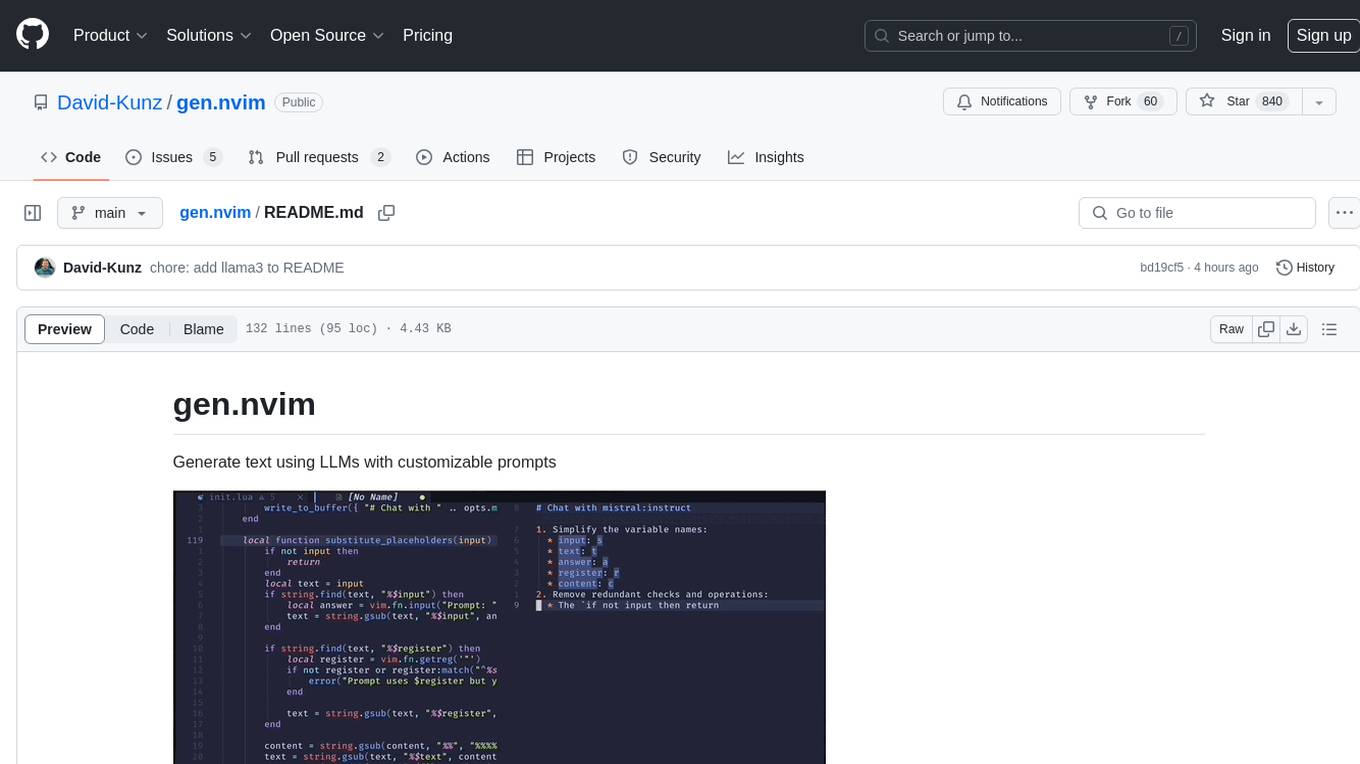
gen.nvim
gen.nvim is a tool that allows users to generate text using Language Models (LLMs) with customizable prompts. It requires Ollama with models like `llama3`, `mistral`, or `zephyr`, along with Curl for installation. Users can use the `Gen` command to generate text based on predefined or custom prompts. The tool provides key maps for easy invocation and allows for follow-up questions during conversations. Additionally, users can select a model from a list of installed models and customize prompts as needed.
aire
Aire is a modern Laravel form builder with a focus on expressive and beautiful code. It allows easy configuration of form components using fluent method calls or Blade components. Aire supports customization through config files and custom views, data binding with Eloquent models or arrays, method spoofing, CSRF token injection, server-side and client-side validation, and translations. It is designed to run on Laravel 5.8.28 and higher, with support for PHP 7.1 and higher. Aire is actively maintained and under consideration for additional features like read-only plain text, cross-browser support for custom checkboxes and radio buttons, support for Choices.js or similar libraries, improved file input handling, and better support for content prepending or appending to inputs.
llm-ollama
LLM-ollama is a plugin that provides access to models running on an Ollama server. It allows users to query the Ollama server for a list of models, register them with LLM, and use them for prompting, chatting, and embedding. The plugin supports image attachments, embeddings, JSON schemas, async models, model aliases, and model options. Users can interact with Ollama models through the plugin in a seamless and efficient manner.
For similar tasks

yarepl.nvim
Yet Another REPL is a flexible REPL / TUI App management tool that supports multiple paradigms for interacting with TUI Apps. This plugin allows users to effortlessly interact with multiple TUI Apps through various paradigms, such as sending text from multiple buffers to a single TUI App, sending text from a single buffer to multiple TUI Apps, and attaching a buffer to a dedicated TUI App. It features integration with aider.chat and OpenAI Codex CLI, as well as provides code cell text object definitions. Users can choose their preferred fuzzy finder among telescope, fzf-lua, or Snacks.picker to preview active REPLs. The plugin also supports project-level REPLs and creating persistent REPLs in tmux.
For similar jobs
weave
Weave is a toolkit for developing Generative AI applications, built by Weights & Biases. With Weave, you can log and debug language model inputs, outputs, and traces; build rigorous, apples-to-apples evaluations for language model use cases; and organize all the information generated across the LLM workflow, from experimentation to evaluations to production. Weave aims to bring rigor, best-practices, and composability to the inherently experimental process of developing Generative AI software, without introducing cognitive overhead.

LLMStack
LLMStack is a no-code platform for building generative AI agents, workflows, and chatbots. It allows users to connect their own data, internal tools, and GPT-powered models without any coding experience. LLMStack can be deployed to the cloud or on-premise and can be accessed via HTTP API or triggered from Slack or Discord.

VisionCraft
The VisionCraft API is a free API for using over 100 different AI models. From images to sound.
kaito
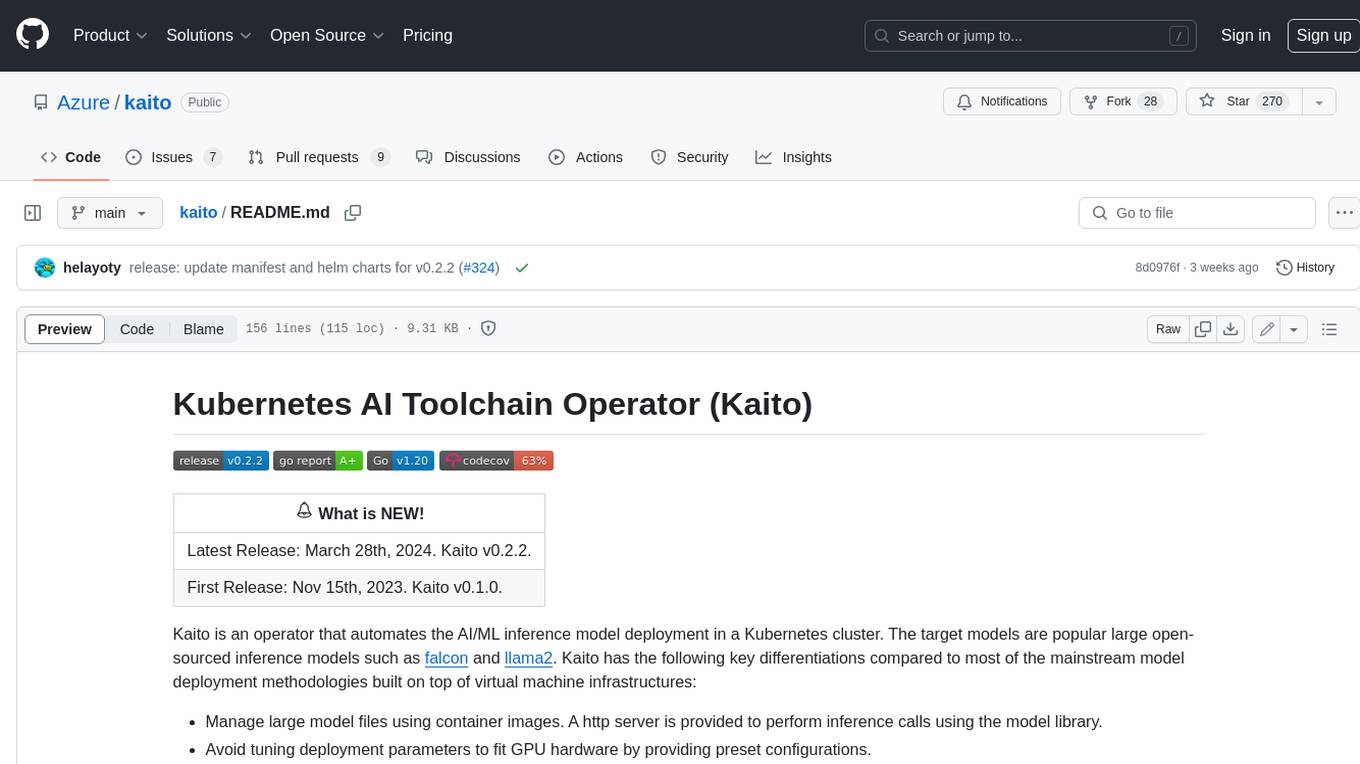
Kaito is an operator that automates the AI/ML inference model deployment in a Kubernetes cluster. It manages large model files using container images, avoids tuning deployment parameters to fit GPU hardware by providing preset configurations, auto-provisions GPU nodes based on model requirements, and hosts large model images in the public Microsoft Container Registry (MCR) if the license allows. Using Kaito, the workflow of onboarding large AI inference models in Kubernetes is largely simplified.

PyRIT
PyRIT is an open access automation framework designed to empower security professionals and ML engineers to red team foundation models and their applications. It automates AI Red Teaming tasks to allow operators to focus on more complicated and time-consuming tasks and can also identify security harms such as misuse (e.g., malware generation, jailbreaking), and privacy harms (e.g., identity theft). The goal is to allow researchers to have a baseline of how well their model and entire inference pipeline is doing against different harm categories and to be able to compare that baseline to future iterations of their model. This allows them to have empirical data on how well their model is doing today, and detect any degradation of performance based on future improvements.
tabby
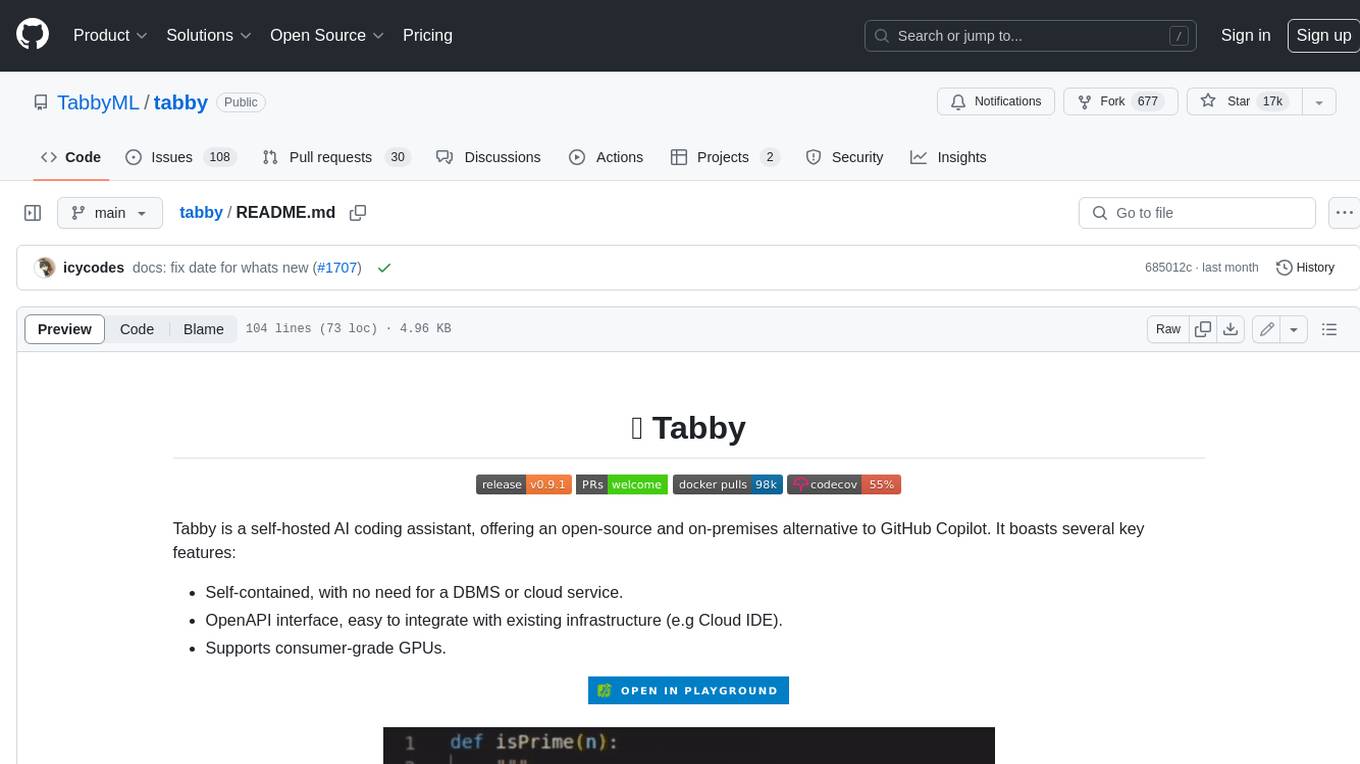
Tabby is a self-hosted AI coding assistant, offering an open-source and on-premises alternative to GitHub Copilot. It boasts several key features: * Self-contained, with no need for a DBMS or cloud service. * OpenAPI interface, easy to integrate with existing infrastructure (e.g Cloud IDE). * Supports consumer-grade GPUs.
spear
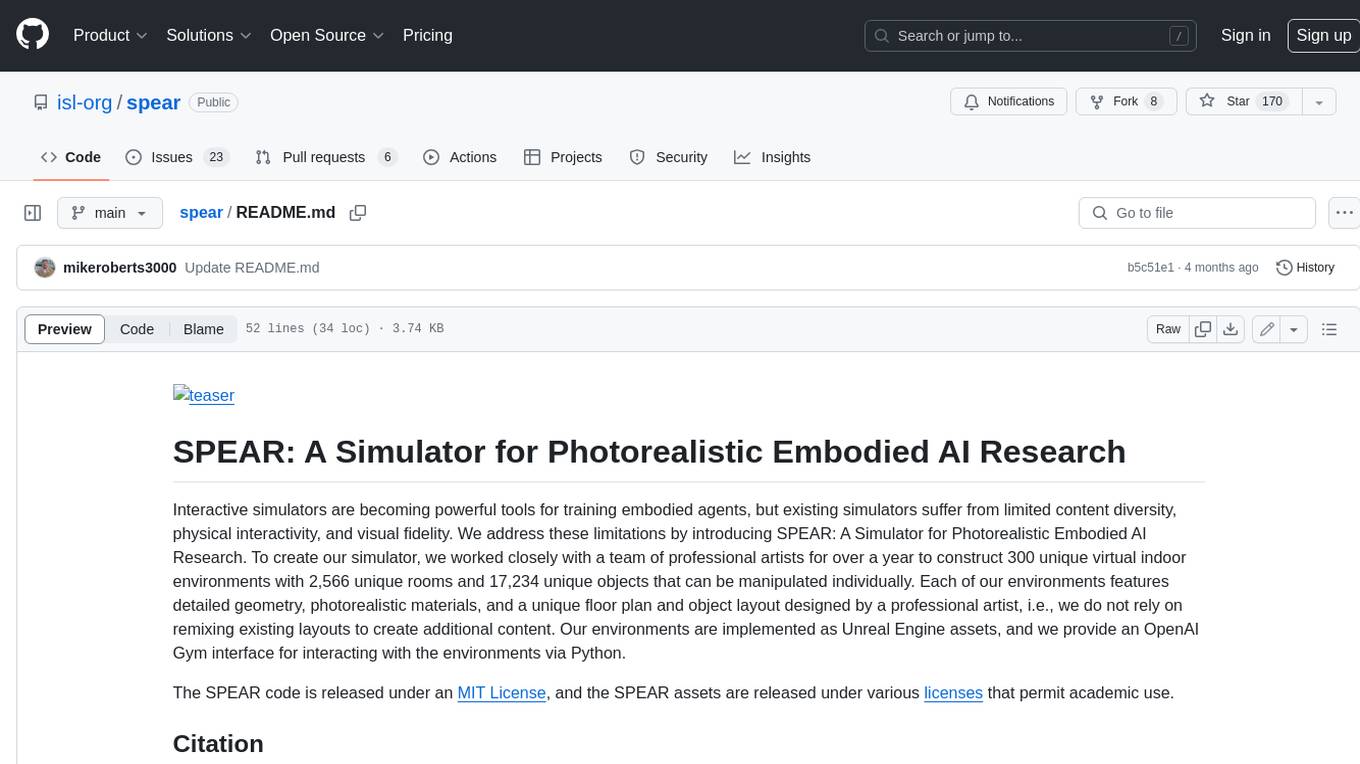
SPEAR (Simulator for Photorealistic Embodied AI Research) is a powerful tool for training embodied agents. It features 300 unique virtual indoor environments with 2,566 unique rooms and 17,234 unique objects that can be manipulated individually. Each environment is designed by a professional artist and features detailed geometry, photorealistic materials, and a unique floor plan and object layout. SPEAR is implemented as Unreal Engine assets and provides an OpenAI Gym interface for interacting with the environments via Python.

Magick
Magick is a groundbreaking visual AIDE (Artificial Intelligence Development Environment) for no-code data pipelines and multimodal agents. Magick can connect to other services and comes with nodes and templates well-suited for intelligent agents, chatbots, complex reasoning systems and realistic characters.
