
legacy-use
Turn any legacy application into a modern REST API, powered by AI
Stars: 86
Legacy-use is a tool that transforms legacy applications into modern REST APIs using AI. It allows users to dynamically generate and customize API endpoints for legacy or desktop applications, access systems running legacy software, track and resolve issues with built-in observability tools, ensure secure and compliant automation, choose model providers independently, and deploy with enterprise-grade security and compliance. The tool provides a quick setup process, automatic API key generation, and supports Windows VM automation. It offers a user-friendly interface for adding targets, running jobs, and writing effective prompts. Legacy-use also supports various connectivity technologies like OpenVPN, Tailscale, WireGuard, VNC, RDP, and TeamViewer. Telemetry data is collected anonymously to improve the product, and users can opt-out of tracking. Optional configurations include enabling OpenVPN target creation and displaying backend endpoints documentation. Contributions to the project are welcome.
README:
- Add API Endpoints via Prompt — Dynamically generate and customize REST API endpoints for any legacy or desktop application.
- Access systems running legacy software — Use established tools like RDP/VNC to run your prompts.
- Logging & Debugging — Track, analyze, and resolve issues effortlessly with built-in observability tools.
- Safety & Reliability — Ensure secure, compliant automation that delivers dependable performance.
- Model Provider Independence — Choose your model provider and avoid vendor lock-in.
- Enterprise-Grade Security and Compliance — Deploy and run locally to ensure security and compliance.
-
Docker - All services run in containers
- Get Docker for your platform
- Note: Make sure Docker is running before proceeding with setup
-
Anthropic API Key - Required for AI model access (Claude)
- Get your API key from Anthropic Console
- Note: You'll need credits in your Anthropic account for API usage
Want to contribute or modify the code? You'll need Node.js and Python locally for development. See CONTRIBUTING.md for the complete development setup guide.
# 1. Clone the repository
git clone https://github.com/legacy-use/legacy-use
cd legacy-use

# 2. Create and configure environment file
cp .env.template .env
# Edit .env file with your favorite editor and add:
# ANTHROPIC_API_KEY=sk-your-anthropic-key-here
# (Optional) Add any configuration options from above

# 3. Build docker containers
make docker-build

# 4. Start all services
make docker-dev
🔑 Automatic API Key Generation
During the initial database migration, the system will automatically:
- Generate a secure API key for the default tenant
- Display the credentials in the console output
- Store the key securely in the database
You'll see output like this:
============================================================
🚀 LEGACY-USE SETUP COMPLETE
============================================================
📡 Server URL: http://tenant-default.local.legacy-use.com:5173/
🔑 API Key: AbC123XyZ789...

💡 To access your instance:
   1. Open the URL in your browser
   2. Enter the API key when prompted
   3. Configure your AI provider in Settings

⚠️  Keep this API key secure - it provides full access to your instance!
============================================================
Once the setup completes:
- Check the console output - You should see the setup credentials displayed
- Frontend: Open http://localhost:8077 - you should see the legacy-use dashboard
- API Documentation: Visit http://localhost:8088/redoc - to explore the REST API
- Configure AI Provider: Go to Settings and configure your Anthropic API key
🎉 You're all set! The complete setup usually takes 2-5 minutes depending on your internet connection.
Docker not starting?
- Ensure Docker Desktop is running
- Check if ports 8077 and 8088 are available:
lsof -i :8077andlsof -i :8088
Build failing?
- Ensure you have sufficient disk space (~2GB)
- Try:
docker system pruneto clean up space, then rebuild
Can't access the UI?
- Wait 30-60 seconds for all services to fully start
- Check logs:
docker logs legacy-use-mgmt
Ready to automate your own Windows applications? Here's how to add a Windows VM as a target:
Choose your virtualization platform:
- macOS: UTM (recommended) or Parallels
- Windows: VirtualBox or VMware
- Linux: VirtualBox or QEMU/KVM
- Download and install UltraVNC
- During setup, set a VNC password (remember this!)
- Ensure the VNC server starts automatically
Find your VM's IP address:
Inside the Windows VM:
- Open Command Prompt (
Win+R→cmd) - Run:
ipconfig - Look for IPv4 Address (e.g.,
192.168.64.2,10.0.2.15)
Alternative - From host machine:
- Check your VM software's network settings for the assigned IP
For optimal performance, configure your VM's display resolution:
Recommended Screen Resolutions:
- 1024 × 768
- 1280 × 800
Note: Larger resolutions can be used, but performance may degrade—especially when working with very small UI elements.
- Open the legacy-use web interface:
http://localhost:8077 - Navigate to Targets → New Target
- Fill in the details:
Name: my-windows-vm Type: VNC Host: [YOUR_VM_IP] # IP from Step 3 Port: 5900 # Default VNC port Password: •••••••• # Password from Step 2 - Click Test Connection to verify, then Save
✅ Success! Your Windows VM is now ready for AI automation.
- Sessions → Create Session for your target.
-
APIs → Import → select
sample_prompts/WindowsCalc.json. - Choose your session & click Execute.
- Integrate via REST ➜ three-dot menu → cURL.
Creating custom automation scripts for your applications? Check out our comprehensive guide:
📖 HOW_TO_PROMPT.md - Learn the best practices for writing prompts that work reliably with legacy-use.
| Technology | Category | Status |
|---|---|---|
| OpenVPN | VPN | ✅ |
| Tailscale | VPN | ✅ |
| WireGuard | VPN | ✅ |
| VNC | Remote | ✅ |
| RDP | Remote | ✅ |
| TeamViewer | Remote | 🚧 |
We collect minimal anonymous usage data to improve the product. This helps us understand:
- Which features are most useful
- Performance bottlenecks
- Common error patterns
What we collect: Usage statistics, error logs, feature interactions What we DON'T collect: Your API keys, target machine data, or sensitive information
Disable anytime by adding to your .env file:
VITE_PUBLIC_DISABLE_TRACKING=trueFull transparency: See exactly what we track in the code:
app/main.tsx, app/services/telemetryService.tsx, server/server.py, server/utils/telemetry.py
-
VITE_ALLOW_OPENVPN: Set totrueto enable OpenVPN target creation.⚠️ Security Warning: OpenVPN requires elevated system privileges (NET_ADMIN capabilities) which may pose security risks. Only enable this if you understand the security implications and trust your target environments -
SHOW_DOCS: Set totrueto make backend endpoints documentation available via/redoc
We love contributors! Read CONTRIBUTING.md to get started.
Made with ❤️ in Munich
For Tasks:
Click tags to check more tools for each tasksFor Jobs:
Alternative AI tools for legacy-use
Similar Open Source Tools

legacy-use
Legacy-use is a tool that transforms legacy applications into modern REST APIs using AI. It allows users to dynamically generate and customize API endpoints for legacy or desktop applications, access systems running legacy software, track and resolve issues with built-in observability tools, ensure secure and compliant automation, choose model providers independently, and deploy with enterprise-grade security and compliance. The tool provides a quick setup process, automatic API key generation, and supports Windows VM automation. It offers a user-friendly interface for adding targets, running jobs, and writing effective prompts. Legacy-use also supports various connectivity technologies like OpenVPN, Tailscale, WireGuard, VNC, RDP, and TeamViewer. Telemetry data is collected anonymously to improve the product, and users can opt-out of tracking. Optional configurations include enabling OpenVPN target creation and displaying backend endpoints documentation. Contributions to the project are welcome.
chat-ollama
ChatOllama is an open-source chatbot based on LLMs (Large Language Models). It supports a wide range of language models, including Ollama served models, OpenAI, Azure OpenAI, and Anthropic. ChatOllama supports multiple types of chat, including free chat with LLMs and chat with LLMs based on a knowledge base. Key features of ChatOllama include Ollama models management, knowledge bases management, chat, and commercial LLMs API keys management.
openwhispr
OpenWhispr is an open source desktop dictation application that converts speech to text using OpenAI Whisper. It features both local and cloud processing options for maximum flexibility and privacy. The application supports multiple AI providers, customizable hotkeys, agent naming, and various AI processing models. It offers a modern UI built with React 19, TypeScript, and Tailwind CSS v4, and is optimized for speed using Vite and modern tooling. Users can manage settings, view history, configure API keys, and download/manage local Whisper models. The application is cross-platform, supporting macOS, Windows, and Linux, and offers features like automatic pasting, draggable interface, global hotkeys, and compound hotkeys.
opcode
opcode is a powerful desktop application built with Tauri 2 that serves as a command center for interacting with Claude Code. It offers a visual GUI for managing Claude Code sessions, creating custom agents, tracking usage, and more. Users can navigate projects, create specialized AI agents, monitor usage analytics, manage MCP servers, create session checkpoints, edit CLAUDE.md files, and more. The tool bridges the gap between command-line tools and visual experiences, making AI-assisted development more intuitive and productive.
figma-console-mcp
Figma Console MCP is a Model Context Protocol server that bridges design and development, giving AI assistants complete access to Figma for extraction, creation, and debugging. It connects AI assistants like Claude to Figma, enabling plugin debugging, visual debugging, design system extraction, design creation, variable management, real-time monitoring, and three installation methods. The server offers 53+ tools for NPX and Local Git setups, while Remote SSE provides read-only access with 16 tools. Users can create and modify designs with AI, contribute to projects, or explore design data. The server supports authentication via personal access tokens and OAuth, and offers tools for navigation, console debugging, visual debugging, design system extraction, design creation, design-code parity, variable management, and AI-assisted design creation.
handit.ai
Handit.ai is an autonomous engineer tool designed to fix AI failures 24/7. It catches failures, writes fixes, tests them, and ships PRs automatically. It monitors AI applications, detects issues, generates fixes, tests them against real data, and ships them as pull requests—all automatically. Users can write JavaScript, TypeScript, Python, and more, and the tool automates what used to require manual debugging and firefighting.
tingly-box
Tingly Box is a tool that helps in deciding which model to call, compressing context, and routing requests efficiently. It offers secure, reliable, and customizable functional extensions. With features like unified API, smart routing, context compression, auto API translation, blazing fast performance, flexible authentication, visual control panel, and client-side usage stats, Tingly Box provides a comprehensive solution for managing AI models and tokens. It supports integration with various IDEs, CLI tools, SDKs, and AI applications, making it versatile and easy to use. The tool also allows seamless integration with OAuth providers like Claude Code, enabling users to utilize existing quotas in OpenAI-compatible tools. Tingly Box aims to simplify AI model management and usage by providing a single endpoint for multiple providers with minimal configuration, promoting seamless integration with SDKs and CLI tools.
llamafarm
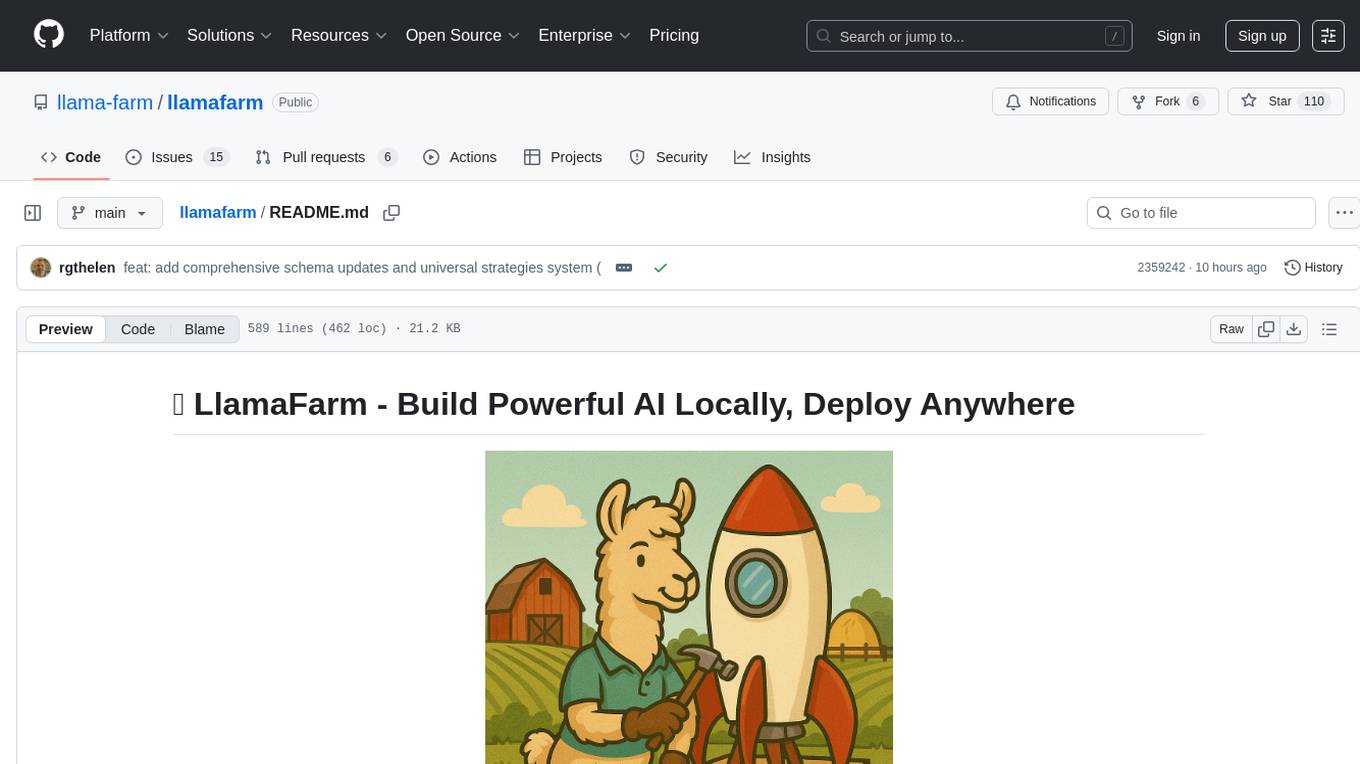
LlamaFarm is a comprehensive AI framework that empowers users to build powerful AI applications locally, with full control over costs and deployment options. It provides modular components for RAG systems, vector databases, model management, prompt engineering, and fine-tuning. Users can create differentiated AI products without needing extensive ML expertise, using simple CLI commands and YAML configs. The framework supports local-first development, production-ready components, strategy-based configuration, and deployment anywhere from laptops to the cloud.
local-cocoa
Local Cocoa is a privacy-focused tool that runs entirely on your device, turning files into memory to spark insights and power actions. It offers features like fully local privacy, multimodal memory, vector-powered retrieval, intelligent indexing, vision understanding, hardware acceleration, focused user experience, integrated notes, and auto-sync. The tool combines file ingestion, intelligent chunking, and local retrieval to build a private on-device knowledge system. The ultimate goal includes more connectors like Google Drive integration, voice mode for local speech-to-text interaction, and a plugin ecosystem for community tools and agents. Local Cocoa is built using Electron, React, TypeScript, FastAPI, llama.cpp, and Qdrant.

LMeterX
LMeterX is a professional large language model performance testing platform that supports model inference services based on large model inference frameworks and cloud services. It provides an intuitive Web interface for creating and managing test tasks, monitoring testing processes, and obtaining detailed performance analysis reports to support model deployment and optimization.
crawl4ai
Crawl4AI is a powerful and free web crawling service that extracts valuable data from websites and provides LLM-friendly output formats. It supports crawling multiple URLs simultaneously, replaces media tags with ALT, and is completely free to use and open-source. Users can integrate Crawl4AI into Python projects as a library or run it as a standalone local server. The tool allows users to crawl and extract data from specified URLs using different providers and models, with options to include raw HTML content, force fresh crawls, and extract meaningful text blocks. Configuration settings can be adjusted in the `crawler/config.py` file to customize providers, API keys, chunk processing, and word thresholds. Contributions to Crawl4AI are welcome from the open-source community to enhance its value for AI enthusiasts and developers.
mistral.rs
Mistral.rs is a fast LLM inference platform written in Rust. We support inference on a variety of devices, quantization, and easy-to-use application with an Open-AI API compatible HTTP server and Python bindings.
MassGen
MassGen is a cutting-edge multi-agent system that leverages the power of collaborative AI to solve complex tasks. It assigns a task to multiple AI agents who work in parallel, observe each other's progress, and refine their approaches to converge on the best solution to deliver a comprehensive and high-quality result. The system operates through an architecture designed for seamless multi-agent collaboration, with key features including cross-model/agent synergy, parallel processing, intelligence sharing, consensus building, and live visualization. Users can install the system, configure API settings, and run MassGen for various tasks such as question answering, creative writing, research, development & coding tasks, and web automation & browser tasks. The roadmap includes plans for advanced agent collaboration, expanded model, tool & agent integration, improved performance & scalability, enhanced developer experience, and a web interface.
indexify
Indexify is an open-source engine for building fast data pipelines for unstructured data (video, audio, images, and documents) using reusable extractors for embedding, transformation, and feature extraction. LLM Applications can query transformed content friendly to LLMs by semantic search and SQL queries. Indexify keeps vector databases and structured databases (PostgreSQL) updated by automatically invoking the pipelines as new data is ingested into the system from external data sources. **Why use Indexify** * Makes Unstructured Data **Queryable** with **SQL** and **Semantic Search** * **Real-Time** Extraction Engine to keep indexes **automatically** updated as new data is ingested. * Create **Extraction Graph** to describe **data transformation** and extraction of **embedding** and **structured extraction**. * **Incremental Extraction** and **Selective Deletion** when content is deleted or updated. * **Extractor SDK** allows adding new extraction capabilities, and many readily available extractors for **PDF**, **Image**, and **Video** indexing and extraction. * Works with **any LLM Framework** including **Langchain**, **DSPy**, etc. * Runs on your laptop during **prototyping** and also scales to **1000s of machines** on the cloud. * Works with many **Blob Stores**, **Vector Stores**, and **Structured Databases** * We have even **Open Sourced Automation** to deploy to Kubernetes in production.
quotio
Quotio is a native macOS application designed as the ultimate command center for managing CLIProxyAPI, a local proxy server that powers AI coding agents. It allows users to connect multiple AI accounts, track quotas, configure CLI tools, and monitor request traffic in real-time. With features like multi-provider support, standalone quota mode, one-click agent configuration, real-time dashboard, smart quota management, API key management, menu bar integration, notifications, auto-update, and multilingual support, Quotio offers a comprehensive solution for AI coding assistants on macOS.
evi-run
evi-run is a powerful, production-ready multi-agent AI system built on Python using the OpenAI Agents SDK. It offers instant deployment, ultimate flexibility, built-in analytics, Telegram integration, and scalable architecture. The system features memory management, knowledge integration, task scheduling, multi-agent orchestration, custom agent creation, deep research, web intelligence, document processing, image generation, DEX analytics, and Solana token swap. It supports flexible usage modes like private, free, and pay mode, with upcoming features including NSFW mode, task scheduler, and automatic limit orders. The technology stack includes Python 3.11, OpenAI Agents SDK, Telegram Bot API, PostgreSQL, Redis, and Docker & Docker Compose for deployment.
For similar tasks

legacy-use
Legacy-use is a tool that transforms legacy applications into modern REST APIs using AI. It allows users to dynamically generate and customize API endpoints for legacy or desktop applications, access systems running legacy software, track and resolve issues with built-in observability tools, ensure secure and compliant automation, choose model providers independently, and deploy with enterprise-grade security and compliance. The tool provides a quick setup process, automatic API key generation, and supports Windows VM automation. It offers a user-friendly interface for adding targets, running jobs, and writing effective prompts. Legacy-use also supports various connectivity technologies like OpenVPN, Tailscale, WireGuard, VNC, RDP, and TeamViewer. Telemetry data is collected anonymously to improve the product, and users can opt-out of tracking. Optional configurations include enabling OpenVPN target creation and displaying backend endpoints documentation. Contributions to the project are welcome.
amazon-bedrock-agentcore-samples
Amazon Bedrock AgentCore Samples repository provides examples and tutorials to deploy and operate AI agents securely at scale using any framework and model. It is framework-agnostic and model-agnostic, allowing flexibility in deployment. The repository includes tutorials, end-to-end applications, integration guides, deployment automation, and full-stack reference applications for developers to understand and implement Amazon Bedrock AgentCore capabilities into their applications.
For similar jobs
aiscript
AiScript is a lightweight scripting language that runs on JavaScript. It supports arrays, objects, and functions as first-class citizens, and is easy to write without the need for semicolons or commas. AiScript runs in a secure sandbox environment, preventing infinite loops from freezing the host. It also allows for easy provision of variables and functions from the host.
askui
AskUI is a reliable, automated end-to-end automation tool that only depends on what is shown on your screen instead of the technology or platform you are running on.
bots
The 'bots' repository is a collection of guides, tools, and example bots for programming bots to play video games. It provides resources on running bots live, installing the BotLab client, debugging bots, testing bots in simulated environments, and more. The repository also includes example bots for games like EVE Online, Tribal Wars 2, and Elvenar. Users can learn about developing bots for specific games, syntax of the Elm programming language, and tools for memory reading development. Additionally, there are guides on bot programming, contributing to BotLab, and exploring Elm syntax and core library.
ain
Ain is a terminal HTTP API client designed for scripting input and processing output via pipes. It allows flexible organization of APIs using files and folders, supports shell-scripts and executables for common tasks, handles url-encoding, and enables sharing the resulting curl, wget, or httpie command-line. Users can put things that change in environment variables or .env-files, and pipe the API output for further processing. Ain targets users who work with many APIs using a simple file format and uses curl, wget, or httpie to make the actual calls.
LaVague
LaVague is an open-source Large Action Model framework that uses advanced AI techniques to compile natural language instructions into browser automation code. It leverages Selenium or Playwright for browser actions. Users can interact with LaVague through an interactive Gradio interface to automate web interactions. The tool requires an OpenAI API key for default examples and offers a Playwright integration guide. Contributors can help by working on outlined tasks, submitting PRs, and engaging with the community on Discord. The project roadmap is available to track progress, but users should exercise caution when executing LLM-generated code using 'exec'.
robocorp
Robocorp is a platform that allows users to create, deploy, and operate Python automations and AI actions. It provides an easy way to extend the capabilities of AI agents, assistants, and copilots with custom actions written in Python. Users can create and deploy tools, skills, loaders, and plugins that securely connect any AI Assistant platform to their data and applications. The Robocorp Action Server makes Python scripts compatible with ChatGPT and LangChain by automatically creating and exposing an API based on function declaration, type hints, and docstrings. It simplifies the process of developing and deploying AI actions, enabling users to interact with AI frameworks effortlessly.
Open-Interface
Open Interface is a self-driving software that automates computer tasks by sending user requests to a language model backend (e.g., GPT-4V) and simulating keyboard and mouse inputs to execute the steps. It course-corrects by sending current screenshots to the language models. The tool supports MacOS, Linux, and Windows, and requires setting up the OpenAI API key for access to GPT-4V. It can automate tasks like creating meal plans, setting up custom language model backends, and more. Open Interface is currently not efficient in accurate spatial reasoning, tracking itself in tabular contexts, and navigating complex GUI-rich applications. Future improvements aim to enhance the tool's capabilities with better models trained on video walkthroughs. The tool is cost-effective, with user requests priced between $0.05 - $0.20, and offers features like interrupting the app and primary display visibility in multi-monitor setups.
AI-Case-Sorter-CS7.1
AI-Case-Sorter-CS7.1 is a project focused on building a case sorter using machine vision and machine learning AI to sort cases by headstamp. The repository includes Arduino code and 3D models necessary for the project.


