
ai
build internal applications for your organization
Stars: 329
This repository contains a collection of AI algorithms and models for various machine learning tasks. It provides implementations of popular algorithms such as neural networks, decision trees, and support vector machines. The code is well-documented and easy to understand, making it suitable for both beginners and experienced developers. The repository also includes example datasets and tutorials to help users get started with building and training AI models. Whether you are a student learning about AI or a professional working on machine learning projects, this repository can be a valuable resource for your development journey.
README:
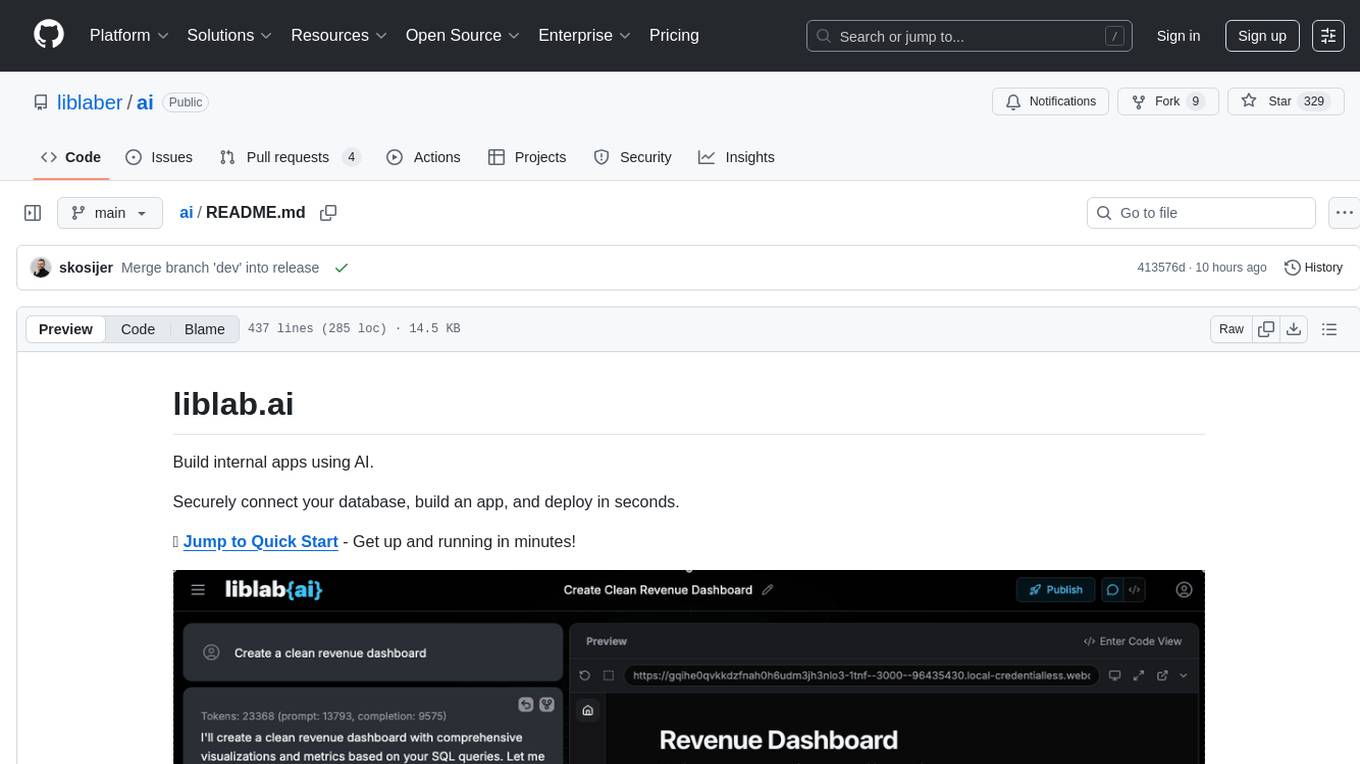
Build internal apps using AI.
Securely connect your database, build an app, and deploy in seconds.
🚀 Jump to Quick Start - Get up and running in minutes!

- Securely connect your database (or use a Sample database)
- Build internal apps that can communicate with your database
- AI builds the whole full-stack app and auto-fixes any issues
- Preview your built app live and make edits
- Download the built app code or connect directly to GitHub
- Deploy your built app
Prerequisites
Node.js (Only required for configuration, not for running the app)
Node.js is a program that helps your computer run certain types of applications. You'll need it to set up this project, but don't worry - it's free and easy to install!
📱 macOS (Mac computers)
Option 1: Simple download (Recommended for beginners)
- Open your web browser and go to nodejs.org
- You'll see two download buttons - click the one that says "LTS" (it's the safer, more stable version)
- The file will download automatically
- Double-click the downloaded file (it will end in .pkg)
- Follow the installation wizard - just click "Continue" and "Install" when prompted
- Enter your computer password when asked
Option 2: Using Homebrew
- Open Terminal
- Copy and paste this command:
brew install node - Press Enter and wait for it to finish
🪟 Windows
Option 1: Simple download (Recommended for beginners)
- Open your web browser and go to nodejs.org
- You'll see two download buttons - click the one that says "LTS" (it's the safer, more stable version)
- The file will download automatically
- Find the downloaded file (usually in your Downloads folder) and double-click it
- Follow the installation wizard - just click "Next" and "Install" when prompted
- Click "Finish" when done
🐧 Linux
Ubuntu/Debian (most common Linux versions)
- Open Terminal (press Ctrl + Alt + T)
- Copy and paste this command:
sudo apt update && sudo apt install nodejs npm - Press Enter and type your password when asked
- Type "Y" and press Enter to confirm
Other Linux versions
- Open Terminal
- Copy and paste this command:
sudo snap install node --classic - Press Enter and type your password when asked
✅ How to check if it worked
After installation, you can verify it worked:
- Open Terminal (Mac/Linux) or Command Prompt (Windows)
- Type:
node --versionand press Enter - You should see something like "v22.0.0" or higher
- Type:
npm --versionand press Enter - You should see a version number like "9.6.7"
❓ Need help?
- Windows users: If you get an error about "node is not recognized", restart your computer after installation or refer to the official Windows guide
- Mac users: If you get a security warning, go to System Preferences > Security & Privacy and click "Allow"
-
Linux users: If you get a permission error, make sure to type
sudobefore the commands
pnpm (Package manager, faster than npm)
# Install pnpm globally
npm install -g pnpm

# Verify installation
pnpm --version
Docker (Required for containerized setup)
Install Docker Desktop from docker.com/get-started
Verify the Installation
docker --version
docker-compose --version
Anthropic API Key (Required for AI model access)
Step 1: Create an Anthropic Account
- Go to console.anthropic.com/signup
- Create an account
- Verify your email
Step 2: Generate an API Key 4. Go to console.anthropic.com/settings/keys 5. Click "Create Key" 6. Give it a name (e.g., "liblab-ai") 7. Copy the API key (starts with sk-ant-)
Step 3: Save your API Key
Add this to your .env file during setup, but keep it handy:
ANTHROPIC_API_KEY=sk-ant-your-api-key-hereNetlify Key (Optional to run the builder. Required to deploy completed apps)
Step 1: Create a Netlify account
- Go to netlify.com
- Sign up for a free account
Step 2: Generate an auth token 3. Go to User Settings > Applications > New access token 4. Generate and copy your token
Step 3: Add the token to your .env file
NETLIFY_AUTH_TOKEN=your-token-hereOnce configured, you can deploy any app you generate through liblab.ai to Netlify using the deploy option in the UI.
liblab.ai runs best on Chrome or Chromium browsers when using a desktop. Mobile browsers don't have full support right now.
Some browser add-ons like ad blockers or VPNs might cause problems. If things aren't working right, try disabling them and reload the page.
Clone the repo
git clone https://github.com/liblaber/ai.git
cd ai
Run the quickstart
Make sure your Docker Desktop is running.
Run the following command to set up and start the app:
pnpm run quickstartThat's it! 🎉 The app will be available at http://localhost:3000
The pnpm run quickstart command now always pulls the latest code and Docker images to ensure you're running the most up-to-date version. Here's what happens:
- ✅ Always rebuilds Docker images with latest code
- ✅ Preserves your database by default (keeps existing data)
- ✅ Interactive prompts if you have existing data
- ✅ Migration support for database schema changes
Additional quickstart options:
# Standard quickstart (preserves database)
pnpm run quickstart

# Fresh start (removes all existing data)
pnpm run quickstart:fresh

# Explicitly preserve database
pnpm run quickstart:preserve
Database Migration
If you encounter database issues after updating, use the migration tool:
pnpm run docker:migrateThis provides options to:
- Auto-migrate database schema
- Create backups before migrating
- Reset database (
⚠️ loses all data)
Your data is PRESERVED when:
- You run
pnpm run quickstart:preserve - You run the standard
pnpm run quickstartand choose to preserve data when prompted (this is the default)
Your data is REMOVED (fresh start) when:
- You run
pnpm run quickstart:fresh - You run the standard
pnpm run quickstartand choose to reset the database when prompted - No existing data is found (e.g., on first-time setup)
Important Notes:
- 🔄 Code is always updated - Docker images are rebuilt with latest code
- 💾 Database behavior is configurable - You control whether to keep or reset data
⚠️ Schema changes may require migration - Usepnpm run docker:migrateif needed
For developers who prefer full control over their environment or need to run without Docker.
💡 Note: We recommend using Docker (Option 1) for the best experience, as it handles all dependencies and provides a consistent environment.
Prerequisites
Before starting, ensure you have all the following installed and configured:
Node.js (22 or higher) (Required for running the application)
Node.js is a program that helps your computer run certain types of applications. You'll need it to run this project on your computer.
📱 macOS (Mac computers)
Option 1: Simple download (Recommended for beginners)
- Open your web browser and go to nodejs.org
- You'll see two download buttons - click the one that says "LTS" (it's the safer, more stable version)
- The file will download automatically
- Double-click the downloaded file (it will end in .pkg)
- Follow the installation wizard - just click "Continue" and "Install" when prompted
- Enter your computer password when asked
Option 2: Using Homebrew (if you're comfortable with Terminal)
- Open Terminal (press Cmd + Space, type "Terminal", press Enter)
- Copy and paste this command:
brew install node - Press Enter and wait for it to finish
🪟 Windows
Option 1: Simple download (Recommended for beginners)
- Open your web browser and go to nodejs.org
- You'll see two download buttons - click the one that says "LTS" (it's the safer, more stable version)
- The file will download automatically
- Find the downloaded file (usually in your Downloads folder) and double-click it
- Follow the installation wizard - just click "Next" and "Install" when prompted
- Click "Finish" when done
Option 2: Using Windows Store (Windows 10/11)
- Open the Microsoft Store app
- Search for "Node.js"
- Click "Install" on the official Node.js app
- Wait for it to finish installing
🐧 Linux
Ubuntu/Debian (most common Linux versions)
- Open Terminal (press Ctrl + Alt + T)
- Copy and paste this command:
sudo apt update && sudo apt install nodejs npm - Press Enter and type your password when asked
- Type "Y" and press Enter to confirm
Other Linux versions
- Open Terminal
- Copy and paste this command:
sudo snap install node --classic - Press Enter and type your password when asked
✅ How to check if it worked
After installation, you can verify it worked:
- Open Terminal (Mac/Linux) or Command Prompt (Windows)
- Type:
node --versionand press Enter - You should see something like "v22.0.0" or higher
- Type:
npm --versionand press Enter - You should see a version number like "9.6.7"
❓ Need help?
- Windows users: If you get an error about "node is not recognized", restart your computer after installation or refer to the official Windows guide.
- Mac users: If you get a security warning, go to System Preferences > Security & Privacy and click "Allow"
-
Linux users: If you get a permission error, make sure to type
sudobefore the commands
pnpm (Package manager, faster than npm)
# Install pnpm globally
npm install -g pnpm

# Verify installation
pnpm --version
Anthropic API Key (Required for AI model access)
Step 1: Create an Anthropic Account
- Go to console.anthropic.com/signup
- Create an account
- Verify your email
Step 2: Generate an API Key 4. Go to console.anthropic.com/settings/keys 5. Click "Create Key" 6. Give it a name (e.g., "liblab-ai") 7. Copy the API key (starts with sk-ant-)
Step 3: Save your API Key
Add this to your .env file during setup, but keep it handy:
ANTHROPIC_API_KEY=sk-ant-your-api-key-hereNetlify Key (Optional to run the builder. Required to deploy completed apps)
Step 1: Create a Netlify account
- Go to netlify.com
- Sign up for a free account
Step 2: Generate an auth token 3. Go to User Settings > Applications > New access token 4. Generate and copy your token
Step 3: Add the token to your .env file
NETLIFY_AUTH_TOKEN=your-token-hereliblab.ai runs best on Chrome or Chromium browsers when using a desktop. Mobile browsers don't have full support right now.
Some browser add-ons like ad blockers or VPNs might cause problems. If things aren't working right, try disabling them and reload the page.
Setup
Clone the repo
git clone https://github.com/liblaber/ai.git
cd ai
Run the setup
pnpm run setupStart the app
Start the development server with:
pnpm run devThat's it! 🎉
- Contributing Guidelines - How to contribute to the project
- Security & Privacy
- Configuration
- Deploy on EC2 with HTTPS & Auto-Restart
- Getting Started
- Features
- Environments
- Team Roles and Permissions
- Tips
- Governance
- License
We welcome contributions! Here's how to get started:
- 📖 Read our Contributing Guidelines - Complete setup and development guide
- 🐛 Browse Issues - Find something to work on
- 🏛️ Check our Governance Model - Understand how we work
New to the project? Look for good first issue labels.
- 🐛 GitHub Issues - Report bugs, request features, or discuss project-related topics
- 📧 General Inquiries - Contact us directly for questions or concerns
This project is currently licensed under the MIT License. Please note that future versions may transition to a different license to support the introduction of Pro features. We remain committed to keeping the core open source, but certain advanced capabilities may be subject to commercial terms.
MIT License - see the LICENSE file for details.
Copyright (c) 2025 Liblab, Inc. and liblab.ai contributors
Ready to contribute? Check out our Contributing Guidelines and join our community! 🚀
For Tasks:
Click tags to check more tools for each tasksFor Jobs:
Alternative AI tools for ai
Similar Open Source Tools
ai
This repository contains a collection of AI algorithms and models for various machine learning tasks. It provides implementations of popular algorithms such as neural networks, decision trees, and support vector machines. The code is well-documented and easy to understand, making it suitable for both beginners and experienced developers. The repository also includes example datasets and tutorials to help users get started with building and training AI models. Whether you are a student learning about AI or a professional working on machine learning projects, this repository can be a valuable resource for your development journey.
lemonai
LemonAI is a versatile machine learning library designed to simplify the process of building and deploying AI models. It provides a wide range of tools and algorithms for data preprocessing, model training, and evaluation. With LemonAI, users can easily experiment with different machine learning techniques and optimize their models for various tasks. The library is well-documented and beginner-friendly, making it suitable for both novice and experienced data scientists. LemonAI aims to streamline the development of AI applications and empower users to create innovative solutions using state-of-the-art machine learning methods.
open-ai
Open AI is a powerful tool for artificial intelligence research and development. It provides a wide range of machine learning models and algorithms, making it easier for developers to create innovative AI applications. With Open AI, users can explore cutting-edge technologies such as natural language processing, computer vision, and reinforcement learning. The platform offers a user-friendly interface and comprehensive documentation to support users in building and deploying AI solutions. Whether you are a beginner or an experienced AI practitioner, Open AI offers the tools and resources you need to accelerate your AI projects and stay ahead in the rapidly evolving field of artificial intelligence.
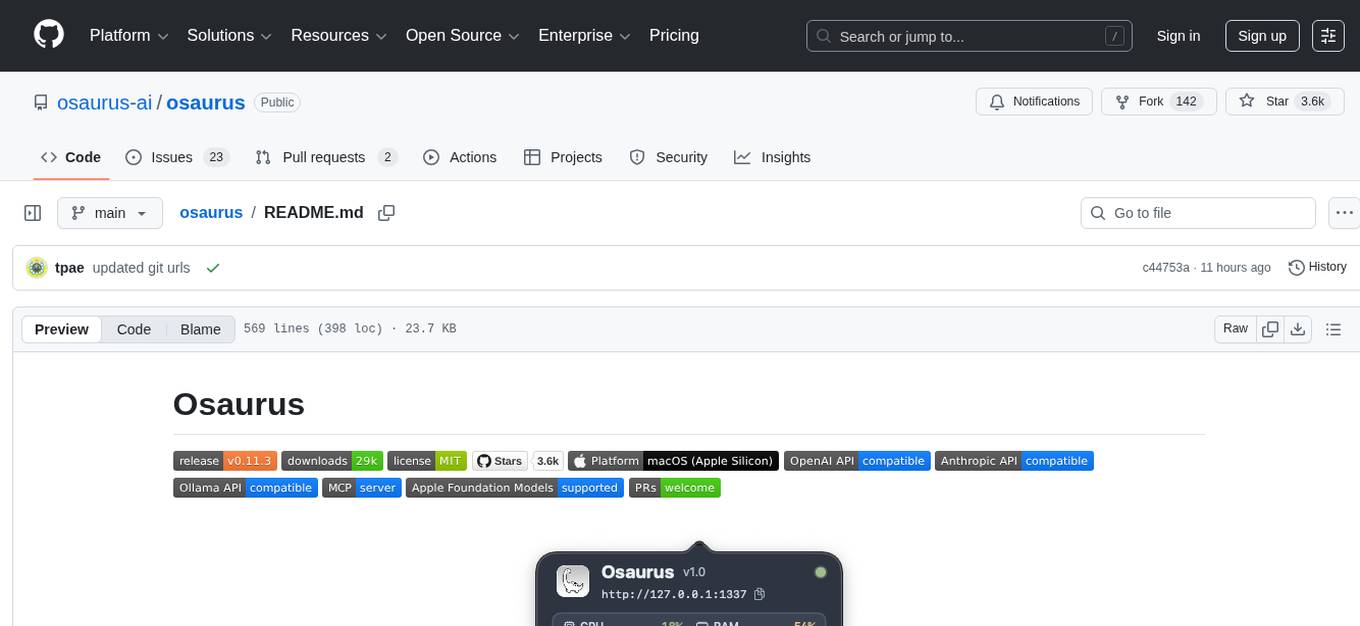
osaurus
Osaurus is a versatile open-source tool designed for data scientists and machine learning engineers. It provides a wide range of functionalities for data preprocessing, feature engineering, model training, and evaluation. With Osaurus, users can easily clean and transform raw data, extract relevant features, build and tune machine learning models, and analyze model performance. The tool supports various machine learning algorithms and techniques, making it suitable for both beginners and experienced practitioners in the field. Osaurus is actively maintained and updated to incorporate the latest advancements in the machine learning domain, ensuring users have access to state-of-the-art tools and methodologies for their projects.
build-your-own-x-machine-learning
This repository provides a step-by-step guide for building your own machine learning models from scratch. It covers various machine learning algorithms and techniques, including linear regression, logistic regression, decision trees, and neural networks. The code examples are written in Python and include detailed explanations to help beginners understand the concepts behind machine learning. By following the tutorials in this repository, you can gain a deeper understanding of how machine learning works and develop your own models for different applications.
ai-inference
AI Inference is a Python library that provides tools for deploying and running machine learning models in production environments. It simplifies the process of integrating AI models into applications by offering a high-level API for inference tasks. With AI Inference, developers can easily load pre-trained models, perform inference on new data, and deploy models as RESTful APIs. The library supports various deep learning frameworks such as TensorFlow and PyTorch, making it versatile for a wide range of AI applications.

simple-ai
Simple AI is a lightweight Python library for implementing basic artificial intelligence algorithms. It provides easy-to-use functions and classes for tasks such as machine learning, natural language processing, and computer vision. With Simple AI, users can quickly prototype and deploy AI solutions without the complexity of larger frameworks.
ai-workshop-code
The ai-workshop-code repository contains code examples and tutorials for various artificial intelligence concepts and algorithms. It serves as a practical resource for individuals looking to learn and implement AI techniques in their projects. The repository covers a wide range of topics, including machine learning, deep learning, natural language processing, computer vision, and reinforcement learning. By exploring the code and following the tutorials, users can gain hands-on experience with AI technologies and enhance their understanding of how these algorithms work in practice.
ai-collection
The ai-collection repository is a collection of various artificial intelligence projects and tools aimed at helping developers and researchers in the field of AI. It includes implementations of popular AI algorithms, datasets for training machine learning models, and resources for learning AI concepts. The repository serves as a valuable resource for anyone interested in exploring the applications of artificial intelligence in different domains.
deeppowers
Deeppowers is a powerful Python library for deep learning applications. It provides a wide range of tools and utilities to simplify the process of building and training deep neural networks. With Deeppowers, users can easily create complex neural network architectures, perform efficient training and optimization, and deploy models for various tasks. The library is designed to be user-friendly and flexible, making it suitable for both beginners and experienced deep learning practitioners.
learn-claude-code
Learn Claude Code is an educational project by shareAI Lab that aims to help users understand how modern AI agents work by building one from scratch. The repository provides original educational material on various topics such as the agent loop, tool design, explicit planning, context management, knowledge injection, task systems, parallel execution, team messaging, and autonomous teams. Users can follow a learning path through different versions of the project, each introducing new concepts and mechanisms. The repository also includes technical tutorials, articles, and example skills for users to explore and learn from. The project emphasizes the philosophy that the model is crucial in agent development, with code playing a supporting role.
learn-applied-generative-ai-fundamentals
This repository is part of the Certified Cloud Native Applied Generative AI Engineer program, focusing on Applied Generative AI Fundamentals. It covers prompt engineering, developing custom GPTs, and Multi AI Agent Systems. The course helps in building a strong understanding of generative AI, applying Large Language Models (LLMs) and diffusion models practically. It introduces principles of prompt engineering to work efficiently with AI, creating custom AI models and GPTs using OpenAI, Azure, and Google technologies. It also utilizes open source libraries like LangChain, CrewAI, and LangGraph to automate tasks and business processes.

model-mondays
Model Mondays is a repository dedicated to providing a collection of machine learning models implemented in Python. It aims to serve as a resource for individuals looking to explore and experiment with various machine learning algorithms and techniques. The repository includes a wide range of models, from simple linear regression to complex deep learning architectures, along with detailed documentation and examples to facilitate learning and understanding. Whether you are a beginner looking to get started with machine learning or an experienced practitioner seeking reference implementations, Model Mondays offers a valuable repository of models to study and leverage in your projects.
Awesome-Efficient-MoE
Awesome Efficient MoE is a GitHub repository that provides an implementation of Mixture of Experts (MoE) models for efficient deep learning. The repository includes code for training and using MoE models, which are neural network architectures that combine multiple expert networks to improve performance on complex tasks. MoE models are particularly useful for handling diverse data distributions and capturing complex patterns in data. The implementation in this repository is designed to be efficient and scalable, making it suitable for training large-scale MoE models on modern hardware. The code is well-documented and easy to use, making it accessible for researchers and practitioners interested in leveraging MoE models for their deep learning projects.
LLM-Project
LLM-Project is a machine learning model for sentiment analysis. It is designed to analyze text data and classify it into positive, negative, or neutral sentiments. The model uses natural language processing techniques to extract features from the text and train a classifier to make predictions. LLM-Project is suitable for researchers, developers, and data scientists who are working on sentiment analysis tasks. It provides a pre-trained model that can be easily integrated into existing projects or used for experimentation and research purposes. The codebase is well-documented and easy to understand, making it accessible to users with varying levels of expertise in machine learning and natural language processing.

awesome-ai-tools
This repository contains a curated list of awesome AI tools that can be used for various machine learning and artificial intelligence projects. It includes tools for data preprocessing, model training, evaluation, and deployment. The list is regularly updated with new tools and resources to help developers and data scientists in their AI projects.
For similar tasks
nlp-llms-resources
The 'nlp-llms-resources' repository is a comprehensive resource list for Natural Language Processing (NLP) and Large Language Models (LLMs). It covers a wide range of topics including traditional NLP datasets, data acquisition, libraries for NLP, neural networks, sentiment analysis, optical character recognition, information extraction, semantics, topic modeling, multilingual NLP, domain-specific LLMs, vector databases, ethics, costing, books, courses, surveys, aggregators, newsletters, papers, conferences, and societies. The repository provides valuable information and resources for individuals interested in NLP and LLMs.
adata
AData is a free and open-source A-share database that focuses on transaction-related data. It provides comprehensive data on stocks, including basic information, market data, and sentiment analysis. AData is designed to be easy to use and integrate with other applications, making it a valuable tool for quantitative trading and AI training.

PIXIU
PIXIU is a project designed to support the development, fine-tuning, and evaluation of Large Language Models (LLMs) in the financial domain. It includes components like FinBen, a Financial Language Understanding and Prediction Evaluation Benchmark, FIT, a Financial Instruction Dataset, and FinMA, a Financial Large Language Model. The project provides open resources, multi-task and multi-modal financial data, and diverse financial tasks for training and evaluation. It aims to encourage open research and transparency in the financial NLP field.
hezar
Hezar is an all-in-one AI library designed specifically for the Persian community. It brings together various AI models and tools, making it easy to use AI with just a few lines of code. The library seamlessly integrates with Hugging Face Hub, offering a developer-friendly interface and task-based model interface. In addition to models, Hezar provides tools like word embeddings, tokenizers, feature extractors, and more. It also includes supplementary ML tools for deployment, benchmarking, and optimization.
text-embeddings-inference
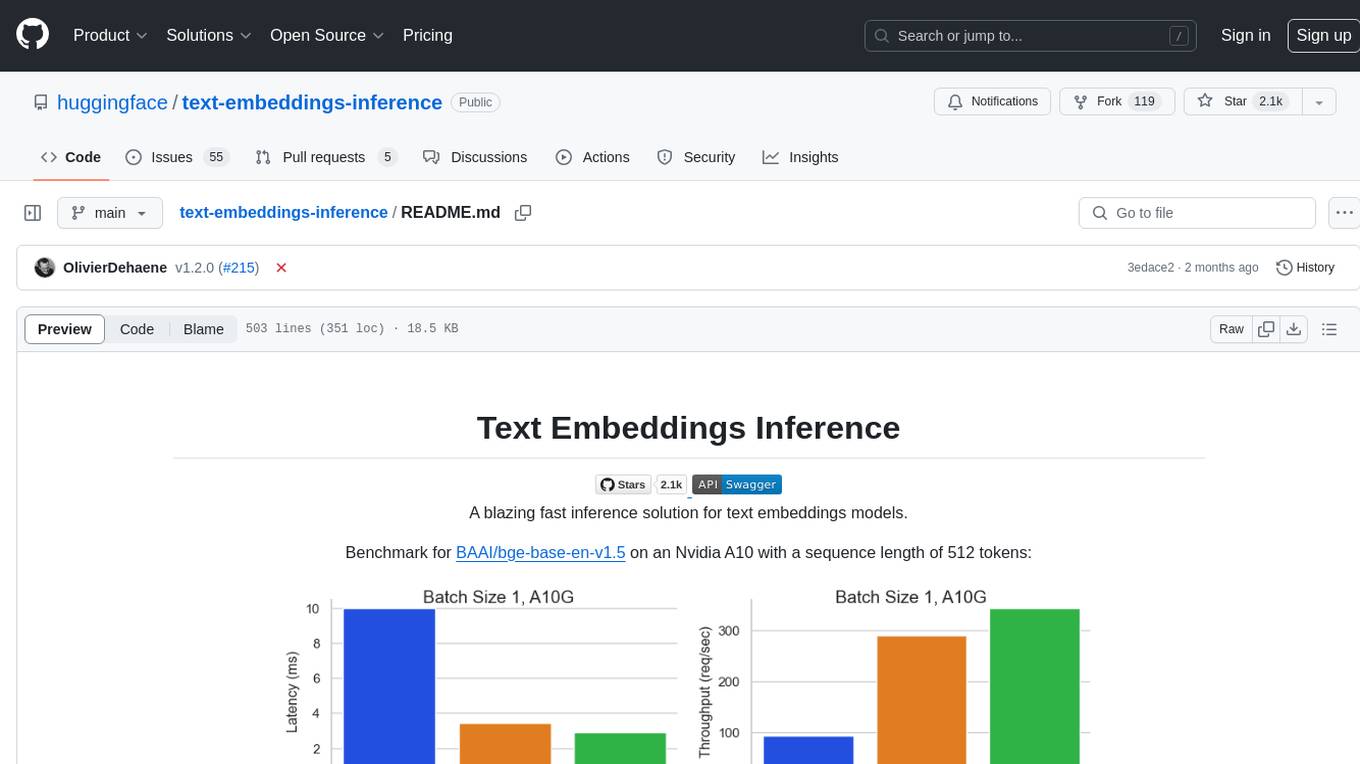
Text Embeddings Inference (TEI) is a toolkit for deploying and serving open source text embeddings and sequence classification models. TEI enables high-performance extraction for popular models like FlagEmbedding, Ember, GTE, and E5. It implements features such as no model graph compilation step, Metal support for local execution on Macs, small docker images with fast boot times, token-based dynamic batching, optimized transformers code for inference using Flash Attention, Candle, and cuBLASLt, Safetensors weight loading, and production-ready features like distributed tracing with Open Telemetry and Prometheus metrics.
CodeProject.AI-Server
CodeProject.AI Server is a standalone, self-hosted, fast, free, and open-source Artificial Intelligence microserver designed for any platform and language. It can be installed locally without the need for off-device or out-of-network data transfer, providing an easy-to-use solution for developers interested in AI programming. The server includes a HTTP REST API server, backend analysis services, and the source code, enabling users to perform various AI tasks locally without relying on external services or cloud computing. Current capabilities include object detection, face detection, scene recognition, sentiment analysis, and more, with ongoing feature expansions planned. The project aims to promote AI development, simplify AI implementation, focus on core use-cases, and leverage the expertise of the developer community.
spark-nlp
Spark NLP is a state-of-the-art Natural Language Processing library built on top of Apache Spark. It provides simple, performant, and accurate NLP annotations for machine learning pipelines that scale easily in a distributed environment. Spark NLP comes with 36000+ pretrained pipelines and models in more than 200+ languages. It offers tasks such as Tokenization, Word Segmentation, Part-of-Speech Tagging, Named Entity Recognition, Dependency Parsing, Spell Checking, Text Classification, Sentiment Analysis, Token Classification, Machine Translation, Summarization, Question Answering, Table Question Answering, Text Generation, Image Classification, Image to Text (captioning), Automatic Speech Recognition, Zero-Shot Learning, and many more NLP tasks. Spark NLP is the only open-source NLP library in production that offers state-of-the-art transformers such as BERT, CamemBERT, ALBERT, ELECTRA, XLNet, DistilBERT, RoBERTa, DeBERTa, XLM-RoBERTa, Longformer, ELMO, Universal Sentence Encoder, Llama-2, M2M100, BART, Instructor, E5, Google T5, MarianMT, OpenAI GPT2, Vision Transformers (ViT), OpenAI Whisper, and many more not only to Python and R, but also to JVM ecosystem (Java, Scala, and Kotlin) at scale by extending Apache Spark natively.
scikit-llm
Scikit-LLM is a tool that seamlessly integrates powerful language models like ChatGPT into scikit-learn for enhanced text analysis tasks. It allows users to leverage large language models for various text analysis applications within the familiar scikit-learn framework. The tool simplifies the process of incorporating advanced language processing capabilities into machine learning pipelines, enabling users to benefit from the latest advancements in natural language processing.
For similar jobs
weave
Weave is a toolkit for developing Generative AI applications, built by Weights & Biases. With Weave, you can log and debug language model inputs, outputs, and traces; build rigorous, apples-to-apples evaluations for language model use cases; and organize all the information generated across the LLM workflow, from experimentation to evaluations to production. Weave aims to bring rigor, best-practices, and composability to the inherently experimental process of developing Generative AI software, without introducing cognitive overhead.
LLMStack
LLMStack is a no-code platform for building generative AI agents, workflows, and chatbots. It allows users to connect their own data, internal tools, and GPT-powered models without any coding experience. LLMStack can be deployed to the cloud or on-premise and can be accessed via HTTP API or triggered from Slack or Discord.
VisionCraft
The VisionCraft API is a free API for using over 100 different AI models. From images to sound.
kaito
Kaito is an operator that automates the AI/ML inference model deployment in a Kubernetes cluster. It manages large model files using container images, avoids tuning deployment parameters to fit GPU hardware by providing preset configurations, auto-provisions GPU nodes based on model requirements, and hosts large model images in the public Microsoft Container Registry (MCR) if the license allows. Using Kaito, the workflow of onboarding large AI inference models in Kubernetes is largely simplified.
PyRIT
PyRIT is an open access automation framework designed to empower security professionals and ML engineers to red team foundation models and their applications. It automates AI Red Teaming tasks to allow operators to focus on more complicated and time-consuming tasks and can also identify security harms such as misuse (e.g., malware generation, jailbreaking), and privacy harms (e.g., identity theft). The goal is to allow researchers to have a baseline of how well their model and entire inference pipeline is doing against different harm categories and to be able to compare that baseline to future iterations of their model. This allows them to have empirical data on how well their model is doing today, and detect any degradation of performance based on future improvements.
tabby
Tabby is a self-hosted AI coding assistant, offering an open-source and on-premises alternative to GitHub Copilot. It boasts several key features: * Self-contained, with no need for a DBMS or cloud service. * OpenAPI interface, easy to integrate with existing infrastructure (e.g Cloud IDE). * Supports consumer-grade GPUs.
spear
SPEAR (Simulator for Photorealistic Embodied AI Research) is a powerful tool for training embodied agents. It features 300 unique virtual indoor environments with 2,566 unique rooms and 17,234 unique objects that can be manipulated individually. Each environment is designed by a professional artist and features detailed geometry, photorealistic materials, and a unique floor plan and object layout. SPEAR is implemented as Unreal Engine assets and provides an OpenAI Gym interface for interacting with the environments via Python.
Magick
Magick is a groundbreaking visual AIDE (Artificial Intelligence Development Environment) for no-code data pipelines and multimodal agents. Magick can connect to other services and comes with nodes and templates well-suited for intelligent agents, chatbots, complex reasoning systems and realistic characters.