
webapp-starter
A monorepo template for building webapps - perfect for LLMs
Stars: 787
webapp-starter is a modern full-stack application template built with Turborepo, featuring a Hono + Bun API backend and Next.js frontend. It provides an easy way to build a SaaS product. The backend utilizes technologies like Bun, Drizzle ORM, and Supabase, while the frontend is built with Next.js, Tailwind CSS, Shadcn/ui, and Clerk. Deployment can be done using Vercel and Render. The project structure includes separate directories for API backend and Next.js frontend, along with shared packages for the main database. Setup involves installing dependencies, configuring environment variables, and setting up services like Bun, Supabase, and Clerk. Development can be done using 'turbo dev' command, and deployment instructions are provided for Vercel and Render. Contributions are welcome through pull requests.
README:
A modern full-stack application template built with Turborepo, featuring a Hono + Bun API backend and Next.js frontend. Easiest way to build a SaaS.
├── apps/
│   ├── api/         # Bun API backend
│   └── web/         # Next.js frontend
└── packages/        # Shared packages, main DB
- Install dependencies
pnpm install
- Bun Setup You can install bun in a few ways, based on your OS. https://bun.sh/docs/installation
curl -fsSL https://bun.sh/install | bash # for macOS, Linux, and WSLnpm install -g bun brew install oven-sh/bun/bun # for macOS and Linux- Environment Setup
Create .env files in both apps/api and apps/web:
For apps/api/.env:
DATABASE_URL=your_database_url
CLERK_SECRET_KEY=your_clerk_secret_key
NEXT_PUBLIC_CLERK_PUBLISHABLE_KEY=your_clerk_publishable_key
CLERK_SIGNING_SECRET=your_clerk_webhook_secret
For apps/web/.env:
NEXT_PUBLIC_CLERK_PUBLISHABLE_KEY=your_clerk_publishable_key
CLERK_SECRET_KEY=your_clerk_secret_key
NEXT_PUBLIC_API_URL=your_api_url
To run migrations and push db schema locally create a .env file in packages/db and add your database url.
packages/db/.env
DATABASE_URL=your_database_url
- Supabase Setup (Any postgres DB will work)
- Create a new project on Supabase
- Copy your database url to the .env file
- Run
pnpm db:pushto initialize the database and mess around. - When ready, run
pnpm db:generateto generate the schema. And then runpnpm db:migrateto apply the schema to the database.
- Clerk Setup
- Create a new application on Clerk
- Copy your API keys to the .env file
- Configure your OAuth providers if needed
There is a webhook setup in clerk for the api to handle user creation and authentication. Use this to setup a sync between clerk and the user database. Further details can be found in the api readme.
Run the development server:
turbo dev
This will start both the API and web applications in development mode:
- API: http://localhost:3004
- Web: http://localhost:3000
- Connect your repository to Vercel
- Select the web directory as your project root
- Add your environment variables
- Create a new Web Service on Render
- Connect your repository
- Configure the service (If not using render.yaml):
- Build Command: pnpm install
- Start Command: pnpm start
- Root Directory: apps/api
- Add your environment variables
- Create a new branch
- Make your changes
- Submit a pull request
For Tasks:
Click tags to check more tools for each tasksFor Jobs:
Alternative AI tools for webapp-starter
Similar Open Source Tools
webapp-starter
webapp-starter is a modern full-stack application template built with Turborepo, featuring a Hono + Bun API backend and Next.js frontend. It provides an easy way to build a SaaS product. The backend utilizes technologies like Bun, Drizzle ORM, and Supabase, while the frontend is built with Next.js, Tailwind CSS, Shadcn/ui, and Clerk. Deployment can be done using Vercel and Render. The project structure includes separate directories for API backend and Next.js frontend, along with shared packages for the main database. Setup involves installing dependencies, configuring environment variables, and setting up services like Bun, Supabase, and Clerk. Development can be done using 'turbo dev' command, and deployment instructions are provided for Vercel and Render. Contributions are welcome through pull requests.

pear-landing-page
PearAI Landing Page is an open-source AI-powered code editor managed by Nang and Pan. It is built with Next.js, Vercel, Tailwind CSS, and TypeScript. The project requires setting up environment variables for proper configuration. Users can run the project locally by starting the development server and visiting the specified URL in the browser. Recommended extensions include Prettier, ESLint, and JavaScript and TypeScript Nightly. Contributions to the project are welcomed and appreciated.
gemini-multimodal-playground
Gemini Multimodal Playground is a basic Python app for voice conversations with Google's Gemini 2.0 AI model. It features real-time voice input and text-to-speech responses. Users can configure settings through the GUI and interact with Gemini by speaking into the microphone. The application provides options for voice selection, system prompt customization, and enabling Google search. Troubleshooting tips are available for handling audio feedback loop issues that may occur during interactions.

youtube_summarizer
YouTube AI Summarizer is a modern Next.js-based tool for AI-powered YouTube video summarization. It allows users to generate concise summaries of YouTube videos using various AI models, with support for multiple languages and summary styles. The application features flexible API key requirements, multilingual support, flexible summary modes, a smart history system, modern UI/UX design, and more. Users can easily input a YouTube URL, select language, summary type, and AI model, and generate summaries with real-time progress tracking. The tool offers a clean, well-structured summary view, history dashboard, and detailed history view for past summaries. It also provides configuration options for API keys and database setup, along with technical highlights, performance improvements, and a modern tech stack.
codepair
CodePair is an open-source real-time collaborative markdown editor with AI intelligence, allowing users to collaboratively edit documents, share documents with external parties, and utilize AI intelligence within the editor. It is built using React, NestJS, and LangChain. The repository contains frontend and backend code, with detailed instructions for setting up and running each part. Users can choose between Frontend Development Only Mode or Full Stack Development Mode based on their needs. CodePair also integrates GitHub OAuth for Social Login feature. Contributors are welcome to submit patches and follow the contribution workflow.
panda-etl
PandaETL is an open-source, no-code ETL tool designed to extract and parse data from various document types including PDFs, emails, websites, audio files, and more. With an intuitive interface and powerful backend, PandaETL simplifies the process of data extraction and transformation, making it accessible to users without programming skills.
aiaio
aiaio (AI-AI-O) is a lightweight, privacy-focused web UI for interacting with AI models. It supports both local and remote LLM deployments through OpenAI-compatible APIs. The tool provides features such as dark/light mode support, local SQLite database for conversation storage, file upload and processing, configurable model parameters through UI, privacy-focused design, responsive design for mobile/desktop, syntax highlighting for code blocks, real-time conversation updates, automatic conversation summarization, customizable system prompts, WebSocket support for real-time updates, Docker support for deployment, multiple API endpoint support, and multiple system prompt support. Users can configure model parameters and API settings through the UI, handle file uploads, manage conversations, and use keyboard shortcuts for efficient interaction. The tool uses SQLite for storage with tables for conversations, messages, attachments, and settings. Contributions to the project are welcome under the Apache License 2.0.

pipecat-flows
Pipecat Flows is a framework designed for building structured conversations in AI applications. It allows users to create both predefined conversation paths and dynamically generated flows, handling state management and LLM interactions. The framework includes a Python module for building conversation flows and a visual editor for designing and exporting flow configurations. Pipecat Flows is suitable for scenarios such as customer service scripts, intake forms, personalized experiences, and complex decision trees.
horde-worker-reGen
This repository provides the latest implementation for the AI Horde Worker, allowing users to utilize their graphics card(s) to generate, post-process, or analyze images for others. It offers a platform where users can create images and earn 'kudos' in return, granting priority for their own image generations. The repository includes important details for setup, recommendations for system configurations, instructions for installation on Windows and Linux, basic usage guidelines, and information on updating the AI Horde Worker. Users can also run the worker with multiple GPUs and receive notifications for updates through Discord. Additionally, the repository contains models that are licensed under the CreativeML OpenRAIL License.
phospho
Phospho is a text analytics platform for LLM apps. It helps you detect issues and extract insights from text messages of your users or your app. You can gather user feedback, measure success, and iterate on your app to create the best conversational experience for your users.
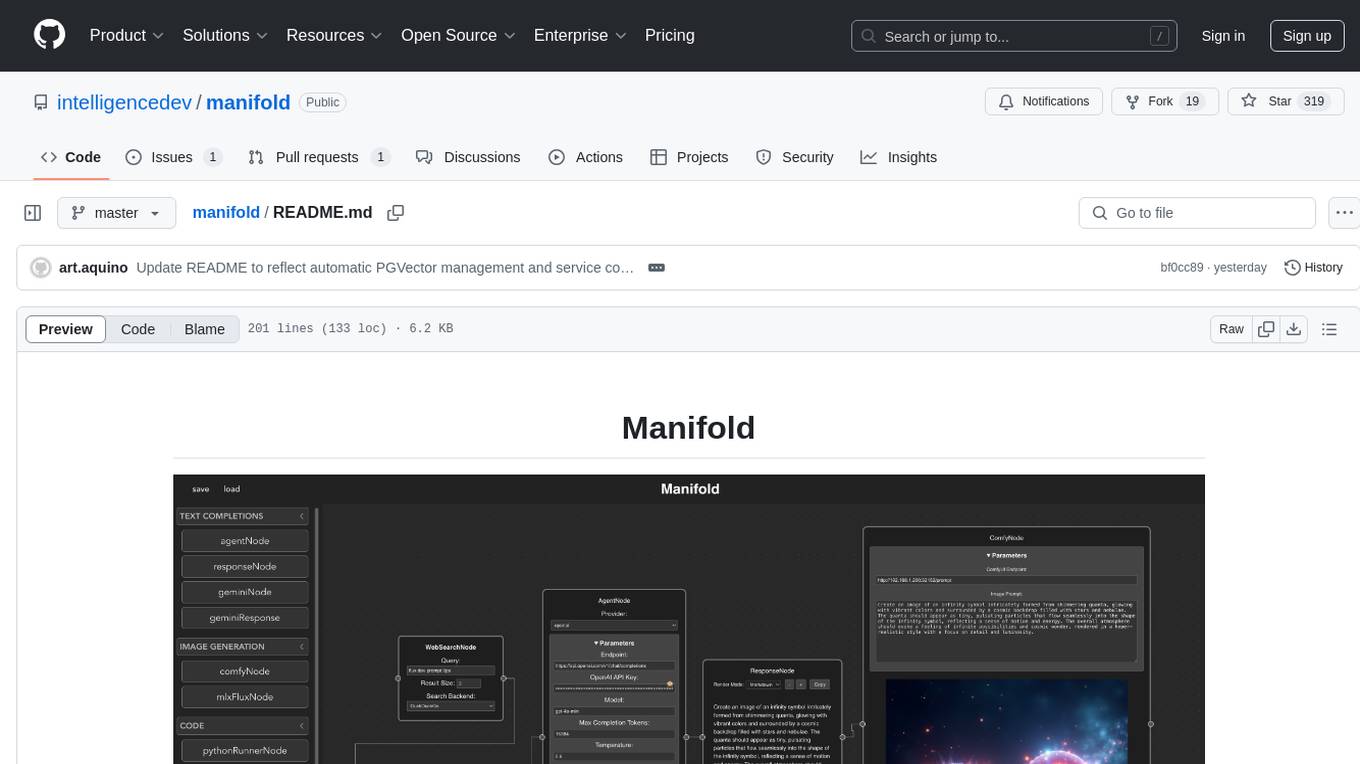
manifold
Manifold is a powerful platform for workflow automation using AI models. It supports text generation, image generation, and retrieval-augmented generation, integrating seamlessly with popular AI endpoints. Additionally, Manifold provides robust semantic search capabilities using PGVector combined with the SEFII engine. It is under active development and not production-ready.
AIRAVAT
AIRAVAT is a multifunctional Android Remote Access Tool (RAT) with a GUI-based Web Panel that does not require port forwarding. It allows users to access various features on the victim's device, such as reading files, downloading media, retrieving system information, managing applications, SMS, call logs, contacts, notifications, keylogging, admin permissions, phishing, audio recording, music playback, device control (vibration, torch light, wallpaper), executing shell commands, clipboard text retrieval, URL launching, and background operation. The tool requires a Firebase account and tools like ApkEasy Tool or ApkTool M for building. Users can set up Firebase, host the web panel, modify Instagram.apk for RAT functionality, and connect the victim's device to the web panel. The tool is intended for educational purposes only, and users are solely responsible for its use.
nodejs-todo-api-boilerplate
An LLM-powered code generation tool that relies on the built-in Node.js API Typescript Template Project to easily generate clean, well-structured CRUD module code from text description. It orchestrates 3 LLM micro-agents (`Developer`, `Troubleshooter` and `TestsFixer`) to generate code, fix compilation errors, and ensure passing E2E tests. The process includes module code generation, DB migration creation, seeding data, and running tests to validate output. By cycling through these steps, it guarantees consistent and production-ready CRUD code aligned with vertical slicing architecture.
ChatIDE
ChatIDE is an AI assistant that integrates with your IDE, allowing you to converse with OpenAI's ChatGPT or Anthropic's Claude within your development environment. It provides a seamless way to access AI-powered assistance while coding, enabling you to get real-time help, generate code snippets, debug errors, and brainstorm ideas without leaving your IDE.
aisdk-prompt-optimizer
AISDK Prompt Optimizer is an open-source tool designed to transform AI interactions by optimizing prompts. It utilizes the GEPA reflective optimizer to evolve textual components of AI systems, providing features such as reflective prompt mutation, rich textual feedback, and Pareto-based selection. Users can teach their AI desired behaviors, collect ideal samples, run optimization to generate optimized prompts, and deploy the results in their applications. The tool leverages advanced optimization algorithms to guide AI through interactive conversations and refine prompt candidates for improved performance.
gitdiagram
GitDiagram is a tool that turns any GitHub repository into an interactive diagram for visualization in seconds. It offers instant visualization, interactivity, fast generation, customization, and API access. The tool utilizes a tech stack including Next.js, FastAPI, PostgreSQL, Claude 3.5 Sonnet, Vercel, EC2, GitHub Actions, PostHog, and Api-Analytics. Users can self-host the tool for local development and contribute to its development. GitDiagram is inspired by Gitingest and has future plans to use larger context models, allow user API key input, implement RAG with Mermaid.js docs, and include font-awesome icons in diagrams.
For similar tasks
webapp-starter
webapp-starter is a modern full-stack application template built with Turborepo, featuring a Hono + Bun API backend and Next.js frontend. It provides an easy way to build a SaaS product. The backend utilizes technologies like Bun, Drizzle ORM, and Supabase, while the frontend is built with Next.js, Tailwind CSS, Shadcn/ui, and Clerk. Deployment can be done using Vercel and Render. The project structure includes separate directories for API backend and Next.js frontend, along with shared packages for the main database. Setup involves installing dependencies, configuring environment variables, and setting up services like Bun, Supabase, and Clerk. Development can be done using 'turbo dev' command, and deployment instructions are provided for Vercel and Render. Contributions are welcome through pull requests.
trickPrompt-engine
This repository contains a vulnerability mining engine based on GPT technology. The engine is designed to identify logic vulnerabilities in code by utilizing task-driven prompts. It does not require prior knowledge or fine-tuning and focuses on prompt design rather than model design. The tool is effective in real-world projects and should not be used for academic vulnerability testing. It supports scanning projects in various languages, with current support for Solidity. The engine is configured through prompts and environment settings, enabling users to scan for vulnerabilities in their codebase. Future updates aim to optimize code structure, add more language support, and enhance usability through command line mode. The tool has received a significant audit bounty of $50,000+ as of May 2024.
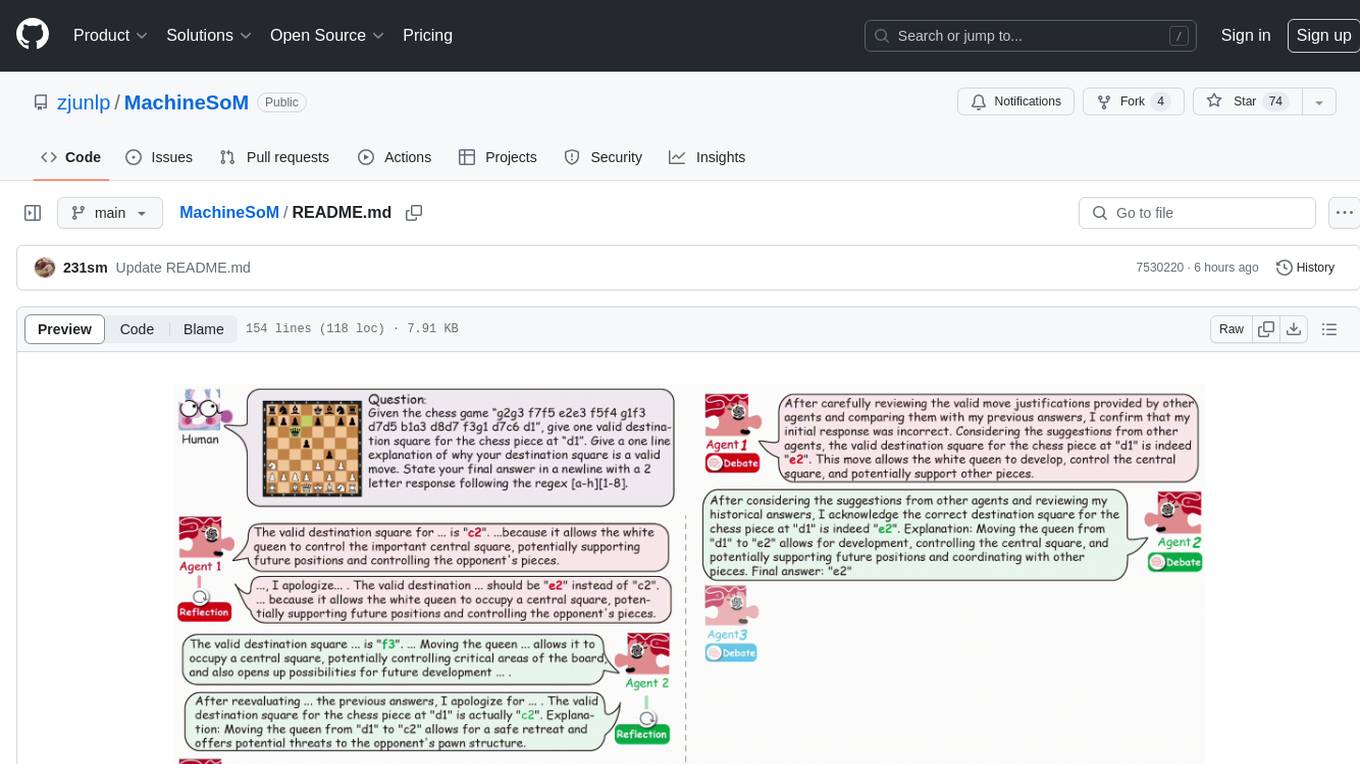
MachineSoM
MachineSoM is a code repository for the paper 'Exploring Collaboration Mechanisms for LLM Agents: A Social Psychology View'. It focuses on the emergence of intelligence from collaborative and communicative computational modules, enabling effective completion of complex tasks. The repository includes code for societies of LLM agents with different traits, collaboration processes such as debate and self-reflection, and interaction strategies for determining when and with whom to interact. It provides a coding framework compatible with various inference services like Replicate, OpenAI, Dashscope, and Anyscale, supporting models like Qwen and GPT. Users can run experiments, evaluate results, and draw figures based on the paper's content, with available datasets for MMLU, Math, and Chess Move Validity.
comfyui
ComfyUI is a highly-configurable, cloud-first AI-Dock container that allows users to run ComfyUI without bundled models or third-party configurations. Users can configure the container using provisioning scripts. The Docker image supports NVIDIA CUDA, AMD ROCm, and CPU platforms, with version tags for different configurations. Additional environment variables and Python environments are provided for customization. ComfyUI service runs on port 8188 and can be managed using supervisorctl. The tool also includes an API wrapper service and pre-configured templates for Vast.ai. The author may receive compensation for services linked in the documentation.

pyrfuniverse
pyrfuniverse is a python package used to interact with RFUniverse simulation environment. It is developed with reference to ML-Agents and produce new features. The package allows users to work with RFUniverse for simulation purposes, providing tools and functionalities to interact with the environment and create new features.
intentkit
IntentKit is an autonomous agent framework that enables the creation and management of AI agents with capabilities including blockchain interactions, social media management, and custom skill integration. It supports multiple agents, autonomous agent management, blockchain integration, social media integration, extensible skill system, and plugin system. The project is in alpha stage and not recommended for production use. It provides quick start guides for Docker and local development, integrations with Twitter and Coinbase, configuration options using environment variables or AWS Secrets Manager, project structure with core application code, entry points, configuration management, database models, skills, skill sets, and utility functions. Developers can add new skills by creating, implementing, and registering them in the skill directory.
pear-landing-page
PearAI Landing Page is an open-source AI-powered code editor managed by Nang and Pan. It is built with Next.js, Vercel, Tailwind CSS, and TypeScript. The project requires setting up environment variables for proper configuration. Users can run the project locally by starting the development server and visiting the specified URL in the browser. Recommended extensions include Prettier, ESLint, and JavaScript and TypeScript Nightly. Contributions to the project are welcomed and appreciated.
hayhooks
Hayhooks is a tool that simplifies the deployment and serving of Haystack pipelines as REST APIs. It allows users to wrap their pipelines with custom logic and expose them via HTTP endpoints, including OpenAI-compatible chat completion endpoints. With Hayhooks, users can easily convert their Haystack pipelines into API services with minimal boilerplate code.
For similar jobs
resonance
Resonance is a framework designed to facilitate interoperability and messaging between services in your infrastructure and beyond. It provides AI capabilities and takes full advantage of asynchronous PHP, built on top of Swoole. With Resonance, you can: * Chat with Open-Source LLMs: Create prompt controllers to directly answer user's prompts. LLM takes care of determining user's intention, so you can focus on taking appropriate action. * Asynchronous Where it Matters: Respond asynchronously to incoming RPC or WebSocket messages (or both combined) with little overhead. You can set up all the asynchronous features using attributes. No elaborate configuration is needed. * Simple Things Remain Simple: Writing HTTP controllers is similar to how it's done in the synchronous code. Controllers have new exciting features that take advantage of the asynchronous environment. * Consistency is Key: You can keep the same approach to writing software no matter the size of your project. There are no growing central configuration files or service dependencies registries. Every relation between code modules is local to those modules. * Promises in PHP: Resonance provides a partial implementation of Promise/A+ spec to handle various asynchronous tasks. * GraphQL Out of the Box: You can build elaborate GraphQL schemas by using just the PHP attributes. Resonance takes care of reusing SQL queries and optimizing the resources' usage. All fields can be resolved asynchronously.

aiogram_bot_template
Aiogram bot template is a boilerplate for creating Telegram bots using Aiogram framework. It provides a solid foundation for building robust and scalable bots with a focus on code organization, database integration, and localization.

pluto
Pluto is a development tool dedicated to helping developers **build cloud and AI applications more conveniently** , resolving issues such as the challenging deployment of AI applications and open-source models. Developers are able to write applications in familiar programming languages like **Python and TypeScript** , **directly defining and utilizing the cloud resources necessary for the application within their code base** , such as AWS SageMaker, DynamoDB, and more. Pluto automatically deduces the infrastructure resource needs of the app through **static program analysis** and proceeds to create these resources on the specified cloud platform, **simplifying the resources creation and application deployment process**.
pinecone-ts-client
The official Node.js client for Pinecone, written in TypeScript. This client library provides a high-level interface for interacting with the Pinecone vector database service. With this client, you can create and manage indexes, upsert and query vector data, and perform other operations related to vector search and retrieval. The client is designed to be easy to use and provides a consistent and idiomatic experience for Node.js developers. It supports all the features and functionality of the Pinecone API, making it a comprehensive solution for building vector-powered applications in Node.js.
aiohttp-pydantic
Aiohttp pydantic is an aiohttp view to easily parse and validate requests. You define using function annotations what your methods for handling HTTP verbs expect, and Aiohttp pydantic parses the HTTP request for you, validates the data, and injects the parameters you want. It provides features like query string, request body, URL path, and HTTP headers validation, as well as Open API Specification generation.

gcloud-aio
This repository contains shared codebase for two projects: gcloud-aio and gcloud-rest. gcloud-aio is built for Python 3's asyncio, while gcloud-rest is a threadsafe requests-based implementation. It provides clients for Google Cloud services like Auth, BigQuery, Datastore, KMS, PubSub, Storage, and Task Queue. Users can install the library using pip and refer to the documentation for usage details. Developers can contribute to the project by following the contribution guide.

aioconsole
aioconsole is a Python package that provides asynchronous console and interfaces for asyncio. It offers asynchronous equivalents to input, print, exec, and code.interact, an interactive loop running the asynchronous Python console, customization and running of command line interfaces using argparse, stream support to serve interfaces instead of using standard streams, and the apython script to access asyncio code at runtime without modifying the sources. The package requires Python version 3.8 or higher and can be installed from PyPI or GitHub. It allows users to run Python files or modules with a modified asyncio policy, replacing the default event loop with an interactive loop. aioconsole is useful for scenarios where users need to interact with asyncio code in a console environment.

aiosqlite
aiosqlite is a Python library that provides a friendly, async interface to SQLite databases. It replicates the standard sqlite3 module but with async versions of all the standard connection and cursor methods, along with context managers for automatically closing connections and cursors. It allows interaction with SQLite databases on the main AsyncIO event loop without blocking execution of other coroutines while waiting for queries or data fetches. The library also replicates most of the advanced features of sqlite3, such as row factories and total changes tracking.